Well, it's been six months since we began the work here, which was originally just a basement room refinishing project that grew to include finding more space for a growing family.
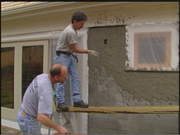
We're doing backyard , we're doing repairs to the house and we're standing on one of them right now--the front porch, the front entrance of the house, a nice wooden deck system that needed to be repaired, and not just the decking, but also the structure underneath, 80 year old timbers, many of which were rotted or insect damaged.
So we've done that, and now we're looking at the finished product, which is a tropical product from Everlasting Hardwoods, which is a renewable product.
And, I think one of the best choices for outdoor decking even though traditionally some people don't like to work with it because you have to sometimes drill it, doesn't nail easily.
We're using tiger claw, a system for installing the wood without any kind of face nailing obvious, which keeps the beauty of the wood right out there.
Take a look and we'll see how these are attached.
Well what we're using today is a hidden deck fastening system from Tiger Claw.
And this particular fastener here that we're using, is made for extreme dense materials, like the ipe that we're putting' down today.
The fastener is very simple to use.
You could see it attaches to the edge of a board, and then a screw is installed through the fastener, down into the joist.
How it works is, the fastener holds the board and then the screw holds the fastener down.
Now you can see we've driven.
Let's take a look at the fastener here.
All stainless steel with a black oxide coating on them.
And, what the reason for the coating is, it helps it to hide very nicely in the seams of the deck so you don't see it even when you look down into the seams.
Now, the, every every retail package of fasteners comes with an installation tool.
Now the installation tool is a very simple block.
You simply insert the fastener into the tool and set it right on your joist.
Now that helps you to install the fastener nice and even, just the right height, and nice and square.
Now you see, I apply a little pressure to the top of the board with my foot.
Give it a little tap and the fastener nicely goes right into the edge of the board, and I take my stainless steel screw also with a black oxide coating, and I just pop it in at a 45 degree angle and that's it.
Simple as that.
Once you install the fastener at each joist, you simply take your next board.
You slide it into place
Using a hammer board, and a small sledge hammer, you simply give it a little tap, and the board goes right onto the fastener.
Once you get it in place simply set another fastener and another screw .
And you continue on with that same installation process.
I'm going to work my way down, hitting one time at each joist, any more than that can make your installation more difficult.
Just hit once and you move along.
And you can see I'm getting the perfect spacing.
Automatic spacing as I move down.
And our board is installed.
Now I simply start that process all over again until I reach the end of my deck.
So one of the other things about the Ipe is that it's extremely strong and also naturally insect resistant.
It doesn't have any kind of chemical applications.
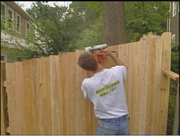
Now the other wood that we have combined up here is Western Red Cedar, which we used overhead for the Newport ceiling, and just last week we made these trellises, which are a large format cedar trellis that will eventually allow a climbing rose to live here.
And which the homeowner thinks might have originally existed here to provide a little bit of privacy from what is a pretty busy street.
The trellis is made of a western red cedar one inch .
The trellis is held together with a lap joint secured with glue and some brads.
The way all the cuts came out so even is that after I made the first cut, I built this spacer.
This spacer has a piece of wood that fits into the previous groove.
That allows me to set my guide up for my next slice.
This also takes into consideration the amount of room that the router itself needs.
The spacer allows me to finish the cut and get a perfect one inch.
It has to be slid into a groove that was here for the previous trellis.
These little chucks down on the bottom that were going to use to hold it into place.
They need to be screwed down to secure the trellis.
The homeowner wanted nice big blocks to let a lot of light in, but still give some privacy, and we have this cutout here for our hanging plant.
The last touch that we are putting on over here is a new light fixture, and John Travoni our electrician, are you all done?
I wanted to see exactly what it looked like up there.
Yeah, we've got the electricity off, of course, and simple are in just white to white and black to black and the first thing you do is definitely ground the system
And then you just bunch them up and attach it in there.
And I like a lot of these new light fixtures that they're making for exterior use that they have these, patinas on them so that they look appropriate to an older house.
Yes, they're very nice.
Where's the glass?
Then that's the wood.
OK.
Alright, and the old-time glass bowl and vinyl which compliment the look.
Thank you Bob.
Very nice John, thanks.