We may earn revenue from the products available on this page and participate in affiliate programs. Learn More ›
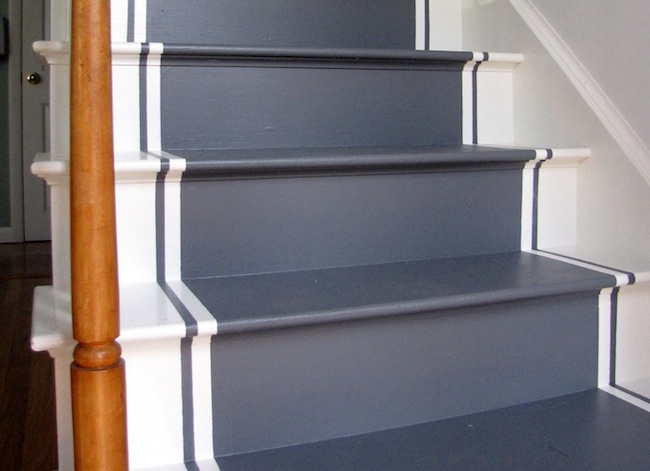
As the times changed, so did my design style. When it became clear that my stairs needed an upgrade, and I was unable to find an affordable runner carpet that I liked, I went for the full-on painted stairs. Although there were a few glitches along the way, it was a pretty easy project to do.
MATERIALS AND TOOLS
– Paint
– Primer
– Tape measure
– Painter’s tape
– Carpenter’s square
STEP 1: Prime and tape
I decided to go with a low-luster enamel paint. I chose the Porch and Patio Floor paint from Behr (available from The Home Depot) and had it color-matched to go with my furniture. After first priming and painting the stairs in my base color (which happens to be the same color as the house’s trim), I went to work on taping. I used a tape measure and decided how wide I wanted my center “runner” to be, used the angle to get a straight line, and then used painter’s tape to create a line on each step. It definitely gets tricky going over the lip and trim pieces, so you want to make sure you seal the edges well.
STEP 2: Measure
After getting the first piece of tape on, I marked the width of my trusty DVD case (we were watching The Lion King, so why not?), made a straight line with the angle, and applied this next line of tape parallel to the first (making sure again to seal the edges well). Then I did it all over again on the other side of the stairs.
Side note: I have a sweet reader who reminded me of a very special tip (that I forgot until AFTER the stairs were painted). Paint over your tape edges with your base color. If you do so, you will seal the tape with the base color, and the next color (in my case gray) cannot get under that pesky tape. BRILLIANT!
STEP 3: Paint.
Once I had finished the stripes, I then painted the tread of the stairs. You may want to paint every other step, giving yourself a dry place to step up and down, but I chose not to do that, since there was enough dry room on the sides. Let it be noted that I did use a paint additive (like this one on Amazon) to give the stairs a little rough texture and create traction. I didn’t want my little girl to wake up one January morning, socks on feet, and slipping down the stairs to me. Additive can easily be found in the paint section of your paint store.
And there she is! I’ve decided I like the stairs. They are much easier to clean too, as I just sweep down and vacuum up. I chose not to put poly on the stairs, but I have no problem with them looking “worn” over time. By then, I’m sure my decorating style will have changed again anyway.
This guide comes to us from Debbie—wife, mother of two, and the creative force behind the popular DIY blog Painted Therapy. Eager to try anything, from painting stairs to making art from old shipping pallets, Debbie is on a mission to prove that home improvement can be both fun and therapeutic.

