We may earn revenue from the products available on this page and participate in affiliate programs. Learn More ›
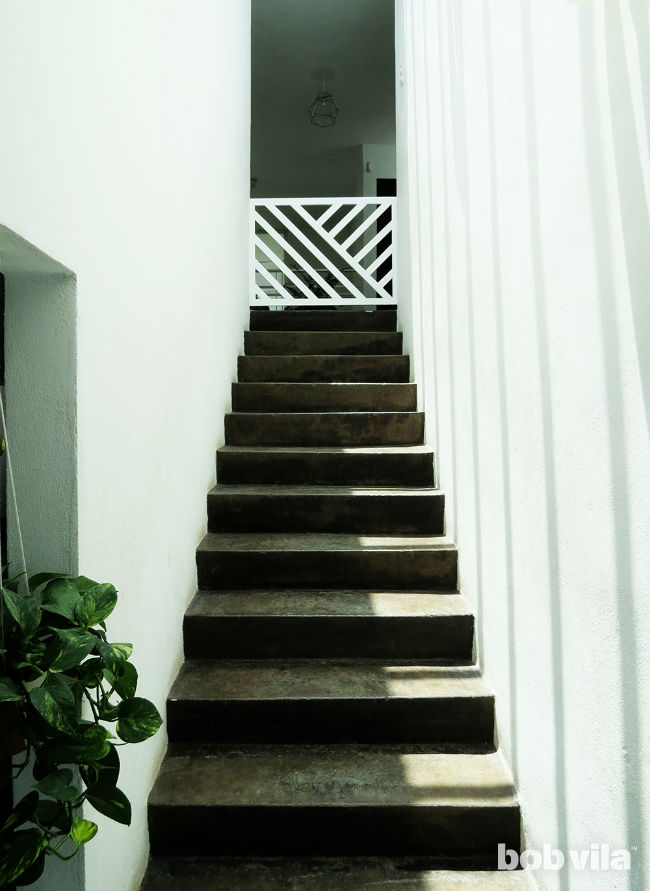
A lot of lifestyle adjustments need to be made when a baby comes along, and the house is no exception. In addition to plugging unused sockets and locking doors, your childproofing methods will likely include cutting off access to potentially dangerous areas like the kitchen or staircase. Plastic baby gates on the market do a good enough job to barricade, but they often go against all of your design inclinations. Since you will be using the gate for a few years until your kiddo grows up, better to build a DIY baby gate that’s easy on the eyes! We’ve got the tutorial you’ve been looking for, good for babies, toddlers, even pets—better yet, your home’s design.
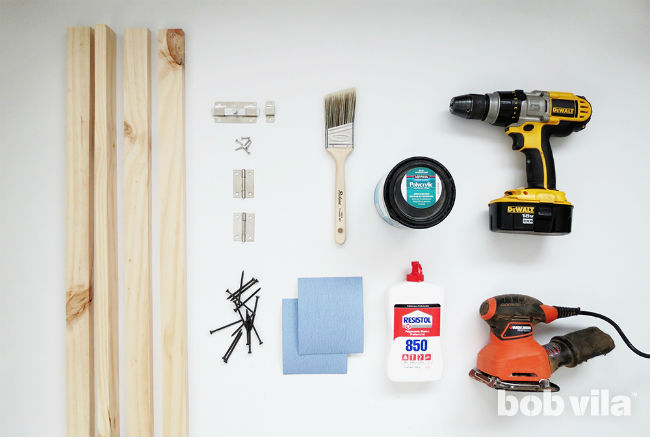
MATERIALS AND TOOLS
– 1×2 lumber (five 8′-long pieces)
– Measuring tape
– Pencil
– Handsaw
– Sandpaper
– Palm sander
– Wood glue
– Cordless drill/driver
– 2-½-inch screws
– Protractor
– Ruler
– Wood filler
– Putty knife
– Paintbrush
– Non-toxic acrylic paint
– Non-toxic acrylic varnish
– 2-inch hinges with screws (2)
– Barrel bolt with screws
STEP 1
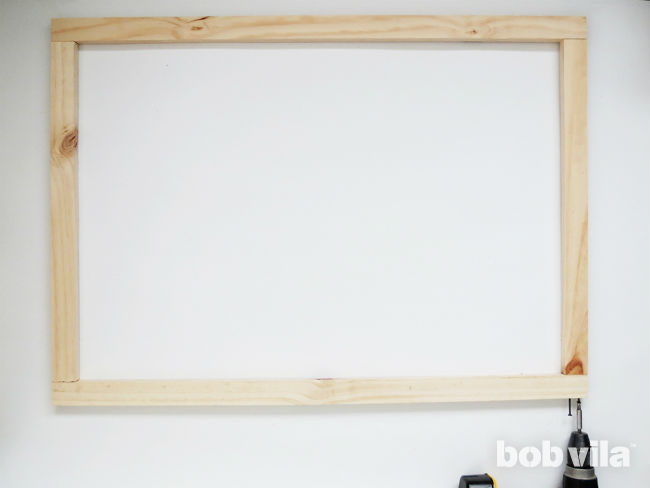
Measure the width of the opening you want to close with the DIY baby gate; this will be the length of your gate. The standard height for a baby gate is between 24 inches and 28 inches, so anything in that range works. Once you have the DIY baby gate dimensions, you can cut the wood to build its outer frame.
Cut 1x2s at the length decided for the top and bottom of the gate; then, cut two pieces of wood trim to be three inches shorter (twice the thickness of the lumber) than your gate’s height.
In our case, the walkway is 38 inches wide and the gate’s height will be 28 inches. So, we cut our 1x2s into two 38-inch pieces for the top and bottom and two 25-inch pieces (28″ – 1½” – 1½” = 25″) for the vertical trims.
Sand all pieces. Then, place the pieces with their wider, 1½-inch edge flat on your work surface and attach them together to build a frame. Use wood glue and two 2-½-inch screws at each end of the top and each end of the bottom. (Tip: To prevent the wood from cracking when you drill the screws, pre-drill holes with a fine drill bit.)
STEP 2
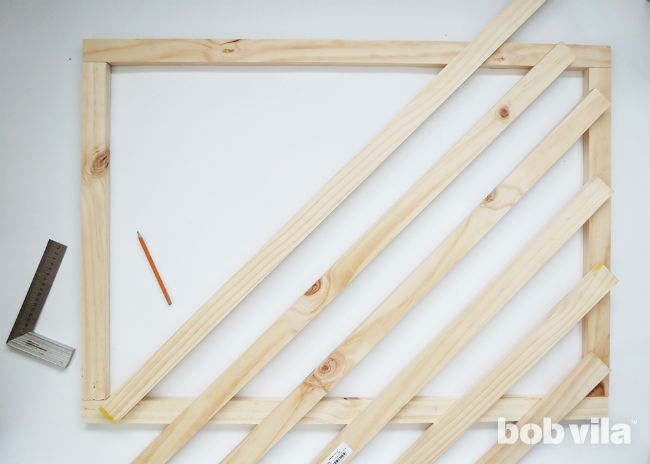
Once the outer frame is built, arrange 1x2s to create a nice design. The space between each piece should be less than apart inches for optimum safety.
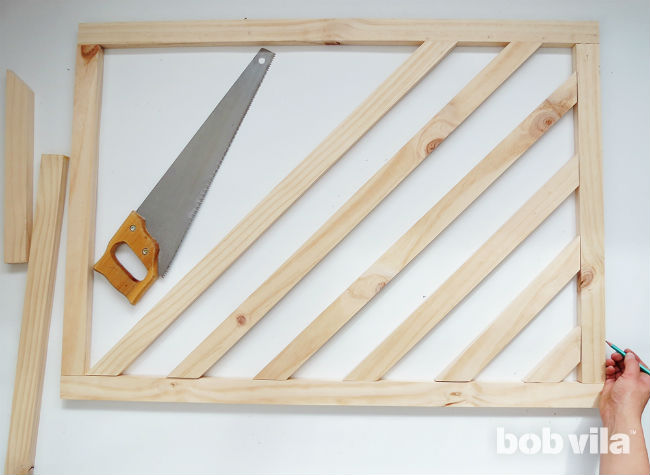
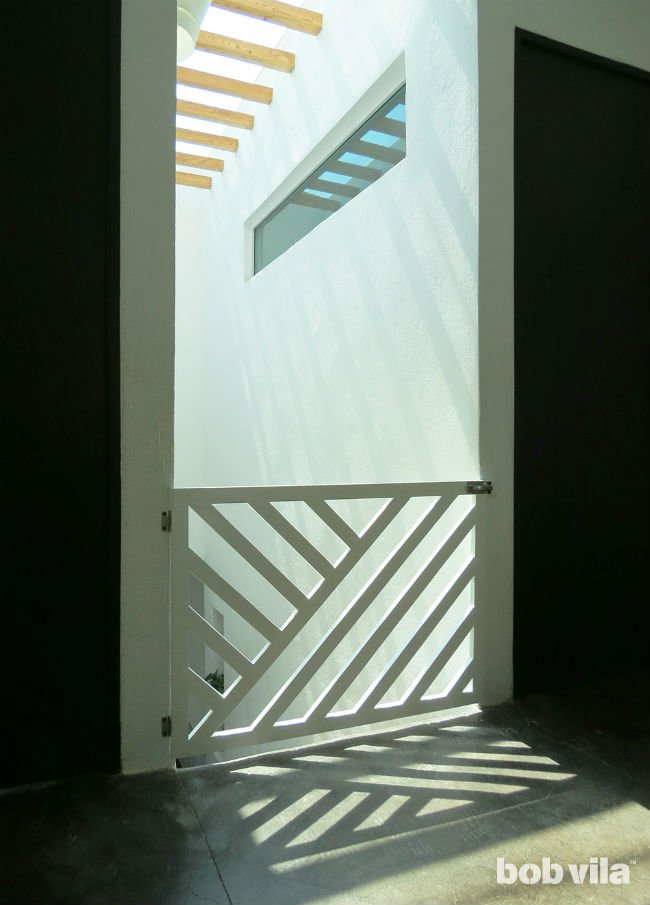
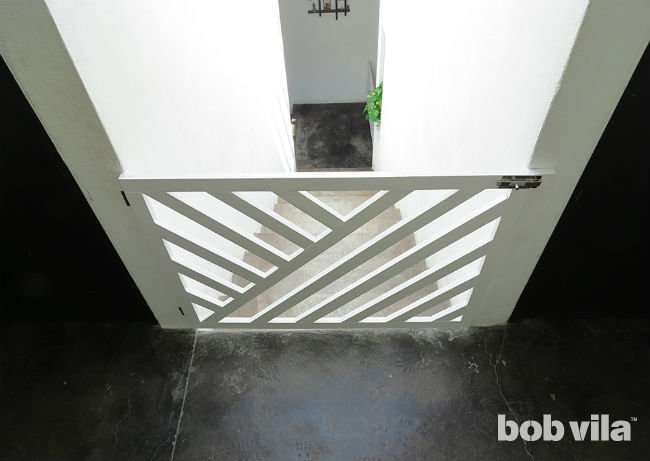
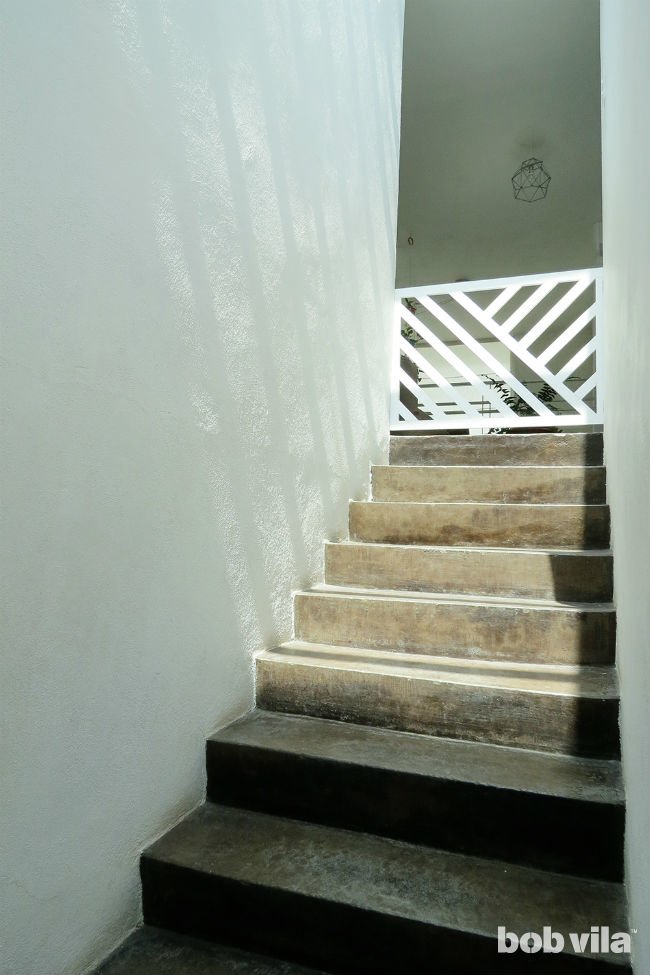
To achieve the design pictured above, we placed most of our 1x2s at a 45-degree angle, running from the bottom left corner to somewhere along the top of the frame. Leave a space of three inches between each. Don’t worry about the opening in the top left corner just yet; we’ll fill that later.
Tip: Lay them across your rectangular frame using a protractor to get the first angle and a ruler to keep consistent spacing. Using the ruler’s straight edge, mark in pencil exactly where the 1x2s meet the frame—you’ll cut here to ensure a snug fit inside the frame.
STEP 3
Cut all 1x2s along the penciled lines, sand the edges, and place the pieces into the frame.
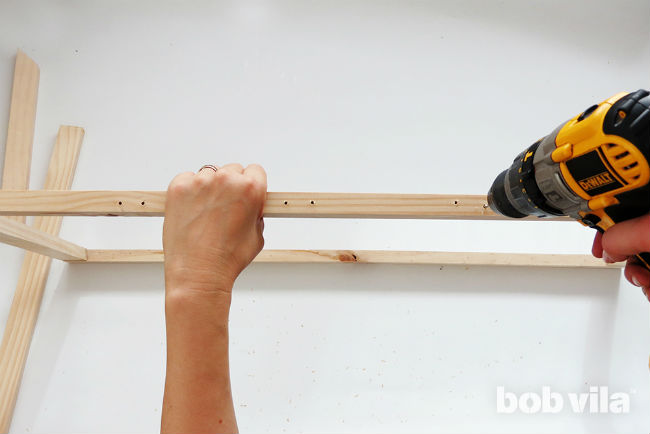
You’ll eventually attach them by screwing through the outside of the frame into the diagonal 1x2s. Again, pre-drilling is best so that you don’t split the wood. Everywhere the diagonal 1x2s meet the frame, mark two spots for screws in pencil on the outside of the frame.
STEP 4
Lift the frame, and use a fine bit to pre-drill holes for each screw.
STEP 5
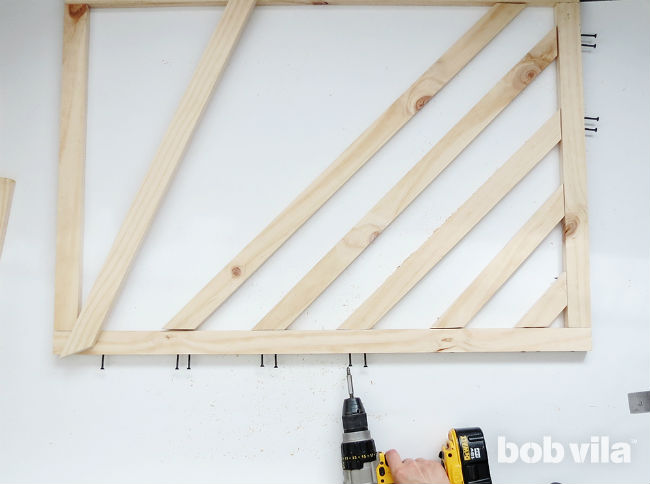
Lay the DIY baby gate’s frame on a flat surface, coat the ends of each 1×2 with wood glue, then replace the cut 1x2s inside the frame. Now, drill the screws into the pilot holes around the frame.
Leave the first 1×2 (the one furthest on the left) unscrewed for the moment so that you can use it to help fill in the open upper left corner.
STEP 6
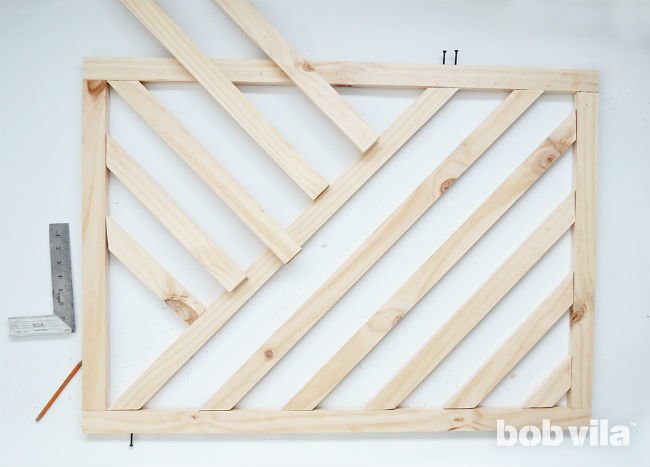
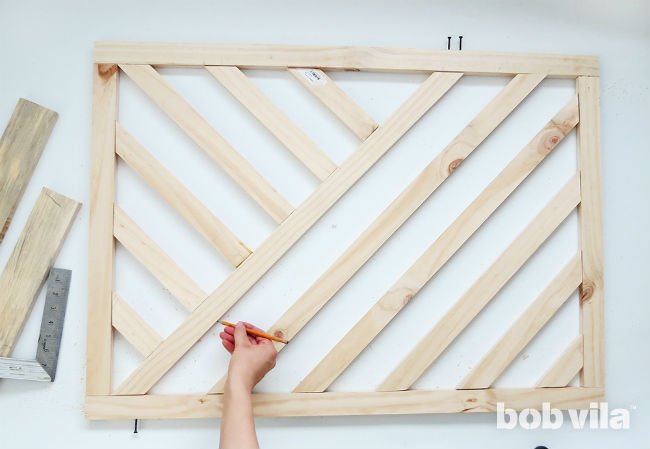
To close the upper left corner of the gate, run some 1x2s perpendicular to the rest of the diagonal pattern and leave three inches between each. Pencil in a line where each crosses the frame and cut them to fit.
STEP 7
Place the cut 1x2s inside the DIY baby gate’s frame and mark its outside as well as the loose diagonal where you’ll need to pre-drill for screws. Here, too, each 1×2 will need two screws at each end.
STEP 8
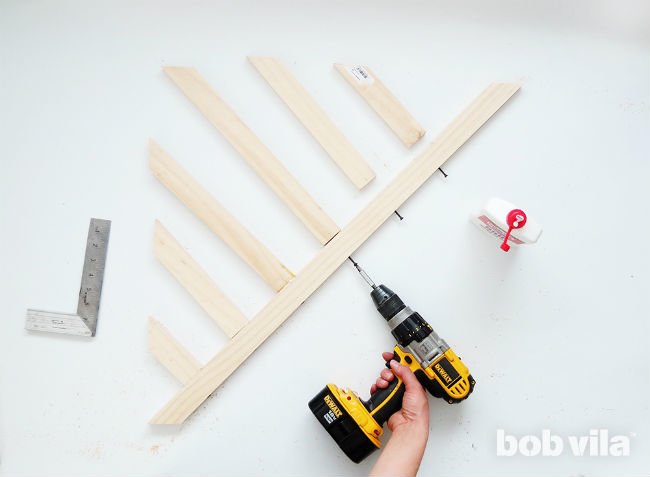
Remove the diagonal 1×2 you left loose in Step 5. Apply wood glue to the ends of the 1x2s that will abut it, then drill in screws.
STEP 9
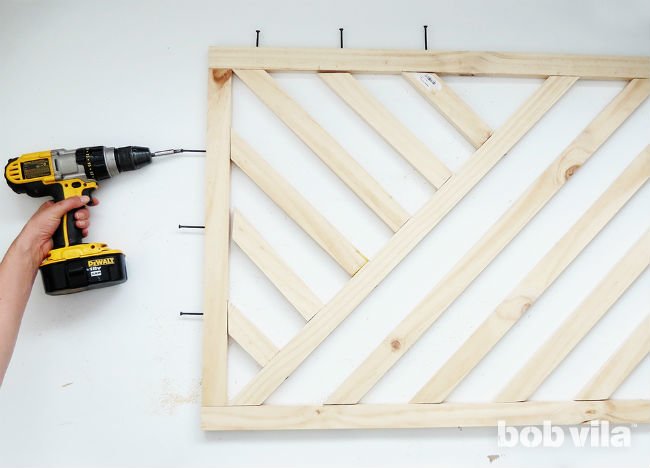
Finally, to finish assembling the DIY baby gate, insert the section from Step 8 like a puzzle piece back inside the frame. Drill screws through the left side of the frame into the remaining diagonal 1x2s.
STEP 10
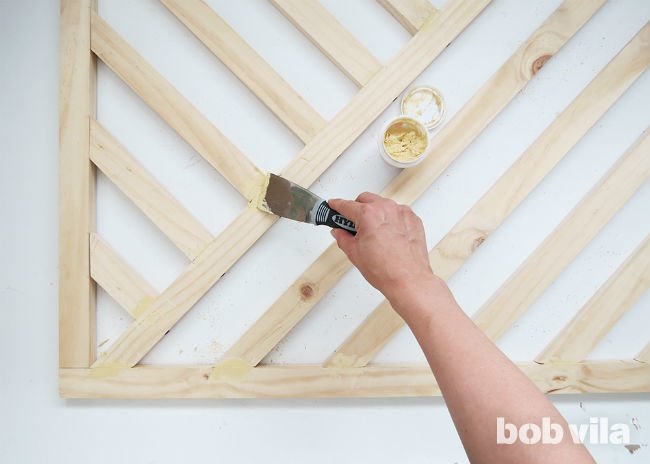
Spread wood filler using a putty knife over any gaps where 1x2s meet, holes in the wood, and recessed screw heads. Wait for the wood filler to dry for the full time recommended by the manufacturers.
STEP 11
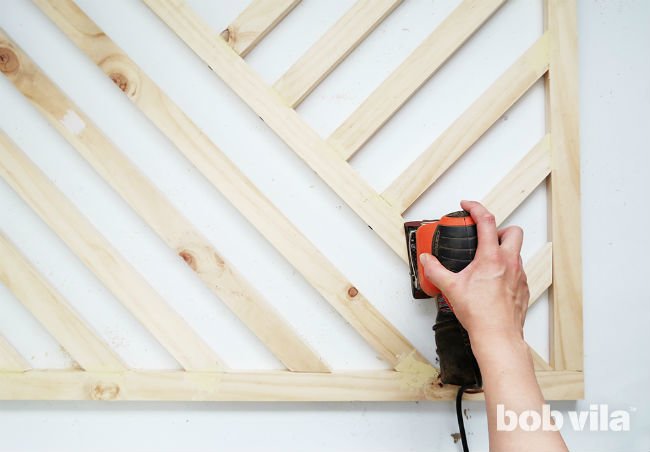
Sand the DIY baby gate with a 120-grit sandpaper to remove labels, splinters, and any excess (dry) wood filler.
STEP 12
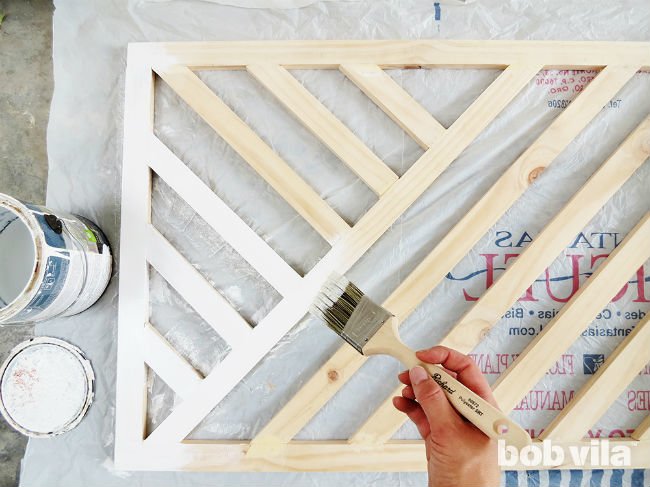
Now, dress it up to match your interior! Apply two coats of acrylic paint in a color to match the walls or the molding. Once the paint has dried, apply a coat of transparent acrylic varnish. Don’t forget to check that all finishes you’re using are non-toxic.
STEP 13
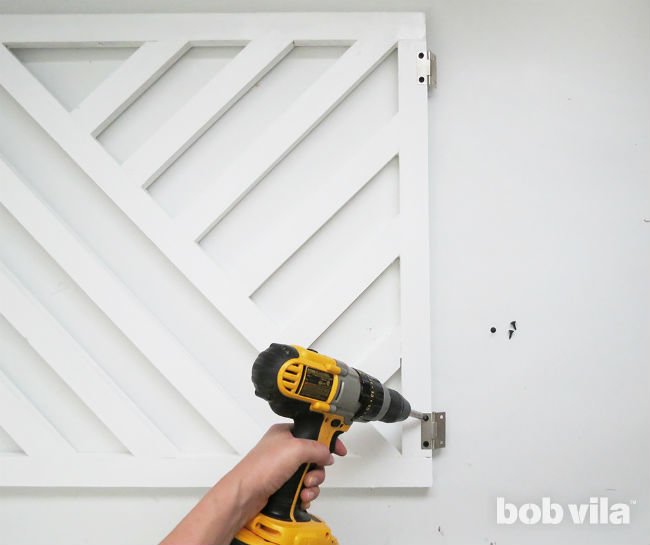
Picture how your gate will open and close. The rule of thumb is that a door swings open into a room, but you can situate yours any way you like. Now, make note of which side of the gate the 2-inch-by-2-inch hinges need to be on to make it happen.
Then, position one leaf of each hinge at two inches from the top and two inches from the bottom of the appropriate side of the gate. Hoist your gate one to two inches off the floor, and screw the other hinge leaves into the wall to attach the gate.
STEP 14
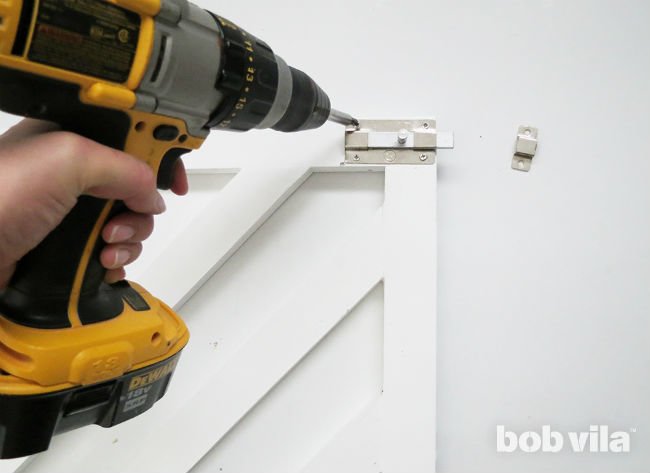
Screw the barrel bolt into the same side but the top corner opposite of the hinges. In our design, we picked one that requires a little more than just sliding the bolt back and forth to open—you need to turn the small round handle to completely lock the barrel. This precaution can prevent even a smart toddler from unlocking the gate.
Position the last U-shaped piece of the barrel bolt on the wall just in front of the barrel. Practice closing and locking: Slide the barrel in and turn it up. Screw this last piece in place on the wall, and you’re all set!
Ama is a DIY addict and the creative mind behind Ohoh Deco. She likes home decor, lighting, and furniture projects that may involve painting, sewing, drilling… no matter the technique! Whatever she has on hand is the inspiration to create and fodder for her serious addiction to upcycling.
