
We may earn revenue from the products available on this page and participate in affiliate programs. Learn More ›
Today’s building codes include the minimum amount of insulation required in walls and attics, but older homes were often under-insulated and some newer homes have gaps in insulation. Without proper insulation, your furnace might be working overtime to ward off the chill and your home’s water pipes could be at risk of freezing and breaking.
Several insulation solutions are designed to fill in gaps in specific parts of a house, and a common type is blown-in insulation. Less expensive than some other types, it is also easier to add than other insulation types after a home is built— it requires that you only make a small hole in a wall to install it . This guide will help you determine whether blown-in insulation might be your solution to comfier conditions and lower energy bills at home.
What is Blown-In Insulation?
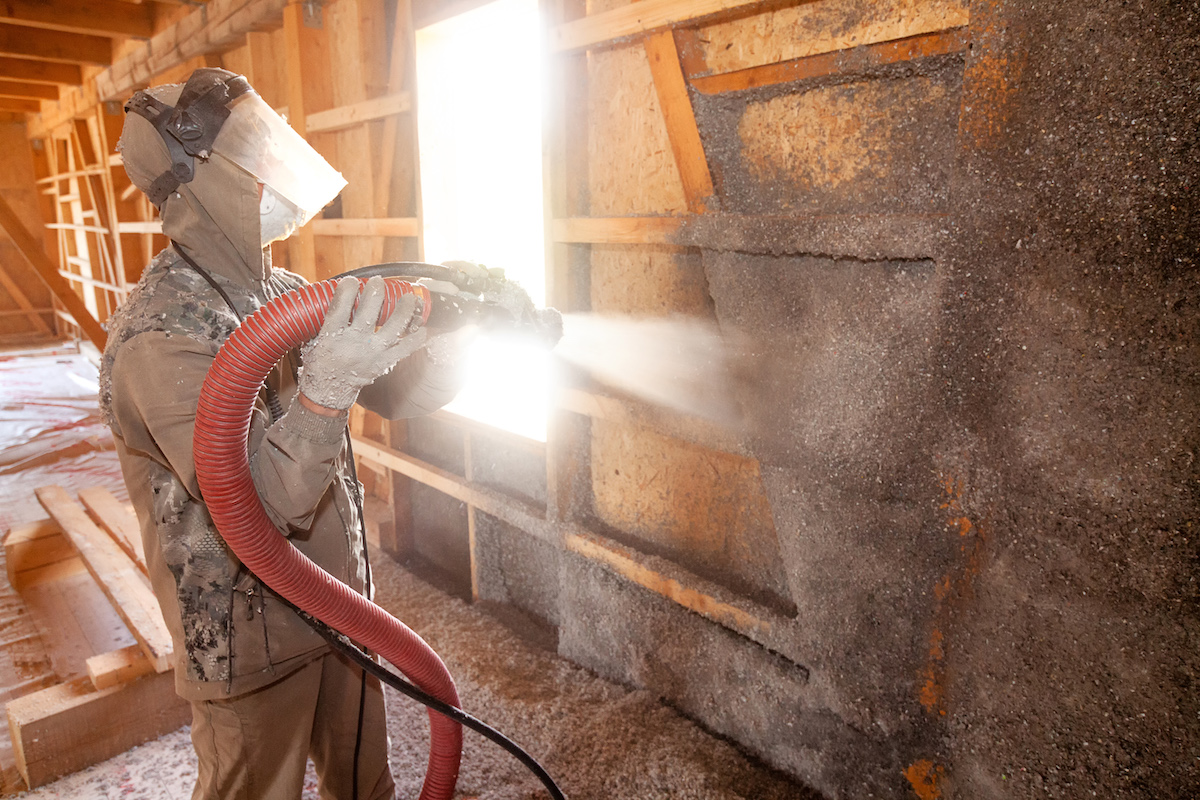
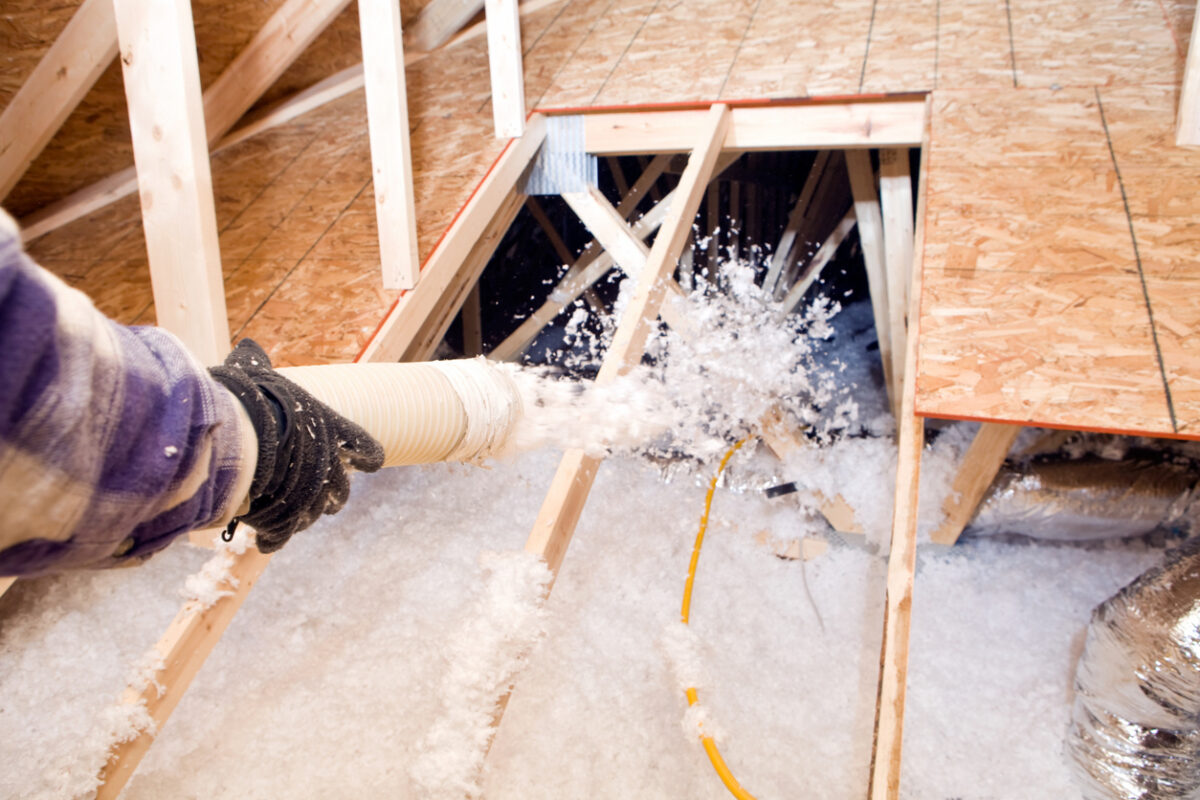
Blown-in insulation is made up of tiny pieces of material, like the stuffing in a throw pillow. Unlike insulation batts or boards, it can fill unusual-shaped gaps. Pros can apply it during construction, but one of the main reasons to choose it for renovations is that it can be blown into your walls’ cavities, attics, crawl spaces, and above your ceiling through small holes drilled at the top of each stud space. You can then blow the insulation into each stud bay through a long, flexible hose.
One of the downsides to blown-in insulation is that the material can settle over time, creating some gaps in the insulation barrier and your home’s thermal resistance 10 to 20 years after installation. If you have blown-in insulation in your home and you notice that rooms aren’t as cozy as they once were, it might be time to update your insulation.
Pro Tip
The higher the thermal resistance (R-value), the greater the insulating effect. Minimum suggested insulation values vary by geographic zones. You can find the recommended values for your region on this Energy Star map.
Blown-In Insulation Materials
The three most common types of blown-in insulation are loose-fill fiberglass, cellulose, and mineral wool. Each type has its pros and cons. Not all types of blown-in insulation offer the same thermal value, but in most cases, even adding a little insulation is better than not adding any at all.
- Loose-fill fiberglass: This light insulation is manufactured from glass that is heated to a liquid and then spun into thin fibers. Adding blown-in fiberglass insulation to attics and wall spaces offers an average R-2.5 thermal value per inch. Loose-fill fiberglass costs up to $1.10 per square foot, and one bag will provide a thermal value of R-19 over a 106.6-square-foot area.
- Cellulose: Eco-minded homeowners often opt for blown-in cellulose insulation, which is made from finely shredded recycled cardboard or newspaper. It’s chemically treated to resist mold and fire. Cellulose insulation has an average thermal value of R-3.5 and costs about $0.60 to $2.30 per square foot. One bag will cover about 36.7 square feet at a thermal value of R-19.
- Mineral wool: This type of blown-in insulation is made from minerals like silica or stone spun into an airy product that resembles the texture of raw sheep’s wool. This type includes a product called Rockwool. Mineral wool is fire-resistant and offers a thermal value of R-3.7 to 4.3 per inch, but it is much more expensive than other loose-fill insulations. It costs about $1.40 to $2.10 per square foot, and one bag can cover 60 square feet at a thermal value equal to R-19.
Hiring a professional installer for any of the above types of insulation will add approximately $1.50 per square foot in labor fees, or you can try to install it yourself, using the tips below. Federal tax incentives for insulating a home are available until the end of 2032, and some homeowners can take advantage of state tax credits, which can help offset the cost of insulating. Check the Department of Energy’s DSIRE web site to see if you can benefit from tax credits.
Pros and Cons of Blown-In Insulation
Blown-in insulation has some advantages and disadvantages. While there are nuances among the types of blown-in materials, generally they all tend to share the following advantages and disadvantages.
Pros
Minimal invasion/repair: Since installing blown-in insulation requires just small holes drilled at the top of each stud space, the process does little damage to existing homes. A plug that matches the siding seals the holes when done. (If the cladding is brick or stucco, the plugs are often more noticeable.)
Effective: Blown-in insulation is effective at increasing the thermal resistance of your walls.
Quick: It can take a few hours to insulate an attic or about a day to install blown-in insulation in an average-size home.
Eco-friendly: Blown-in insulation can be a sustainable option, since some types are made from recycled materials. In addition, adding the insulation can decrease your carbon footprint.
Sound transfer: Blown-in insulation helps reduce sound transfer between the outdoors and the indoors, so unwanted street noise will be reduced
Cons
Settling: After a few years, blown-in insulation tends to settle downward by a few inches, which slightly reduces its overall thermal resistance, or R-value, because it leaves a small section at the top of the stud space uninsulated.
Unseen barriers: If there’s an obstruction in the wall—such as a drainpipe, outlet box, or any other type of unseen barrier, it can keep the insulation from filling the entire stud space, leaving a void with no insulation.
Mold: If blown-in insulation gets wet, and it can’t dry out, mold can develop.
Tips for Installing Blown-In Insulation
Follow the instructions printed on each bag of insulation and on the blower, as well as the tips below, to help you safely and successfully complete an attic- or wall-insulating project. Before you begin, make sure to recruit a helper and wear protective gear.
- Recruit a helper. Someone needs to load the bags of insulation into the blower, which will remain on the floor below, while the other person distributes the insulation via a long hose.
Don protective gear. Blowing in insulation is a messy prospect and you’ll need to wear a dust mask, protective eyewear, gloves, and old clothing that you can toss out when you’re done.
Blown-In Insulation for Attics
Blowing insulation into an attic can be a DIY task. It will likely require you to crouch under low, sloping attic rafters to distribute the insulation evenly. Keep the following tips in mind when you plan your attic insulation project:
- Never stand on joists. If you stand on joists in the attic and lose your balance, your foot will go right through the drywall ceiling below. Don’t risk injury and damage to your home. Instead, position plywood across the joists to give you a stable standing area.
Box-off electrical boxes and recessed can lights. Insulation should be kept away from recessed can lights because it can cause the light bulb to burn out prematurely; it also presents an elevated risk of fire because some older can lights can become very hot and ignite cellulose insulation. Use scrap plywood to build a box around each recessed light, leaving a minimum space of 3 inches between the light and the box.
Blown-In Insulation for Walls
Blowing insulation into walls is usually best left to the pros because it involves drilling into stud spaces that may contain electrical wiring and pipes. Here are some steps used when adding insulation to existing walls:
- Sealing small spaces: This type of insulation can seal small gaps and spaces as it settles, so be sure to note any areas where you feel drafts or temperature variations to help identify problem spots. Pros also can use thermal imaging to identify problem areas.
- Accessing walls: Pros will assess walls to find the best access points for adding insulation. They might remove siding or protect materials and belongings near their work.
- Making holes and filling walls: A hole can be made by cutting with a saw or by drilling before applying blown-in insulation based on the expected R-value or manufacturer’s recommended density.
- Checking and cleaning up: A professional installer should verify that cavities are filled before closing up the holes and patching walls.
Cost of Blown-In Insulation
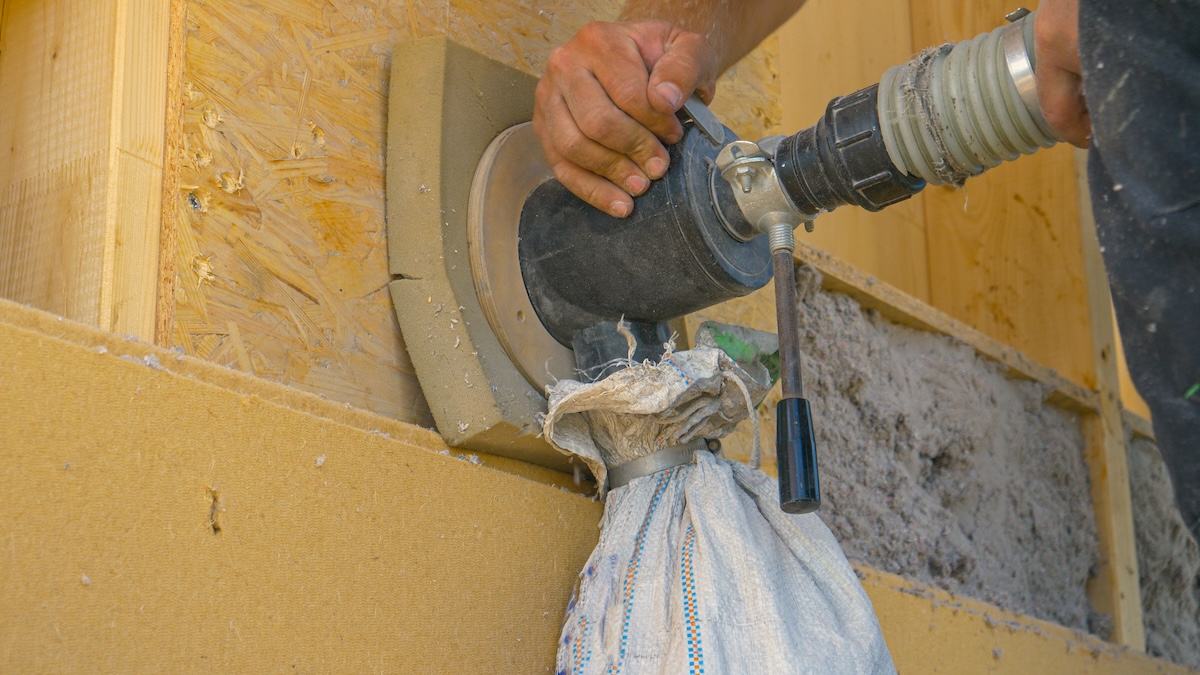
How much does blown-in insulation cost? Blown-in insulation pricing depends on how it’s installed. Labor is an important factor; contractors generally charge between $40 and $70 per hour. Labor costs are essentially unavoidable when installing blown-in insulation in walls, but DIYers planning to insulate their attics themselves can save that cost. The DIY approach has additional costs, though, as the cost to rent the blowing machine typically runs $100 to $200 per day.
The main blown-in insulation cost to consider is the insulation itself. Including labor, expect your budget to look something like this:
- Fiberglass costs about $0.50 to $1.10 per square foot.
- Cellulose costs about $0.60 to $2.30 per square foot.
- Mineral wool costs about $1.40 to $2.10 per square foot.
Materials aren’t the only driver of price, since local building code requirements for insulation R-values differ between attics and walls. Attics (R-30 to R-60) often need greater thermal resistance than walls (R-13 to R-23), and code requirements depend on your climate zone, too. Coupled with the large surface area of most attics, this makes blowing insulation into the attic more expensive than blown-in wall insulation.
How Blown-In Insulation Compares to Other Insulation Types
Blown-in insulation is often compared to other types of insulation, especially fiberglass batts. It’s important to know when it’s best to use each type of insulation to get the most for your money and time when updating the thermal efficiency of your home.
- Fiberglass batts: Typically the most affordable type of insulation, batts are easiest to install when walls are open, since batts go between studs.
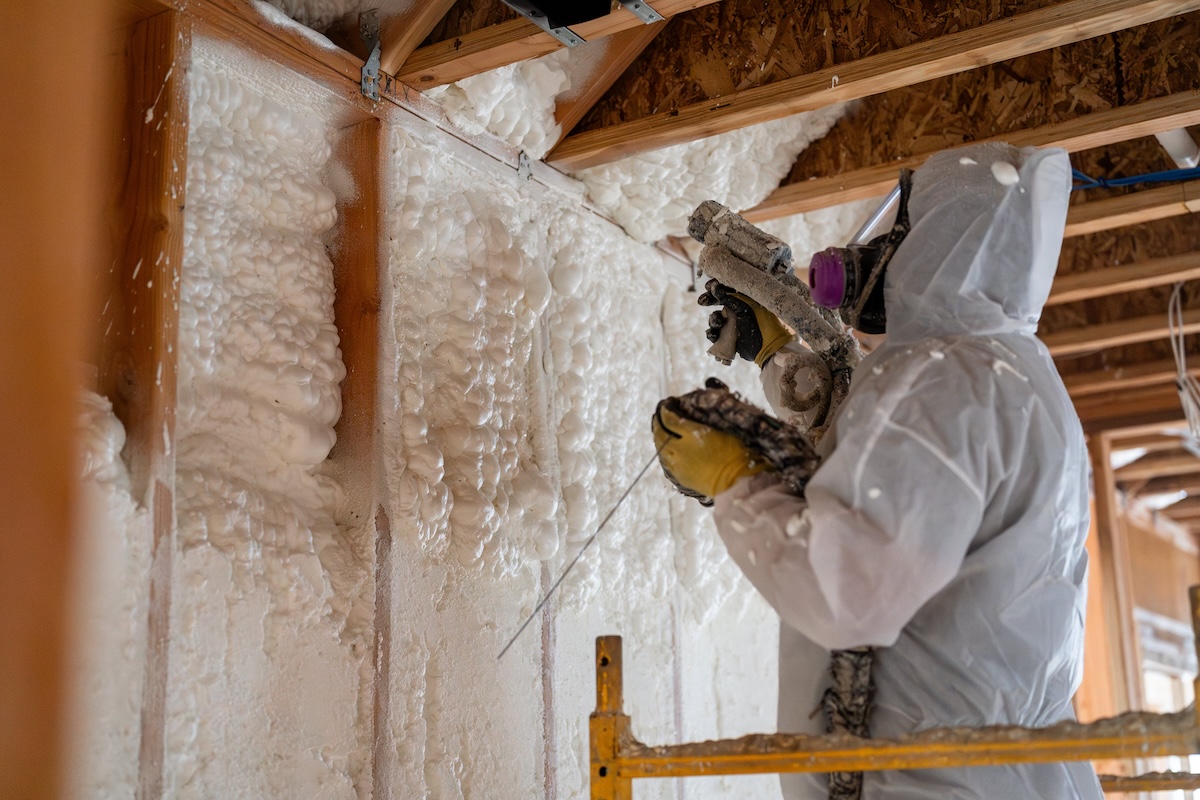
- Spray foam: Used for detailed areas around plumbing vents, electrical outlets, light fixtures, and doors and windows. Once installed, it won’t compress or settle.
- Insulation boards: More expensive than batts, insulation boards usually provide greater R values. They are installed between studs like batts. Unlike batts and blown-in insulation, insulation boards are rigid and aren’t susceptible to shrinkage over time.
FAQs
The best type of insulation depends on the situation. Factors like climate, budget, and R-value goals factor into the decision-making process. In addition, if you are adding insulation to a completed home, it’s usually most efficient to add blown-in insulation or spray foam insulation. If you are in the process of building an addition, finishing a basement, or constructing a new home, a combination of insulating boards, batts, and spray foam usually make the most sense as the stud bays are open and accessible.
If budget isn’t a factor, mineral wool insulation is often preferred for its ability to provide thermal efficiency, moisture resistance, and fire resistance. Plus, it is effective at sound absorption and can be made from recycled materials.
Blown-in insulation, as a category, can be effective for up to 30 years. However, it can start to settle after about a decade.
Yes, blown-in insulation can be a DIY project, but it’s recommended that you work with a helper. The machine used to blow-in the insulation can be rented. Typically, an unfinished space like an attic is easier for DIYers to install insulation than adding it to finished walls, which requires making holes and then sealing and patching them after installing insulation.
