We may earn revenue from the products available on this page and participate in affiliate programs. Learn More ›
Front doors undergo wear and tear on a daily basis, not least from the elements—precipitation and wind and the glaring-hot rays of the sun. That being the case, it’s no surprise that every so often, depending on the architecture of your home, it becomes necessary to paint the front door. Some might see this as a chore, a purely maintenance-oriented responsibility, but why not capitalize on the chance to paint the front door a new color? After all, a new look for the entryway can go a long way toward boosting curb appeal, and I think the change can make it more enjoyable to return home after a day at work or weekend away. Of course, painting is one of the easiest home improvements one might undertake, and if you start in the morning, you can have the project completely finished by nightfall.
Tools & Materials
Bobvila.com may earn a commission from purchases made through these links.
Step 1
For best results, particularly if you are painting both sides of the door, I highly recommend removing the door from its hinges. Certainly, it can be a hassle to do so—after all, front doors are heavy—but wouldn’t you rather inconvenience yourself for ten minutes than suffer the sight of a poor paint job over the next few years?

Step 2
Prepare an adequate work area. That includes laying down an old sheet or drop cloth to catch paint drips, then bringing a pair of sawhorses (or makeshift stand-ins) into position to hold the door off the floor. Finally, ask a friend or family member to help you lift the door and place it over the supports.
Step 3
If the existing paint on the door has cracked or peeled, remove it with a putty knife. Just be careful not to gouge the door with the tool. Next, smooth rough areas with fine-grit sandpaper before washing the surface with warm, soapy water. Wipe the door down with a lint-free cloth and be sure that it’s completely dry before you start to actually paint. Remember, preparation is key in any paint job.
Step 4
Take off all removable hardware, including the doorknob and lockset. If the door features any immoveable details, such as an integrated pane of glass, cover those carefully with blue painter’s tape.
Step 5
You don’t have to apply a coat of primer, but if the new color you’ve chosen is lighter than the existing one (or if you’ve had to remove a lot of old paint), then it’s probably wise to take this extra step. Priming the door will save you from having to do an extra topcoat or two. Of course, if you buy a primer-paint combination, and you should if possible, then you can very likely complete the job with only two coats.
Step 6
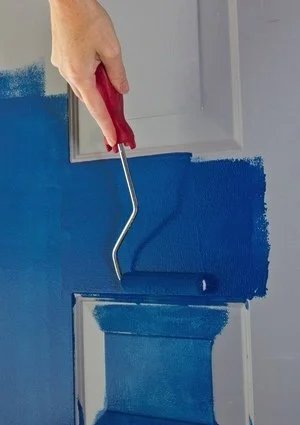
Stir up the paint before beginning to apply it. Use a three- to four-inch paintbrush around the outside edges and corners of the door, then brush the edging around any raised or recessed panels. Switch to a small paint roller to make quicker work of the flat parts of the door. Assuming you’ve used a water-based—which is to say latex—paint product, each coat should take a few hours to dry in low humidity.
Step 7
Apply the final coat in the same manner as above, starting with the outside edges and corners. Once finished, allow a little extra drying time—perhaps an additional hour. Finally, remove the painter’s tape, reattach the hardware, and replace the door on its hinges. That’s it—see, I told you it wouldn’t take long!


