
We may earn revenue from the products available on this page and participate in affiliate programs. Learn More ›
If the only obstacle standing in your way of replacing an old and corroded shower head is knowing how to replace a shower head, this article is for you. Not only is it disheartening to shower underneath an unattractive and well-worn shower fixture, but the outdated model can also be costing you more on your monthly water bill.
For a quick fix, consider replacing an existing shower head with an energy-efficient, low-flow model. This newer option doesn’t mean low pressure, it just uses less water per minute, which saves resources in the long run. Follow these steps to learn how to change a shower head, and install a new fixed-mount or handheld shower head with ease.
Tools & Materials
Bobvila.com may earn a commission from purchases made through these links.
Choosing a New Shower Head
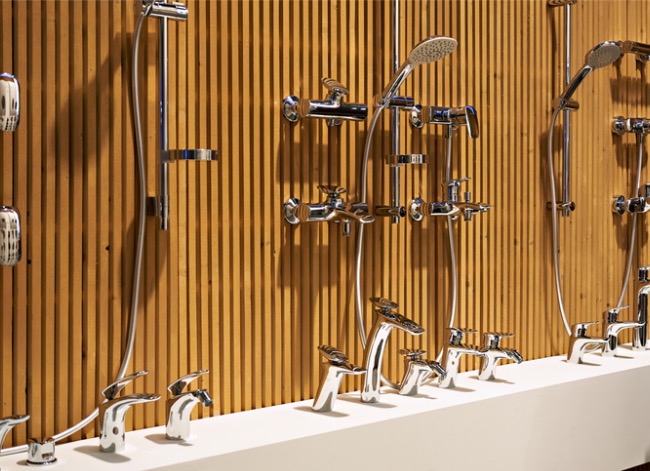
After deciding that a shower head needs to be replaced, the next step in how to change a shower head is figuring out its replacement. While it’s lucky there are so many types available, it can take some time to figure out which kind is right for your shower. More than just finishes and styles, there are adjustable sprays, handhelds, wall mounts, top mounts, and shower panel systems. Plus, there are options with lights, music, temperature controls, and the ability to take phone calls.
Another consideration is the flow rate and pressure. Products that carry the EPA WaterSense label indicate that no more than 2 gpm (gallons per minute) is used. (A standard shower head uses 2.5 gpm.) If you are considering a low-flow shower head, keep in mind that it can’t increase your water pressure. Models that offer help with low water pressure are called high-pressure shower heads and include products such as the Speakman Anystream High Pressure Shower Head, which is our top pick in the Best High-Pressure Shower Heads guide.
For a versatile handheld option, Moen’s Engage Magnetix Six-Function Handheld Showerhead is WaterSense and Americans with Disabilities Act (ADA) compliant. If you need help narrowing down the options to find the perfect shower head for your bathroom, review our article on how to choose a shower head.

Changing a Shower Head in 5 Easy Steps
With any home update, there’s an opportunity to refresh a much-used space and make it more appealing and inviting. Upgrading your shower experience can help everyone in a household feel better, too. While updating the shower with a new shower head isn’t a tough DIY project, it’s important to set aside enough time to complete and test the installation so you aren’t without a way to shower.
Step 1: Remove the old shower head.
The first step in this changing shower head project requires knowing how to remove a shower head. Removing the old fixture may be as easy as turning it counterclockwise a few times to see if you can remove it by hand.
If it won’t budge, grab a rag or towel and some tools for assistance. Wrap the rag around the shower arm—the pipe that connects the shower head to the wall—to protect it from damage as you grip onto it with slip-joint pliers. Then, clamp the adjustable wrench around the head’s base and twist it off counterclockwise until it’s removed from the arm.

Step 2: Clean the shower arm thoroughly.
As there’s likely some rust, scale, and other debris left behind from your old shower head, use the rag to clean inside and outside the arm. Not only will that clear a path for better pressure and cleaner shower water, but it will also make the installation process of your new shower head much easier.

Tried-and-True Advice
While you may remember to protect the chrome or brushed nickel finish on the shower head by wrapping it in a cloth before tightening it with an adjustable wrench, don’t forget to protect the tub below. I learned this the hard way. As the final step to a weeks-long complete bathroom remodel that involved replacing the porcelain tub, I added the shower head. While tightening it in place, the adjustable wrench slipped out of my hand and fell onto the tub below, chipping the brand new porcelain tub. With this cautionary tale in mind, place a towel on the tub or shower floor to protect it while installing the shower head.
—Tony Carrick, Contributing Writer
Step 3: Wrap the shower arm with shower head tape.
Find the series of linear grooves, also called threads, at the end of the shower arm, and apply two or three passes of Teflon tape over them in a clockwise direction. Press the shower head tape firmly into the threads with your fingers with each wrap-around so that you can start to see them through the tape. This specialty plumbing tape acts as a seal; when you twist on a new shower head, it ensures a snug fit and prevents water flow from leaking where the hardware screws together.
Keep the tape handy since you might need it again after you check for leaks at the end of the installation.
Step 4: Install the replacement shower head.
The steps involved in installing a shower head depend on the type of replacement shower head chosen. While a standard wall-mount shower head may be easy to swap in and out, other types may require more work and professional installation. For each type, here is an overview of how to install a shower head:
- Standard wall mount. Usually the least expensive and easiest to install, the wall-mount shower head usually can be attached by hand. Just place the new head on the shower arm and twist it clockwise until it’s securely in place. Be sure to follow any special instructions from the manufacturer.
- Top mount. If replacing a top-mount shower head with the same type, it can be replaced by hand on the shower arm. If you are installing one for the first time and have no plumbing experience, it’s best to ask a pro for help.
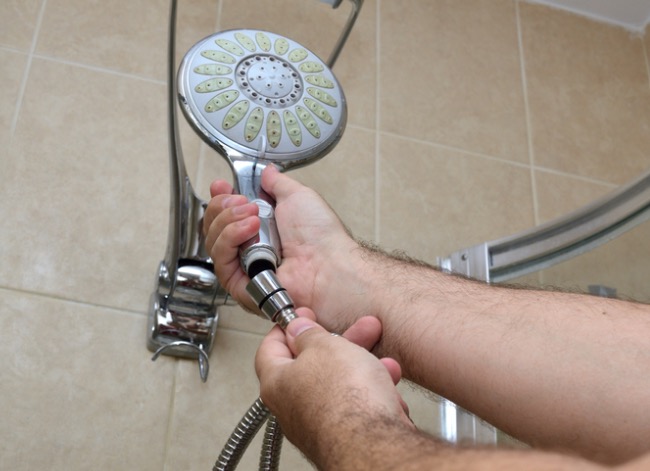
- Handheld. There are handheld shower heads that can replace tub spouts and others that can replace an existing shower head. Usually they are fairly easy to install. Connect the new shower head to the end of the shower arm clockwise, then connect the end of the shower hose to the mount. As always, check to see if the manufacturer has additional instructions.
- Sliding bar. An adjustable sliding bar shower head usually has a handheld sprayer connected to a flexible hose on a 24-inch vertical bar mounted to the wall. In addition to connecting the shower head to the supply line, the bar needs to be installed. Usually hollow-wall anchors can make this easier in a shower.
- Shower panels or technology enabled. Extra features and functions can make showering more pleasurable. However, the installation becomes more involved with more complicated offerings. For shower panels and technology-enabled shower heads, it’s best to read the manufacturer’s instructions carefully and hire an experienced professional if you don’t have plumbing and electrical experience.

Step 5: Inspect your work and check for leaks.
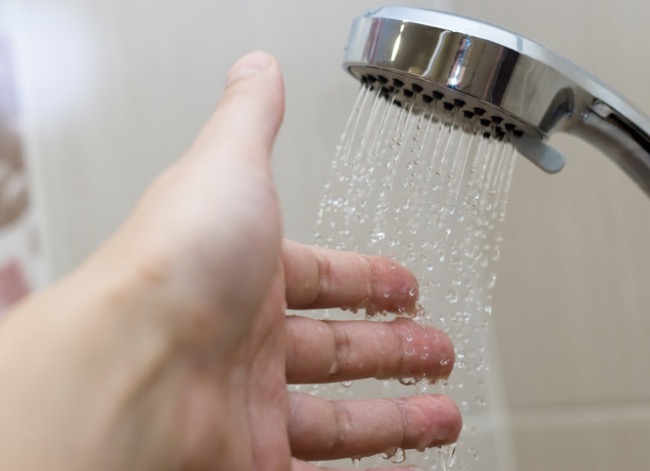
Before you wash your hands of this job, check for any leaks that could lead to wasted spray and higher water bills. After the new shower head installation is complete, take a step back and turn the water on for a few moments. If you see any streams of water coming from the wrong parts of the hardware, turn off the water once more so that you can disassemble the head, dry it, and then secure it with more Teflon tape. Then, tightly secure it to the arm and test it again.
RELATED: This Bathroom Upgrade Can Help Control Your Shower’s Temperature and Water Flow
Final Thoughts
The process of how to change a shower head depends on the type of shower head you choose. While replacing one with the same type may be very simple for even beginning DIYers, installing one that will be placed in a different location or offers technology features can require some plumbing and electrical work and may require the help of a professional.
To ensure that your new hardware works properly and water flows freely in the long run, clean your shower head at the first sign of clogging or lower water pressure in order to keep scaly buildup at bay. You can either use a cleaner or unscrew the head and put it in the dishwasher. Whatever maintenance approach you choose, just make sure to regularly clean it so you’ll have a refreshing shower for years to come.

FAQs
While some may claim that shower heads should be changed every year or sooner, it depends on the situation. If the shower head has been regularly cleaned and maintained and is no longer performing the same, or it’s moldy, covered in sediment, or is leaking, it may be time to replace it.
Most shower heads in the United States are made with a universal thread size so they can connect to a ½-inch National Pipe Tapered Thread (NPT) pipe. It’s important to check if a shower head fits with this standard before attempting to install.
Replacing a shower head pipe (also known as a shower arm) is not much harder than replacing just the shower head. To remove the old pipe, use a wrench to rotate the pipe counterclockwise. Clean the connection and replace the Teflon tape. Turn the new shower head pipe clockwise on the taped fitting. After it is installed, check for leaks.
