
We may earn revenue from the products available on this page and participate in affiliate programs. Learn More ›
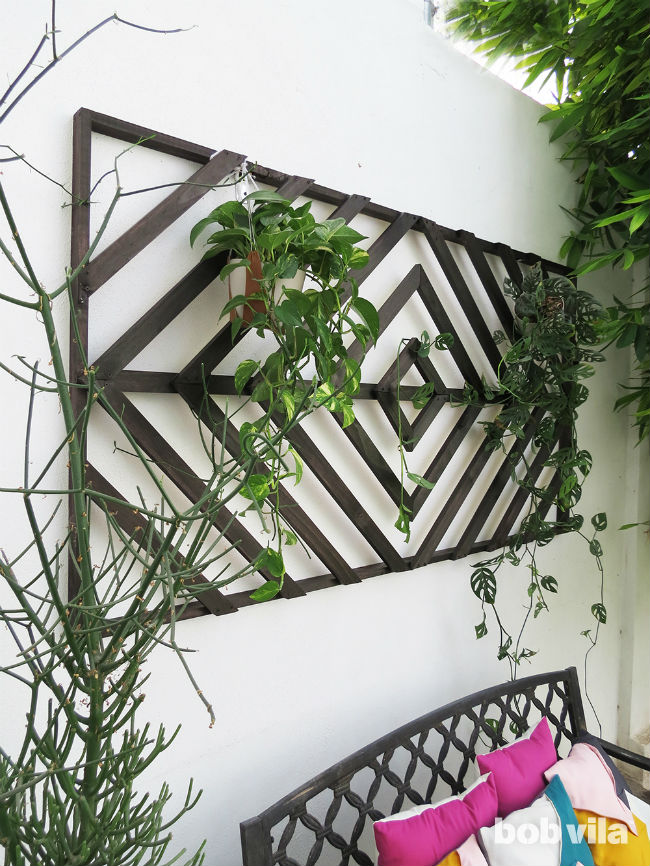
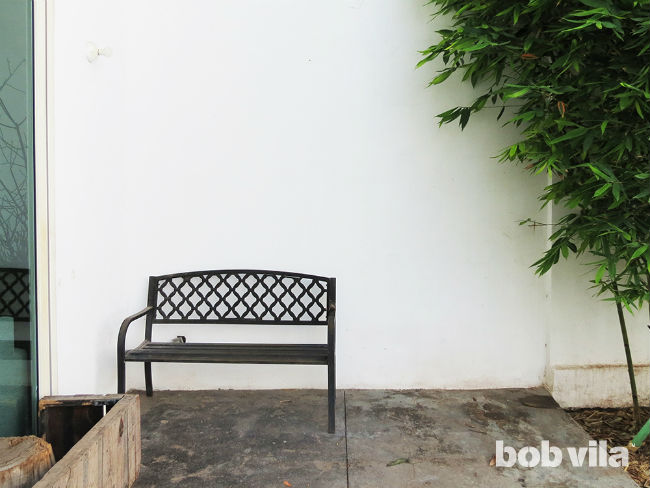
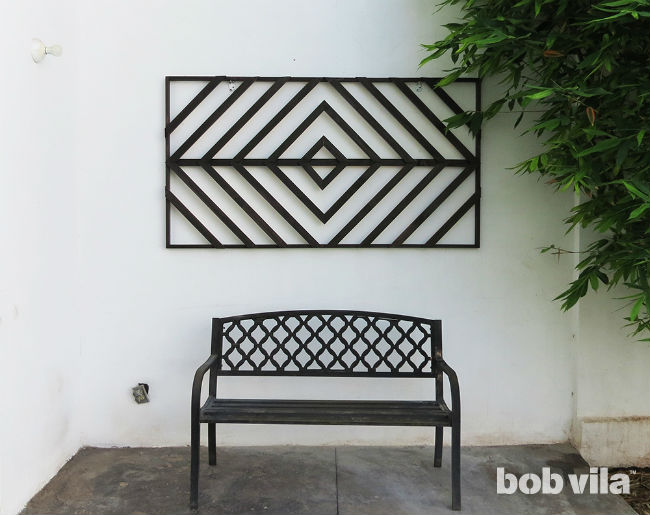
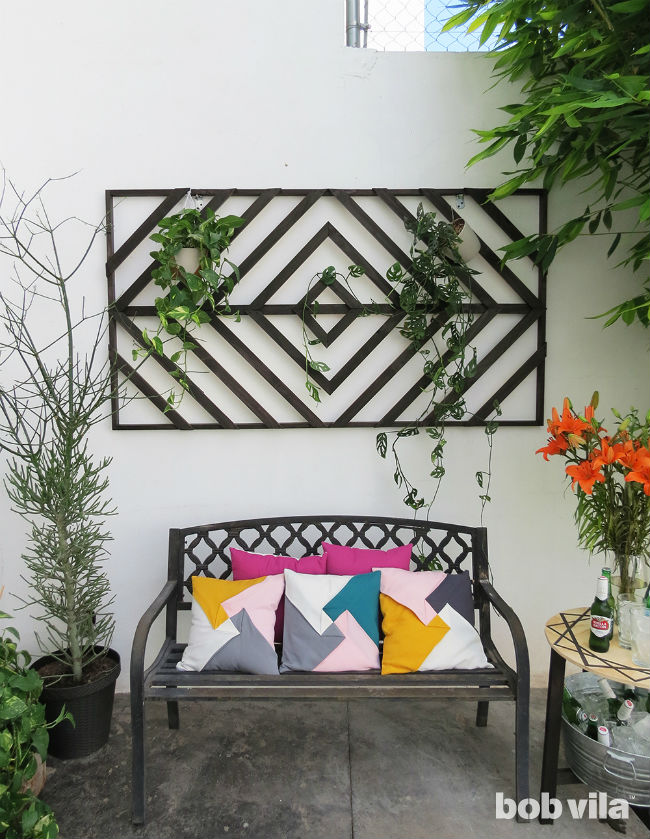
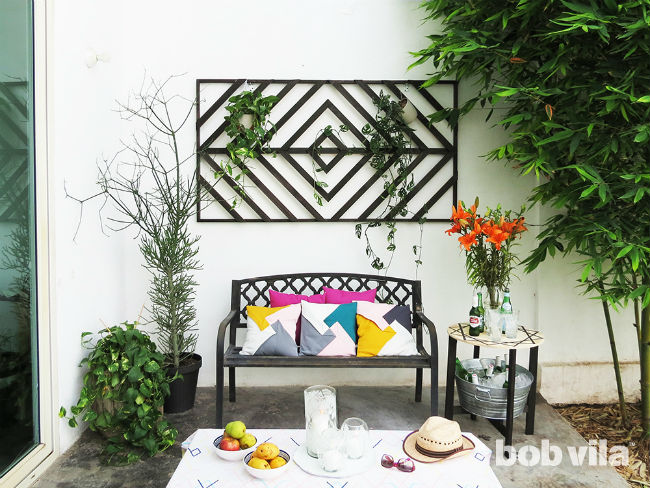
It’s not news: You don’t need to have a huge backyard to enjoy greenery. The key is to embrace your vertical space, and there’s no better way to do so than with a wall trellis. This particular project tutorial can dress up any small outdoor space, from terrace to balcony—we used the blank wall behind a backyard patio to mount ours! Keep reading to learn how little it takes to build a DIY trellis that highlights your plants during summertime and even decorates the outdoor space in stark winter with its showy, geometric design.
RELATED: 20 Ways to Garden Without a Backyard
MATERIALS AND TOOLS
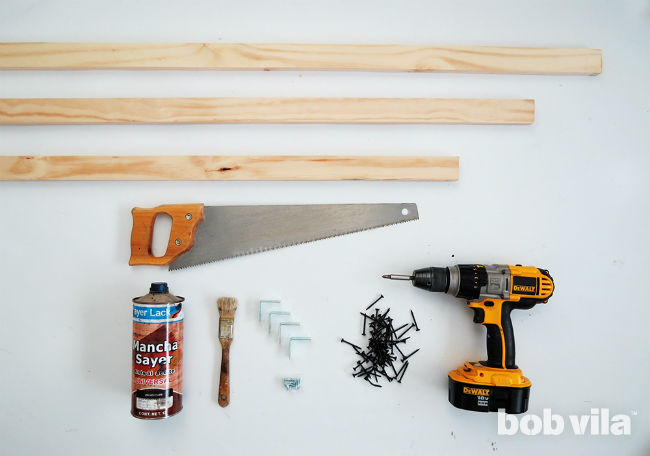
– 1×2 lumber (10 8-foot-long pieces)
– L-shaped ruler
– Pencil
– Saw
– Sandpaper
– Wood glue
– Wood screws
– Cordless drill
– 1½ inch flat corner braces (4)
– Wood stain
– Varnish
– Brush
– 1½ inch metal corner brace (4)
– S hooks
STEP 1
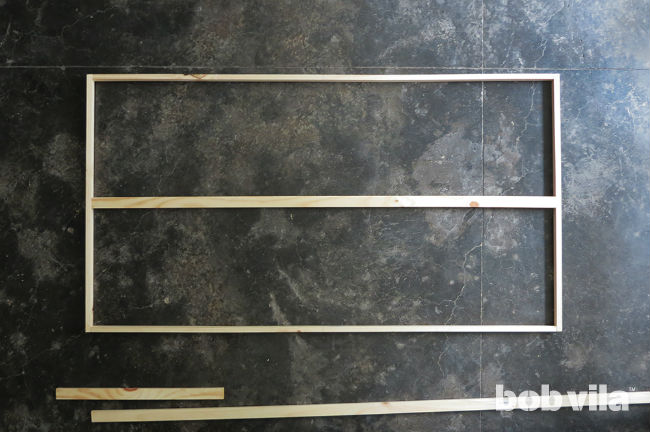
To build the outer frame of the wall trellis, cut three 1x2s to be 6½ feet long and two others to be 3¼ feet long, then sand all of the pieces.
Lay the wood pieces on a flat work surface, with the narrow, ¾-inch side of the 1x2s facing down. Run the two long cuts parallel to one another to make the top and bottom of the frame, then position the two short wood pieces at each end to create a rectangle. Put the wall trellis frame together with wood glue and two screws at each corner.
Once you have a rectangle, find the center of each small side of the rectangle, and lay the third 6½-foot-long piece across the exact middle of the trellis.
STEP 2
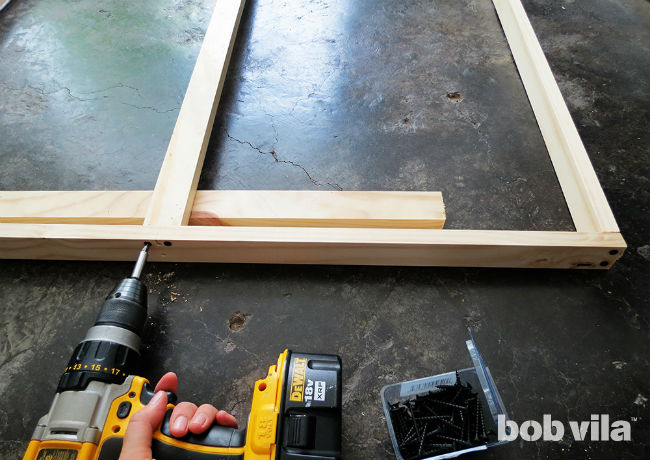
For the middle of the wall trellis, you’ll want the 1½-inch side of the 1×2 to face up and be flush with the edge of the frame. To hold it in place while you attach it, lift the lumber, stick some scrap wood under it, then glue and screw it into the rectangle frame.
STEP 3
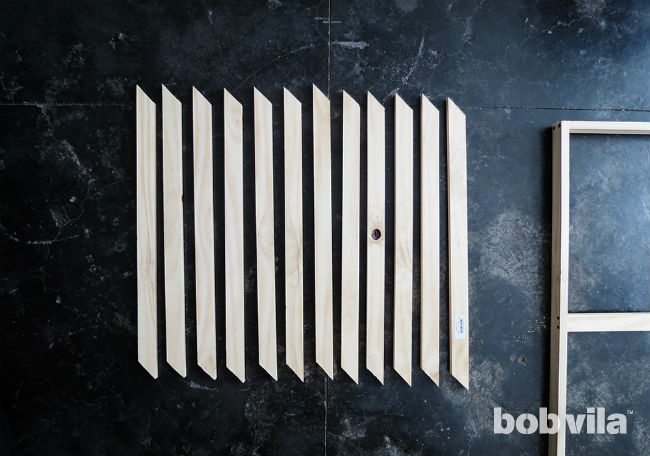
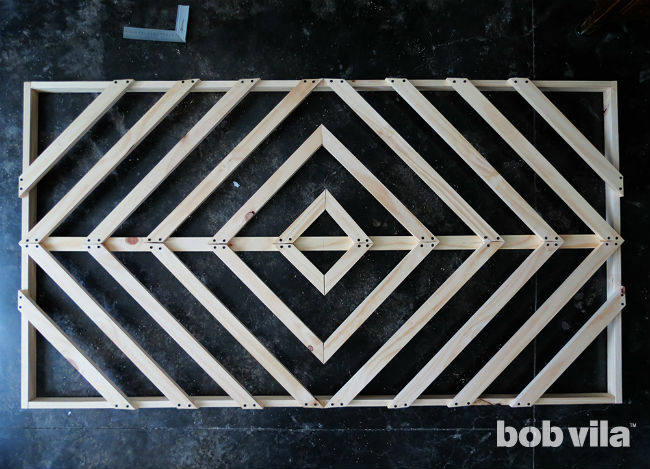
Now that the frame is made, start the decorative part of the wall trellis. As you saw in the first photo, it’s made of six diamonds radiating from the center. Cut 1x2s into a dozen 29-inch-long pieces. Then, with the 1½-inch sides of the 1x2s facing up, trim each edge at a 45-degree angle. Take care to make cuts in the same direction. Sand each piece thoroughly.
STEP 4
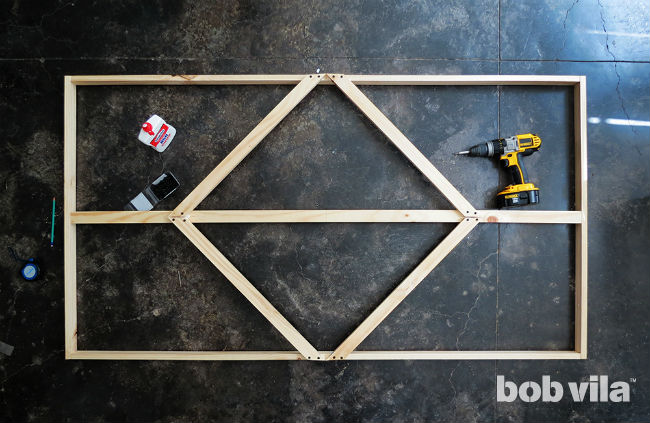
Measure to find and mark the center on both long sides of the rectangular frame. Position four wood pieces to create a square: It will look as though the corner is cut off where the 1x2s meet along the top and bottom of the frame, while the 1x2s will come together in a mitered corner on the middle.
Fasten the square to the trellis frame with wood glue and two 1¼-inch screws at each end of every 29-inch piece. To prevent the wood from cracking, we suggest pre-drilling small holes through the wood before inserting the screws. (It also makes it easier to screw straight!)
STEP 5
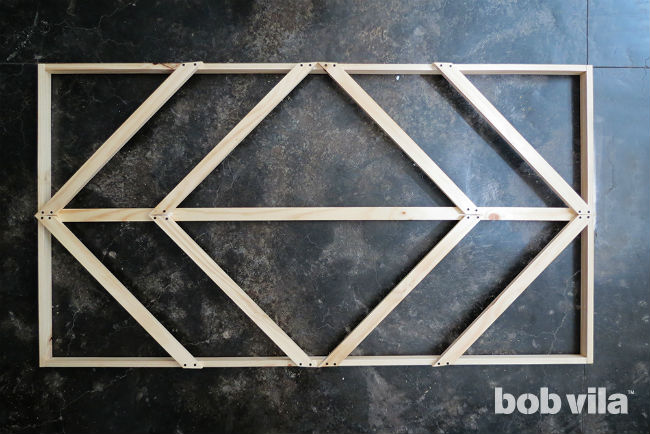
Take another four 29-inch pieces to create two sideways “V” shapes facing in towards the center (or, a “less than” symbol on the left and a “greater than” symbol on the right) to parallel the first square. The tips of each shape should meet at the center of the small sides of the rectangle. Once they are in place, you can screw them with the frame following tips in Step 4.
STEP 6
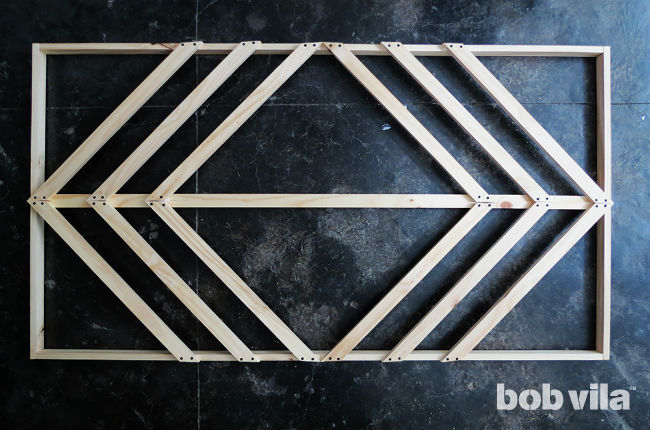
Take the last four cuts and insert them between the first and second sideway “V” shapes. Use a ruler to check that the pieces are placed at equal distance from each other and verify that all the pieces are parallel too. (Expect for each to be approximately four inches apart.) Then, screw them with the frame as instructed in Step 4.
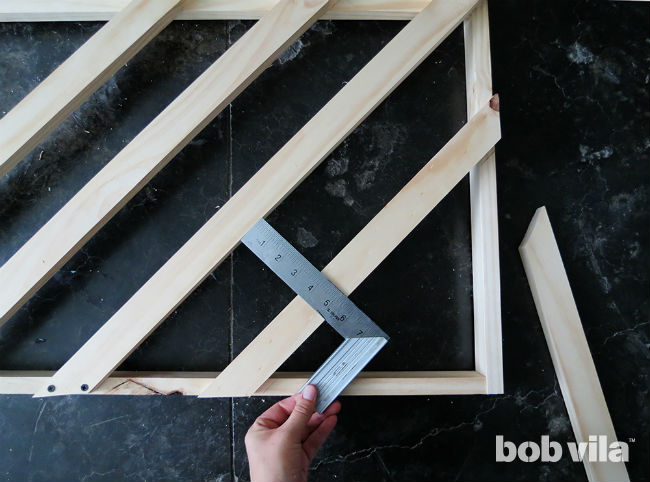
STEP 7
To fill the corner gaps, cut 1x2s into four pieces that are each 20 inches long. Lay each with the 1½-inch side facing up, and cut each end at a 45-degree angle—this time with each end in an opposite direction (see photo above). Sand thoroughly.
Start in one corner, measure four inches from the outermost piece of wood, and place newest cut parallel to the others. Then, glue, pre-drill, and screw into to the frame.
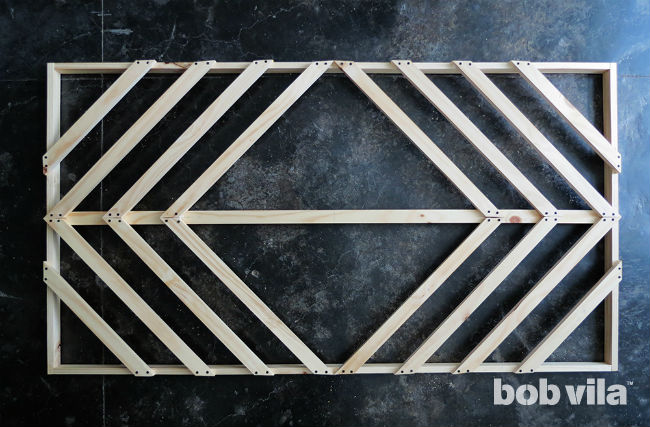
STEP 8
Attach the remaining three 20-inch pieces in the open corners.
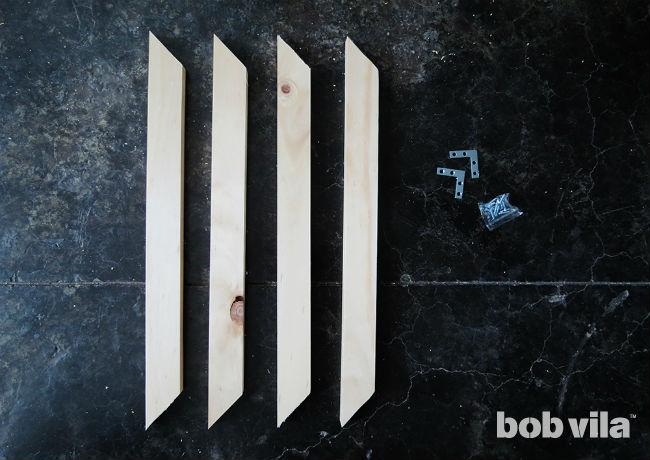
STEP 9
To fill the center of the trellis, you will have to build two smaller squares. And, since they’ll be smaller than the frame itself—and won’t reach to the top and bottom rails—you’ll use corner braces to strengthen the top and bottom corners.
First, cut 1x2s into four 20-inch-long pieces for the bigger square and four 9-inch-long pieces to make the smaller square. Again, turn all so that 1½-inch sides are flat on the ground, and cut ends at 45-degree angles with opposite angles at each end. Sand thoroughly.
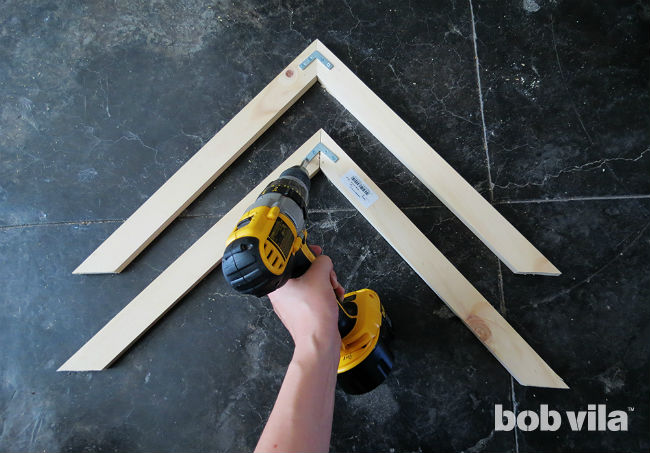
STEP 10
Take the four 20-inch-long pieces and position them to create two mitered corners. Then, use corner braces and shorter, ¾-inch screws to bring the ends together.
Place each “V” onto the center of the wall trellis—one with its corner pointing up and the other pointing down—and have them meet along the middle bar. Glue, pre-drill, and screw them onto that middle piece with the corner braces facing down (toward the back of the trellis).
STEP 11
Repeat Step 10 with the 9-inch-long 1x2s to make the smaller square. Position the small square inside the big one and screw it with the frame.
And with that, the building is finished!
STEP 12
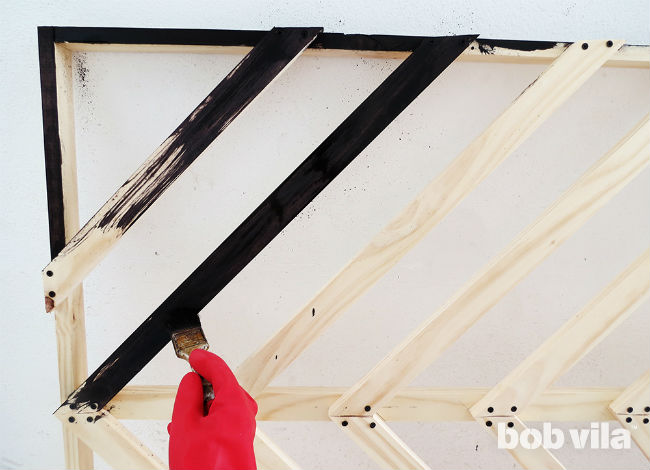
After a good sanding, you are ready to paint or stain the wall trellis. We suggest you use a contrasting color to what’s on the wall where it will hang—perhaps the color of your exterior trim or an even brighter hue.
Once dry, brush on at least two coats of varnish to ensure long-lasting results.
STEP 13
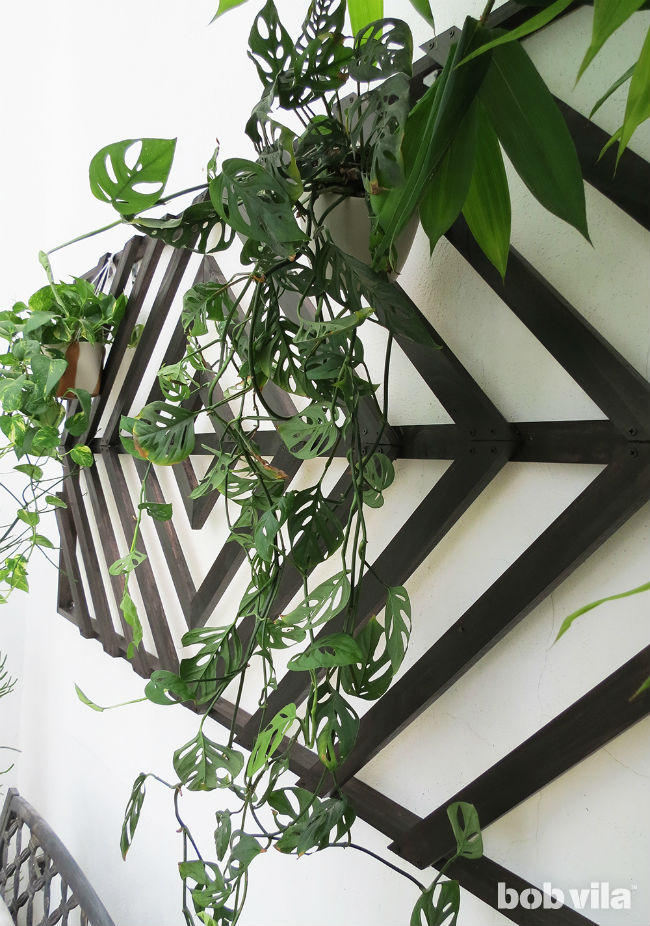
Hang the trellis on the wall. Depending on what your wall is made of, you can choose to screw the frame directly into the wall or hang it from some brackets or hooks. Whatever method you choose, make sure that the trellis is firmly fixed and will hold the plants’ weight. All it needs is a handful of S hooks over the top or middle bars to start hanging planters and vines from it.
If you like what this does for a boring wall in the backyard, stay tuned for even more projects that will help makeover your outdoor space this summer!
RELATED: 12 Big Ideas for Small Backyards
Ama is a DIY addict and the creative mind behind Ohoh Deco. She likes home decor, lighting, and furniture projects that may involve painting, sewing, drilling… no matter the technique! Whatever she has on hand is the inspiration to create and fodder for her serious addiction to upcycling.
