

We may earn revenue from the products available on this page and participate in affiliate programs. Learn More ›
This content is presented by The Home Depot. The included facts and opinions are those of BobVila.com.
Our garages are often more than just a covered area to park a car. Many use the space for organizing lawn and gardening equipment, completing DIY projects, working out, or storing food or other household supplies. When the weather gets warmer during the spring and summer months, the space is likely to be used even more frequently. (In fact, a 2024 survey by the Craftsman brand found that 76 percent of respondents say their garages could potentially become the most productive room in their house.)
With all of the many things going on in a garage, things can easily get messy. In case that sounds familiar, we’ve laid out the steps to get your garage tidy and organized again with the help of Ecolab Scientific Clean products, exclusive to The Home Depot. With a neat and tidy garage, you’ll be ready for everything you need to tackle this summer’s to-do list.
Tools & Materials
Bobvila.com may earn a commission from purchases made through these links.
- Tarps
- Safety glasses
- Gloves
- Trash can
- Recycling bin
- Duster
- Broom/dustpan combo
- Wet/dry vacuum
- Microfiber cloth
- Bucket
- Pressure washer
- Shelving (optional)
- Pegboard (optional)
- Hooks (optional)
- Storage cart (optional)
- Dust mask
- Dish soap
- Vinegar
- Industrial degreaser
- Concrete and driveway cleaner
Project Overview
Working Time: 2 to 4 hours
Total Time: 2 to 4 hours
Skill Level: Intermediate
Estimated Cost: $85 to $500+
Before You Begin
Deep-cleaning your garage is a big undertaking. Be sure to pick a day when you have sufficient time to complete the task. It is also a good idea to choose a day when there’s no rain in the forecast, so the items that are removed from the space don’t get wet while you are trying to clean. To protect yourself, be sure to wear safety glasses, gloves, and a mask when dusting and using cleaners.
STEP 1: Remove everything from the garage.
Before you can clean your garage, it’s best to start with a blank canvas. Lay out some tarps or blankets on the driveway, patio, or another part of your yard. Then completely empty the space and place items on the tarps or blankets. In addition to making it possible to clean the entire space, removing everything will also allow you to make sure the items are properly organized when you place them back inside the spruced-up garage.
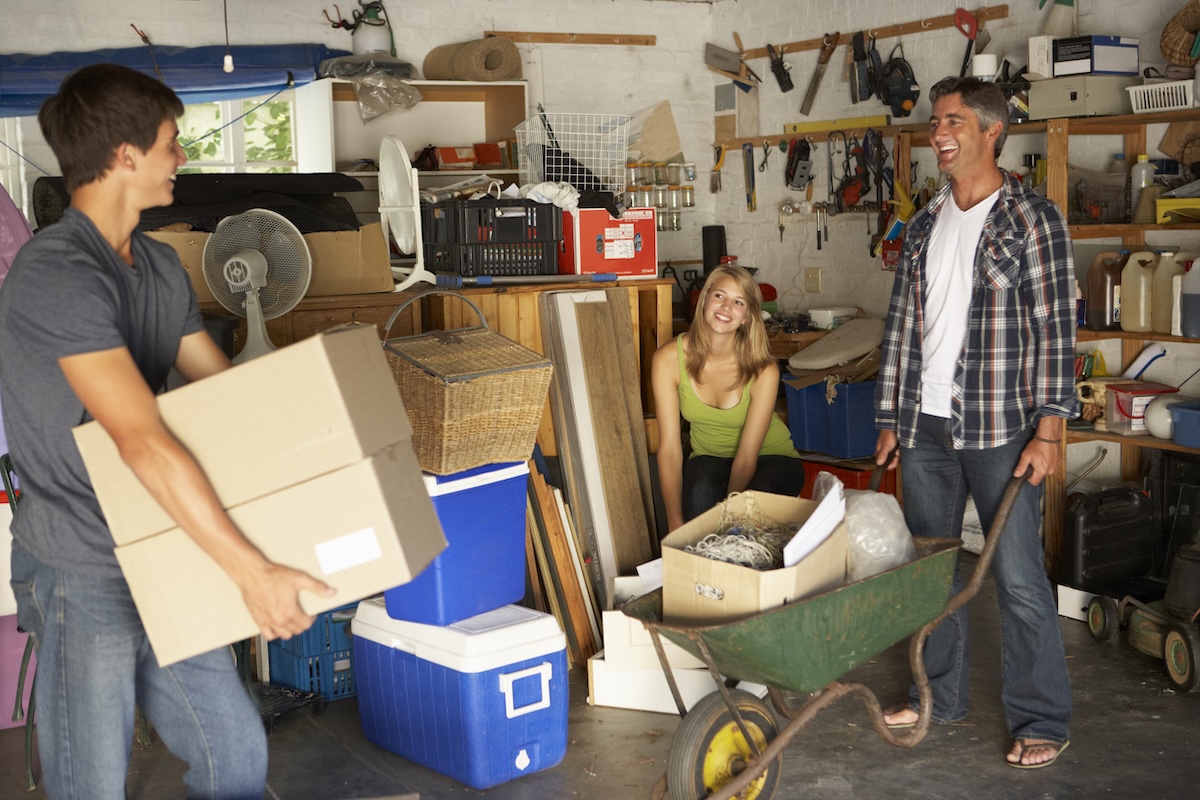
STEP 2: Sort items into categories to keep, donate, or throw out.
After you’ve emptied the garage, take some time to go through your belongings. Now is the time to sort everything so it will be organized and easy to find when you return things to the garage. It is also the perfect opportunity to downsize and make sure you’re not storing more than you really need.
Create categories (such as lawn and gardening tools, sports equipment, kids toys, and long-term storage), and group your items together. Designate a spot for items you no longer need that will be donated. Keep a trash can and recycling bin nearby as well to collect garbage or broken items.
If you have a lot of items stored in your garage, it may be overwhelming to sort through everything all at once. You may prefer to empty it in stages and sort as you go.
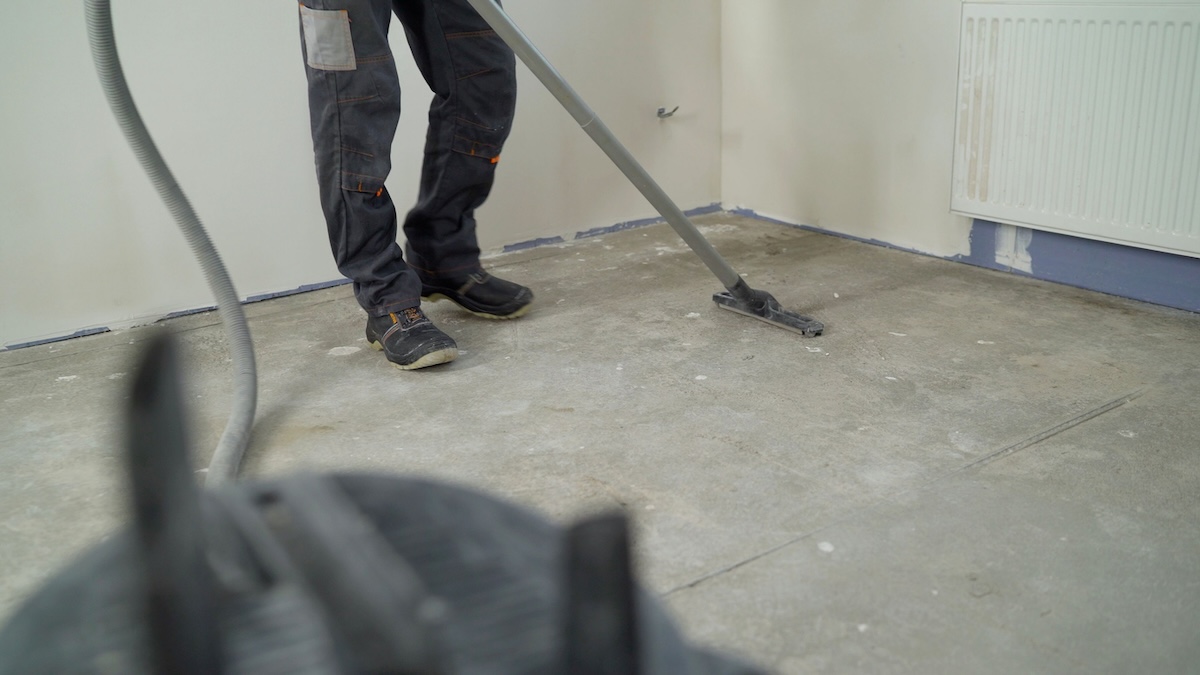
STEP 3: Dust surfaces and sweep or vacuum loose debris.
Once the garage is empty, start cleaning it. Always begin by dusting walls, shelves, and any other high surfaces. After dusting the other surfaces in the space, use a broom or wet/dry vacuum to remove loose debris from the floor.
Tip: Clean the floor after all other surfaces are cleaned to prevent falling dust or dirt from dirtying your clean floor.
STEP 4: Wipe down the walls, doors, and shelves.
Now it’s time to deep-clean the walls, doors, shelves, and any other upper surfaces in the garage. Fill a bucket with warm, soapy water. Dampen a microfiber cloth with the soapy water, and use it to wipe down all of these surfaces. If needed, you can mix equal parts of water and vinegar and use it to attend to any particularly grimy or mold-covered areas.
STEP 5: Use a degreaser to get rid of oil stains.
After attending to all the upper surfaces, it’s time to give the garage floor a deep-cleaning. If there are any oil stains on the floor, use an industrial degreaser, such as this highly rated Ecolab Industrial Degreaser Pressure Wash Concentrate available at The Home Depot. These concentrated solutions are designed to be added to the on-board tank of a pressure washer or a pump sprayer. They work to remove oil and other greasy messes from a variety of surface types, such as concrete, asphalt, and brick.
STEP 6: Deep-clean the garage floor.
Once you’ve removed oil stains, give the rest of the floor a deep-cleaning. The Ecolab Concrete & Driveway Pressure Wash is a concentrated formula that you can add to a pressure washer or pump sprayer to dissolve the gunk that has built up over time on your garage floor.
After spraying the floor with the cleaning solution, let it sit for about 5 minutes to give it time to break down the grime. Rinse the cleaner away using a garden hose, then let the floor dry completely before returning any items to the space.

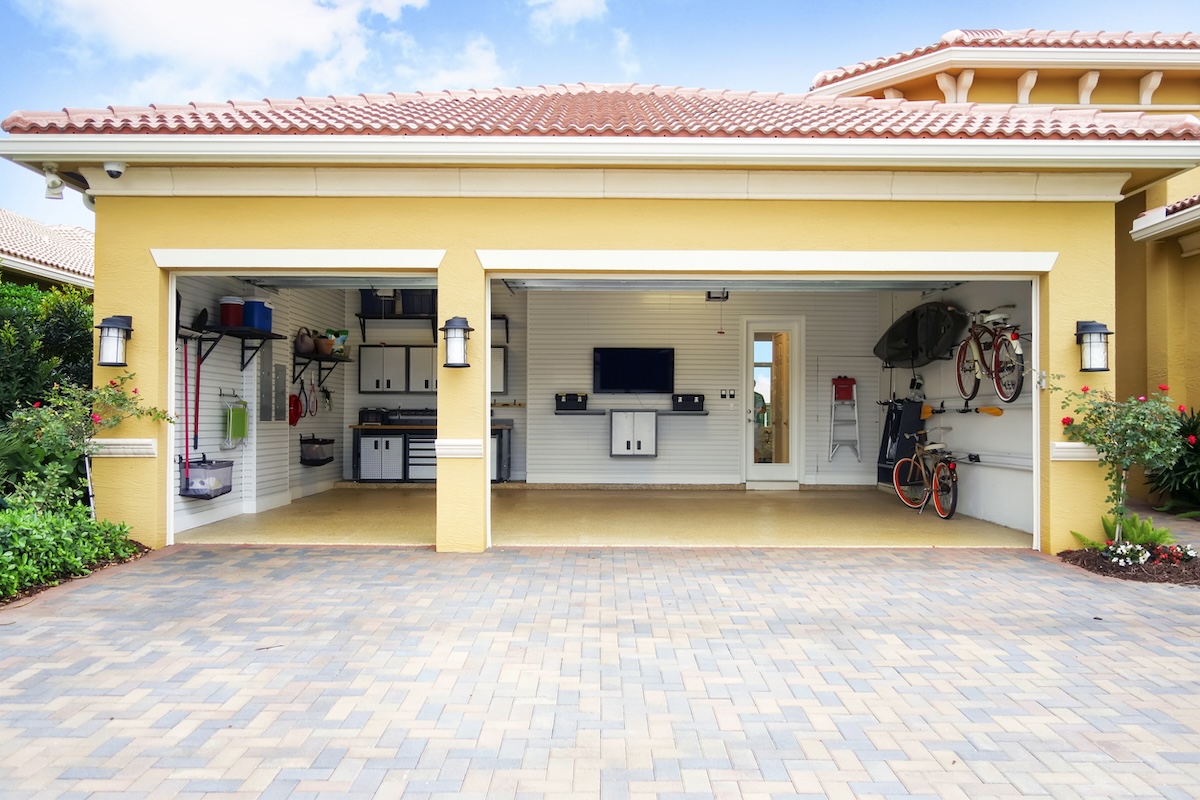
STEP 7: Optimize storage.
Before bringing any of your belongings back into the garage, evaluate your storage and organization needs. Do you have enough shelves or racks to keep your items secure and easily accessible? Consider adding more shelving, pegboards, hooks, or rolling carts to prevent clutter from accumulating in the freshly cleaned space.
STEP 8: Organize and return belongings to the space.
Now it’s time to return all of your belongings to the garage. After all the time you spent cleaning and decluttering, take your time putting everything away. Be purposeful about where you place things, ensuring that they’ll be accessible when you need them. Create a system that will be easy to stick with so that your garage will stay organized.
Final Thoughts
We put our garages through a lot. In the process, they can get dirty and grimy, whether from oil leaks, accumulated grass clippings, splotches of paint from our DIY projects, or just general dust and debris. Follow the steps outlined above to give your garage the deep-cleaning it needs. This will leave you with a fresh and renewed space to protect your car from the elements, keep your belongings organized and accessible, and complete home and garden projects.
