We may earn revenue from the products available on this page and participate in affiliate programs. Learn More ›
If you love having a cheerful jack-o’-lantern (or two) on your front porch, but you’re tired of all the mess and hassle of pumpkin carving, we’ve got just the thing: concrete pumpkins made from your kids’ favorite candy pails! Molding concrete into a jack-o’-lantern shape is an easy and inexpensive project that the whole family can enjoy. Be forewarned, though: While the mixing and casting part of the project takes less than 20 minutes, the concrete will need an additional day or two to harden before you can decorate your jack-o’-lantern. Plan on getting started on the next crisp fall weekend and splitting the work into two parts.
These concrete pumpkins are trending because they’re so easy to make, and they come out looking every bit as happy and welcoming as the gourd that inspired them—only they last a lot longer! With the concrete version, you won’t have to worry about protecting your pumpkin from rot or marauding squirrels. You just need to decide which pail to use, how to decorate it, and how to display it. You can paint your jack-o’-lantern in the colors of your favorite sports team, use it as a planter for potted mums, or place a battery-operated tea light in its center to create a soft glow after dusk. Can’t decide? Well, you’re in luck! One 80-pound bag of Quikrete concrete mix can fill up to four average-size pumpkin pails (roughly eight inches in diameter), so you’ll be able to cast a few of these cool concrete pumpkins to welcome all the little ghosts and goblins to your house on Halloween night. The full instructions appear below, and you can even follow along in the viral Facebook video by Mother Daughter Projects that started it all.

TOOLS AND MATERIALS
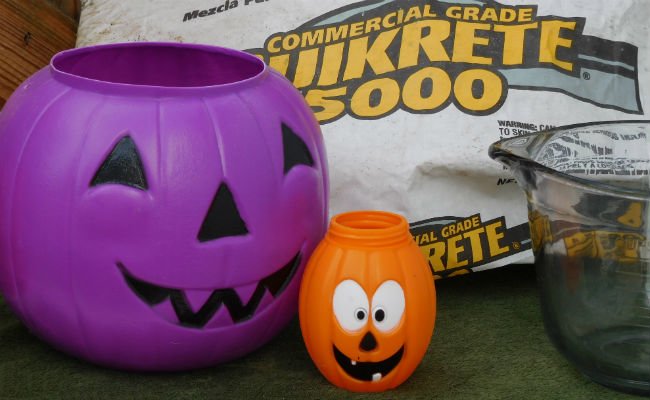
– Plastic pumpkin pails
– Plastic tarp
– Dust mask
– Waterproof gloves
– Old clothing
– Scissors
– Quikrete 5000 Concrete Mix
– Quikrete Countertop Mix (for a smoother concrete surface)
– Large bucket
– Water
– Quikrete Liquid Cement Color (optional)
– Medium bucket (optional)
– Hand trowel
– Disposable plastic cup or bottle
– Paper towels
– Large brick
– Utility knife, fitted with hook blade
– Sandpaper
– Paint (optional)
– Plant (optional)
– Battery-operated tea light (optional)
STEP 1
Prepare your work area. Concrete is heavy, so you might want to work on the ground rather than having to lift and pour the concrete mix at table height. To prevent wet concrete spills from marring a sidewalk or patio, put a tarp down first. You’ll also want to wear a dust mask, waterproof gloves, and old clothing when working with the dusty concrete mix.
STEP 2
Use scissors to cut and remove the handle from the pumpkin pail.
STEP 3
Pour dry concrete mix into a large plastic bucket or tub. (It has to be big enough also to hold the water, which you’ll be adding in the next step.) Quikrete 5000 is a good all-purpose concrete mix for casting jack-o’-lanterns, but if you’re looking for a super-smooth surface, try Quikrete Countertop Mix instead—its gravel and sand are very fine, so you won’t notice any large gravel pieces on the exterior of your concrete pumpkins once they have cured.
The amount of concrete you’ll need for each pumpkin depends on the size of your pumpkin pail, so follow the mixing instructions on the bag. You can even use the pumpkin pail as a measure: Fill it completely with the dry mix, and then dump that amount into your mixing bucket or tub. If you’re making multiple jack-o’-lanterns, you can mix the concrete for all of them at the same time.
STEP 4 (optional)
If you know you want to add color and don’t want the extra step of coating a whole pumpkin in paint, you can inject the color right into the wet concrete mix! Fill a medium bucket with the amount of water recommended for your particular bag of Quikrete, adjusting the amount according to the size of the project, then stir in Liquid Cement Color—you can see what that process looks like here. It takes at least half of a 10-ounce bottle to color a 60-pound bag’s worth of concrete, or you can use the whole bottle if you’re looking for some truly intense coloring.
STEP 5
Add water (colored or plain) to the large tub filled with dry mix. Again, the amount of water you will need depends on the amount of dry mix (which, in turn, depends on the size of your pumpkin and whether you’re making multiple pumpkins), but err on the side of too little water rather than too much, and add water a little at a time.
STEP 6
Mix thoroughly and quickly using a sturdy hand trowel until you get a consistency of thick brownie batter. If it’s too thick or thin, add water or dry mix until the mixture reaches the correct consistency. Resist adding too much water to the concrete mix. Wetter concrete is easier to handle, but if the mix is too wet, your concrete pumpkins are more likely to crumble and crack. See how the concrete pros mix by hand in this video.

STEP 7
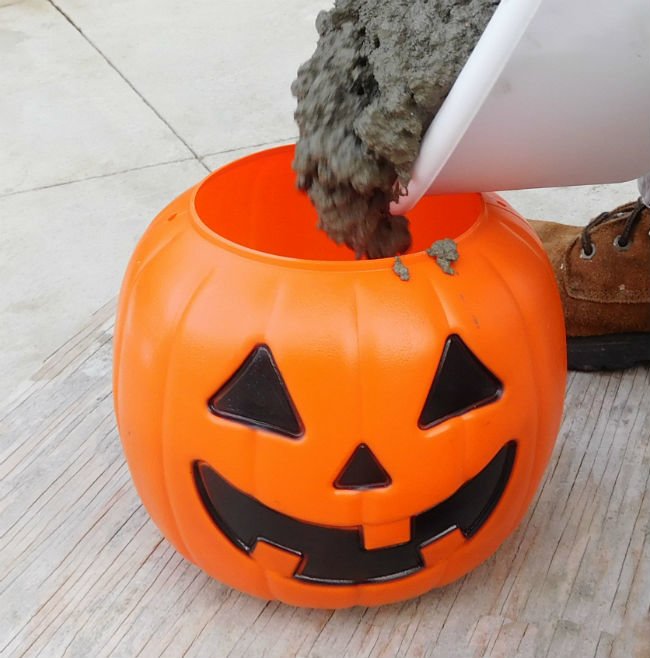
Using the hand trowel, spoon or pour the wet concrete into the plastic pumpkin pail. Push it down with the trowel as you go, working the tool through the wet concrete in a chopping motion to remove all air bubbles.
Fill it up quickly, but not all the way to the top—leave about one inch of space near the top of the pumpkin.
STEP 8
Insert a disposable plastic cup (or a plastic bottle) into the center of the wet concrete mix, pushing it down until the top is level with the top rim of the bucket. This will create a recess so you can fill your jack-o’-lantern with a tea light, flowers, or whatever else strikes your fancy. The concrete will rise as it is displaced by the cup. Wipe away any overflow using paper towels.
STEP 9
Place a large brick or another heavy item over the opening of the pumpkin to weight down the plastic cup. This prevents the pressure of the heavy concrete mix from pushing the plastic cup up and out of the pail.
STEP 10
For the smoothest surface possible, work air bubbles out of the concrete by carefully bumping the filled pumpkin on the ground and tapping it repeatedly (and firmly) on all sides with the back of the hand trowel. For the best results, don’t skimp on this step—the more you tap, the smoother the final product will be.
STEP 11
Put the pumpkin aside and allow the concrete to set for at least 24 hours.
STEP 12
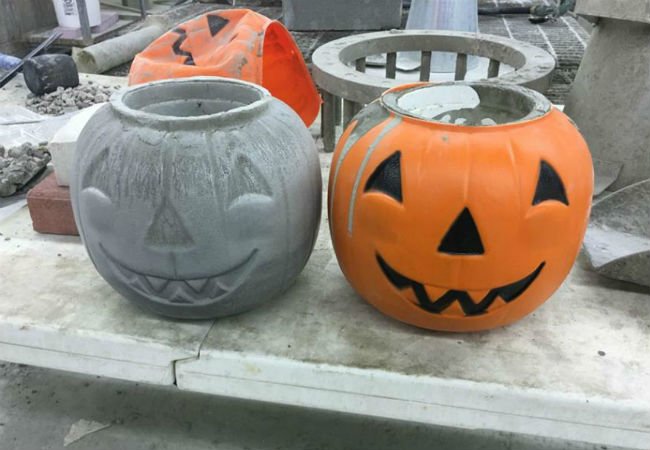
Use a utility knife that’s fitted with a hook blade to cut and remove the plastic pumpkin pail. Proceed cautiously: Stand over the pumpkin and position the tip of the blade at the bottom of the pumpkin (in one of the grooves) and pull slowly upward. The plastic is quite thick, so cut slowly and carefully. After you’ve made a couple of slices, you can peel the plastic away.
STEP 13
Remove the plastic cup or bottle from the center by making a single cut along the inside edge, then breaking the cup and pulling it out. If there are any rough edges you’d like to get rid of, simply smooth using sandpaper.
STEP 14
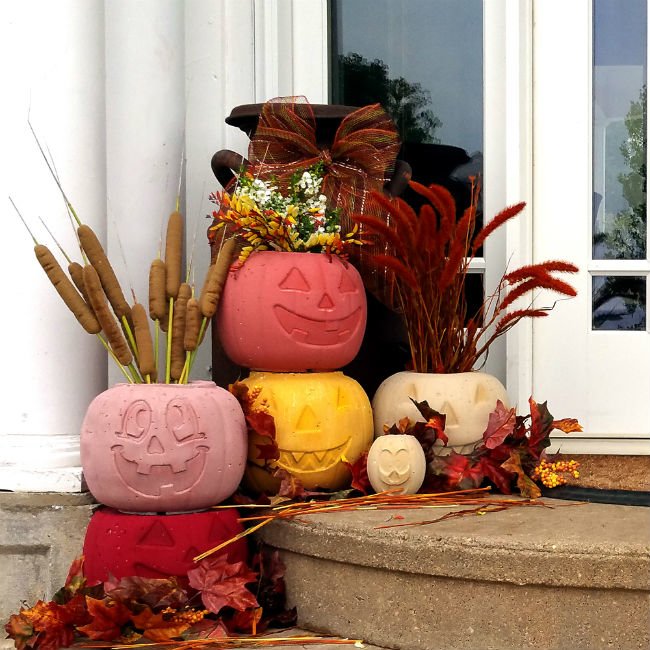
Allow your concrete pumpkins to dry out another day or so (a week, even, if you can contain your excitement!) before adding any paint or glue-on decorations. The longer you wait, the further along your concrete pumpkins will be in their monthlong curing process, which means that the paint will be less likely to peel. We colored ours with milk paint!
A great thing about these concrete pumpkins is that they’re built to last and can adorn your front porch all season long—not just through Halloween. Make your concrete project even more versatile by choosing to decorate with harvest colors that mimic the changing leaves like goldenrod yellow, sunset orange, cranberry red, and wheat brown. Or, just turn your jack-o’-Lantern’s goofy grin the other way and you’ve extended your porch decorations through Thanksgiving!


Pro Tips for Pouring and Casting Your Concrete
• If you intend to use your concrete jack-o’-lantern as a planter, drill a couple of drainage holes in the bottom when you remove the plastic mold. At this point, the concrete is still green—concrete actually takes a full 28 days to cure—and you can drill through it with relative ease. If you wait even a couple of days, it becomes more difficult to drill through and may then require a masonry bit.
• Unless you’re using the countertop mix, you’ll probably see a few holes on the surface of your concrete pumpkins. Don’t sweat them! They just add to the character of the jack-o’-lantern.
• Are you already committed to casting multiple concrete pumpkins? For bigger projects, it’s a good idea to mix the concrete in a wheelbarrow and use a hoe to stir it.
This content has been brought to you by Quikrete. Its facts and opinions are those of BobVila.com.

