We may earn revenue from the products available on this page and participate in affiliate programs. Learn More ›
You may rightly consider concrete to be one of the most durable and attractive construction materials around, but did you know that everything you do after pouring has just as much impact on its strength as the mixing process? In fact, the chemical reaction between cement and water that binds sand and gravel together to make concrete takes nearly 28 days to fully complete. During this process, which is known as hydration, you want to keep moisture in the concrete. Otherwise, water evaporating too quickly from the surface—which can happen easily outdoors and in direct sun—will weaken the finished product with stresses and cracking.
Controlling the moisture content and the temperature of the new concrete for the first several days through curing take top priority. By giving concrete mix extra attention during this period rather than walking away as soon as it’s poured, you can increase the structural integrity of the concrete and make it more resistant to future cracking. For the best results, check out our list of best (and worst) concrete-curing practices before you tackle your next project.
DO spray new concrete with water.
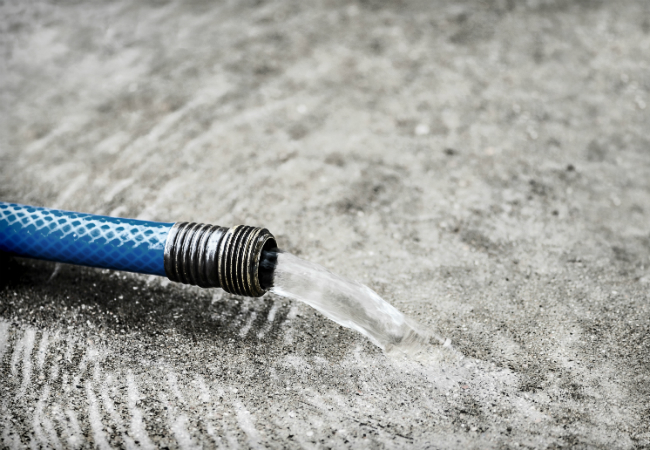
One of the most common methods for curing concrete is to hose it down frequently with water—five to 10 times per day, or as often as you can—for the first seven days. Known as “moist curing,” this allows the moisture in the concrete to evaporate slowly. Moist-cured concrete can be up to 50 percent stronger than concrete that was cured without being dampened! Spraying is not recommended for concrete poured during cold weather, however; for pours in chilly weather, see “Don’t Let Concrete Get Too Cold,” below.
DO cover new concrete.
When you don’t have time to revisit your concrete with a hose as many times as necessary for true moist curing, another option is to use a cover that can trap and slow the evaporation of the moisture in the mix. Either polyethylene sheeting that’s at least 4mm thick or a concrete curing insulating blanket—both available from DIY stores—are good for this task. Wet the concrete thoroughly, and then cover it with the sheeting of your choice, using bricks, rocks, or other heavy items to hold it in place. Remove the sheeting or blanket daily, wet the concrete again, re-cover it, and repeat for seven days. This technique can also be used for upright concrete columns and walls by wetting them down and wrapping them with a curing blanket or plastic sheeting.
DO pond cure concrete slabs.
Pond curing is another great way to cure concrete, and the process is just as it sounds: You form temporary berms around a new concrete slab, and then flood the area inside them with one foot of water. Three days of pond curing does the work of seven days of moist curing, and without daily attention—just be sure the water level remains above the concrete slab. If it drops, you’ll need to refill a little. This technique isn’t for everyone, though, because it takes quite a bit of soil to form berms around a big concrete slab. Large-scale builders may use this method to speed up the construction process when pouring foundation slabs, for example, in order to get on to framing the structure.
DO make the process easier by applying a curing compound.
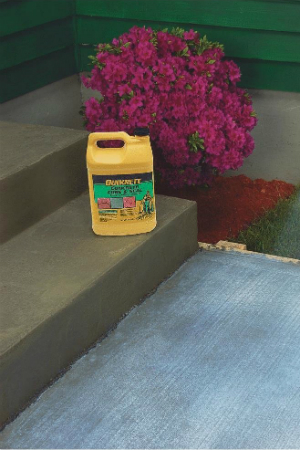
If other methods are not feasible, there’s a simpler solution yet: curing compounds. Available from DIY stores and ready-mix concrete companies, these contain soluble emulsions that form a protective film when sprayed directly onto the surface of newly poured concrete slabs or walls. Ultimately, the film provides a barrier or film to prevent water from evaporating, allowing it to cure at a consistent rate. Some curing compounds are designed to disintegrate completely after a couple of weeks, while others should be removed by scrubbing after the curing process is complete. Still others, such as Quikrete Acrylic Concrete Cure & Seal, penetrate the surface of the concrete, becoming a permanent sealer that waterproofs the concrete to keep it looking freshly poured. Read the manufacturer’s labels carefully before choosing a curing compound to ensure that it meets your specific needs.
DON’T skip control joints in concrete slabs.
The goal of all concrete installation is to produce a high-quality product that resists cracking. While curing concrete will go a long way toward strengthening the finished project, many concrete slabs will crack anyway—despite all precautions—due to concrete shrinkage as water is used up in the hydration process as well as temperature fluctuations. To preserve the beauty of the slab in the face of these challenges, do-it-yourselfers can place control joints at predetermined locations to guide the inevitable cracks. These joints should be cut in a quarter of the depth of the concrete slab during the very beginning of the curing process, within 24 hours of the initial pour. Using a metal jointing tool, the control joints can be easily and smoothly cut into the concrete surface as the appropriate distances in the slab.
Determine the maximum spacing between joints (in feet) by multiplying the planned concrete thickness (in inches) by 2.5. For example, if you’re creating a sidewalk that is 4 inches deep, you’d multiply 4 by 2.5 to get a distance of 10 feet between joints. Feel free to place them closer together for added crack protection. On a larger square slab, like a patio, you’ll want to consider breaking the concrete with joints that are perpendicular, too—down as well as across. Then, if your slab patio, driveway, or sidewalk cracks, it will most likely do so along a precut joint and can, therefore, go virtually unnoticed.

DON’T let new concrete get too cold.
The best time to pour concrete is when temperatures are expected to remain above 50 degrees for five to seven days, but plans can go awry with the arrival of an unexpected cold front. When that happens, the importance shifts from keeping the concrete damp to keeping it warm enough that the chemical hardening process is not interrupted. Concrete’s chemical reaction slows at 50 degrees Fahrenheit and completely stops at 45 degrees Fahrenheit, meaning that it’ll go dormant and it won’t gain strength. If you expect to pour concrete and use it in a couple days, you can’t. When the temperatures drop, new concrete should be covered with concrete insulating blankets (or, in a pinch, old household blankets!). Protect new concrete from the cold for the first two to three days—up to a week, if it’s very cold—after which it should be strong enough to handle it without risk of damage.
DON’T paint or stain concrete in the first month.
Any paint or stain applied to young concrete while it’s still hardening can be negatively affected by residual moisture or the changing chemical content in the concrete. It takes about a month for all of the water to get used up in the hydration process. Brush on paint too soon while moisture is still rising to the surface, and it can put pressure underneath the hard barrier of paint, causing it to peel away or break the bond. For this reason, paint may not adhere as well, and the final color and appearance of stained concrete may also be affected. To achieve the best results, wait until the 28-day period is over to apply paint or stain, and then follow the top tips outlined in this video from the concrete pros at Quikrete.
DON’T subject new concrete to excessive weight.
Although concrete will harden soon after pouring, it’s still susceptible to damage from weight during the first four weeks. Wait at least 24 hours before allowing foot traffic, including pets, on a newly poured sidewalk or slab, and don’t drive a vehicle on a new driveway for at least 10 days. After that, you can drive regular passenger cars on the concrete; heavy pickups or RVs can roll onto the driveway once the concrete reaches its full strength, at around 28 days.
This content has been brought to you by Quikrete. Its facts and opinions are those of BobVila.com.

