We may earn revenue from the products available on this page and participate in affiliate programs. Learn More ›
Any interior designer will recommend layering multiple light sources, from wall sconces to floor lamps, for both illuminating everyday tasks as well as inspiring a spectrum of moods. Investing in these various lighting options for each of your spaces can add up quickly—that is, unless you’re willing to get your hands dirty with a DIY project or two. You can make your own floor lamp with all the style but a fraction of the cost of lookalikes at luxury retailers. Start the day with a trip to the hardware store, and you can end it with a seat on the well-lit couch and a good book.
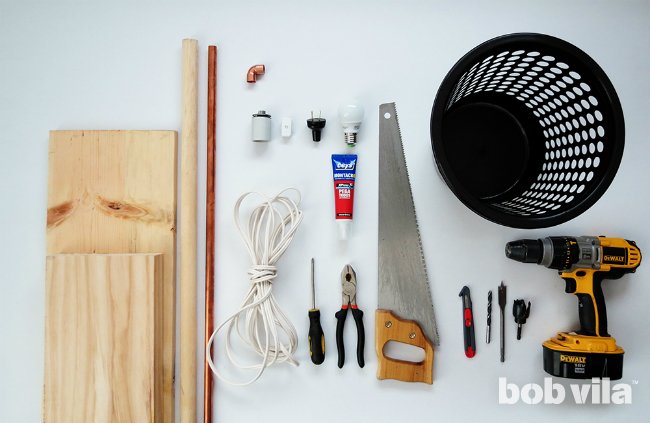
MATERIALS AND TOOLS
– Reclaimed lumber
– Handsaw
– Wood glue
– Clamps
– Drill with a 3⁄4-inch bit, a 1⁄4-inch bit, and a 1-1⁄4-inch hole saw
– Wood chisel
– 1-1⁄4 inch wooden dowel (at least 55 inches long)
– 3⁄4-inch copper pipe (39 inches long)
– 70 percent isopropyl rubbing alcohol
– Clean cloth
– Protractor
– Permanent marker
– All-purpose glue
– 3⁄4-inch-diameter copper elbow
– Lamp kit with light socket, electrical cord (10 feet), and plug
– Pliers
– Screwdriver
– Plastic bin
– Utility knife
– Spray paint
– LED light bulb
STEP 1
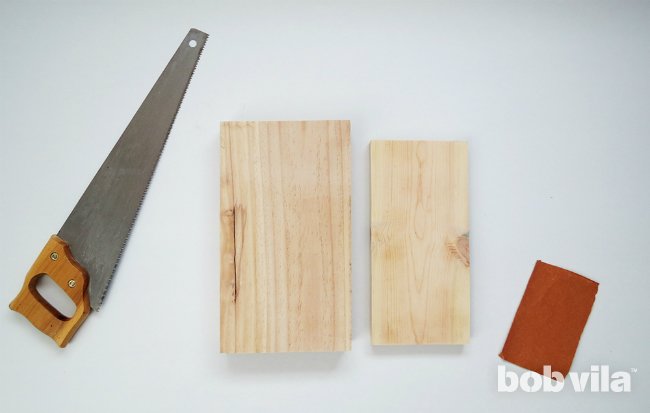
Start by making the lamp base with the reclaimed wood or whatever other scrap lumber you have lying around. Cut approximately 13 inches from a 2×8 plank and 12 inches from a 1×6 plank, then sand both pieces. You can use wood blocks with different dimensions—slightly smaller or slightly larger—but make sure that the base is heavy enough to keep the tall lamp from tipping.
STEP 2

Apply wood glue to the bottom of the smaller piece, then align it so that it sits centered along the shorter end of the bottom block. Press together and clamp for as long as the glue needs to dry completely.
STEP 3
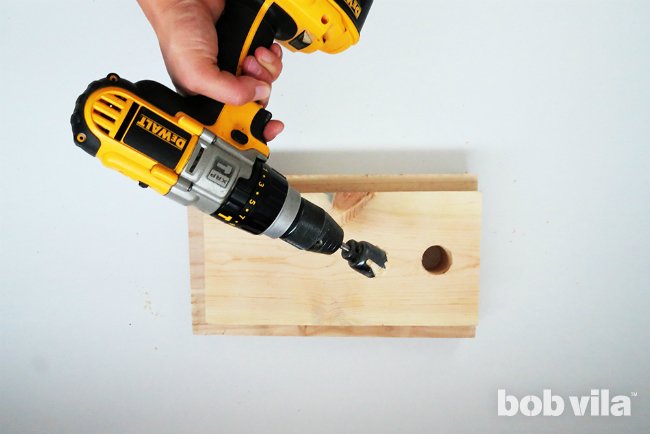
Measure 2 inches from the edge and drill vertically in the base center with the 1-1⁄4-inch hole saw. As the wooden base is quite thick, you will have to proceed in several stages: Drill as far as you can, remove the drill, then pull out the wood cuttings using a wood chisel. Repeat until the hole goes completely through the wood, then sand all edges and set aside.
STEP 4
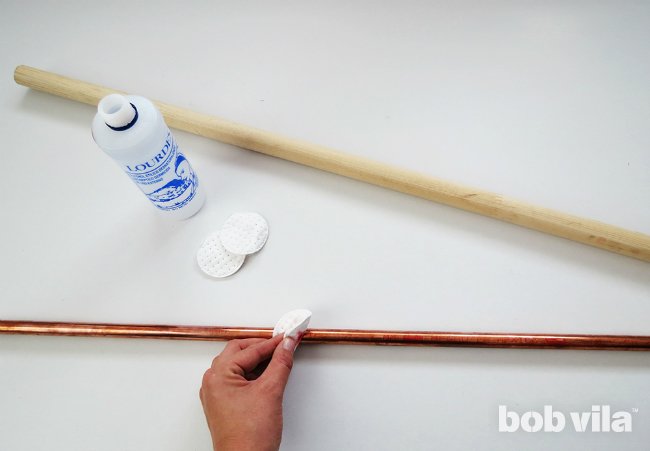
To make create the height of the floor lamp, cut the 1-1⁄4-inch wooden dowel to be 55 inches long and the 3⁄4-inch copper pipe to be 39 inches long. (We picked these lengths to make a reading light that hovers over the seat of the couch, but you can opt for a longer wooden dowel if you want a taller lamp.)
Wipe down the pipe with 70 percent rubbing alcohol to remove labels and sticker residue before you continue.
STEP 5
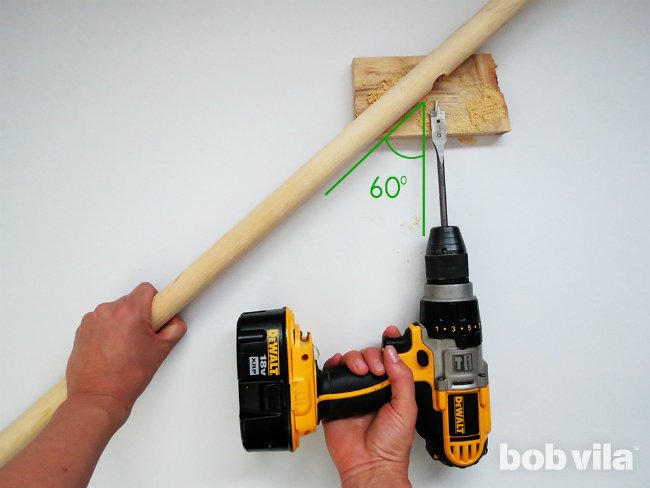
In this design, the copper pipe slides through the dowel at an angle so that the lamp hangs over any seat. To facilitate this, you need to drill a hole into the dowel using the 3⁄4-inch bit.
Measure 11 inches from the end of the dowel, mark, place your drill bit against the spot, and then—this is key—rotate the dowel so that it is at a 60 degree angle with your drill bit (you can check against a protractor for help finding the precise angle). Steady the dowel with a firm grip or clamps while you drill.
STEP 6

Slide the copper pipe through the dowel so that only 10 inches hang out the end. Use a permanent marker to note the point of intersection.
STEP 7
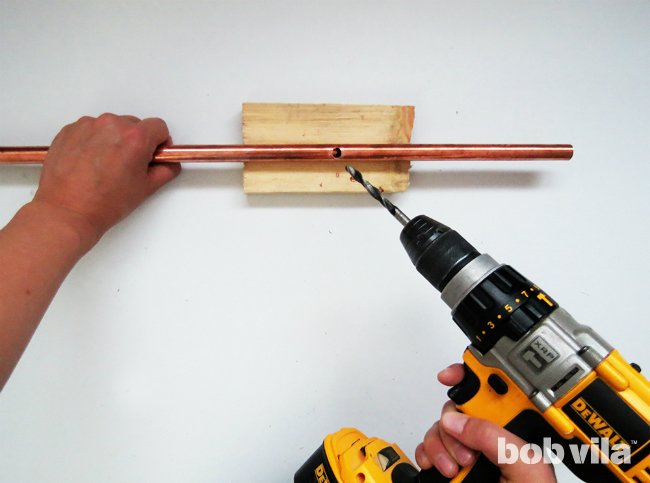
Switch to a 1⁄4-inch bit to drill where you’ve marked in Sharpie, through one side of the tube but not out the other. In a later step, this will allow you to thread the lamp’s cord through the pipe to reach the light bulb.
STEP 8
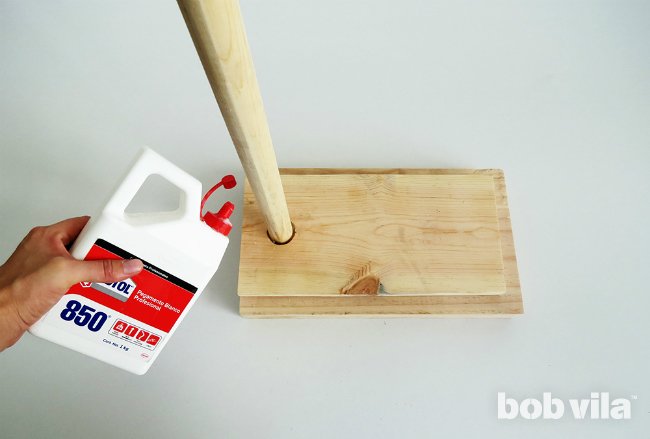
Time to assemble! Cover the bottom end of the dowel (the one further from the 1-1⁄4-inch hole) in wood glue, and fit it into the hole drilled in the wooden slab base. Hold the two pieces in place for the amount of dry time recommended by the wood glue manufacturer.
STEP 9
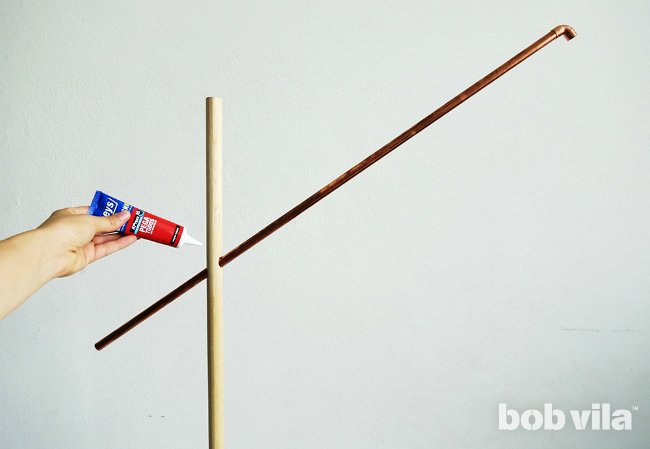
Slide the copper pipe through the 3⁄4-inch hole in the dowel, leaving the small hole in the copper pipe exposed and facing the floor. Once the pieces are in position, join the two materials using an all-purpose glue. Next, glue a copper elbow (curved down) at the end of the pipe where the lampshade will hang.
STEP 10
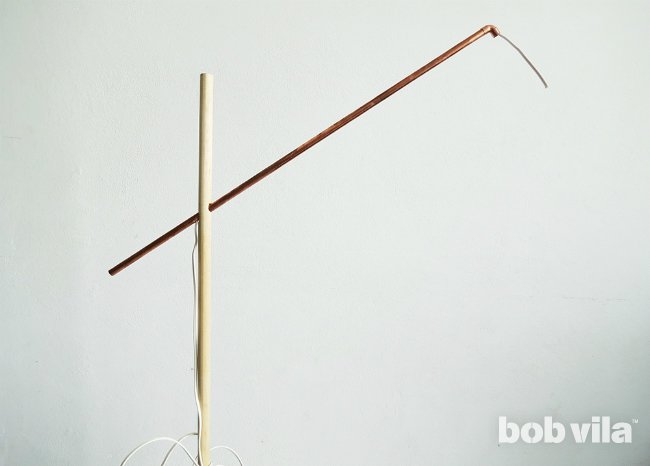
Wiring your floor lamp with a DIY-friendly light kit—one with an electrical cord that’s 10 feet or longer—is the easiest way to go about these next steps. Kits can come in a variety of shapes and forms, some with a cord, plug, socket, and maybe even a switch, and others with just a plug at one end of your electrical cord with socket sold separately. Given the choice, opt to start with a kit that is nearly complete.
If your socket comes already attached to an end of the electrical cord, you’ll need to cut the cord in order to thread it through the 3⁄4-inch copper piping. Push the non-plug end of the cord in through the hole that you made in Step 7 and out through the elbow pipe fitting.
STEP 11
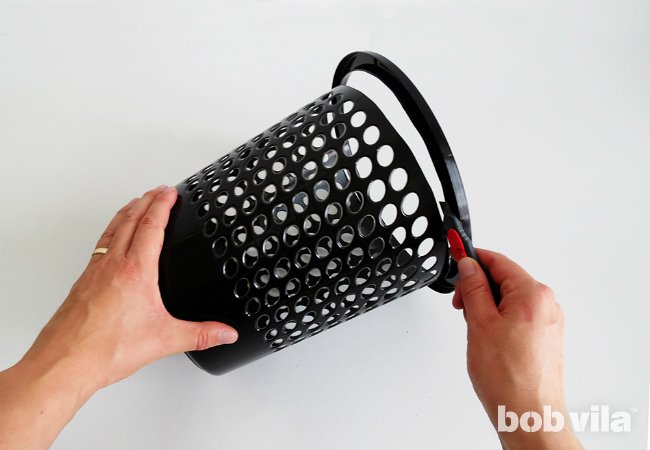
Before you can affix a socket and light bulb to end of the cord, you must first prep and attach your desired lampshade.
Rather than purchasing something standard from the store, we upcycled a small plastic basket with a slotted design. (If you don’t have one on hand, you can find similar options at the dollar store.) To minimize the basket-like features, carefully cut the curved plastic edge off using a utility knife.
STEP 12
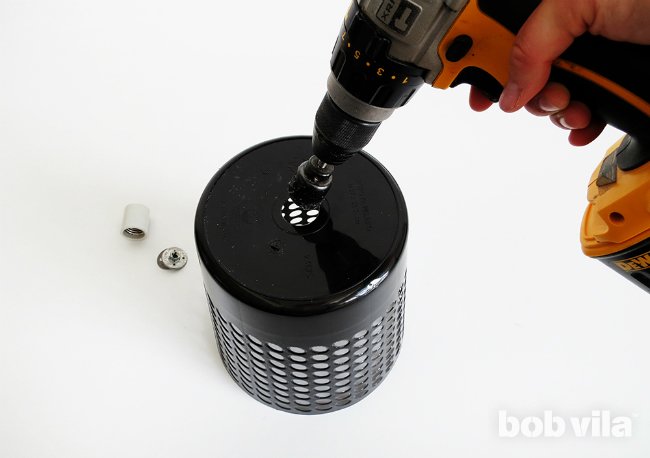
Next, cut a 1-1⁄4-inch hole in the center of the container’s bottom so that you can thread the cord through to attach a light socket. (Ideally, the hole should be slightly smaller than the diameter of the socket in order to prevent the shade from slipping down over it and resting on the bulb.)
Tip: Drill very slowly with your hole saw so that you do not break the plastic.
STEP 13
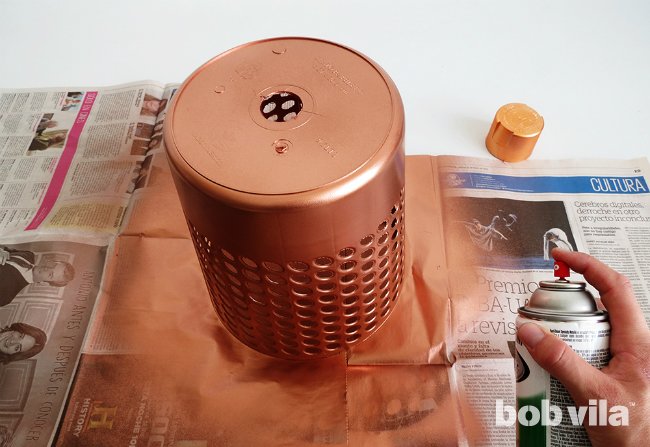
Spray paint the plastic shade inside and out with a copper color to match the pipe. For best results, apply a primer and at least two coats to completely mask the plastic. (Be sure to follow the can’s instructions to allow the appropriate amount of dry time after each coat for a professional finish.)
STEP 14
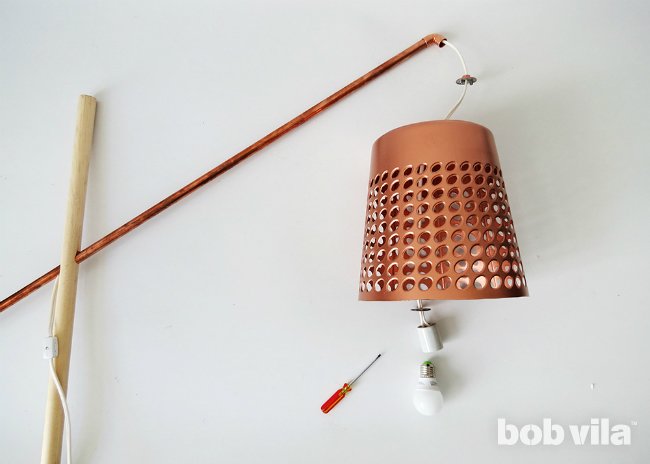
Finally, you can slide the wire through the shade and attach the light bulb socket. While best to refer to your specific lamp kit’s instructions, here’s a preview of what that process entails.
Typically, you’ll start by removing the base of the socket. Screw the threaded pipe (also known as a socket nipple) into the base cap, then pass the wire through a nut the size of the threaded pipe, the hole drilled in your shade, and the threaded pipe-base combo. Tightening the nut over the threaded pipe will secure the socket to the shade.
Pull the electrical cord out so it has a little extra give while you finish the wiring job. Where the cord splits, tie a special underwriter’s knot out of the two ends (refer to your light kit for a diagram). Then identify the difference in the two wires’ texture: one is smooth, and the other is ribbed. Pick up your socket and separate it from its shell to expose two screws. Loosen these and wrap a wire around each—the smooth wire attaches to the brass screw, the ribbed wire to the silver screw—before tightening once more. Pop the shell back on and twist the wired socket into the base inside the shade.
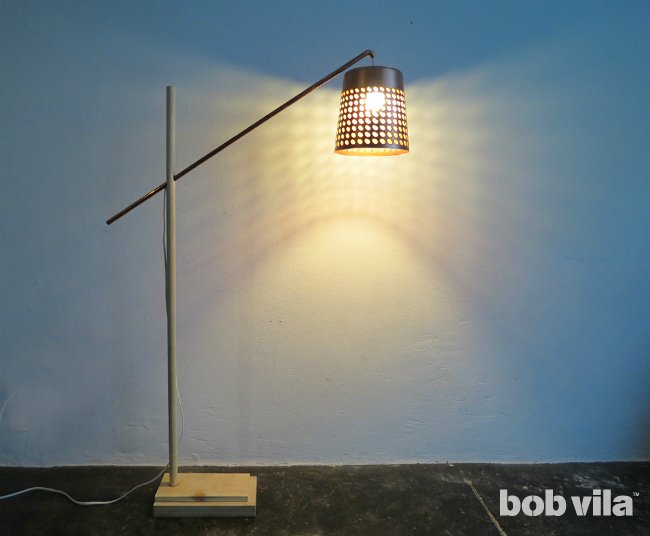
Now reach around the back of the angled floor lamp where the electrical cord enters the copper piping, and gently pull on it so that the lampshade raises to meet the elbow pipe fitting. All that’s left to do is insert an LED bulb—which both saves more energy and gives off less heat than an incandescent bulb. You’re ready to plug in your new floor lamp, curl up beneath its glow with a good book, and call it a night!
Ama is a DIY addict and the creative mind behind Ohoh Blog. She likes home decor, lighting, and furniture projects that may involve painting, sewing, drilling…no matter the technique! Whatever she has on hand is inspiration to create, and fodder for her serious addiction to upcycling.

