We may earn revenue from the products available on this page and participate in affiliate programs. Learn More ›
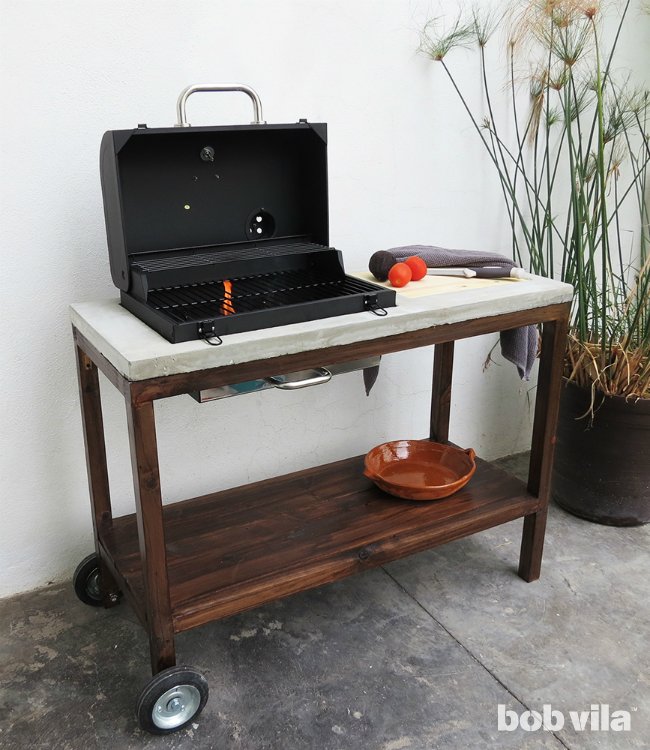
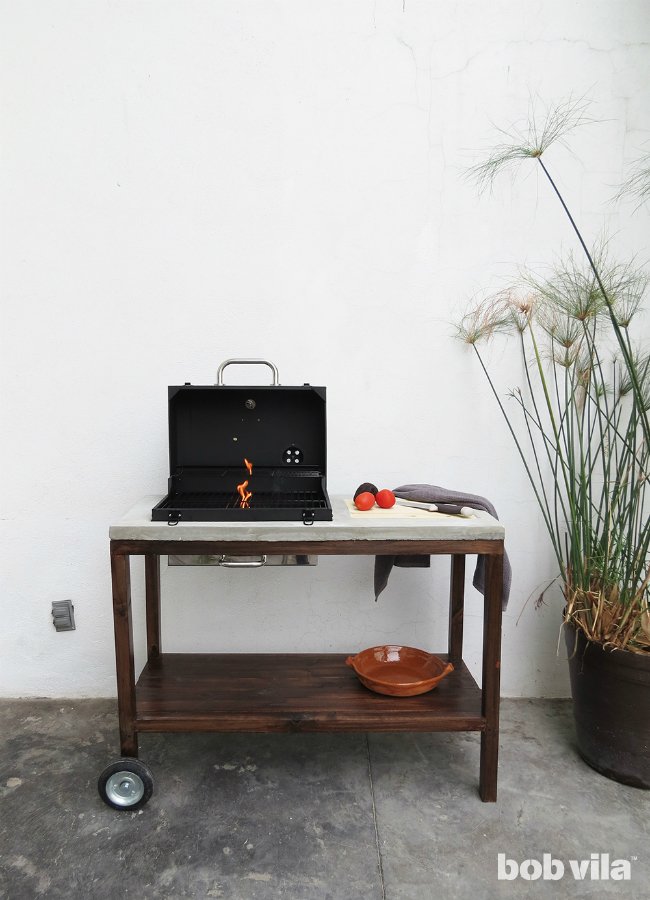
Whether you’re accustomed to hosting the big barbecue or simply enjoy the occasional family dinner from the grill, you’re likely familiar with the inadequate storage and prep space around a standard outdoor cook station. Rather than spending thousand of dollars on the latest all-inclusive grill station, build yourself a custom unit that’s comparable to your indoor kitchen. This DIY design incorporates any portable grill into an outdoor kitchen station that also features concrete countertop, built-in cutting board, and lower shelf—all mounted on wheels to move about easily.
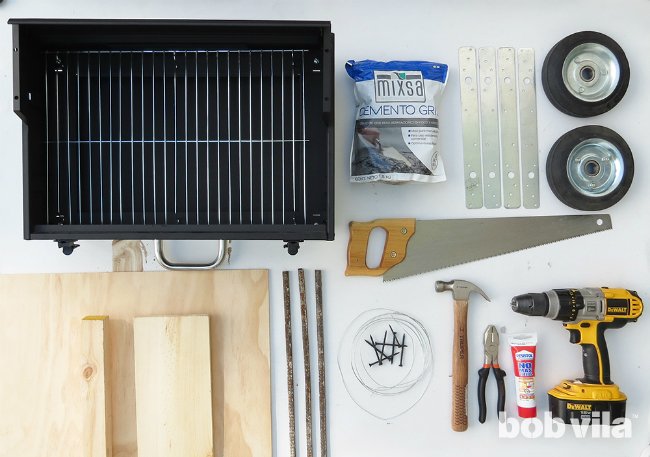
MATERIALS AND TOOLS
– Portable grill
– 6mm plywood
– 2×2 lumber (64 feet)
– Handsaw
– Wood glue
– 2-1⁄2-inch nails (18)
– Hammer
– Pencil
– Cutting board
– Rebar (143 inches)
– Wire
– Concrete (33 pounds)
– Plastic bucket
– Trowel
– 1×6 lumber (16 feet)
– Garden cart wheels (2)
– Wrench
– Drill
– 2-1⁄2-inch screws (44)
– 2-inch metal brackets (8)
– 3⁄4-inch screws (16)
– Wood stain
– Varnish
– Brush
– All-purpose glue
– Palm sander
STEP 1
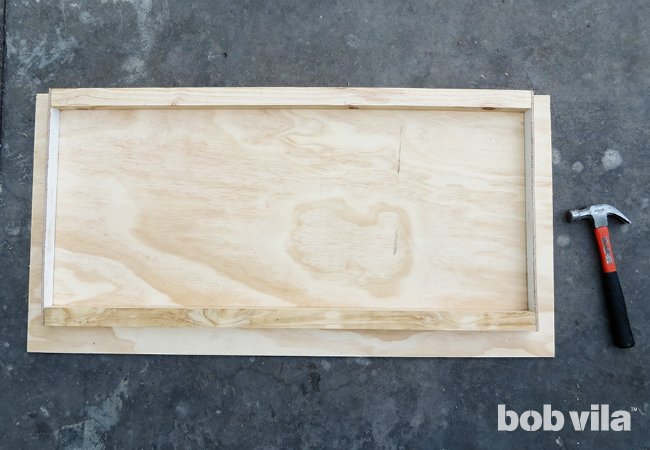
Start this project by making the concrete counter so that, in the few days it takes to cure, you can turn your attention to the wooden base.
Our grill was 13 by 20 inches, so we planned the total countertop to be 20 by 44 inches. But the best part of any DIY project is that you can adapt the design to meet your own needs! Keep in mind: You need at least 3 inches of concrete all around the grill. If yours is no larger than 14 inches by 24 inches, you can follow along with this tutorial and simply adjust the inset to accommodate the grill. Otherwise, here’s the basic formula we used to determine dimensions for the countertop and, therefore, the outdoor kitchen cart:
Your grill’s length + 3 inches to the left + a 18-inch wide prep surface = Your cart’s width
Your grill’s width + 3-inch lip around front + 3-inch lip around the back = Your cart’s depth
For the rest of the tutorial, we’ll stick to actual dimensions used.
Since most of the countertop will be concrete, you’ll need to build a mold with interior dimensions that match what your plan. Cut your 2×2 lumber so that you two 44-inch pieces (the same length as the cart) and two 23-inch pieces (3 inches longer than your cart’s width). Arrange them on 6mm plywood—FYI, this will be the top of your concrete counter when you undo the mold—so that the two longer pieces are parallel and a shorter piece connects them at each end to make a box. These will be the walls to your mold.
Apply wood glue wherever your 2×2 pieces meet one another, and reinforce the corners by hammering one 2-1⁄2-inch nail through each end of the 23-inch cuts. Then glue the open rectangle to the center of your plywood and secure with nails, one at the end of each 2×2 piece.
STEP 2
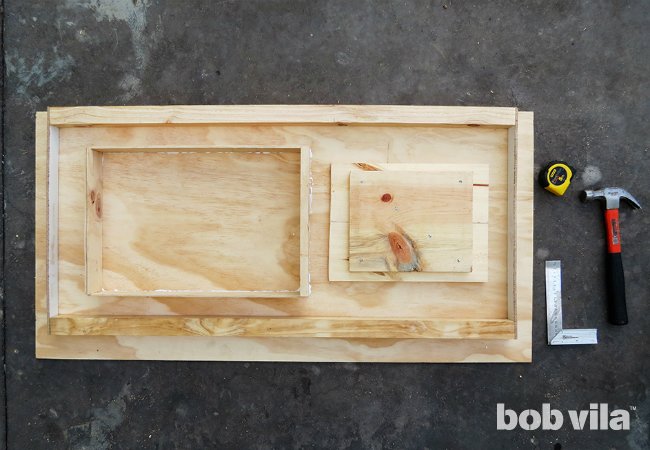
Next, build a rectangular frame from 2×2 the size of your grill to hold its place in the left side of the concrete mold. Since ours is 13 inches by 20 inches, we cut two 13-inch-long pieces and two 17-inch-long pieces (which, when added to the two 1-1⁄2-inch-thick 2×2 sides, make up the 20-inch sides).
Measure in 3-1⁄2 inches from the left wall and draw a line all the way down using pencil, then do the same for each long side. Glue one 13-inch length inside the first penciled line you drew. Next, position the two 17-inch pieces parallel inside their pencil lines so that each have one end touching the 2×2 already in place; glue these to the 2×2 and the plywood. Finally, glue the second 13-inch length to the open ends of the frame and plywood.
We’re also integrating a wooden cutting board on the open side. Since the plywood will be removed to reveal the top of your counter, you cannot affix the cutting board to it with nails. Instead, place your cutting board in place first where you’d like it to set. We also fastened extra scrap wood behind it using nails to steady the addition as the concrete cured.
STEP 3

Next, prep a rebar frame along the perimeter of your countertop’s features to help strengthen the concrete; otherwise, you risk breaking the concrete when taking the counter out of the mold. Cut and lay two 43-inch pieces on the edge lengthwise, and cut three more 19-inch pieces to lay perpendicularly as seen above.
Two important things to know: First, the rebar needs to be totally connected wherever it intersects with another piece, so wrap wire at each intersection. Second, the rebars should not laid directly on the bottom. To prevent it from sinking to the bottom of your mold (and potentially peeking through the top of your counter), form W shapes with the wire behind the rebar at each intersection to help raise the structure from the plywood panel, then lay it into place halfway through your concrete pour.
STEP 4
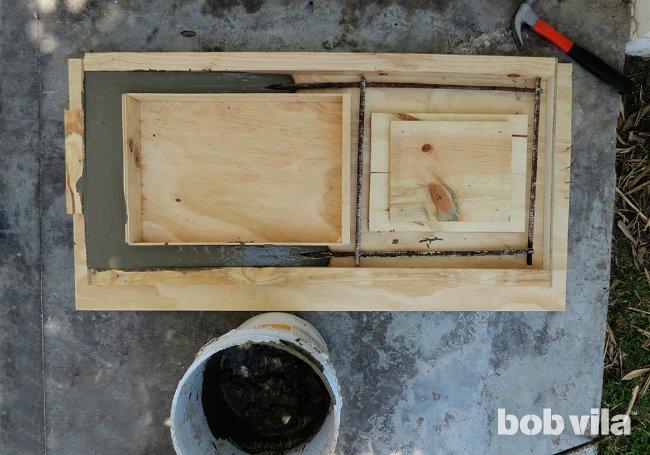
Once you’re sure all of the wood glue has dried, you can start to prep the concrete. Fill a plastic bucket with dry concrete and mix with water using a trowel or a large kitchen spoon, carefully following the package’s instructions. Rather than make the entire package at once, work with several small batches at the time. The more concrete, the harder it is to mix—and the heavier it is to pour.
Pour each batch evenly across the entire mold, as if in layers. When you’ve filled the mold halfway, lay your rebar frame. Then cover and continue until your mold is completely filled.
STEP 5
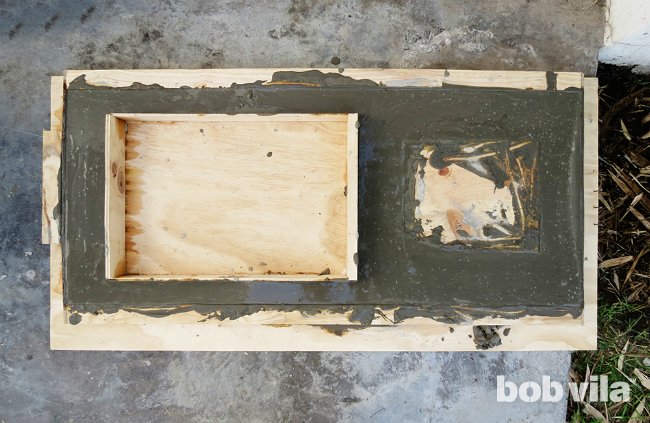
Tap lightly along the edges of the mold with a hammer. This releases trapped air bubbles and ensures that the concrete is homogeneous. Let cure for a few days, or as long as the packaging’s instructions require. When ready, you’ll un-box a 1-1⁄2-inch-thick concrete counter.
STEP 6
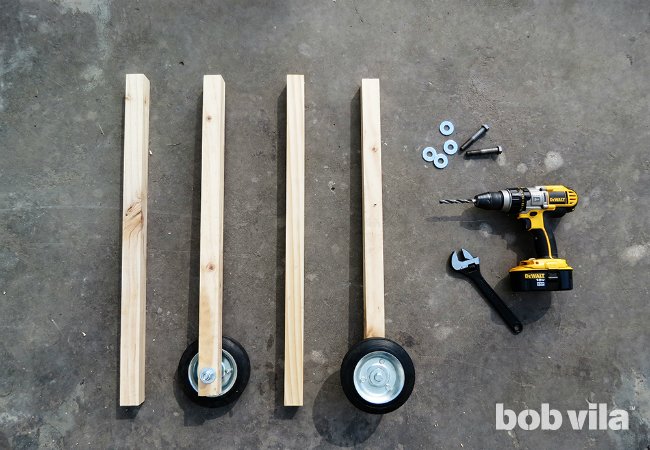
Next up: The wooden base for your DIY outdoor kitchen. Cut four 30-inch lengths from the remaining 2×2 lumber to make its legs, and drill holes and screw garden cart wheels to the bottom of two. Washers and any other hardware included with your wheel will twist onto the opposite side of the leg to keep each from falling off.
Now, the four legs need to be exactly the same length in order to keep your grill cart level at all times. Since the wheels add a couple of inches to the two legs depending on the size you picked up, you’ll want to cut a some from the non-wheeled ends to compensate. Line bottoms of your four legs (wood and wheels) to determine how much needs sawed off, pencil your marks, and cut.
STEP 7
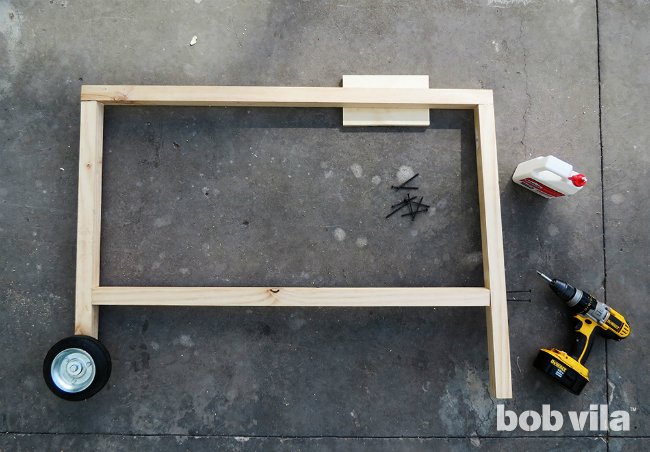
Space the two legs (one simple leg and one with a wheel) 41 inches apart and glue their tops so that you can adhere a 44-inch 2×2 across them. Reinforce with two 2-1⁄2-inch screws through the top at each end.
Next, measure 20 inches down and connect the legs with a 41-inch 2×2. Again, glue and screw into place (two screws at each end).
STEP 8
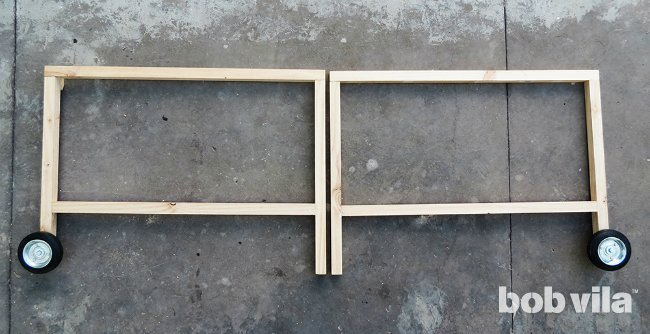
Repeat Step 7 to build the second side of your cart’s frame. In order for both wheels to be on the outside of the cart, build this second side as a mirror image of the first (see above).
STEP 9
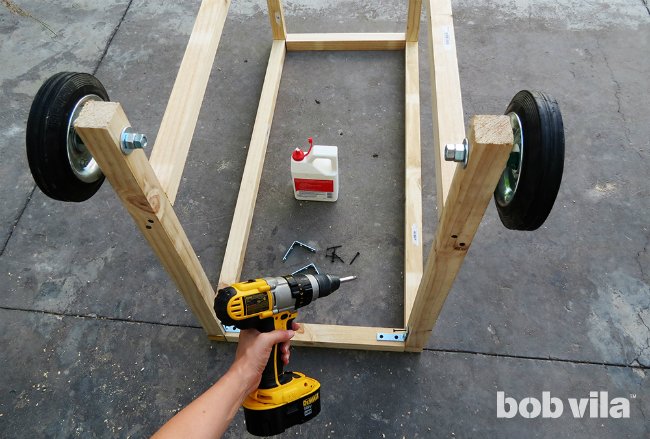
Flip the two sides so that the wheels are in the air and on the outsides of the legs. Connect their top corners (the ones now resting on the ground) with 17-inch cuts of 2×2. Glue each into place, then use 3⁄4-inch screws to reinforce each corner with a 2-inch metal bracket—you want to make certain that the structure is strong enough to support its concrete countertop.
STEP 10
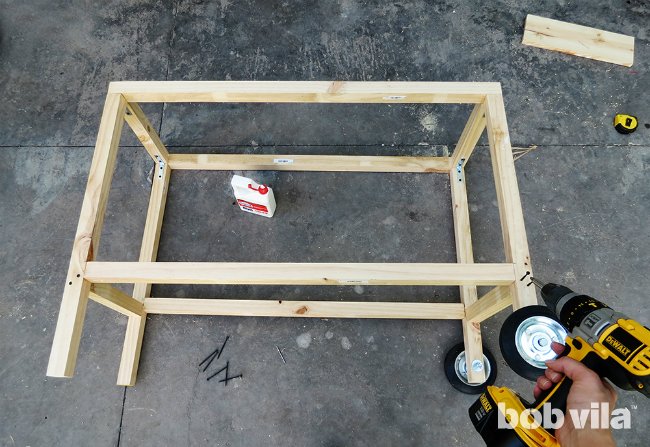
Glue two more 17-inch cuts of 2×2, this time 20-3⁄4 inches below the top ones. This time, drill two 2-1⁄2-inch screws through each leg into the new additions.
STEP 11
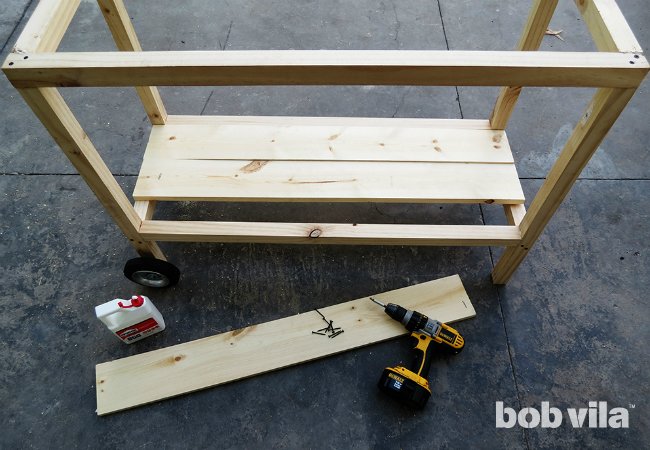
Stand the cart upright so that you can attach a bottom shelf made from the 1×6 lumber.
Cut the lumber into 40-inch pieces and fit them to lay over the 17-inch 2×2 support at either end of the grill cart. We purposefully installed the side 2×2 supports so that they were 3⁄4 inches below the 2×2s along the front and the back, so that when you lay the 1×6, it will be even with those 40-inch supports already in place. If there’s a little gap, evenly these three new slats to make it less obvious. Attach first with glue, and then screw down through the top, two into each end of every slat.
STEP 12
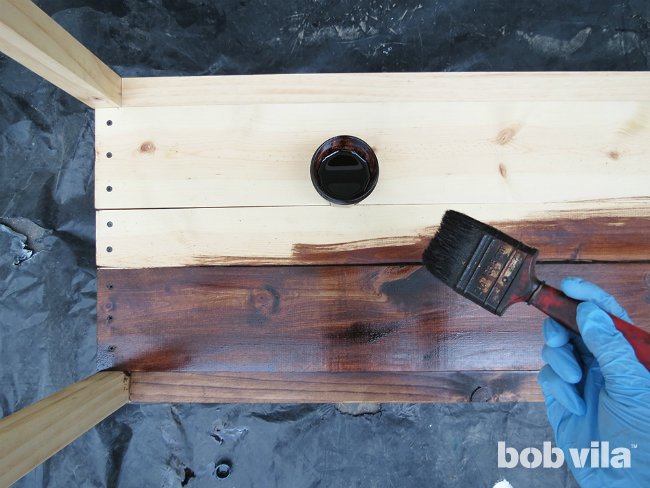
Brush on one to two coats of stain, depending on the color you want to achieve. Be sure to allow the structure to dry completely after each coat. Once the stain dries, apply at least two coats of acrylic varnish.
STEP 13
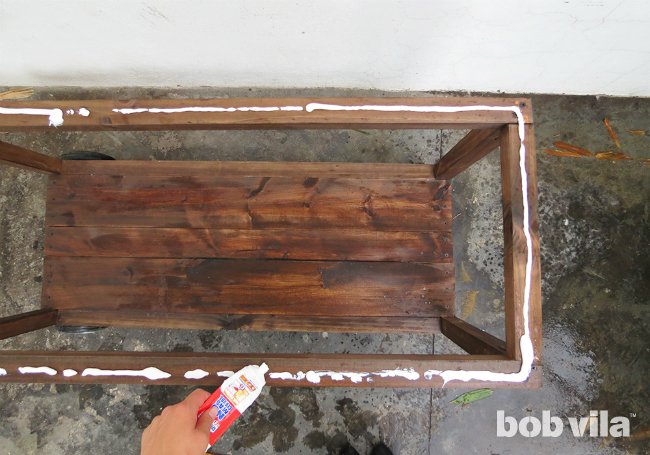
Now, you’re ready to assemble the two parts of this build.
First, check that the concrete top is dry. To undo the wooden mold and reveal your concrete creation, remove the nails one by one and pull.
Next, cover the top of the cart with all-purpose glue and place the concrete counter on top. Ask for some help before you lift: Its weight requires at least two people to carry the counter and flip it right side up onto the wooden base. Wait for the glue to dry before you continue.
STEP 14
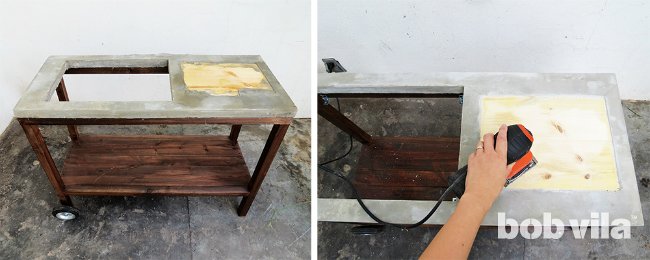
Sand the edges and the wooden cutting board, if needed. Then use a damp microfiber cloth to wipe away all of the dust from sanding.
STEP 15
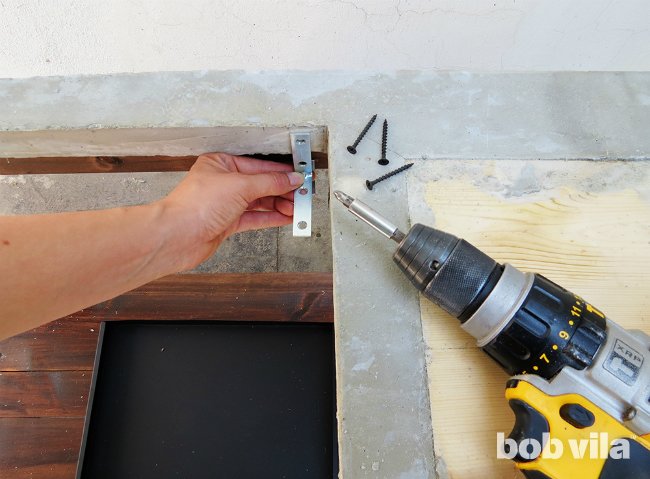
The hole in the concrete should be exactly the dimensions of your grill, meaning that if you place your portable grill in right now it would drop through to the lower shelf. To prevent any damage to your grill, screw four 2-inch brackets (one in each corner) into the concrete as well as the wood frame immediately beneath; their open bottoms will hold the grill in place.
Pro tip: When you switch from drilling holes in the wood to boring concrete, change to a masonry bit and then work slowly.
Fit the grill into place in the top of your DIY outdoor kitchen, and get ready to turn up the heat! A job well done deserves a burger made to the same specifications.
Ama is a DIY addict and the creative mind behind Ohoh Blog. She likes home decor, lighting, and furniture projects that may involve painting, sewing, drilling…no matter the technique! Whatever she has on hand is inspiration to create, and fodder for her serious addiction to upcycling.
