We may earn revenue from the products available on this page and participate in affiliate programs. Learn More ›
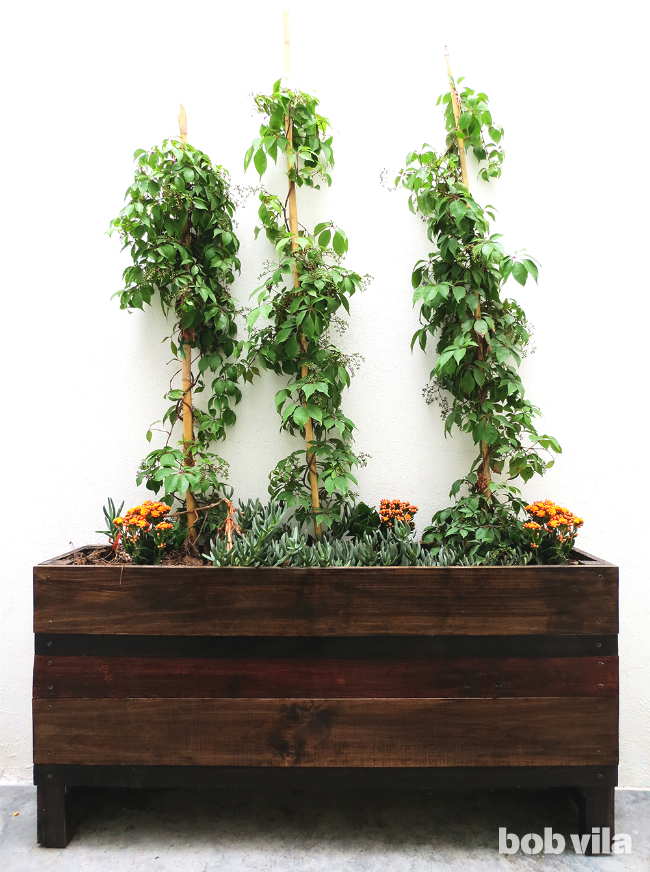
Some lucky homeowners with enough property for a large plot of land to be dedicated garden space; for the rest of us, a planter box is the next best way to enjoy lush greenery or an edible garden. A long narrow planter can energize smaller outdoor spaces like terraces, balconies, and even the occasional cramped patio—proving that you definitely don’t need a big backyard to surround yourself with nature. And because, as its name suggests, this outdoor installation isn’t much more than a cube without a top, it’s one weekend project well worth DIYing. Check out this design for a stylish wooden planter box that requires little more than beginner woodworking skills.

MATERIALS AND TOOLS
– 1×6 lumber, 8-foot lengths (2)
– 1×2 lumber, 8-foot lengths (2)
– 1×4 lumber, 8-foot length (1)
– 1×10 lumber, 8-foot length (1)
– 2×2 lumber, 8-foot length (2)
– Ruler
– Handsaw
– Sandpaper
– Wood stain (3 colors)
– Brush
– Wood varnish
– Wood glue
– Power drill
– 1-1⁄4-inch screws (72)
– 2-inch metallic brackets (4)
– Medium-duty plastic sheeting (5 feet by 8 feet)
– Staple gun
STEP 1
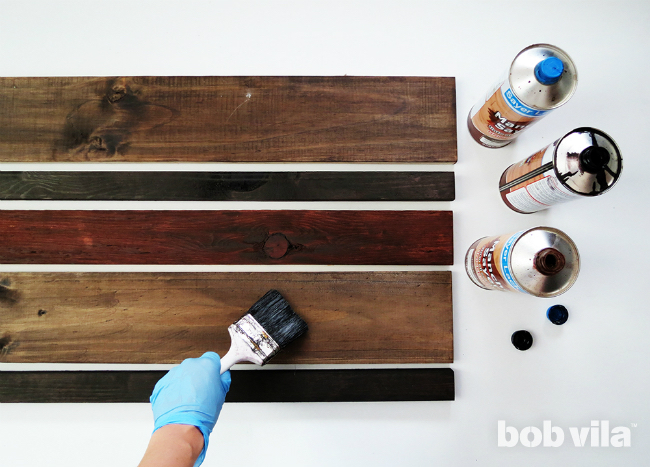
Start by cutting all the lumber pieces to the right lengths. We designed a 4-foot-long planter in order to facilitate cuts that leave (almost) no wood waste.
• To make the planter’s front and back, cut your 1×6 lumber into four 4-foot-long pieces, your 1×2 lumber into four 4-foot-long pieces, and 1×4 lumber into two 4-foot-long pieces.
• To make the sides, cut your 2×2 lumber into four 2-foot-long pieces and your 1×10 lumber into two 2-foot-long pieces.
• To make the planter bottom, cut two 43-inch pieces from the remaining 2×2 lumber and one 46-inch piece of the remaining 1×10 lumber.
Sand all of your cuts to remove splinters. Then, following the directions on the can, brush wood stain over all of your cut lumber. You can stain the wood slats all using the same color and allow the varying widths to provide subtle texture to the finished planter, or opt for multiple shades as we have to create higher contrast and an interesting striped finish. We used Chocolate on all 1×2, 2×2, and 1×10 slats; Mahogany on the 1×4 slats; and Early American on the 1×6 slats to match the style of our DIY outdoor bench. Follow with two coats of varnish (best to use a one specifically appropriate for outdoor use) to protect the stained wood.
STEP 2
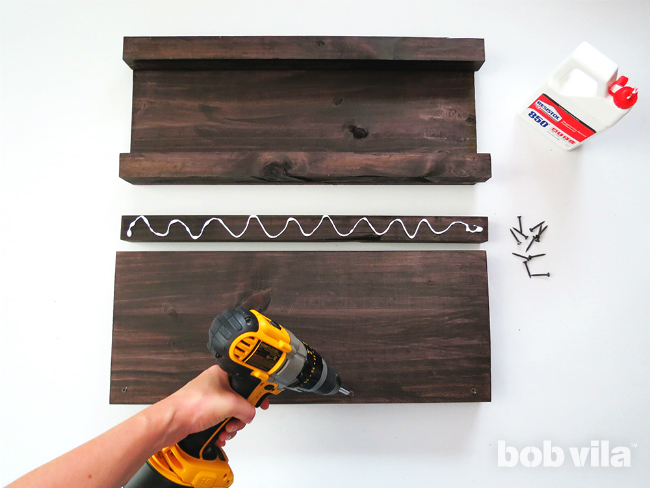
Once all of coats of stain and varnish dry, you can start by building the planter sides. Lay your two 2-foot-long 1×10 planks out in front of you, and place a pair of 2-foot-long 2×2 pieces on top of each; set the rest of your cuts to the side for now.
Position one 2×2 flush with the top edge of the first 1×10 length and the other flush with its bottom edge, then affix with wood glue. After the glue dries, turn the 1×10 piece over and pre-drill holes through its flat backside, four spaced equidistant along each 2-foot-long edge. Fill in with 1-1⁄4-inch screws. Glue and screw the second side together in the same manner.
STEP 3
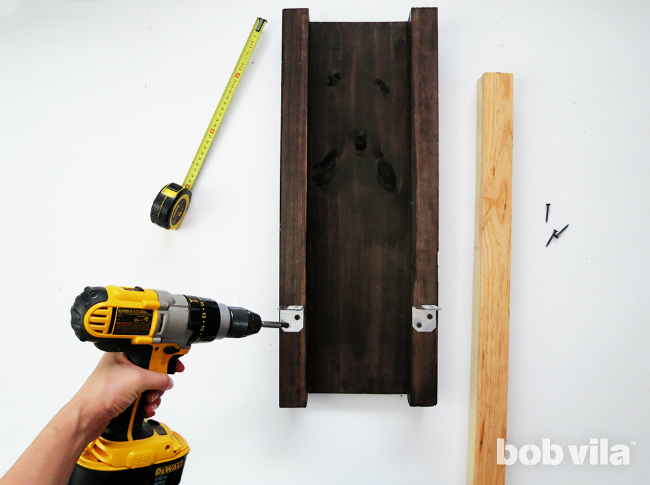
Next, screw the metal brackets to the 2×2 pieces you’ve secured. Their positions will designate the bottom of your planter, determining exactly how much room your plants have to take root. To hold enough soil for climbing plants, we placed the brackets 18 inches from the top of the planter. If you only plan to use your planter for flowers or herbs, though, 10 inches will be more than enough.
Flip the L-shaped bracket so that its bottom attaches to a 2×2 and its opening faces what will be the ground when you later stand the planter; pre-drill holes and screw into place. Repeat until you’ve attached each of the four brackets on a 2×2, careful to make sure they are each the same distance from the top—you don’t want the bottom of your planter box to be uneven!
STEP 4
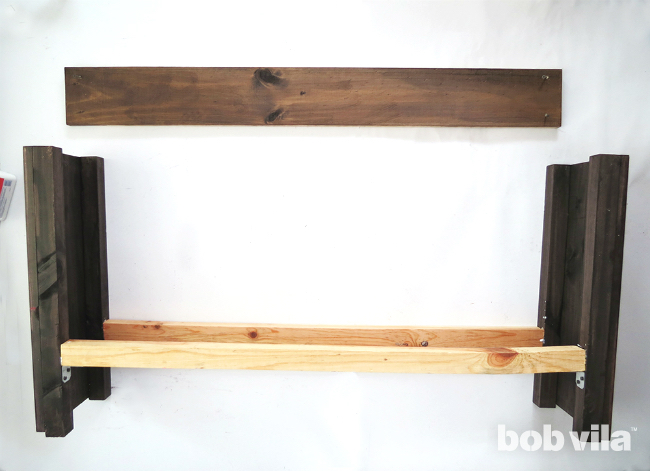
Turn each side of your planter box so that the brackets face one another. Then, join the sides by screwing the ends of your two 43-inch pieces of 2×2 onto the exposed ends of these brackets. Later on, those two pieces will support the bottom board.
STEP 5
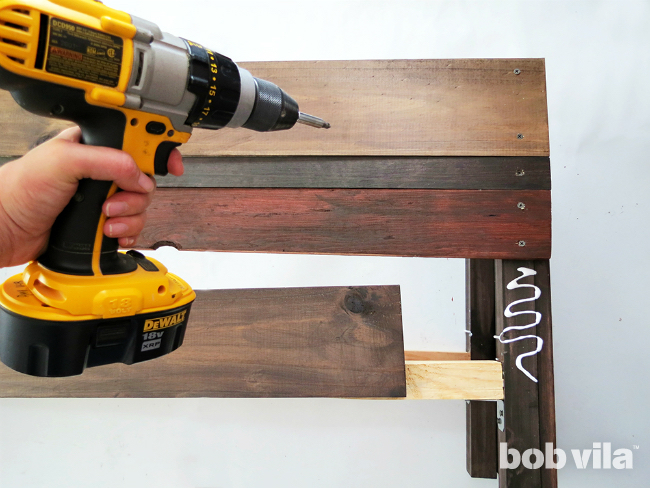
Your project is really taking shape now. To construct the planter box’s front and back, start by laying your 4-foot-long pieces across the box’s framework, working top-down until you cover the brackets and 2×2 pieces that connect the box’s sides. Alternate the planks in a repeating pattern of 1×6, 1×2, and 1×4 until five are in place. (Hint: Your 1×4 won’t repeat.)
Next, lift the top plank, apply wood glue to the sides of the planter box that will be covered, and press the plank back in place. Continue down the front, making sure you don’t leave any space between the boards. Then, go back and provide extra security to these wooden slats with screws: one at each end should hold the 2-inch-wide pieces, and one in each corner for the rest.
Repeat the same process for the back side.
STEP 6
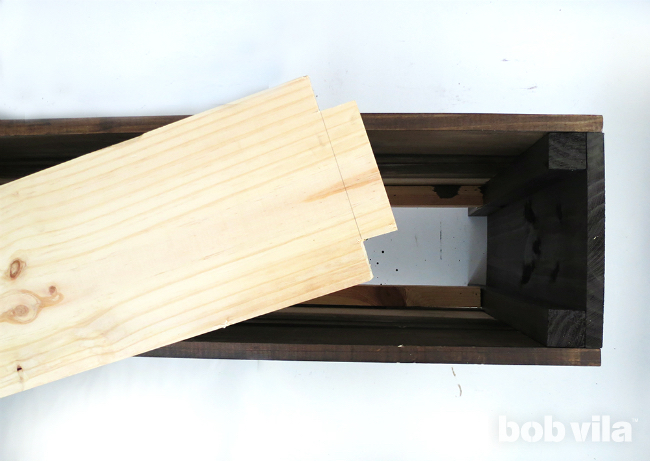
The last step in creating the planter box’s structure is placing the bottom board. Cut out a 2-inch square out of each corner on your 46-inch-long 1×10 plank so that it can fit snugly inside what you’ve built so far. Apply glue to its bottom along each of the longer sides, and place the board into the planter so that it rests on the 2×2 ledges. Turn the planter box over to screw from the bottom along the front and back edges to steady the board.
STEP 7
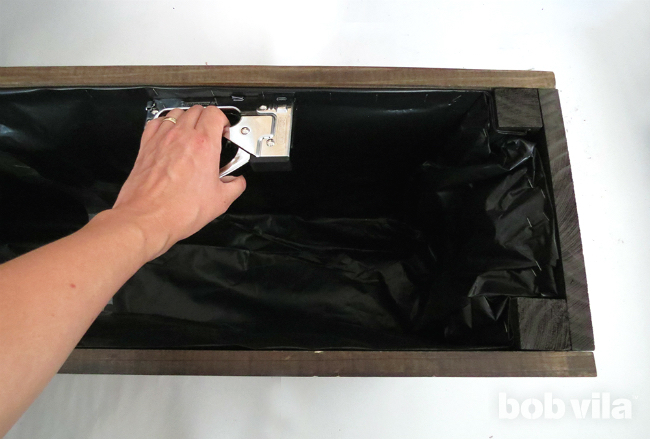
Your planter box is so close to complete—but if you want it to last many seasons packed with watered soil, you’ll want to line its inside with a sheet of plastic before calling it quits.
Lay a 5-by-8-foot sheet of medium-duty plastic so that its longer sides meet the inside of your box’s front and back. Lift the tarp and pull it as taut as you can behind the front side of the planter; expect the sheet to bunch a little in each corner, considering that it’s actually longer than your planter box. Use a staple gun to fasten it in place along the top plank. Drape the plastic sheet across the interior of the planter and affix the top edge of the other side (the back). Now pull one of the plastic’s smaller sides taut so that you can staple it to the 2-foot side of the planter; repeat on the opposite side.
It doesn’t matter if there are creases or that the entire bottom of this sheet looks like a misshapen bag, so long as you completely cover the inside perimeter of the planter box, separating the wood from the soon-to-be pit of soil.
STEP 8
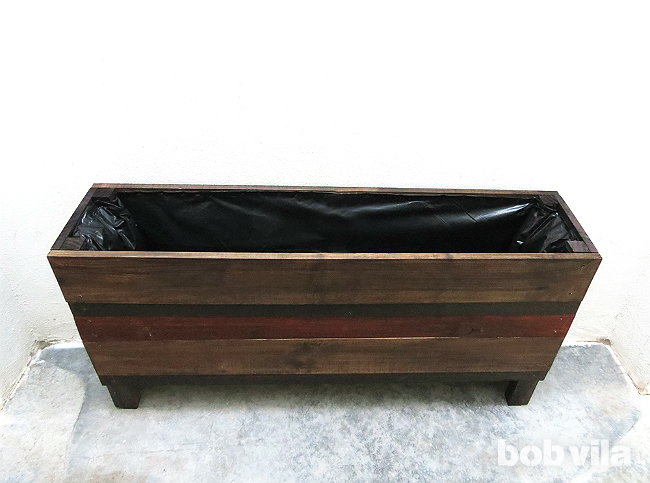
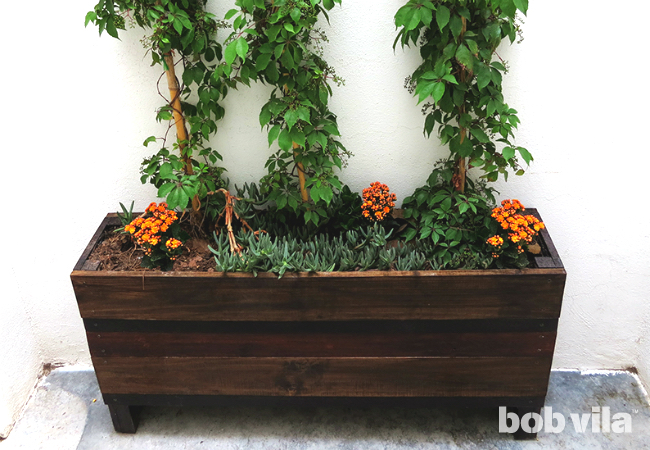
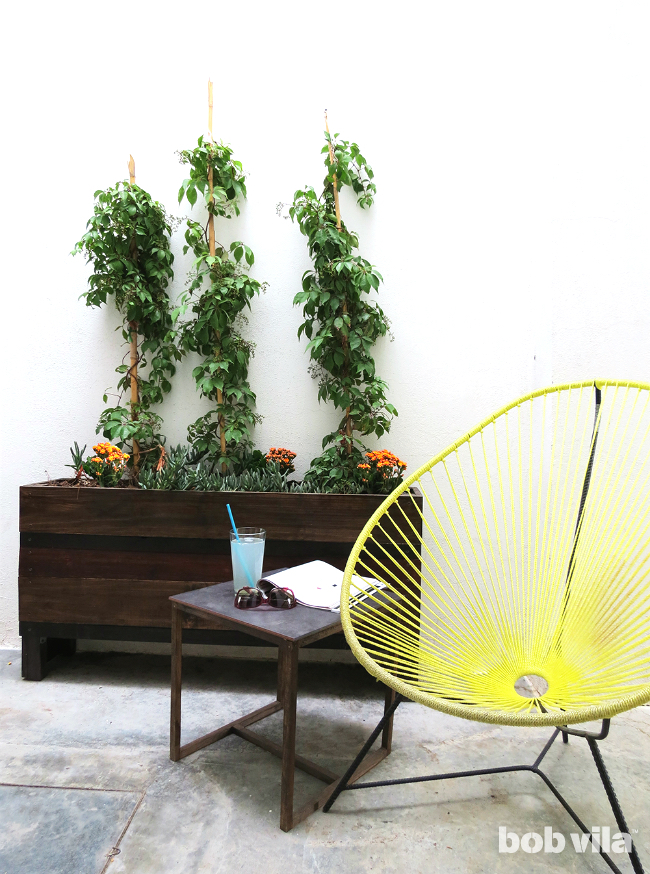
Once is dry, you’re all set to add soil and root your favorite greenery. The planter box’s 10- by 46-inch plot and 2-foot height make it flexible enough to hold anything from a vegetable garden to trellises layered with fast-growing vines for privacy. The sky is the limit for you and your budding greens!
Ama is a DIY addict and the creative mind behind Ohoh Blog. She likes home decor, lighting, and furniture projects that may involve painting, sewing, drilling… no matter the technique! Whatever she has on hand is inspiration to create, and fodder for her serious addiction to upcycling.
