
We may earn revenue from the products available on this page and participate in affiliate programs. Learn More ›
Professional drywall taping crews make it look so easy: They move quickly, slather compound on every joint and nail hole, and leave behind walls that are ultra-smooth. While taping drywall isn’t a difficult task, a flawless finish can be hard to ace. That requires the right techniques, appropriate tools, and patience. With the following guidelines—and a little help from Hyde Tools—you’ll be taping walls like a pro in no time.

DO put your power drill to work.
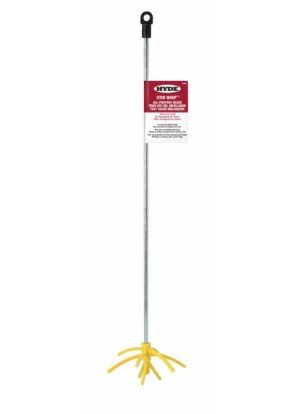
Drywall mud must be smooth and free from lumps before you begin taping. Mixing powdered compound and water by hand is time-consuming, and you might not work out all the lumps of powder if you don’t stir long enough. Instead, use a mixing bit, such as Hyde Tools’ Stir Whip, attached to a heavy-duty ½-inch power drill to blend the compound until it reaches peanut butter consistency. Even premixed mud (always a good idea) can benefit from a burst of machine mixing, as it may have settled in the container.
DON’T buy the wrong mud for your project.
One of the most common mistakes new tapers make is selecting the wrong mud. Use an “all-purpose” or “setting” compound for the initial coat and for each additional coat—except the final coat. All-purpose compound goes on smooth and adheres well to joints and drywall tape. For the final coat, though, switch to a “topping” compound, which creates a fine surface and sands easily.
Unless you’re an experienced taper, steer clear of “fast-setting,” or “hot,” mud that dries very quickly. Hot mud can set up before you have a chance to smooth it out, leaving you with a lot of extra sanding.

DO prefill wide joints.
Gaps 1/8 inch or wider between drywall panels can give a drywall installation an amateur appearance, but gaps aren’t the end of the world. Just fill ’em up before you get to work taping! Because the compound used to fill them has a tendency to shrink, it may cause the paper tape (and the entire initial coat) to warp if you fill the gaps at the same time as you apply your initial tape coating. If you prefill the gaps, however, and let them dry before you apply the tape coat, the compound in the gaps will not negatively affect the tape.
To prefill gaps, use an all-purpose compound and a small flexible putty knife like Hyde Tools’ Black & Silver 2-Inch Flexible Putty Knife. When prefilling joints, carefully press the compound directly into the joint, then wipe the excess off with the blade of the putty knife—you don’t want any mud buildup on the face of the drywall. Allow joints to dry completely (24 hours) before applying the first taping coat.
DON’T overlap drywall tape.
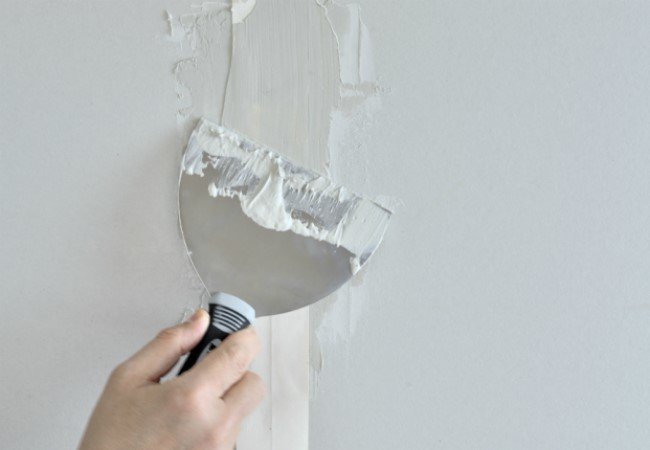
Applying a single layer of paper tape will help minimize any chance of ending up with a bulge in the finished wall. Begin by applying a thin layer of compound to a single vertical joint using a quality knife, such as Hyde Tools’ 6-Inch Flexible Black & Silver Stainless Steel Joint Knife. Its flexible blade will distribute mud uniformly over the joints. Then, immediately after applying mud to the entire length of a single vertical joint, position a strip of paper tape (about two inches shorter than the joint) over the wet mud. Pull the joint knife smoothly—working from the middle of the tape to each end—to bed the tape securely in the mud. Repeat with all vertical joints. When you tape horizontal joints, cut the tape so it fits between the vertical joints without overlap. If they do overlap, they will probably leave bumps.
DO take steps to reduce the mess caused by wet compound.
As you tape, you’ll find that splatters of drywall compound go just about everywhere: in your hair, on your clothing, and on everything else in the room. Wear a hat, protective eyewear (drywall compound stings!), and old clothing that you can toss when you’re done. Remove furniture from the room, and cover the floor with a canvas drop cloth.
DON’T skip nail or screw holes while applying each coat of compound.
It takes just a dab of compound to cover the head of a fastener. Smooth out the compound with your 6-inch joint knife. Only the dimple over the fastener should have any mud—the wall around it should be completely clear. Wipe the knife over the fastener a second time in a different direction to remove any excess mud.
DO cut away bubbles that form in the paper tape.
After the initial coat of compound dries, check for bubbles in the paper tape. These indicate that there wasn’t enough mud on the wall beneath the tape or that you may not have pressed the tape firmly enough with your joint knife. Fear not: You can remove these blips. Use a sharp utility knife, such as Hyde Tools’ Auto-Lock 18mm Utility Knife that features snap-off blades, to cut around the edge of the bubble, and then remove the loose piece of tape. Apply a dab of fresh mud over the bubble, smooth it out, and let it dry.
DON’T apply the next coat of mud over bits of dry compound.
While it’s important to smooth the compound with each coating, it’s common to end up with a few slight ridges caused by excess mud that escaped the corners of the knife and dried. These, in addition to any unintentional flecks of compound, should be removed before applying the next coat. Scrape them off using a taping knife, such as Hyde Tools’ 8-Inch Pro Hardwood Stainless Steel Extruded Backing Taping Knife. Rather than pulling the knife as you do when you spread the compound, simply push the edge of the blade along the wall to scrape off any hardened bits of compound.

DO apply multiple thin coats instead of a thick coating of mud.
The biggest secret to a professional finish? Apply three or more coats of very thin compound rather than one or two heavier coats. Yes, it takes time for the compound to dry, but don’t try to rush the drywall taping process along by applying fewer, thicker coats. Doing so only increases your sanding time, and you may never be able to get the joints completely smooth. As well, compound shrinks slightly as it dries, so thick layers have a tendency to buckle and warp, leaving you with a hardened, lumpy mess.
DON’T forget to feather out joints.
“Feathering” involves applying a coat of mud and then using a taping knife to smooth the edges of the compound so thin that it’s hard to tell where the mud stops and the wall starts. It’s a technique that takes practice and quality tools. For most feathering situations, a good 10-inch taping knife, such as Hyde Tools’ 10-Inch Pro Project Blue Steel Extruded Backing Taping Knife, will give the best results. Hold the taping knife at a 45-degree angle and use light pressure—just enough to smooth out the edge, but not enough that you make a ridge in the mud.
DO add an extra swath of mud on each side of butt joints.
While standard drywall joints (where the long edges of two panels meet) have a factory bevel that accommodates a four-inch coating of compound, butt joints (where the ends of two panels meet) do not. There, the compound you apply tends to build up over the joint. To make these joints less noticeable, apply the first coat of mud and paper tape as usual, but apply two additional swaths—8 to 10 inches wide—on either side of the second coat of mud. This will give you a swath that spans 20 to 30 inches across the butt joint. By spreading the compound out over a wider distance, the joint will be less obvious. With each successive coat, continue to spread the mud in the same manner over the entire joint.

DON’T sand before protecting yourself and your home.
Your top coat has dried and you’re probably anxious to see just how smooth the finish turned out, but don’t start sanding until you have dust protection in place. Tape plastic sheeting over doorways, vents, and registers to keep drywall dust from filtering throughout the rest of the house. Wear old clothing, a hat, protective eyewear, and a full respirator mask. Drywall dust is incredibly invasive. It will cling to everything and even travel out of the room if you’re not careful.
If you have a lot of sanding to do, it’s a good idea to invest in Hyde Tools’ Professional Dust-Free Pole Sander. This sanding pad connects to a shop vacuum that will suck up most of the dust as you smooth walls top to bottom. While you should still wear some protective gear, the Dust-Free Pole Sander will remove up to 99 percent of the drywall dust that otherwise gets into the air.
This content has been brought to you by Hyde Tools. Its facts and opinions are those of BobVila.com.
