
We may earn revenue from the products available on this page and participate in affiliate programs. Learn More ›
Concrete is one of the most durable construction materials around, but faulty installation, everyday wear and tear, exposure to chemicals, and even the hazards of extreme temperatures can all take a toll on concrete surfaces. If your concrete is starting to look a little rough around the edges, take heart: You can probably fix it! Whether the problem is spalling on a concrete slab, scratches on a countertop, or crumbling edges on steps, you can often restore the concrete to its former good looks using the right techniques and quality repair products. Keep reading for DIY solutions to five of the most common superficial concrete problems.

The Cure for Crumbling Concrete Steps
Crumbling or chipped step surfaces, edges, or corners can really detract from your home’s curb appeal. You don’t have to put up with the rundown look of chipped, damaged stairs. As long as the steps are structurally sound—meaning, they’re not spalling, flaking, or broken all the way through—you can repair most surface issues.
If you’re dealing with cracks and chips, count on the polymer resins in Quikrete’s Vinyl Concrete Patcher to generate a tough, durable bond with the existing concrete and even out the surface. The patcher can be spread over clean and sound chipped surfaces to a thickness of ¼ inch, and its smooth consistency makes it easy to feather out with a trowel and blend with the rest of the step’s surface. If your patch is thicker, build the vinyl concrete patcher up in ¼ inch applications. (See this handy video for the technique.)
Restoring crumbling step edges to their former crisp and sharp contour appearance requires a different product altogether: Quikrete’s Quick-Setting Cement. When mixed with Quikrete’s Acrylic Fortifier, this product yields a flexible semisolid mixture you can shape, mold, and sculpt to each step’s exact edge. If making repairs shallower than one inch, adding the acrylic fortifier to the quick-setting cement will increase bonding strength. Follow the tips in this video to prep the concrete surface and create new edges with ease.

Resurface a Spalling Driveway
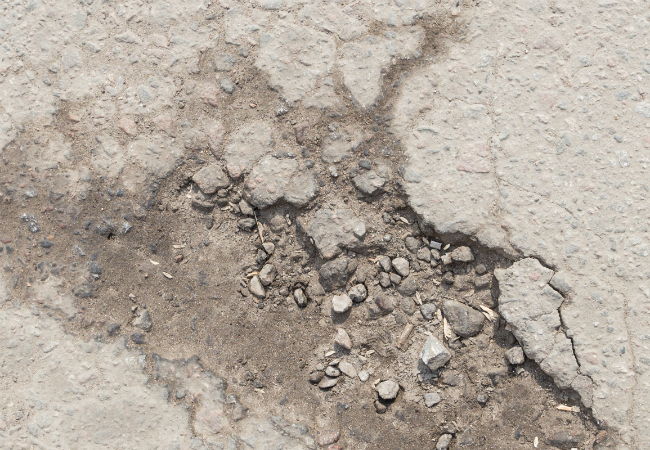
Are you finding flakes and pits in your outdoor concrete? This effect, called spalling, often occurs in concrete that was poured too wet at installation, but such factors as prolonged snow exposure, repeated use of chemical ice-melting products, or persistent dripping of water in one place (such as under a garage eave or beneath a spot that lacks gutters) can also cause this type of surface damage. Fortunately, though spalling is definitely an eyesore, it won’t actually compromise the structural integrity of your driveway, sidewalk, or patio. You can get rid of it by smoothing Quikrete’s Concrete Resurfacer over the rough, damaged surface. Concrete Resurfacer is manufactured from Portland cement and a unique blend of polymers and additives that give it extra strength and durability. And it’s tough enough to drive on, to boot!
For the best results, divide large driveways into smaller areas; working one section at a time makes it easier to apply and control the resurfacing product. Clean the existing surface with a power washer, then mix the resurfacing product using a heavy-duty drill and paddle bit, then spread it on evenly with a long-handled squeegee following these tips from the pros. You can use a utility broom to add texture that will keep the concrete slabs from becoming dangerously slick when wet.

Eliminate Countertop Scratches and Stains
As cool to the touch as they are to look at, concrete countertops offer a trendy yet tough work surface for the kitchen—a space where the concrete will inevitably succumb to stains and scratches over time. Should any of these superficial flaws appear on your countertop, the best way to restore the surface is simply to grind it down, then restain and reseal it. Lucky for you, stains and scratches rarely penetrate deeper than the top layer of a concrete countertop, so you don’t have to remove too much of the surface to get rid of them. Wearing a respirator mask and protective eyewear to keep the airborne concrete dust at bay, sand the entire surface in several passes using a handheld grinder fitted with a series of diamond grinding pads. Work in graduated grits, beginning with a 50-grit pad to remove any stains and scratches, then move up to a pad as fine as 400 grit for an ultra-smooth, polished surface.
Next, apply a good penetrating stain like Quikrete’s Penetrating Concrete Stain to the sanded surface to enhance the natural beauty of your countertop with one of a variety of rich hues. Protect your countertop’s fresh new look with a sealer like Quikrete’s Concrete & Masonry Waterproofing Sealer, which will prevent damage from acidic spills, such as vinegar or lemon juice. (A sealed countertop is likely to develop a warm and inviting patina, which most homeowners love, over its first few months.) Finally, once the sealer is dry, get your countertop ready for meal prep by finishing with a layer of glossy, food-safe wax, such as carnauba.

Replace Worn Patio and Driveway Expansion Joints
Expansion joints are set in large expanses of concrete to prevent the surface from developing cracks as sections shift imperceptibly over time as a result of temperature fluctuations or soil movement. If, however, these joints were never sealed, or if the old sealer has since hardened, crumbled, or pulled away from the concrete in spots, the joints cannot do their jobs. Once damaged, these spaces can allow water to seep under the concrete surface, which increases the risk of soil movement and can result in cracks.
You can prolong your patio’s lifespan by removing the old sealant, cleaning the joints, and applying new sealant. As with all concrete repairs, the surface must first be cleaned of dirt, debris, and grease. For hard-to-remove stains on exterior slabs, use Quikrete’s Concrete and Asphalt Cleaner, which is applied with a stiff brush and then rinsed off with a hose. Cut away hardened sealant from expansion joints using a utility knife. If any of the expansion joints are ½ inch or wider, insert a compressible foam “backer rod” into the joint first to prevent sealant from sagging between slabs, leaving approximately ¼ inch of space above for the sealant. After the joints have been cleaned and prepped, squeeze Quikrete’s Self-Leveling Polyurethane Sealant into each joint using a standard caulk gun. When you’re ready to get started, review this video for a close look at every step in the process, from prepping the joints to applying the new sealant.

Plug Leaky Basement Walls
Lateral pressure from the soil outside can cause basement walls to develop cracks over time. More than just unsightly, these cracks also increase the risk of groundwater seeping into your basement. As long as the cracks are small (¼ inch or less) and the wall isn’t showing signs of structural failure, you can reduce the likelihood of winding up with a wet basement by sealing the cracks immediately with Quikrete’s Hydraulic Water-Stop Cement. When mixed according to the instructions and applied as shown in this video tutorial, the cement takes on a putty-like consistency that can easily be pushed and molded into the cracks. The material expands, locking it into place permanently.
So, now that you know how easy it is to make some basic concrete fixes around the house—and which products are best for each application—what’s stopping you? Get to work cleaning up small cracks, untidy edges, and rough surfaces to give your house a neater, more polished appearance.
This content has been brought to you by Quikrete. Its facts and opinions are those of BobVila.com.
