We may earn revenue from the products available on this page and participate in affiliate programs. Learn More ›
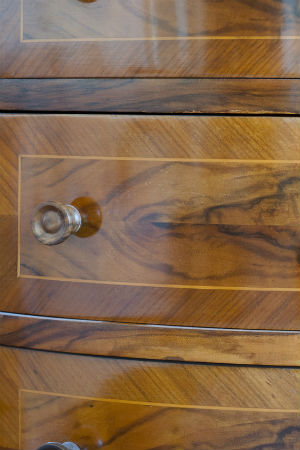
If you’ve ever admired the extraordinarily glossy finish on an antique piece of wooden furniture or a wooden instrument such as a guitar or violin, you’re likely looking at wood finished with the French polishing technique. While you appreciate the good looks, you may also respect the hard work behind the fine finish. While it is a very time-consuming process and does take practice before you’ll reliably achieve the best results, it’s hard to match this time-honored method for producing a lustrous finish that shows off wood grain to perfection.

What is French Polish?
French polish is not a product. Rather, French polishing is a method of applying shellac to wood furniture, musical instruments, or decorative accents in many thin layers—typically well over 100—that results in a highly glossy, glass-smooth surface with a rich depth that beautifully highlights the grain of the wood. While it’s been around since the 1600s, French polish today has somewhat fallen out of favor, due to its labor-intensive process.
While you might be tempted to cheat by taking shortcuts, you won’t be using any sprays, brushes, or sponges for a true French polish finish. Nor will you be using polyurethane or other modern-day hard-and-shiny wood sealers. Instead, you’ll use a cloth dabber to apply the shellac, along with a few other basic supplies.
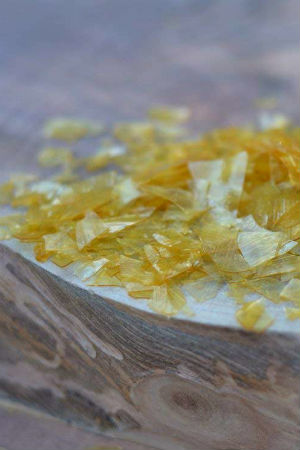
Made from a substance secreted by the lac bug—a species of scale insect native to Asia—shellac is suitable for any type of wood, but you’ll find it far easier to achieve the glossy, perfect French polish finish on hardwoods with closed grains, such as maple, spruce, and cedar. If used on an open-grain wood, such as walnut, mahogany, and rosewood, you’ll need to fill the grain with pumice powder, adding an extra step to the (already lengthy) process.
While there are certainly other methods of finishing wood that produce a glossy finish—including varnish, polyurethane, and high-gloss stains and paints—none of those produce the depth and richness of French polish.
RELATED: Is Varnish or Polyurethane the Right Finish for You?
Pros and Cons of French Polish
You’ll want to weigh the following advantages and disadvantages of French polishing carefully before embarking on the multi-day process. After all, while beautiful, there are scenarios in which it is not a suitable technique for your wooden furniture or accent.

On the plus side, French-polished shellac is durable and doesn’t require much in the way of polishing once dry. It’s flexible, so resists cracking, scratches, and wear—a definite advantage if you drop your keys onto a shellacked table, for example. Shellac also dries quickly and is nontoxic. It won’t yellow over time, as varnish will, and it’s fairly easy to patch up your French-polished piece without leaving obvious signs of repair. While shellac is naturally amber to orange, you’ll also find bleached shellac that’s useful over light-colored wood like maple.
On the downside, however, shellac burns if exposed to high heat—such as a hot plate set down without a trivet. It also develops white rings or patches if subject to high humidity or liquids, meaning it’s risky to French polish a coffee table or any piece of furniture that might gather drips or condensation. Nor would you want to French polish anything too close to a high-humidity area, such as the bathroom or kitchen. In fact, before you even start your French-polishing project, you’ll want to check the weather report and postpone if the day calls for rain or high humidity. Finally, shellac is also damaged by alcohol, so this isn’t the best choice for counters or furniture in your home bar.
You should also take your own experience into account. If you are a newcomer to woodworking or don’t have the time or the patience for a lengthy process, French polishing isn’t the best technique for you. Instead, consider staining or varnishing your piece, then sealing it with a coat of glossy polyurethane. While the finished project won’t have the same level of depth and rich gloss as French polish, the process is far easier and faster.
Pro Tips for French Polishing Wood

- Start by sanding. Prepare your wooden piece by sanding off any old finishes, paint, varnish, or rough surfaces. While you might start with a medium-grit sandpaper, you’ll want to finish up with a fine grit, such as 400. Wipe away sawdust with a slightly damp clean cloth or a tack cloth.
- Mix your shellac. Although you can save yourself time and effort by buying prepared shellac (like a can of Zinsser’s Clear Shellac at Home Depot), the insect-derived finish applies best when fresh, so many woodworkers prefer to mix their own. If so, start with three ounces of shellac flakes (such as these flakes from Old World Shellac on Amazon) dissolved in 16 ounces of denatured alcohol. Keep your shellac in a squirt bottle for easiest use, or store it in a glass jar and pour small amounts into a shallow bowl to access as needed.
-
Make your dabber. To apply shellac, you’ll need a pad with an absorbent core that slowly dispenses shellac while you work. Start with a golf-ball-sized wad of cotton gauze, cotton balls, or wool. Set this ball in the center of a 6-inch square of cotton fabric—an old white tee shirt is perfect. Squirt a little bit of the shellac mixture onto the center wad—enough to wet it, not drench it—and then use string or twist-ties to tightly fasten the tee shirt fabric around the wad, creating a fabric “dabber” that’s easy to grip.
Now use an eyedropper to apply one or two drops of pure olive oil to the fabric dabber’s work surface; olive oil works very well to keep the dabber moving smoothly, as otherwise, the shellac tends to become sticky.
-
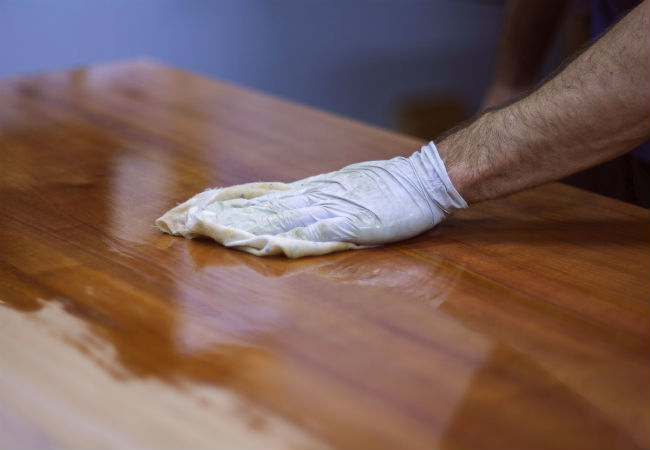
Start with your sealer coat. For the very first coats of shellac, which will serve as the sealer on your wooden piece, glide the dabber across the wood in the same direction as the wood grain. Use sweeping, even strokes, moving your dabber across the wood without breaking or stopping in the wood’s center—this creates thin or imperfect spots in the finish. Instead, stroke to an edge before lifting the dabber.
Apply three coats of shellac in this manner, letting the shellac dry for a few minutes between coats. If your dabber starts to drag or stick, apply another drop or two of olive oil to its surface.
-
Fill in open grain with pumice powder. While this step is optional, you will want to include it if you are working with a very open-grained wood like walnut. Filling in the grain with ultra-fine FFFF-grade pumice powder (such as this CQ Concepts product on Amazon) will help achieve the smoothest French polish.
Make a new dabber, and moisten it just a little bit with denatured alcohol. Now, pour a small sifting of pumice powder onto the dabber. Work the pumice into the wood grain with firm pressure and small, circular motions; do not follow the grain of the wood, which would push the powder out of the grain. Continue to apply pumice powder until the surface of the wood is completely smooth (i.e. without wood grain texture).
-
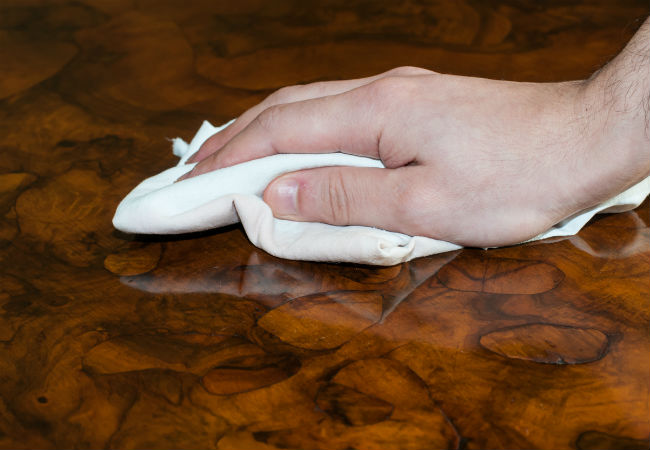
Begin to French polish in earnest. Switch back to your first shellac dabbing pad. Open it up to apply a small spritz of fresh shellac to the inner wad, retie the dabber, and then apply a drop or two of olive oil to the dabber’s surface. Smooth the shellac onto your wooden piece, working the dabber in small circles or figure-eights. Apply firm—but not excessive—pressure to the pad, and keep the dabber moving constantly. If the dabber begins to stick or “grab” the surface of the wood, add another drop of oil. Add more shellac to the dabber’s inner wad as necessary to maintain thin, even applications.
Continue to add thin coats of shellac to the wood until you’ve covered the entire surface several times. Because shellac dries very quickly, you should be able to apply multiple coats in this session—a dozen or more. Eventually, you’ll see a smooth, definite layer of shellac.
- Spirit the finish. “Spiriting” is necessary to remove the excess oil that rises to the surface of the shellac as it dries. Apply several drops of denatured alcohol to your dabber, and then sweep it across the wooden piece, moving in even strokes from one side to the other. Let the wood dry for at least an hour before moving on to the next step.
- Repeat as necessary. It typically takes six to eight full repetitions of the French polishing and spiriting steps outlined above before you’ll reach the full glossy finish you desire. Remember to let the wood dry completely for at least one hour between each session.
- Buff out any small imperfections. Your wooden piece should now be glossy and smooth, with a rich depth to the shellac. But there still may be some very small imperfections, generally in spots where the dabber slowed or stopped. Look over the finish in good light; if you see any rough spots, gently buff them away with 1200-grit sandpaper topped with a drop or two of olive oil. Remove any residue by barely moistening your dabber with four or five drops of denatured alcohol and then wiping the surface of the wood.
- Finish with a coat of furniture wax. After the shellac has dried completely, safeguard the finished surface—and all of the time you invested in it—by buffing out your finished project with a bit of wax paste furniture polish on a soft rag.
RELATED: Antiquing vs. Distressing: 8 Tips on Creating the Look and Patina of a Genuine Antique

Congratulations! The finished project is sure to be a stunner, and you can now add French polishing to your repertoire of woodworking and do-it-yourself skills.

