We may earn revenue from the products available on this page and participate in affiliate programs. Learn More ›
When it comes to electricity, safety has always been a major concern, but thanks to the development of ground fault circuit interrupter outlets (GFCIs), the risk of being severely shocked or electrocuted is greatly reduced. According to the Electrical Safety Foundation International (ESFI), electrocutions are down 83 percent since the 1970s when GFCIs were introduced. These quick-to-react outlets are required by law in new home construction, and it’s a good idea to put them in older homes as well. Read on for must-know info on GFCIs—what they are, how they work, and where to install them.
RELATED: These Electrical Safety Tips Could Save Your Life
What is a ground fault?
In your home, the flow of electricity is contained within wires covered with rubber- or plastic-based insulating material. When everything goes as planned, the electrical current runs safely through the insulated wires to switches and wall outlets and on to the many appliances and gadgets we take for granted today. But in its raw state, electricity has a “mind” of its own, and left to its own devices—as evidenced by most lightning strikes—it makes a beeline for the ground.
A ground fault is the occurrence of electricity taking an unintended path to the ground. It occurs when the electrical current escapes the insulated wires, as a result of a damaged cord or faulty wiring, and flows through a different conductor. If that different conductor is a human being, the result can be a serious electrical shock or electrocution. Because water is an excellent conductor of electricity, the risk of a ground fault occurring is greater in areas of your home where water is commonly used, such as near a kitchen sink.
How do GFCIs work?
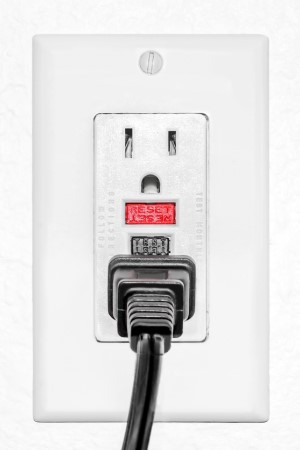
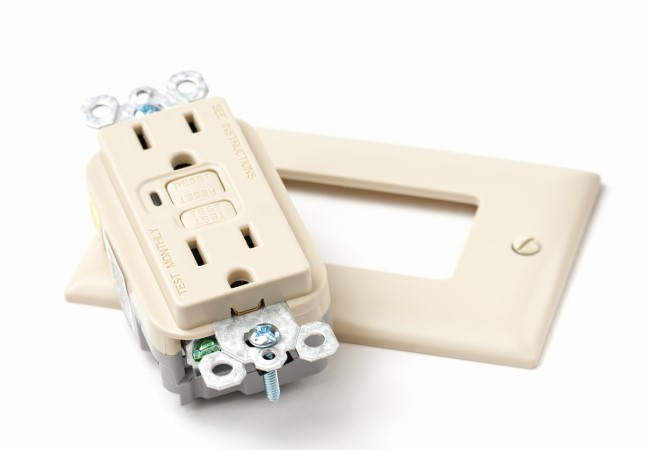
The singular purpose of a GFCI outlet is to prevent electrical injury to humans, something regular outlets are not equipped to do. A standard household outlet features two, three-prong plug-in slots, while a GFCI outlet features the same plug-in configuration plus two buttons on its face: a “TEST” button and a “RESET” button. The rules requiring the installation of the GFCI outlets in new construction has expanded over the years to include more applicable locations:

1973 – exterior outlets
1975 – bathroom outlets
1978 – garage outlets
1987 – any outlet within six feet of a kitchen sink
1987 – at least one basement outlet
1990 – crawl spaces
1993 – wet bars
1996 – every kitchen outlet that serves a countertop
1999 – electrically heated floors
Normally, electrical current flows at a uniform rate through wiring, but when a ground fault occurs, the flow of electricity surges as it jumps to the unintended conductor. A GFCI outlet contains a sensor that monitors the flow of the electrical current through the wires, and when it senses a ground fault (in electrical terms, “fault” means any variation from the normal current), the GFCI, which also contains an internal switch, shuts off the flow of electricity in the outlet.
While you may still receive a painful shock, the GFCI will prevent a prolonged surge of electricity, the type that injures and kills. A standard outlet, like the type in your bedroom, doesn’t have a sensor.

Where should GFCIs be installed?
The National Electric Code (NEC) requires the installation of GFCI outlets in new construction in areas where electrical outlets are in close proximity to water. Older homes are not required to have GFCI outlets unless the wiring is being updated, but it’s a good idea to install them anyway.
The NEC requires GFCIs on all exterior and bathroom receptacles (another term for outlets). GFCIs are also required on all receptacles serving kitchen countertops. In laundry rooms and utility rooms, GFCIs should be installed on outlets within six feet of sinks, washing machines, and water heaters. They should also be installed within six feet of a wet bar and in garages and unfinished basements.
In bedrooms, living rooms, and other areas where water fixtures are not found, regular outlets are fine—and they are still installed in today’s new homes. The ESFI estimates that approximately 43 million homes in the U.S. still do not have GFCIs installed in “wet” rooms, and notes that as many as 47 percent of today’s electrocutions could be prevented in older homes if GFCIs were installed.

Can I install GFCIs myself?
A DIYer with basic knowledge of electrical wiring may be able to replace an existing outlet with a GFCI outlet (instructions below), but only when swapping out a three-prong outlet—two plugin slots and a hole. Outlets with only two slots and no third hole indicate the presence of older wiring that should only be replaced by a licensed electrician.
The other caveat is that only outlets connected to three wires are suitable for DIY replacement. Outlets with three attached wires (remove the outlet plate to determine the number of attached wires) indicate that the outlet is located at the end of an electrical circuit (a wiring loop that starts and finishes at the breaker panel). An outlet with five attached wires is located in the middle of an electric circuit, and the wiring process is more complicated—only a licensed electrician should replace those outlets.
A GFCI outlet runs about $15, such as this Levitron GFCI Outlet (available from Home Depot). An electrician will charge an additional $50 to $100 dollars per hour to replace outlets.
Replacing a GFCI Outlet Yourself
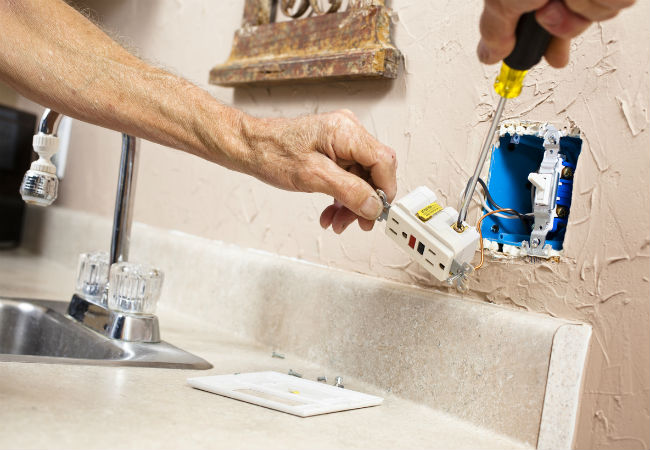
Replacing an existing outlet at the end of a circuit (as explained above) is not particularly difficult, but the task requires some experience. You should understand how outlets are wired and how electrical current travels from the breaker panel through each electrical circuit (wiring loop) in your home. Some communities prohibit homeowners from doing their own wiring, so check with your local building authority before you start.
MATERIALS AND TOOLS
– Flat screwdriver
– Phillips screwdriver
– Flashlight
– GFCI outlet
– GFCI outlet cover
STEP 1:
Shut off the power to the outlet by turning off the circuit breaker (at the breaker panel) that provides electricity to the outlet. A good way to ensure that the power is off is to plug a nightlight into the outlet and turn it on, then shut off the breaker. If the nightlight does not go off, you’ve got the wrong breaker—try again.
STEP 2:
Remove the outlet cover with a flat screwdriver. You’ll probably need a helper to hold a flashlight for you now, since the overhead light might also be off.
STEP 3:
Remove the old outlet from the outlet box using a Phillips screwdriver. The outlet is typically held in place by two screws at the top and two at the bottom. When the screws are removed, the outlet will hang freely—the only things holding it are the attached wires.
STEP 4:
Remove the three attached wires, which are held in place with Phillips screws. Note the color of the screws and the color of the wires.
- Black (hot) wire connects to a brass or gold screw on one side.
- White (neutral) wire connects to a silver screw on the opposite side.
- Green or copper (ground) wire connects at the bottom of the outlet to a green screw.
STEP 5:
Attach the new GFCI outlet in the same way you disconnected the old outlet, making sure the wires attach to the screws using the above color-coded method. The GFCI outlet will also have two additional screws on the bottom sides, and these screws will be covered by a piece of tape. Leave the tape in place—these screws are for use by an electrician who is replacing an outlet in an advanced wiring situation.
STEP 6:
Fasten the new GFCI outlet to the outlet box with Phillips screws (use the same holes).
STEP 7:
Position the new GFCI outlet cover over the outlet and attach it with flat screws. A new outlet cover is necessary because the cover of a standard outlet will not fit a GFCI outlet.
STEP 8:
Turn the circuit breaker back on.
STEP 9:
Press the “Reset” button on the front of the GFCI outlet to turn it on and plug the nightlight in to test it.
STEP 10:
Leave the nightlight in and then press the “Test” button. The nightlight should go off, which tells you that the GFCI outlet is working as intended. If it’s not working, it’s time to call the electrician.
How should I care for GFCI outlets?
Once installed, a GFCI outlet needs virtually no additional care, although you might want to press the Test button once a month or so to make sure it’s still functioning properly. Occasionally, a GFCI will shut itself off for no apparent reason—known as “nuisance trips” or “ghost trips.” This can be caused by something as simple as static electricity or nearby lightning. When this happens, just press the Reset button to restore electricity.
If a GFCI trips frequently when not in use (daily or weekly), the outlet itself could be worn out or faulty and should be replaced.


