
We may earn revenue from the products available on this page and participate in affiliate programs. Learn More ›
Pavers—be they brick, stone, or concrete—are a pleasing alternative to large expanses of plain concrete, adding visual texture to patios, walkways, and even driveways. While pavers are fairly do-it-yourself-friendly, you’ll probably have to cut some to fit your layout. If you only need to cut a few, a hammer and chisel can be employed, but if cutting many pavers, a power saw, such as an angle grinder or a circular saw, is recommended to speed up the process. Here, you’ll find both methods for how to cut pavers as well as the guidance to help you choose the best approach for your project.
Cutting Pavers with a Hammer and Chisel
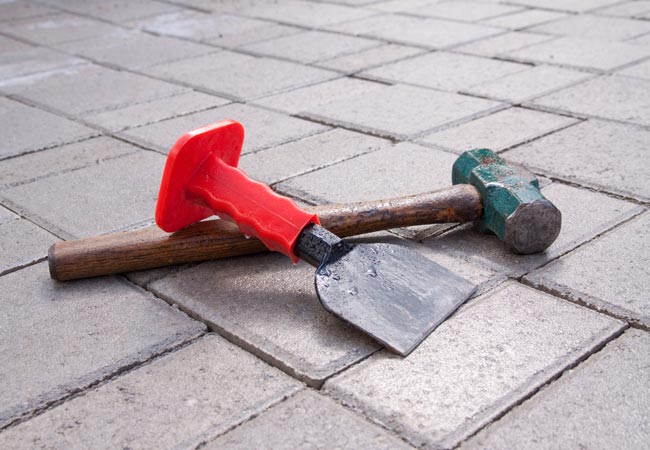
A hammer and chisel works well on relatively soft pavers, such as brick or concrete. It’s an old-fashioned technique, but it’s tried and true. Even professional masons use this method to cut pavers in a pinch, and it’s your only option if you don’t have access to electrical power on the site of your project.
MATERIALS AND TOOLS
– Work gloves
– Protective eyewear
– Measuring tape
– Carpenter’s pencil
– Cold chisel
– Brick-set chisel
– Hammer
STEP 1
Protect your eyes from the small chips that will inevitably fly when cutting pavers by wearing protective goggles. It’s also a good idea to wear gloves when handling pavers because they can quickly wear down the skin on your fingertips.
STEP 2
Measure the space in your sidewalk or patio layout where you’ll need to install a smaller paver, and then transfer that measurement to the paver itself, marking the cutline clearly with a pencil. Mark the front, back, and sides of the paver—the cutline must run all the way around because you’ll need to score all four sides.
STEP 3
Lay the paver on a flat surface, such as the ground or a piece of plywood set on top of a couple of sawhorses. Position the sharp edge of a cold chisel (a small hardened steel chisel with a sharp blade) on the pencil line and gently tap the other end with a hammer. As you tap, the chisel will score a groove in the paver. Move the chisel along the mark, tapping until you’ve made a groove about 1/16-inch deep along the entire line on both sides and both edges. Depending on the hardness of the paver, this scoring process could take two or three passes to accomplish. Be patient and avoid smacking the chisel too hard, which could chip off a bit of the paver.
STEP 4
Lay the paver flat on the ground when you’ve finished scoring, and position a brick-set chisel, vertically, in the center of the groove. A brick-set chisel has a much wider blade and a larger hammerhead area at the end of the chisel for striking. Hit the end of the chisel firmly with the hammer and the paver should split into two separate parts. If it doesn’t, use the cold chisel to score around the cutline again.
STEP 5
If necessary, chip away any uneven or protruding bits from the center of the broken paver with the brick-set and a hammer. Your cut paver is now ready to be positioned in your layout.

Cutting Pavers with a Power Saw
You can cut pavers of virtually any kind with a power saw as long as you use the correct blade. These saws are especially handy on stone pavers, which can be time-consuming and tedious to cut manually with a hammer and chisel, but they’re also a good choice for cutting softer pavers if you have a lot to cut.
MATERIALS AND TOOLS
– Gloves
– Protective eyewear
– Dust mask
– Ear protection
– Measuring tape
– Pencil
– Power saw (angle grinder or circular saw)
– Diamond masonry blade
– Hammer or mallet
STEP 1
Don a good dust mask in addition to protective goggles and gloves when cutting pavers with a power saw. It’s also a good idea to wear ear protection because the cutting process is quite loud.
STEP 2
Measure the space you need to fill in your layout and transfer that measurement to the paver, making a pencil mark on the front and the back of the paver. There’s no need to mark the sides.
STEP 3
Fit your power saw with a diamond masonry blade designed to cut the pavers you’re installing. If your pavers are stone, be sure to choose a blade labeled for cutting stone, not just brick or concrete, because natural stone is much harder than either brick or concrete. If the blade isn’t labeled for stone, it won’t cut through the pavers.
STEP 4
Set the saw blade to cut ½-inch deep, and position the paver on a flat surface, such as the ground or a sturdy board set on top a couple of sawhorses. Saw along the marked line on the front and on the back of the paver. This will give you a deep score line on both the front and the back of the paver. It’s not necessary to cut the sides. Follow all safety instructions that came with the saw. Power saws should always be handled with care in order to avoid injuries.
STEP 5
Position the paver on top of a step or another paver with the scored line and the end of the brick hanging over. While holding the paver in place with one hand, tap the overhanging end firmly with a hammer or a mallet. The paver should break cleanly, ready to be set into your layout.
