We may earn revenue from the products available on this page and participate in affiliate programs. Learn More ›
Plexiglass, the clear acrylic material that revolutionized modern architecture and design, was developed in the 1930s by German chemist Otto Röhm, who called his new invention Plexiglas. Over time, the name was adopted as a generic—plexiglass—to describe these transparent acrylic plastics, valued for their light weight, strength, and clarity. Today, many manufacturers produce plexiglass, which is available in a variety of sizes and thicknesses.
In a range of applications, from picture frames to tabletops, plexiglass is growing in popularity and serves as a cost-effective, shatterproof substitute for glass. In fact, because of its light weight and durability, many do-it-yourselfers prefer plexiglass, not least because it can be cut and shaped with common workshop tools.
Versatile and tough though it may be, plexiglass isn’t perfect. For one thing, it scratches easily. That’s why sheets of the material come covered in a thin layer of protective film. The other downside? Homeowners who don’t know how to cut plexiglass can be intimidated by the material at first—but we’re here to help!
Continue reading for details on how to cut plexiglass the right way.
Choose the Right Cutting Tool for Plexiglass
Cutting plexiglass requires careful precision and the right tool for the job. While thin sheets of the material can be scored and cut with a utility knife, there are other tools that can make cutting multiple sheets, thicker sheets, or complicated shapes easier and faster. A jigsaw, mini circular saw, or rotary tool can more easily handle sheets that are more than ¼-inch thick. For complicated shapes, a rotary tool or jigsaw may be your best choice to get the precision you need.
Project Overview
Working Time: 30 minutes
Total Time: 1 hour
Skill Level: Beginner
Estimated Cost: $20, depending on which tools you already have on hand
Before You Begin
The best way to cut plexiglass requires having enough flat surface area available and the patience and concentration to create a clean score. It’s important to wear gloves, long sleeves, and safety glasses when cutting plexiglass, as the process of cutting—especially with power tools—could produce splinters or shards of plastic.
When cutting plexiglass, leave the protective film in place as long as possible to avoid marring the surface while handling the sheet. Also, bear in mind that even if you’re careful, it can be difficult to cut plexiglass without leaving a rough, irregular edge. If your project requires a clean edge, expect to devote energy to smoothing the finish with sandpaper. Simply cutting plexiglass to size is easy by comparison.
How to Cut a Thin Sheet of Plexiglass
SUPPLIES
Metal ruler
Permanent marker or grease pencil
Tape measure
Utility knife, box cutter, or glass cutter
Clamp
Work gloves
Safety glasses
Knowing how to cut plexiglass by hand is a useful skill. For a thin sheet of plexiglass—a sheet up to about 3/16-inch thick—the scoring method is similar to the technique used to cut actual glass. Here’s how to cut plexiglass with a utility knife.
Step 1: Measure and mark the plexiglass.
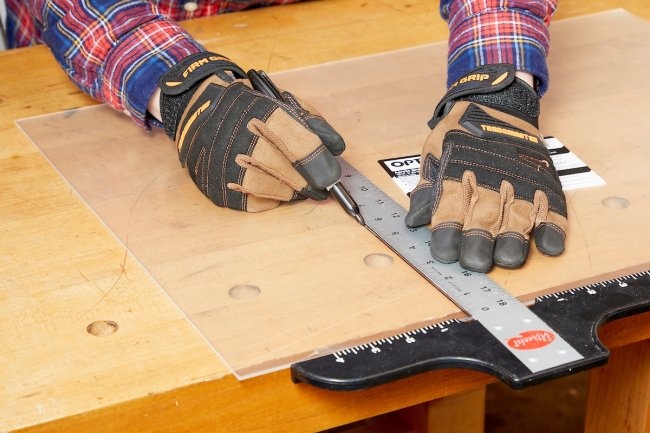
Lay the sheet on a flat surface that is free of any debris, as it can mar the surface and create an uneven cut. Using a metal ruler, tape measure (if needed), and a permanent marker (or a grease pencil), measure and mark the line you wish to cut.
Step 2: Score the plexiglass.
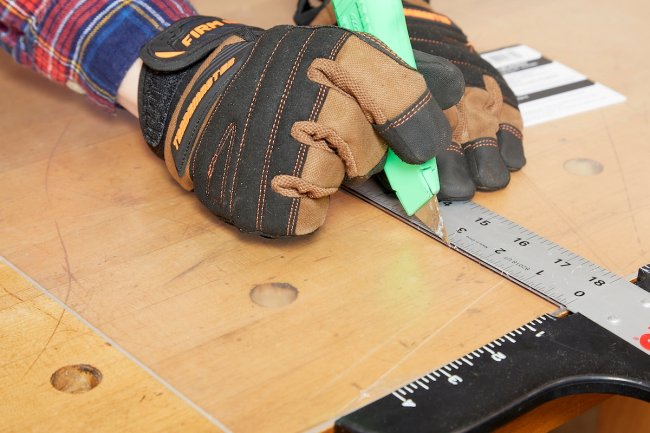
Hold a metal ruler along the marked line, and run the utility knife along the straight edge to score the sheet. Hold the knife firmly and run the blade along the line slowly to ensure a clean score.
Step 3: Score the plexiglass again.
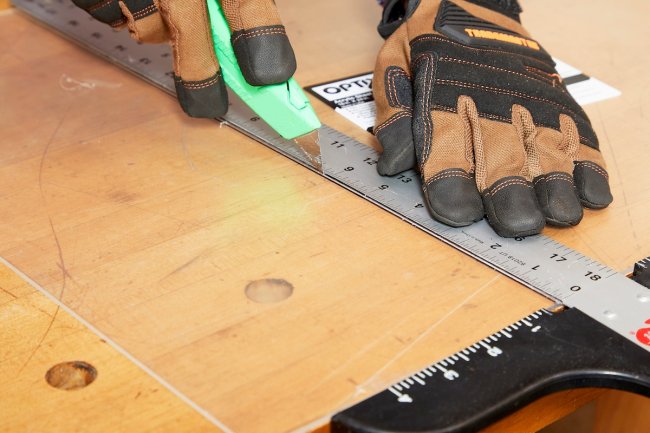
Running a blade along the cut line will create a shallow dent in the surface, but one run along the surface won’t be enough. Score it again and again, as many as 10 or 12 times, until you have made a deep groove in the plexiglass.
Step 4: Score the other side of the plexiglass sheet.
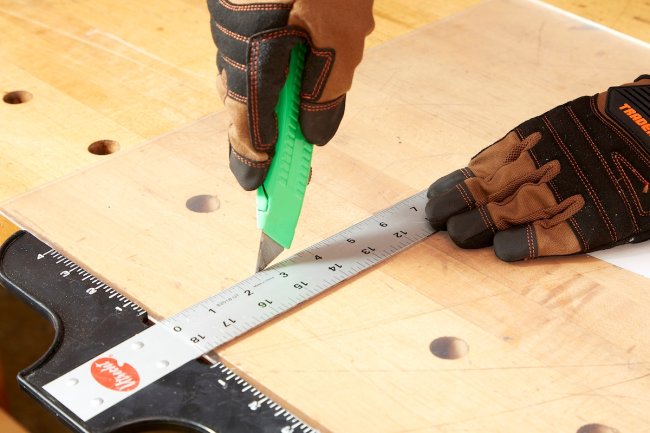
Now that one side is scored, the next step in how to cut plexiglass sheets involves scoring the other side. Carefully flip over the plexiglass sheet, and score the opposite side, as described in steps 2 and 3 above.
Step 5: Snap off the piece of plexiglass.
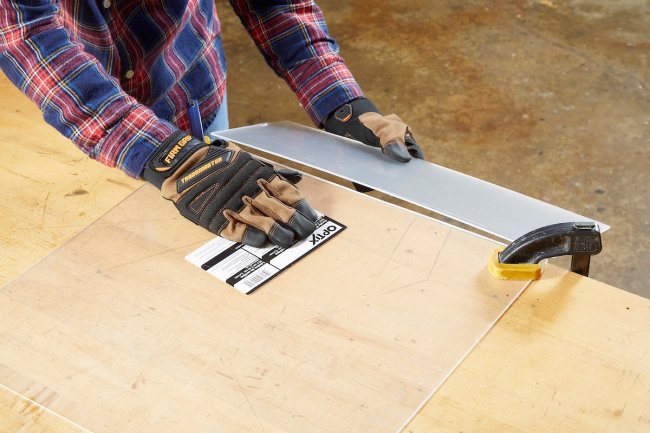
Before snapping off the piece, align the scored groove with the edge of your work surface and secure the plexiglass sheet in place with a clamp. Then, with sharp downward pressure, snap off the portion of the plexiglass that extends beyond the work surface.
How to Cut a Thick Sheet of Plexiglass
SUPPLIES
Mini circular saw (or circular saw, table saw, or jigsaw)
Metal cutting blade
Metal ruler
Permanent marker
Tape measure
Clamp
Painter’s tape
Work gloves
Safety glasses
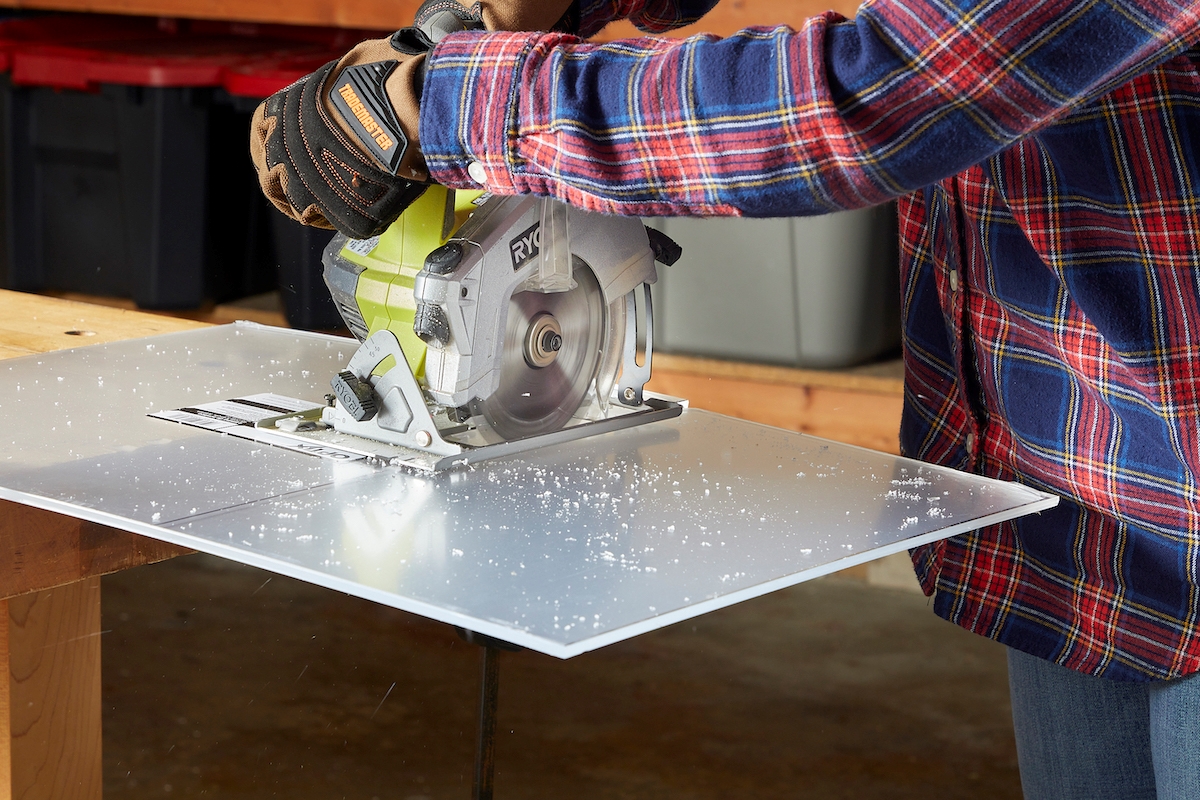
Cut thicker sheets of plexiglass with a power saw—be it a circular saw, reciprocating saw, or table saw. (To cut anything but a straight line, opt for a jigsaw or rotary tool.) Here’s how to cut plexiglass with a circular saw, and remember: Whenever you work with power tools, be sure to wear appropriate safety gear and follow best practices for tool use.
Step 1: Select the blade.
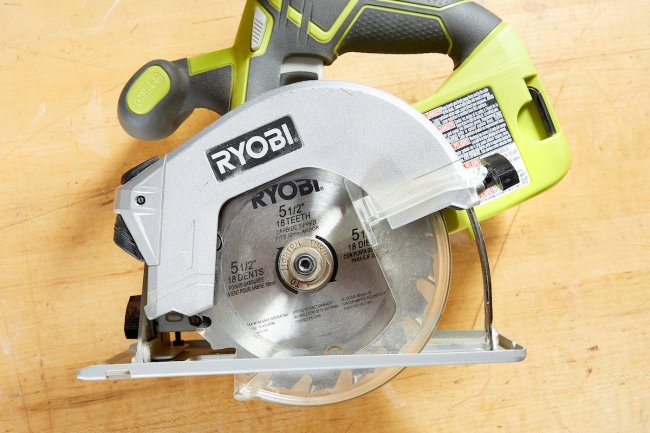
No matter which type of saw you choose for the task, it’s critically important to use the right blade. There are special blades designed expressly for acrylic, but any metal-cutting blade with carbide tips can do the trick. Before committing to one blade or another, double-check that its teeth are evenly spaced, with no rake (backward or forward lean of the teeth), and of uniform height and shape.
Step 2: Set up the plexiglass on a work surface.
After readying your tool and blade, lay out the plexiglass on a flat, debris-free surface. Make sure there is ample room to move around the surface so you can cut the plexiglass with one smooth, uninterrupted stroke.
Step 3: Measure and mark the plexiglass.
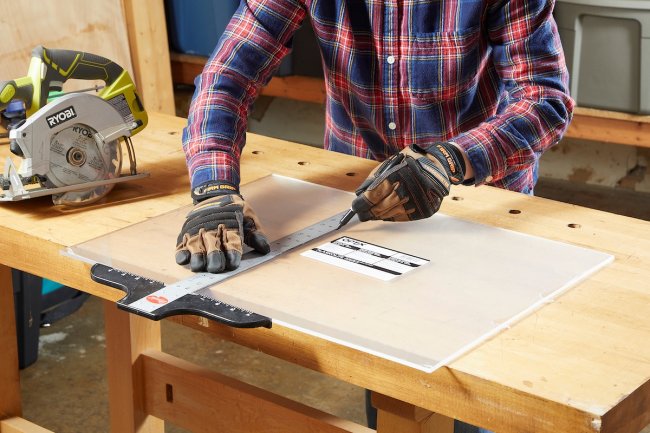
Using your tape measure, marker, and straight edge—a metal ruler is recommended—mark the cut line on the plexiglass. If there are multiple lines that overlap, use different-colored markers so it’s easy to differentiate while cutting.
Pro Tip: Cover the cut line with painter’s tape, and then mark the tape with the cut line. Painter’s tape will help protect the surface while cutting. This can decrease—or eliminate—the amount of sanding and buffing required later.
Step 4: Cut the plexiglass.
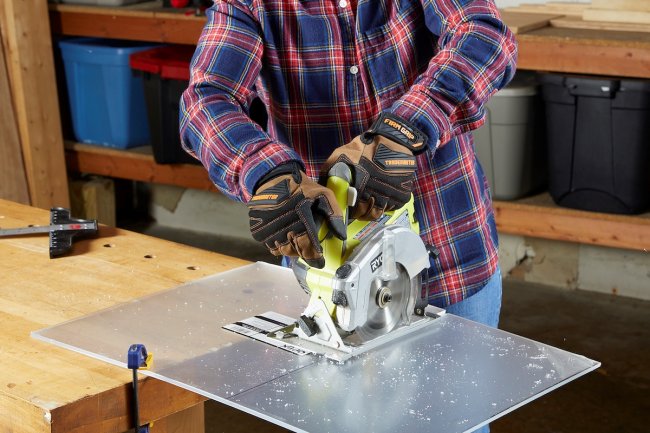
Clamp the plexiglass to the work surface so the cut line sits beyond the surface. This will allow the cantilevered piece to drop to the ground when it’s been cut. If you need that piece for your project, put a soft surface like a moving blanket underneath to catch it.
Apply painter’s tape to the tool’s housing so there’s no opportunity for the tool to scratch or ding the plexiglass surface. Run the saw blade along the cut line.
One note of caution: If the blade overheats, the material may chip or crack. If necessary, water-cool the blade or pause your work for a few minutes.
How to Polish and Buff Cut Plexiglass
SUPPLIES
Variety pack of waterproof sandpaper (120 grit to 600 grit) or sanding blocks
Clamp
Spray bottle
Drill
Buffing pad
Polishing compound
You may find that the cut plexiglass edge doesn’t look terribly attractive, so if it will be visible in your application, take the time to sand and buff out the imperfections.
Note: You can use a handheld power sander, but manual wet-sanding typically achieves the best results.
Step 1: Place the plexiglass on a work surface.
Put the plexiglass on a clean, flat surface and clamp the material so the edge that needs to be smoothed is cantilevered off the work surface. This will allow you access to the entire edge and will save you from having to clamp and reclamp the material for continued access.
Step 2: Wet sand with a 120-grit sandpaper.
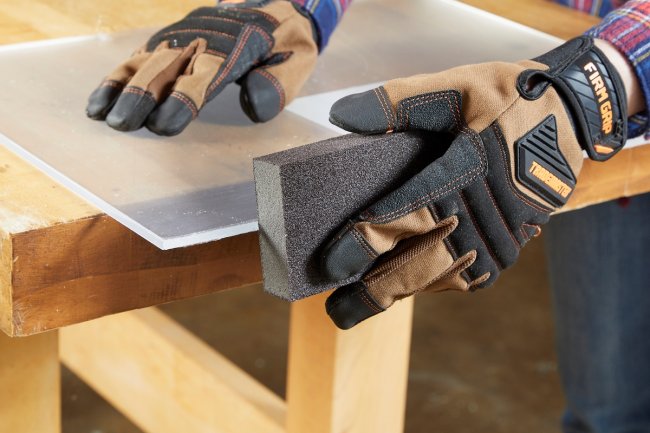
Start sanding the plexiglass with a wet piece of lower grit sandpaper. A 120- or 180-grit waterproof sandpaper is ideal. While you can sand using just the sandpaper, it’s easier to maintain a flat sanding surface when it’s used in combination with a wood or rubber sanding block. Spray water on the surface of the plexiglass and on the sandpaper before sanding.
Step 3: Sand with a higher-grit sandpaper.
As the plexiglass becomes smoother with the 120-grit sandpaper, transition to successively finer grits. Keep changing the sanding pad as the surface gets smoother. Finish by sanding with 600-grit sandpaper.
Step 4: Buff the surface.
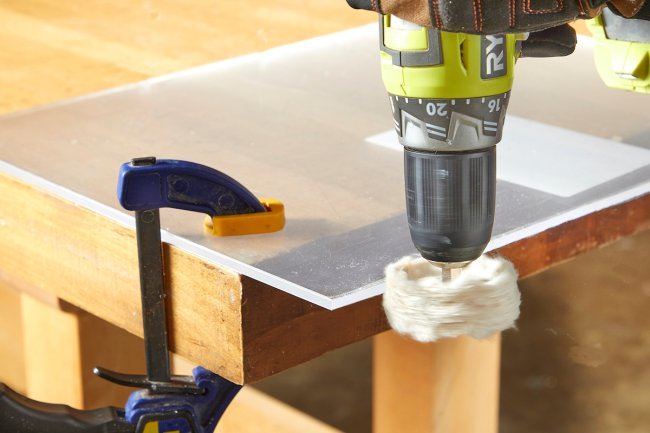
After you are satisfied with the appearance of the edge, clean the plexiglass with a cloth. Then, move on to buffing. Outfit your electric drill with a buffing pad and, after applying a polishing compound formulated for plastic, bring the plexiglass edge to a perfect polish.
How to Achieve a Clean Cut in Plexiglass
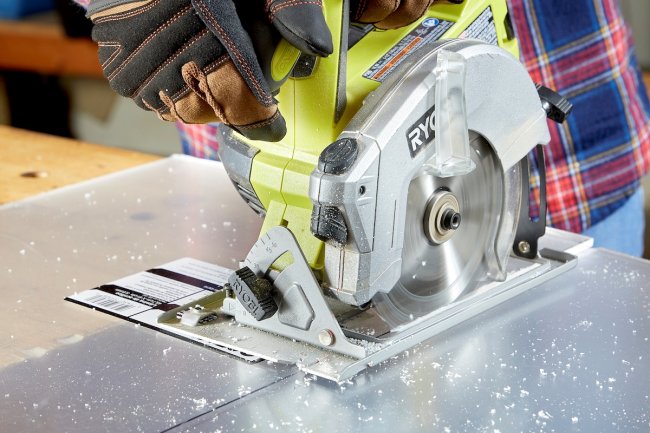
Though plexiglass is a durable material, it’s not unbreakable. Keep the following tips in mind when cutting plexiglass at home to prevent damage to the sheet or panel.
- Keep the plastic film on. Plexiglass usually comes with a thin layer of plastic film intended to prevent scratches while the product is in transit. Leaving that film on as you measure, mark, and cut will prevent scratches from your tools and work surface.
- Score deep. When using a box cutter or other sharp knife to cut plexiglass, be sure to score a straight, deep groove before attempting to break the material at the mark.
- Use the right blade. Whether using a hand tool or a power saw to cut plexiglass, it’s important to use a sharp, metal-cutting blade. A dull blade will fight against the material, potentially causing cracks and breaks and yielding a rough edge. A dull blade isn’t safe to use, either.
- Keep the blade cool. An overheated blade on a power saw can cause plexiglass to crack and break during the cutting process. Leaving the thin plastic film on the surface helps to an extent, but if your blade starts to overheat, pause and turn off the saw to let it cool. You can also add a small amount of soapy water to the plexiglass surface for lubrication.
FAQs
Q: Where can I buy plexiglass?
Plexiglass can be purchased at most home improvement stores and from online retailers like Amazon.
Q: What size sheets is plexiglass sold in?
While rectangular plexiglass sheets have long been sold in a range of standard dimensions, from 5-inch-by-7-inch picture frame “glass” to 4-foot-by-8-foot (and beyond) panels, there are now round options available for DIYers to purchase too.
Q: When is plexiglass not the best choice?
When cost, sustainability, or the potential for scratches is an important factor, glass can be a better option than plexiglass because glass is less expensive, recyclable, and more scratch-resistant. However, plexiglass is stronger and lighter weight than glass.
About the Author
Theresa Clement is a handy designer who has been improving homes for more than 20 years. Starting with her work at architecture firms, she has authored DIY books; writes for Architect magazine, JLC magazine, and Remodeling magazine; worked as a design producer on makeover shows; and now works with her carpenter husband on private homes and their home improvement brand, MyFixitUpLife.

