We may earn revenue from the products available on this page and participate in affiliate programs. Learn More ›
Last summer, for the first time in more than 10 years, I moved into a house with central air conditioning. I assumed that meant I would be able to sleep comfortably in a nice cool bedroom. I soon discovered that was not the case and found myself overheating upstairs while my housemates froze in their lower-level bedroom. I thought our problems were solved when I got a portable air conditioner. However, another issue arose when I realized that the house has casement (or crank) windows, a setup that isn’t compatible with portable AC unit venting systems. I was not to be deterred—there’s surely a solution for this, right?
Why the Included Venting Supplies Don’t Work in a Casement Window
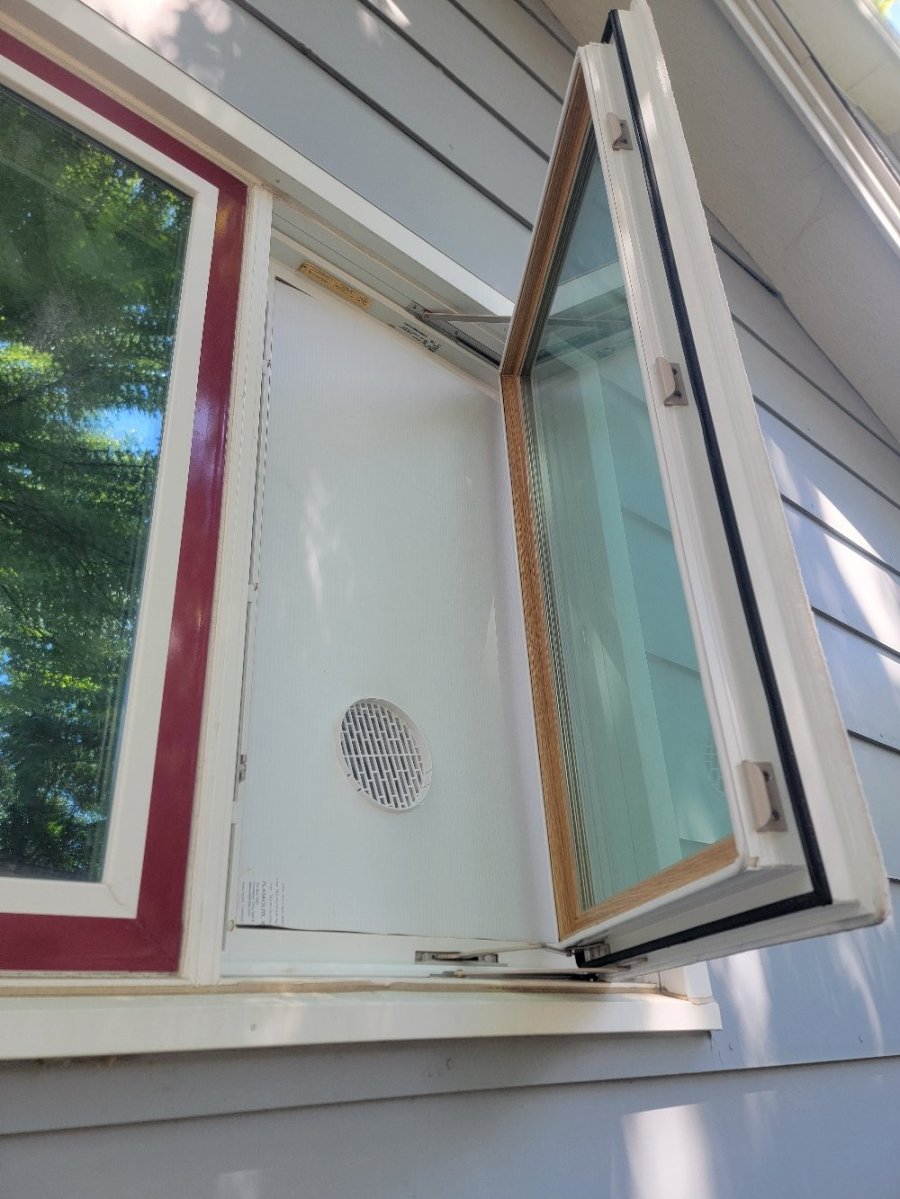
Window and portable AC units are a great option to help control the costs of cooling your home. They’re also ideal for people who live in places without central AC. However, their venting is designed to work with sliding windows only. Crank windows are built in such a way that there is no way for the included exhaust hose window panels to be secured. The panels only work when the window opening can be adjusted and the sliding window can provide pressure to hold the panels in place.
For a vent to be installed in a casement window, the entire window opening has to be covered. Since not allowing an AC unit to vent is counterproductive, I knew I needed to figure out how to create a venting setup that would work with my casement window.
Existing Solutions Are Either Expensive or Flimsy
Knowing I wasn’t the first person to deal with this issue, I went about researching my options for venting my portable AC. I found several solutions, but there were none that really worked with my budget, skill set, and needs.
A common suggestion is plexiglass. While this looks really nice, a sheet of plexiglass the size I needed costs several hundred dollars, not to mention that I didn’t have the tools or skills necessary to cut plexiglass.
On the other end of the spectrum for both cost and skill was the use of cardboard. While it’s cheap and easy to DIY, I know cardboard wouldn’t stand up to any sort of weather and would collapse at the first sign of water.
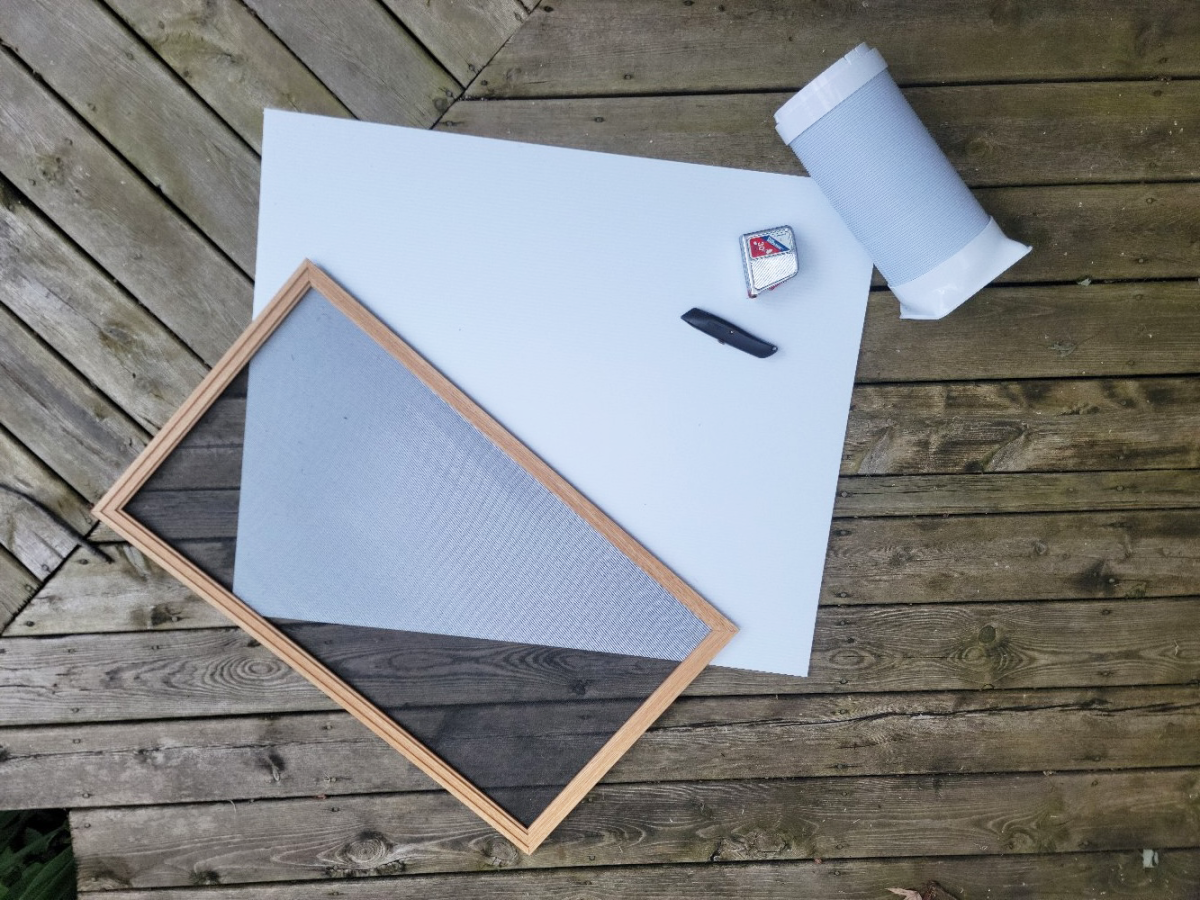
Nothing I found in my research seemed workable, so I decided to ask a professional. I reached out to Jon Thomas, a district building engineer for YMCA of the North, for advice on the best material to use that would be cost-effective, durable, and easy for me to work with. His suggestion? Corrugated plastic, an inexpensive cardboard-like sheet that is both sturdy and water-resistant.
How I Made a Casement Window Exhaust Covering
I found that the best way to make sure that my window cover was going to fit correctly was to use the window screen as a measurement guide. I also recommend cutting the corrugated plastic long, as the edges can compress slightly when pressed into the window frame.
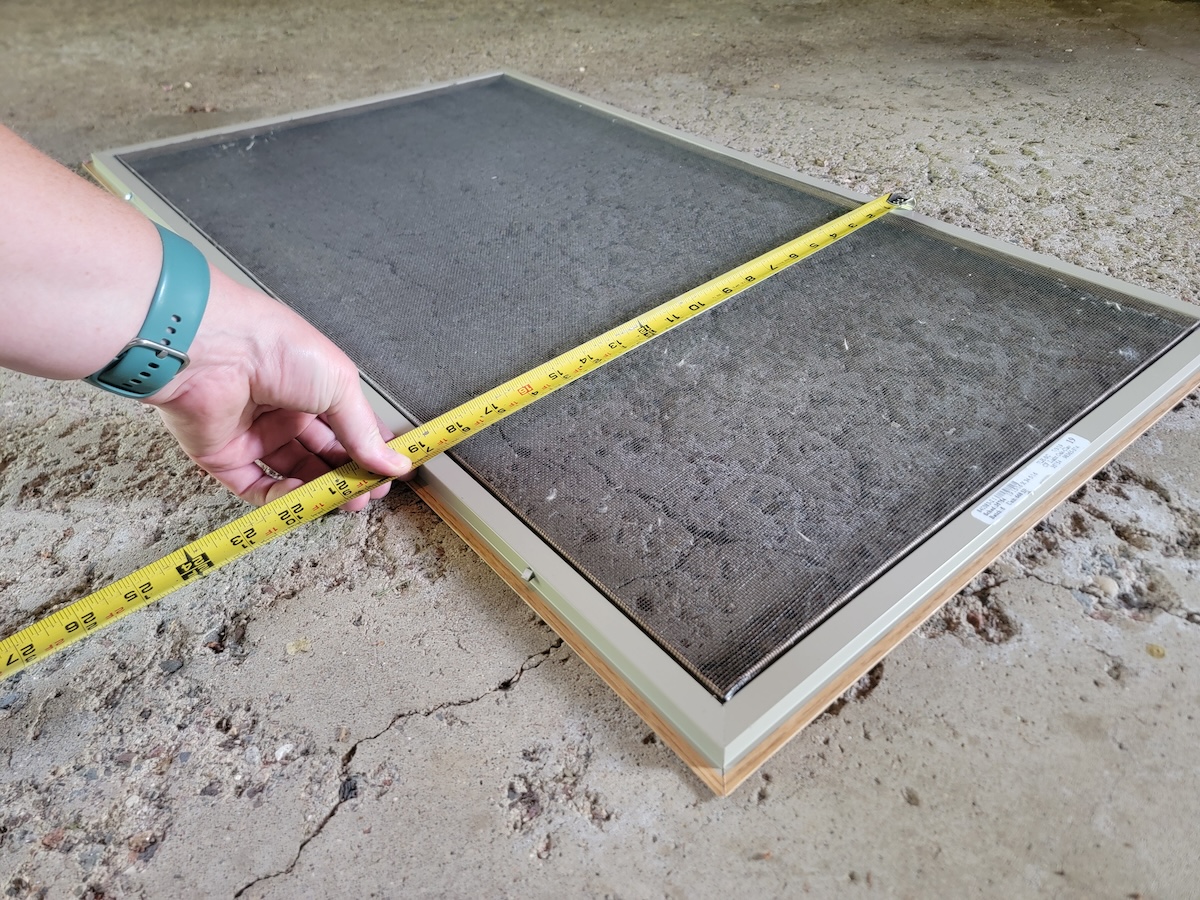
I used a measuring tape and a craft knife to cut down the sheet to fit the window. Then I used my AC unit’s exhaust hose to measure the size I needed to cut for the vent hole. While I used the outside measurement to mark the location, I cut slightly inside of the measurement so that I knew the hose would fit snugly, ensuring it would not only stay in place but also not leak.
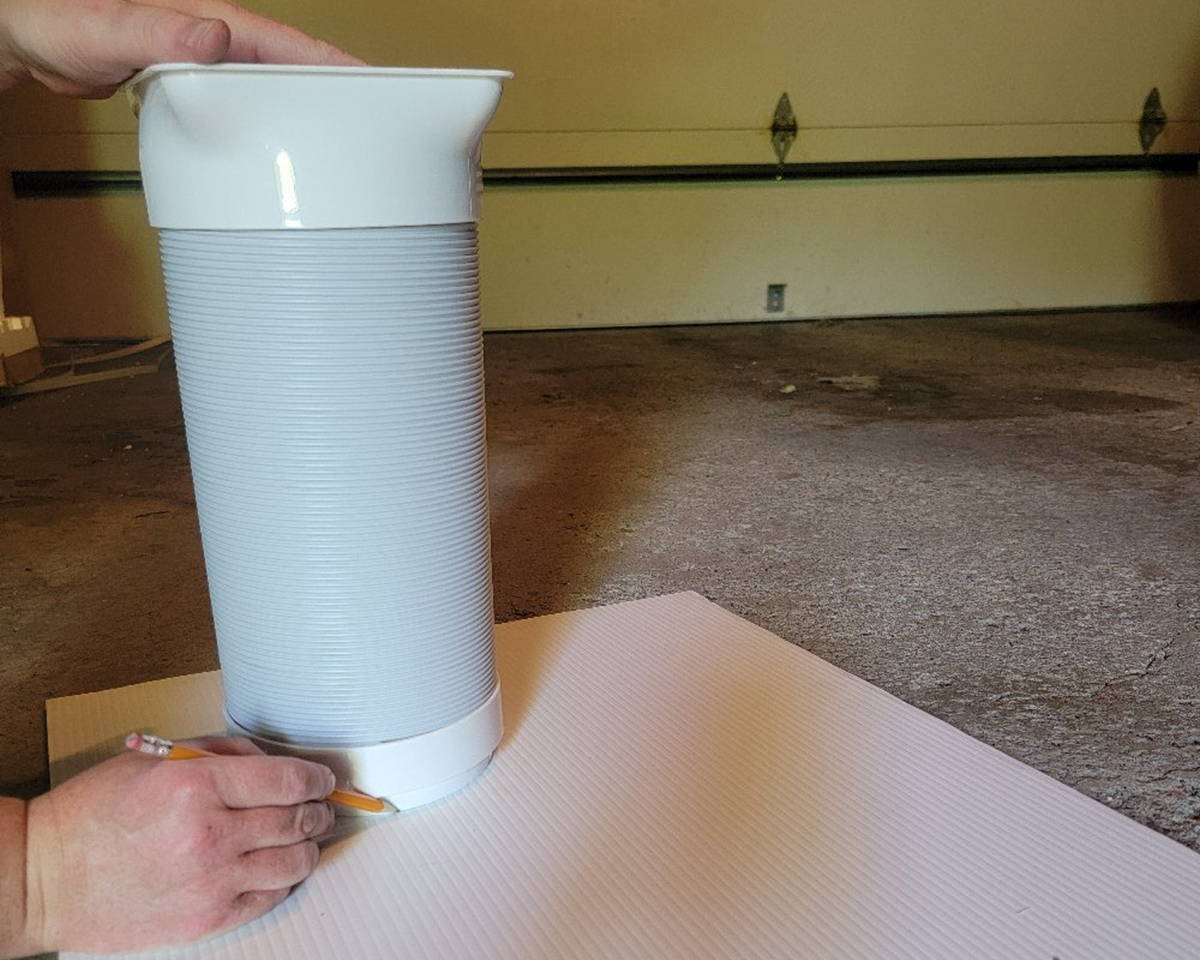
When choosing the location for the hole, I needed to take into account the height of the portable AC’s exhaust outlet, the placement of the window crank, and the angle needed for the hose.
Once everything was cut out, I inserted the output end of the exhaust hose into the corrugated plastic sheet; then I fit the assembly into the window casement where the screen would usually be located.
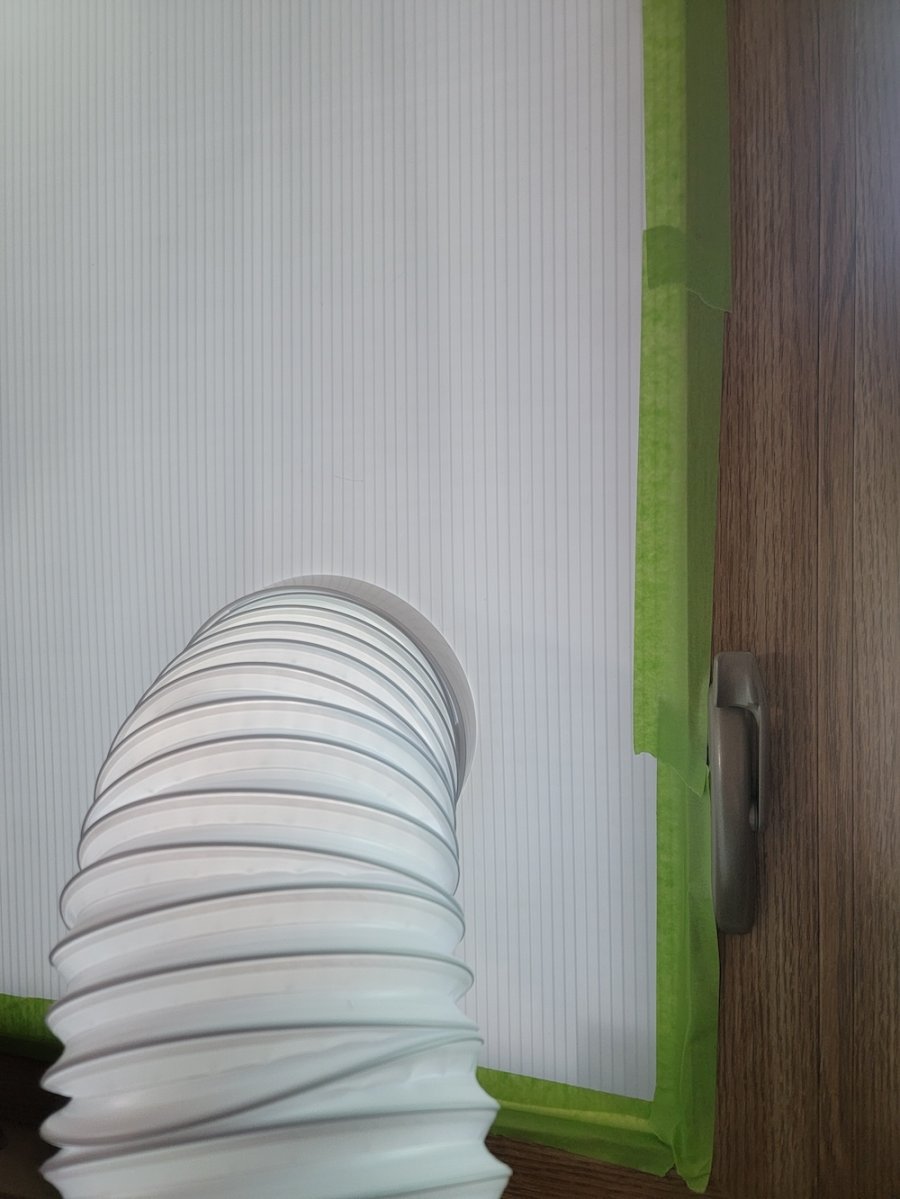
To both secure the plastic in place and cover any gaps caused by uneven cutting, I used masking tape along the outside to attach it to the window frame. Just like that, I had created a water-resistant AC venting solution for my casement window!
