
We may earn revenue from the products available on this page and participate in affiliate programs. Learn More ›
Sooner or later, most of us need to patch drywall, whether for purely cosmetic reasons—filling nail holes, for example—or for comfort or safety—say, a hole has left wiring exposed. Although accomplishing the latter requires a greater investment of time, rest assured that a do-it-yourself solution exists, no matter the scale of the repair. Read on for guidelines for patching drywall in small-, medium-, and large-size projects.
Patching a Small Area
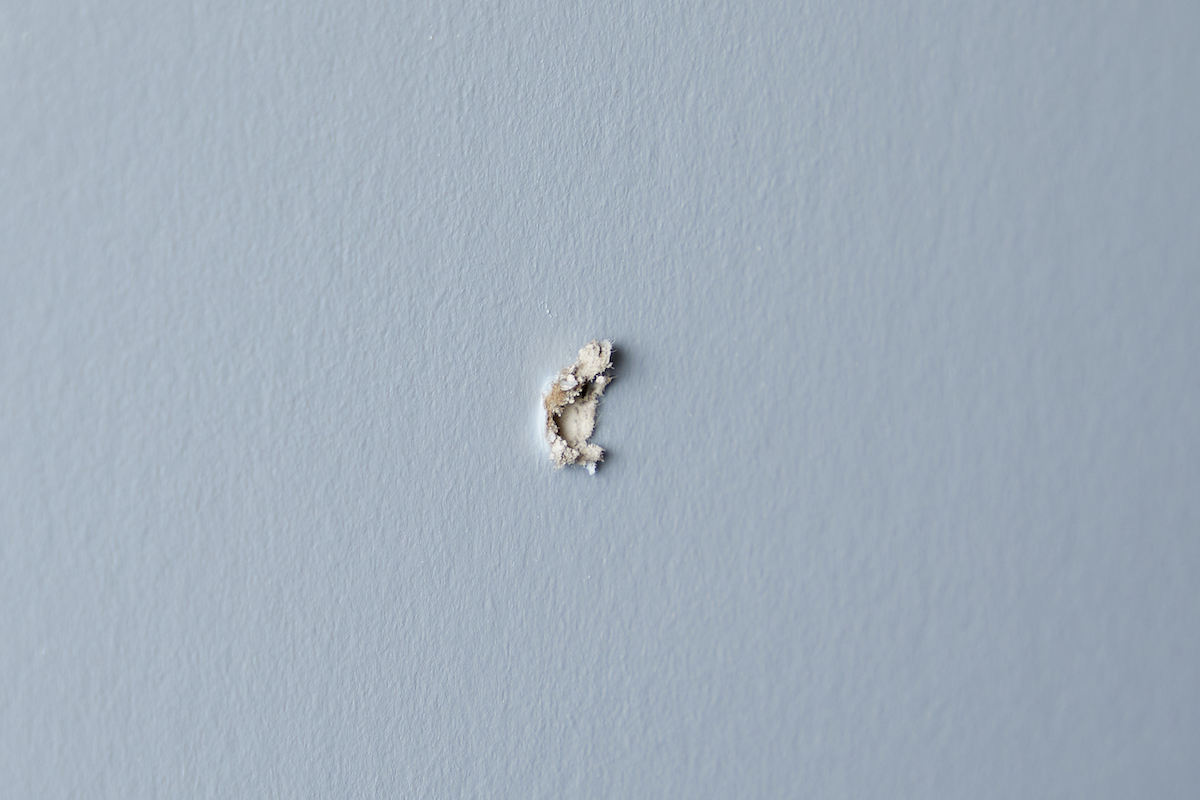
The smaller the hole, the easier it is to patch. This DIY should only take you a few minutes, not including drying time.
SUPPLIES
Sandpaper or sanding block
Spackling paste
Putty knife
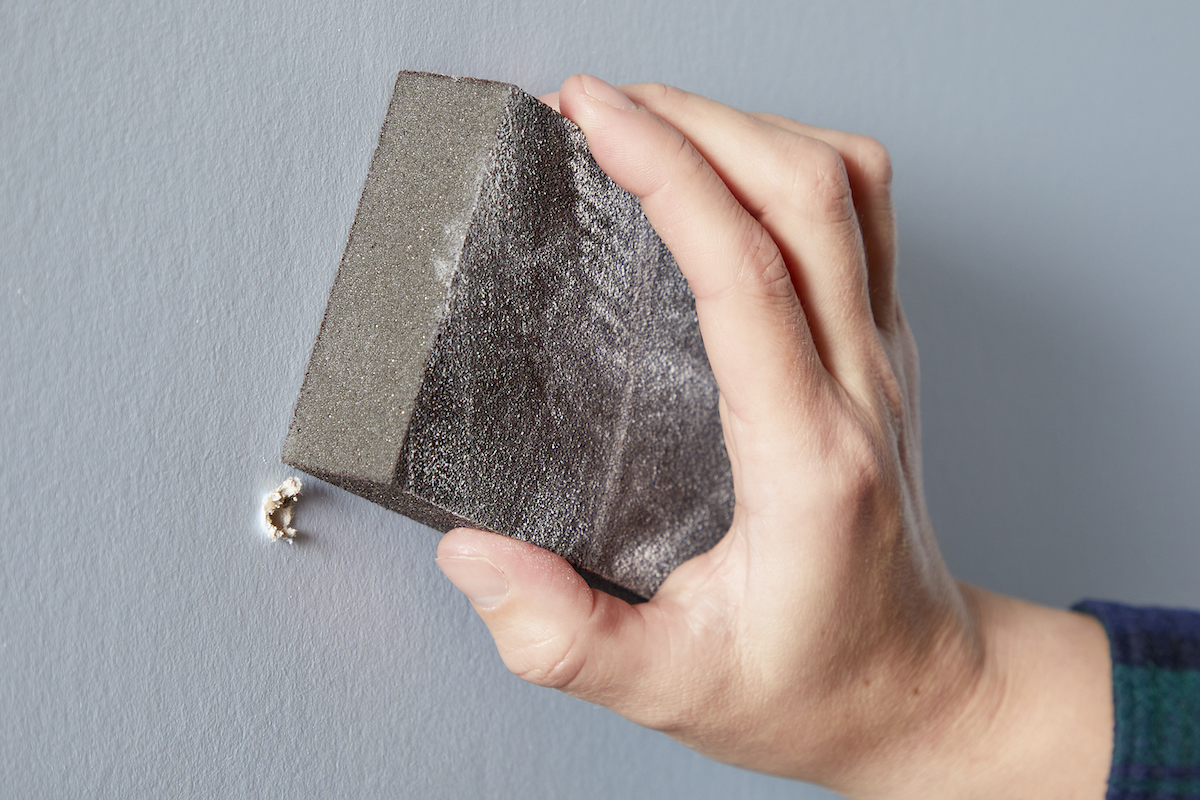
Step 1: Start the process by sanding the area smooth.
Step 2: Load a bit of spackling paste onto your putty knife and apply the product directly to the hole. Work in enough of the paste so that it leaves a small mound over the hole, then press the flat side of the knife firmly against the mound in order to flatten it.
Step 3: Finally, swipe the blade in a broad motion across the repaired area, leaving the filled-in hole perfectly level with the finished drywall.
Step 4: Allow the spackling sufficient time to dry. Dry times vary, so refer to the manufacturer’s instructions for an accurate estimate. Sand lightly when dry.

2 Brilliant Wall Patching Hacks #diyhacks #homeimprovement #homerepair #homehacks #tipsandtricks
Need help with drywall repair?
Maybe it's time to call in a pro. Get free, no-commitment repair estimates from drywall specialists near you.
Patching a Medium-Size Area
If you want to patch a somewhat larger hole—an area with a diameter of 1 or 2 inches—the process becomes slightly more complicated, if only because it involves a material you might not have on hand: mesh tape. (You can buy mesh tape either as a roll or as a precut square.)
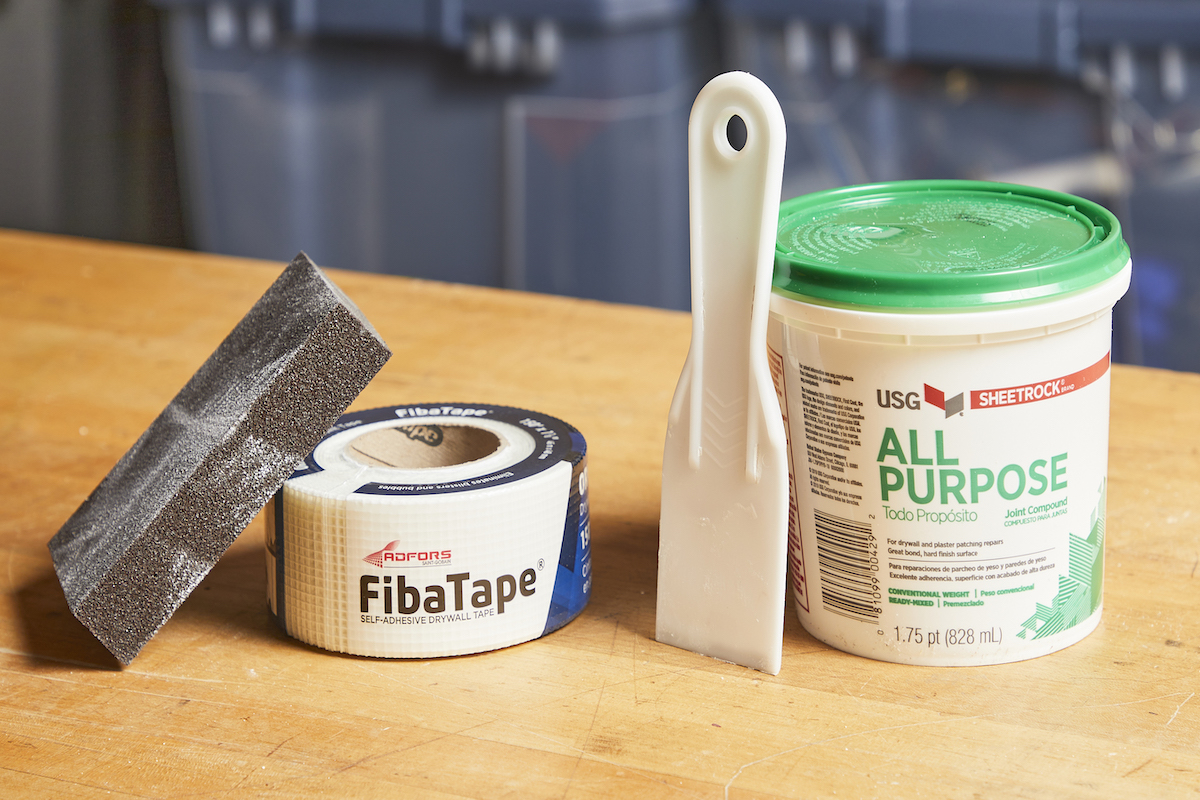
SUPPLIES
Sandpaper or sanding block
Putty knife
Joint compound
Drywall mesh tape
Step 1: Sand the area to be patched with sandpaper or a sanding block.
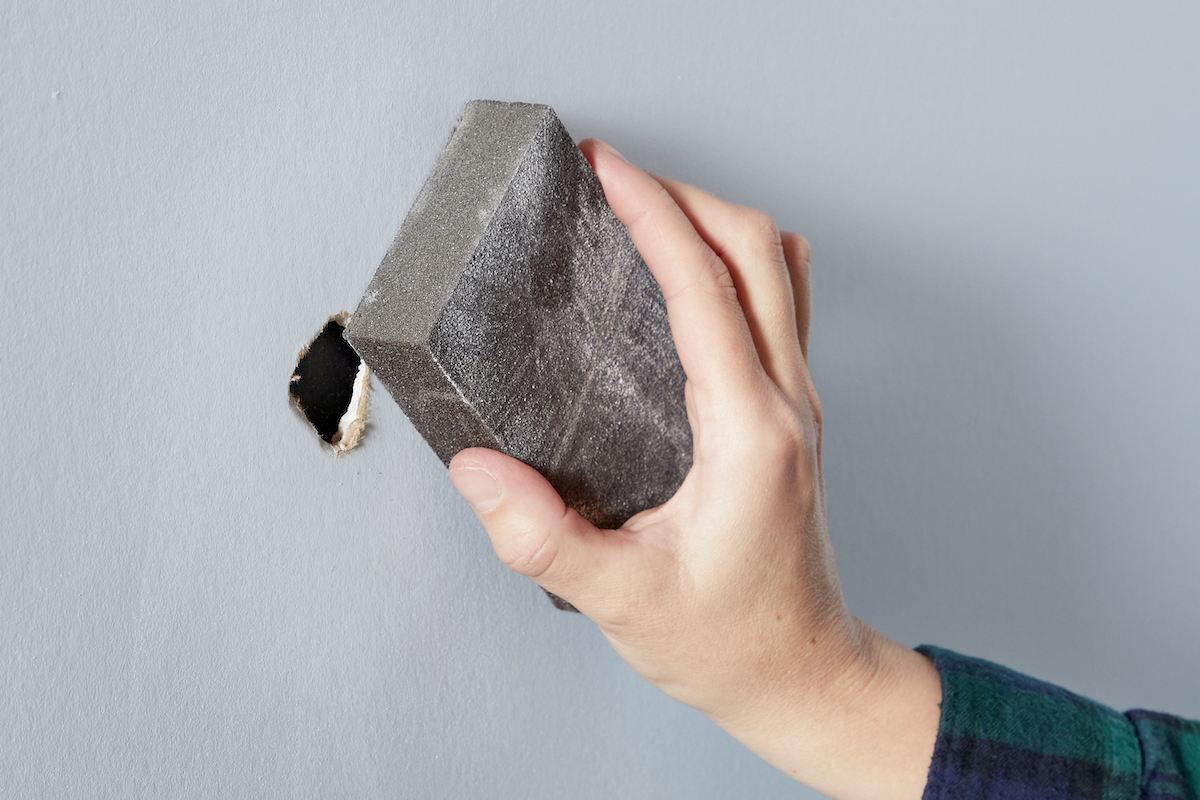
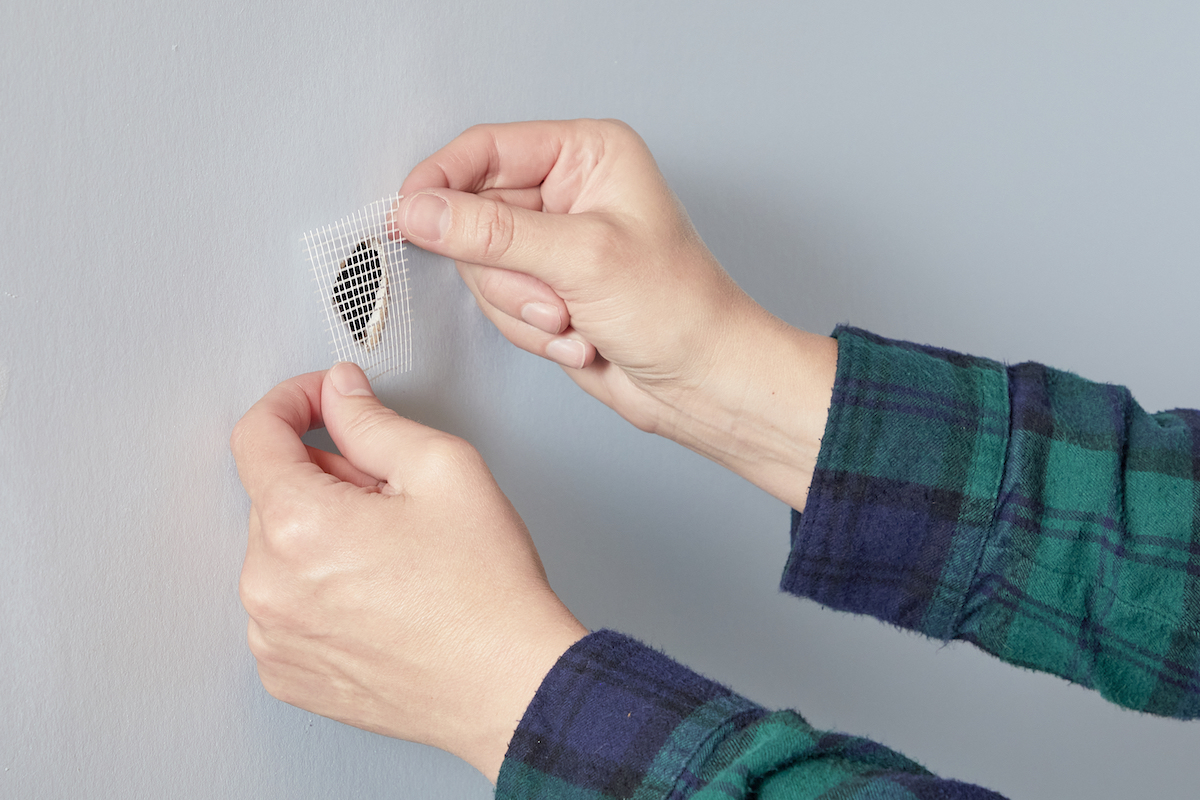
Step 2: Completely cover the hole with mesh. This now becomes the base to which you’ll add joint compound, a product that goes on like spackling paste but achieves a stronger result.
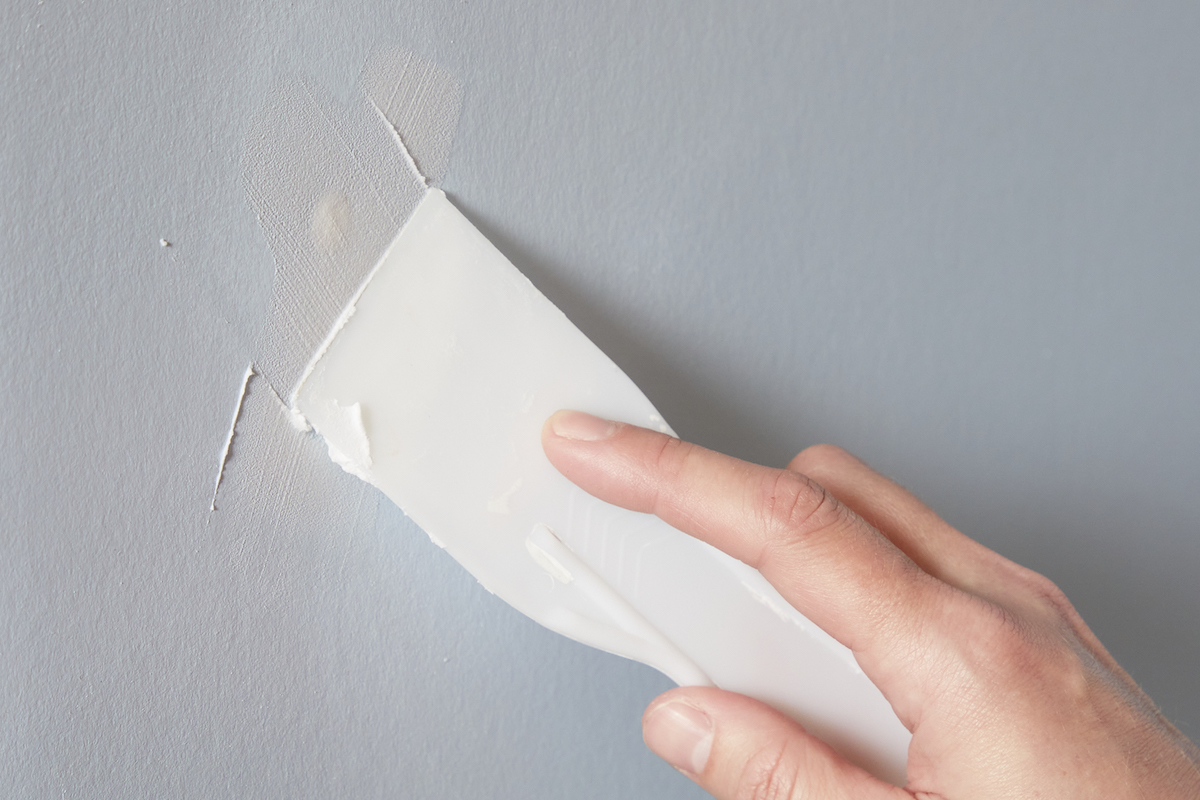
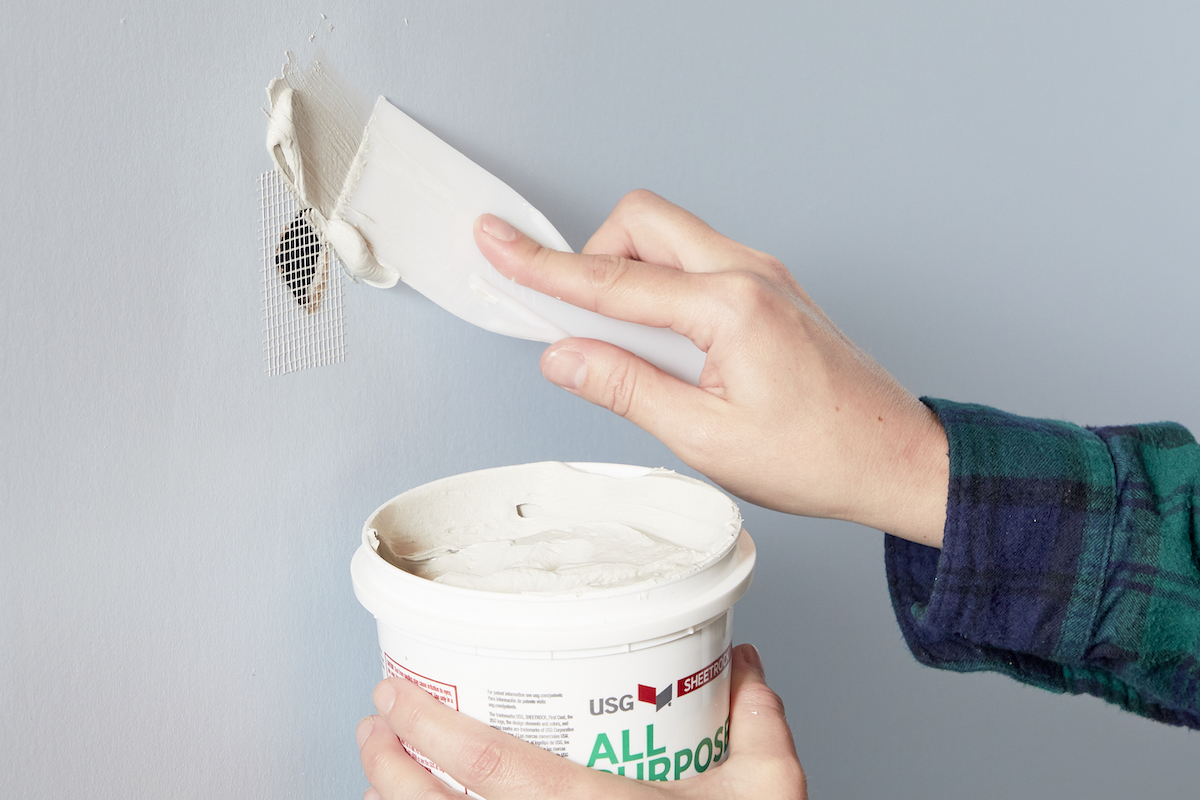
Step 3: As you spread the joint compound, pay special attention to the seams where the mesh tape meets the surrounding drywall. Once you can no longer see the tape, use the putty knife to flatten the mounded joint compound, then scrape the surface in wide, smooth side-to-side movements that create an even finish.
Step 4: Finally, allow the joint compound to dry for about 8 hours—consult the manufacturer’s directions for guidance on the product you’re using—before sanding and repainting the wall.
Patching a Large Area
A larger patch involves a commensurately greater commitment of time and effort to complete. In fact, the patching process here is not very different from the one that was used to install your drywall in the first place.
SUPPLIES
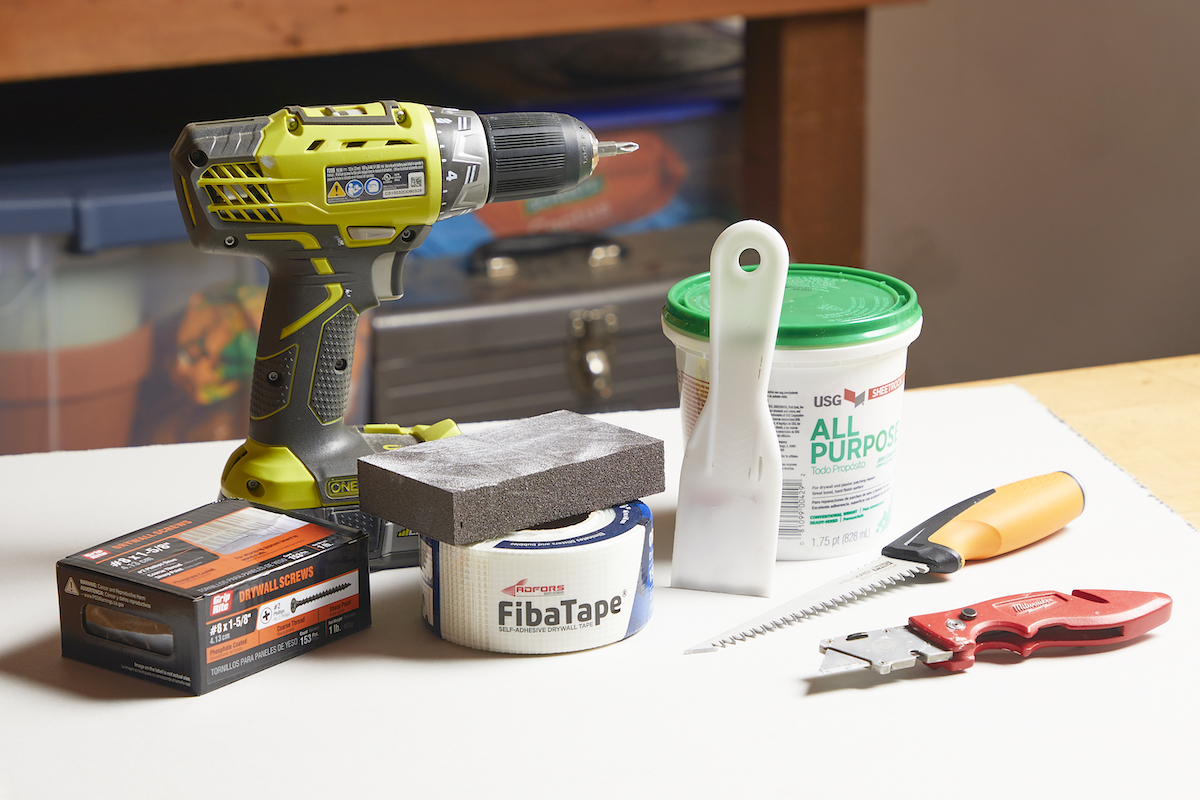
Drywall panel
Utility knife
Drywall saw
Drywall screws
Screwdriver
Drywall mesh tape
Putty knife
Joint compound
Sandpaper or sanding block
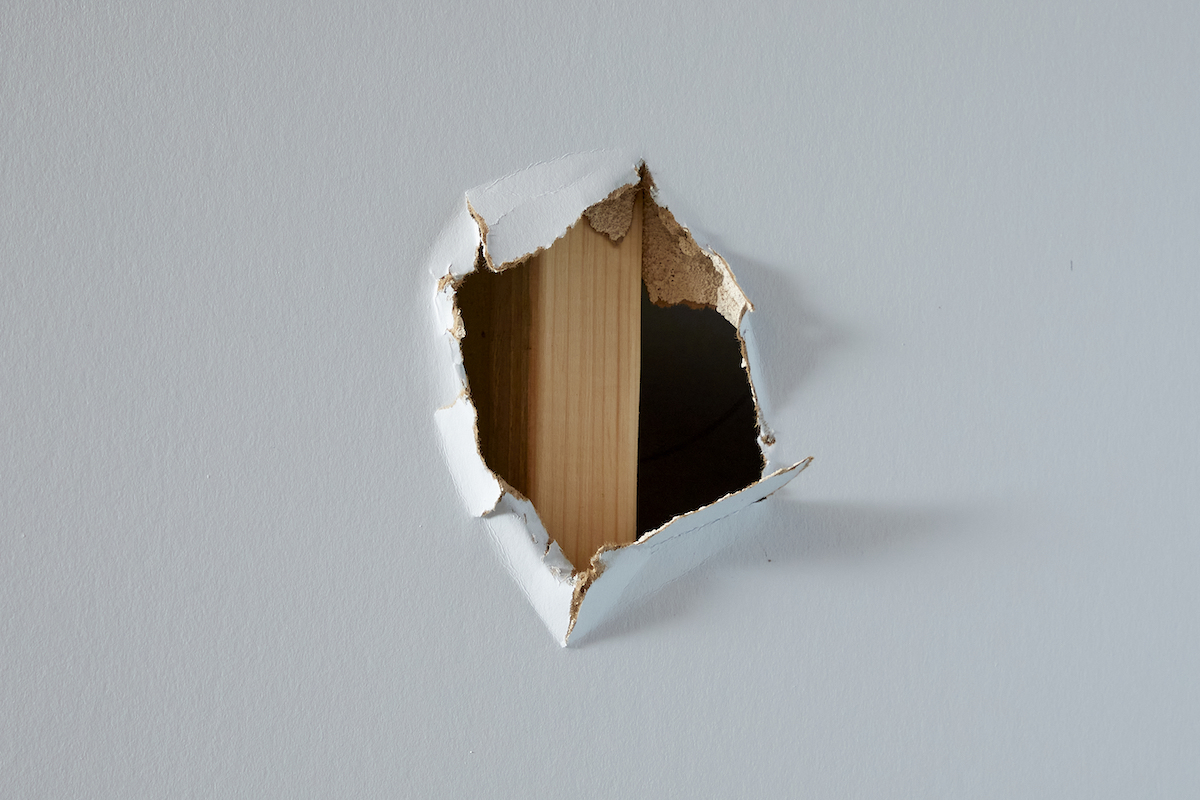
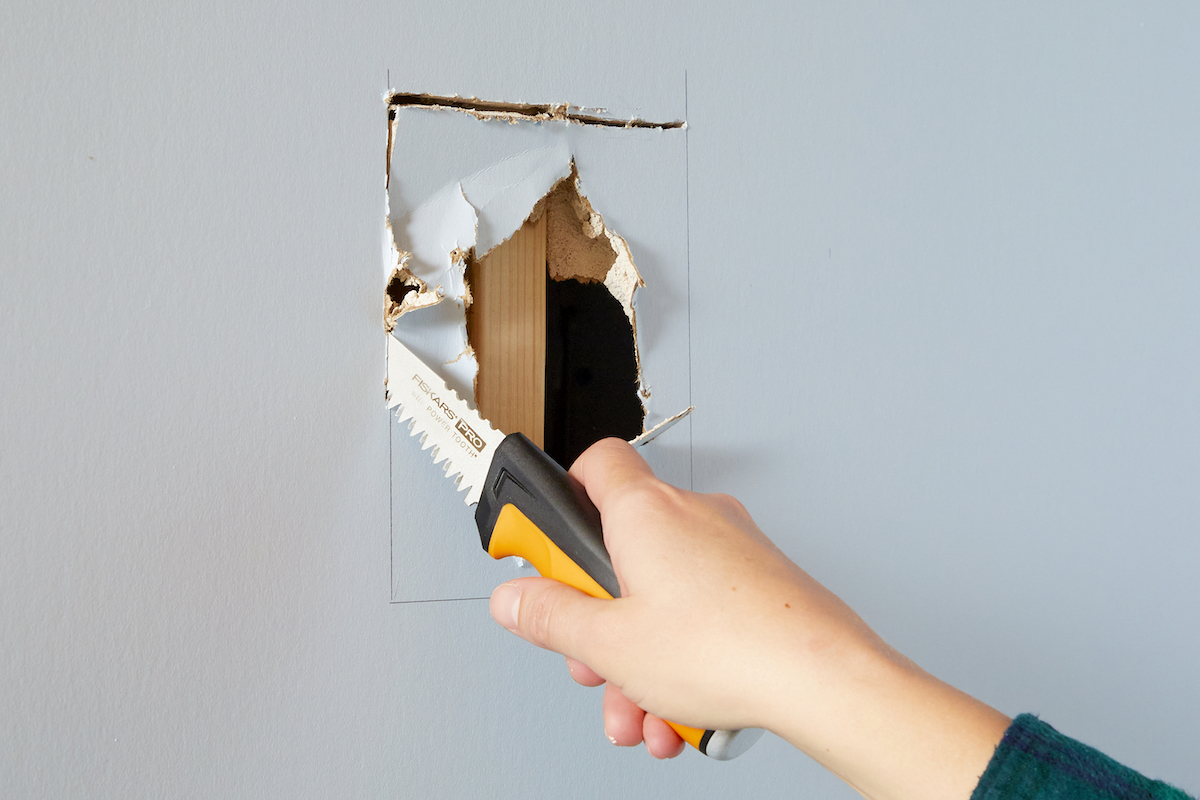
Step 1: Use a drywall saw to cut evenly around the problem area. You should be left with a hole that’s rectangular in shape. Use a utility knife to clean up the edges, if necessary. If possible, make your hole big enough to expose one of the wall studs. Failing that, you’ll need to run a wooden member horizontally between the two closest studs. Why? You’re going to fill the hole in the wall with a piece of new drywall, and that piece needs a surface to which it can be securely attached.
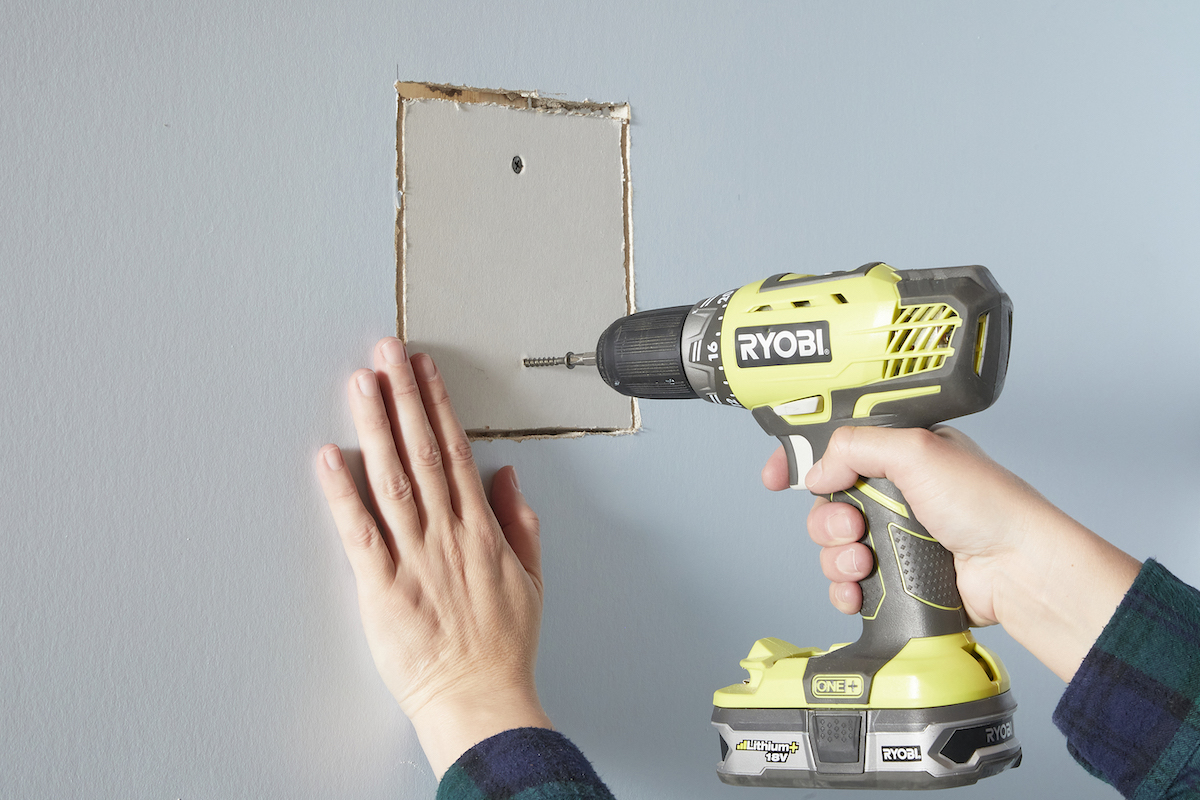
Step 2: Use a drywall saw to cut out a section of the drywall panel. Measure and cut carefully, as the piece must fit perfectly into the rectangle you’ve cut in the wall. Once you’re certain that you’ve got a snug fit, use drywall screws to attach the new drywall to the stud (or horizontal member).
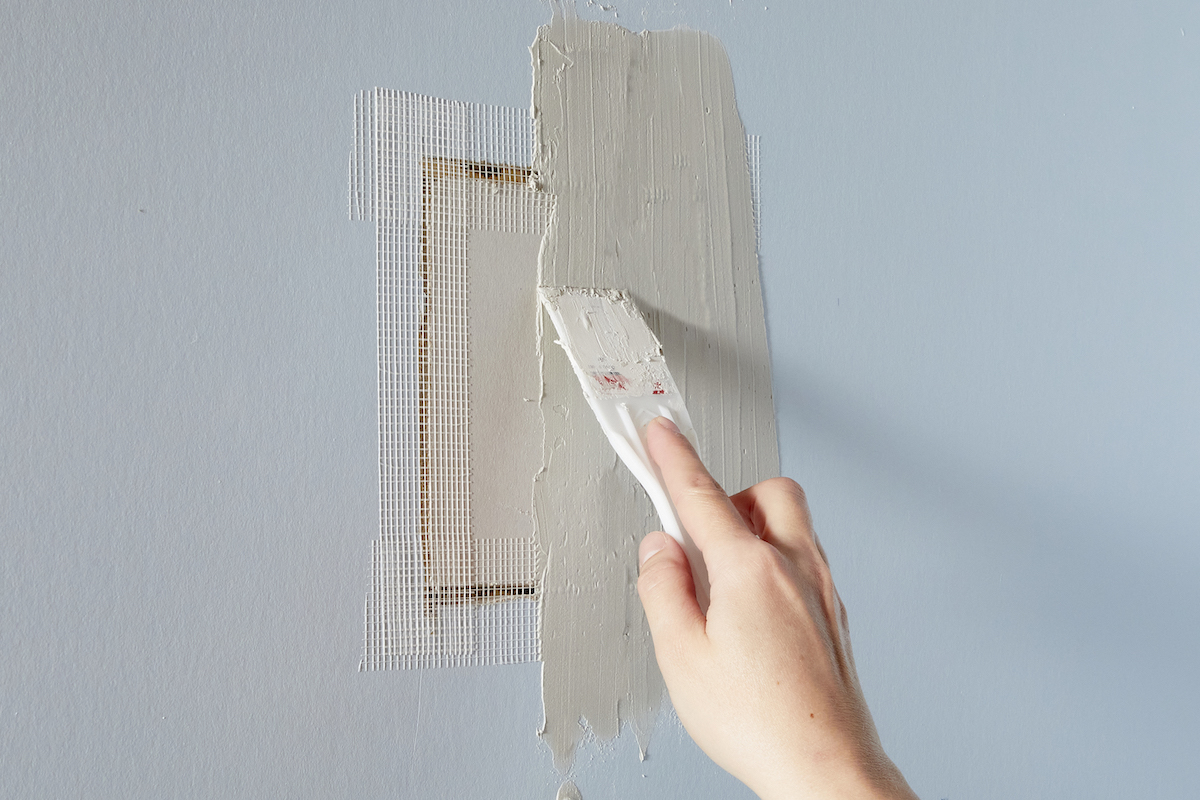
Step 3: Apply mesh tape over all the seams between the patch and the existing drywall.

Step 4: Load your putty knife with joint compound and proceed to cover the mesh completely. (Don’t forget to smooth compound over the drywall screws, too.) Use the blade of the putty knife to flatten out the compound in any spots where it’s mounded, then scrape across the seams in wide strokes, either side-to-side or top-to-bottom, depending on the orientation of the mesh.
Step 5: Allow the compound to dry for about eight hours before you begin the final stage: sanding the patched area and repainting the freshly repaired drywall.
