We may earn revenue from the products available on this page and participate in affiliate programs. Learn More ›
Maybe you dream of upgrading to a modern jetted model, or simply want to switch to a stall shower to gain square footage—whatever your reason, that old bathtub has got to go. While a cast iron tub of yesteryear can weigh as much as 500 pounds, removing it yourself (well, with three or four strong friends) is entirely doable. You’ll need the right tools, of course, and some plumbing know-how is helpful when disconnecting drainage and water supply lines. But if you follow the procedures outlined here, the process of removing a bathtub should go smoothly.
Before starting, protect the floor from damage by laying down sheets of plywood. And keep in mind that your junk may be another homeowner’s joy: Cast iron claw foot tubs can fetch as much as $800 on the salvage market, and the feet alone could net you upwards of 40 bucks!
Tools & Materials
Bobvila.com may earn a commission from purchases made through these links.
- Screwdrivers
- Needle nose pliers
- Pipe wrenches
- Water pump pliers
- Saw with metal blade
- Grinder with diamond bit
- Chisel
- Utility knife
- Crowbar
- Safety goggles
- Sledgehammer
- Rust-removing solvent
- Pipe plugs
- PVC cleaner
- PVC glue
- Plumber’s putty
- Plumber’s tape
- Push-to-connect end caps
Step 1
Shut off the water supply. Freestanding models generally have a shutoff valve on the exposed line that runs to the faucets, but for other bathtubs you may need to turn off the H2O to the bathroom or even the entire house. Open tub faucets and another faucet in the house to bleed the water pressure off the lines. When no more water runs from the tub faucet, you’re ready to move on.
Step 2
Remove the overflow and stopper assembly. These vary slightly by bathtub, but typically the overflow consists of a plate with one or two screws that holds a stopper lever. Once the plate is unscrewed and removed, slip the lever hook off the linkage bar with your fingers. Next, disconnect the stopper from the drain by unscrewing or pulling, depending on type.
Step 3
Remove the drain flange with a dedicated drain flange removal tool, or stick a pair of needle nose pliers in the drain flange, twist counterclockwise, and pull. If yours is a freestanding tub, gather your able-bodied buddies: You might be able to lift it up and off the drainpipe at this point. For built-ins—or if the drain flange on a freestanding tub is stuck—proceed to the next step.
STEP 4
Detach the drainpipe. For a freestanding tub, reach underneath and cut through the drainpipe close to the bottom of the bathtub with a reciprocating saw that is fitted with a metal blade. For built-in tubs, you’ll have to gain access from below, through a basement or crawlspace, to disconnect the drainpipe. Use pipe wrenches or water pump pliers to grasp and twist the pipe loose at a connection. If the joints are glued PVC, cut the line with a reciprocating saw.

STEP 5
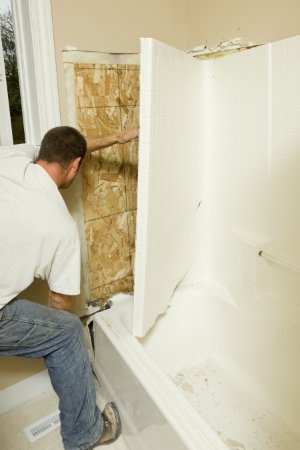
Cut away a horizontal strip of wall about 6 inches above the bathtub to reveal the tub flange, and remove any screws that secure the flange to the wall studs. You can use a reciprocating saw to cut wallboard, but take care not to cut the studs or any mechanical elements, such as wires or pipes that might be in the stud spaces. If the wall is tiled, use a grinder with a diamond blade to cut through a horizontal grout line and then pop off the individual tiles below with a chisel.
STEP 6
Cut away caulking around the bathtub with a utility knife, and then pull the tub out and onto the plywood. If the bathtub sticks, carefully pry it loose with a crowbar. As soon as you pull the bathtub, stuff a large rag in the top of the now-open drainpipe to block smelly sewer gases; this will also ensure nothing gets accidentally dropped into the line. In high concentrations, sewer gases can be toxic and flammable, but the small amount that filters out of the tub line will be more obnoxious than hazardous.
STEP 7
If the old bathtub has value and you wish to salvage it, remove the feet (which should twist off) counterclockwise. If rusted in place, spray with a rust-removing solvent to loosen. Then carry it out with the help of your friends. Take some measurements first, however: You may need to pull hinge pins and remove a door to gain enough space to fit the bathtub.
If the tub is worthless to you, cover it with an old, heavy towel or blanket and put on goggles and a long-sleeve shirt for extra protection from flying chips. Then break the tub into manageable pieces with a sledgehammer. You can also cut steel, fiberglass, and plastic tubs into smaller pieces with a reciprocating saw.
STEP 82>
If you have no plans to install a new bathtub in the old one’s place, you’ll need to terminate the water supply and drain lines. Terminating a drainpipe involves removing the drain trap and the drainpipe back to at least the nearest plumbing connection. Then you can install a cap or plug on the pipe. The process will vary slightly depending on your piping:
- For PVC, cut the pipe with a reciprocating saw, and then clean the pipe end with PVC cleaner. Next, apply PVC glue to both the end of the pipe, and on the inside of a matching PVC cap, and slip the cap over the end of the pipe.
- For galvanized pipes, use pipe wrenches or water pump pliers to loosen the pipes at a joint, and then install a corresponding cap or plug, using plumber’s putty and plumber’s tape to hold the cap in place. If you run into a cast iron trap (very hard, dark metal), or a lead trap (so soft, you can nick it with a knife) that connects to a cast iron drainpipe, call a plumber to cut it to avoid breakage. It’s difficult to cut cast iron pipe without specialized tools.
STEP 9
In order to terminate the water supply lines, you need access to the stud space behind the faucets. If the tub installer did not put in an access panel in the room on the opposite side of the faucets, you’ll have to open up that section of the wall with a reciprocating saw in order to reach the water supply lines.
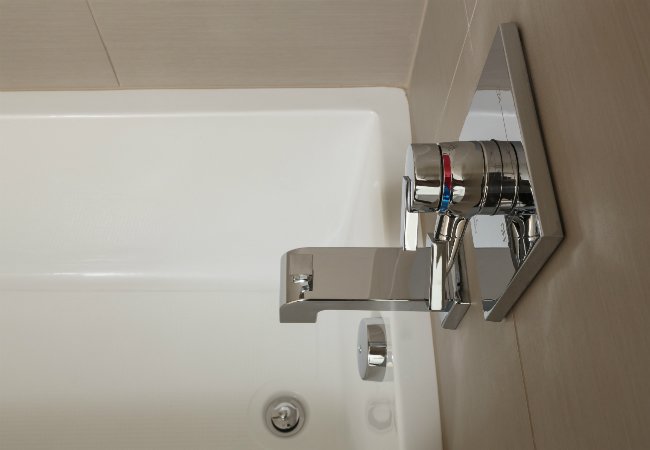
Once you have access, remove the faucet(s). Pop off the caps with a flathead screwdriver, removing the screws. Then use a pipe wrench to remove the faucet sleeves and stems. The spout may have a setscrew on the underside, or the whole thing might twist off, counterclockwise. After cutting the water supply lines, cap them with corresponding push-to-connect end caps.
With the tub out and both water supply and drain lines successfully sealed, you’re free to repurpose all of that newly opened square footage however you’d like! Whether you plan to turn the room into a half-bath with storage for linens or keep renovating until the entire space is a dreamy walk-in closet, rest assured that the bulk of the work (literally) is done.


