We may earn revenue from the products available on this page and participate in affiliate programs. Learn More ›
We all have those “What was I thinking?” moments, and when it comes to decorating, those mistakes often take the form of tacky wallpaper borders. While wallpaper can add beautiful pattern or textural interest to a room, it can also quickly date it, leaving you ready for a change sooner than you may have planned.
But don’t fret! Removing a wallpaper border is a lot simpler than the sticky business may seem, and it requires no more than a few inexpensive tools and a little patience. Continue on to learn how you can replace those unforgiving florals and make way for a more up-to-date accent in no time.
Tools & Materials
Bobvila.com may earn a commission from purchases made through these links.

Step 1
Move all the furniture that you can out of the room, and protect the floors and any remaining furniture with a drop cloth to make cleanup a cinch.
Some wallpapers will come off easily without first needing to be saturated with a stripper. To test, simply try to lift a corner of the paper with a putty knife. If it comes up easily, you can continue removing the border in sections without worrying about the extra step of getting it wet.
If it doesn’t come off cleanly, you’ll need to start the removal process by using a wallpaper scoring tool to make small holes or slits in the wallpaper. Go over the entire border in a random pattern, keeping in mind that the more holes you make, the easier it will be for your stripper to seep in and loosen the wallpaper glue.
Step 2
Pull on a pair of work gloves before you get to work softening the paper with solution. Fill your spray bottle with the wallpaper stripper of your choice, diluting it with water if the instructions call for it.
Note: Many swear by a product called the World’s Best Wallpaper Remover, reporting that it truly lives it up to its name. You can buy it directly from the manufacturer, Chomp Solutions, or through an online retailer like Amazon.
Once you have prepared the solution, spray it on one section at a time, continuing until the entire border is completely saturated. Allow several minutes of soaking time to help loosen the glue.
Step 3
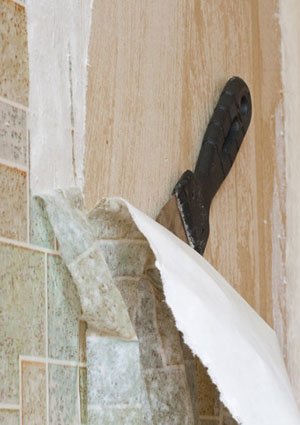
Begin removing one section of wallpaper border by lifting the corner of the border using just the tip of the scraper or putty knife. Then, using your hands, grasp the edge and do your best to pull off as much paper as possible in one continuous strip. If any of the border doesn’t come off easily, spray again with your stripper and repeat the process until the difficult sections have been fully removed.
Step 4
Still stuck with stubborn spots of wallpaper? Try using an electric steamer (you can rent one at your local home center). Steaming further softens the glue. From there, you can attempt another round of scraping with a putty knife and prying with your fingers.
Step 5
After all the wallpaper border has been removed, wash the entire area with warm water and a scouring pad to remove any remaining glue. Let the wall dry completely, and it will be ready for its next makeover!

