We may earn revenue from the products available on this page and participate in affiliate programs. Learn More ›
Removing wallpaper is laborious. The process takes a great deal of energy and time. And lo and behold, even once you think you’re finished, you’re not. Stubbornly positioned between you and a smooth, clean wall, there still remains a smattering of stubborn wallpaper glue.
Don’t worry, you can get it off. In fact, anyone can learn how to remove wallpaper glue. It doesn’t take any advanced skills or exotic tools. But much like the work you’ve done already to get this far, removing wallpaper glue requires patience and commitment.
When you’re ready to power through to the finish line, continue reading the step-by-step instructions for removing wallpaper glue.
Tools & Materials
Bobvila.com may earn a commission from purchases made through these links.
Guide to Removing Wallpaper Glue
Step 1: Clear the room.
First, before you begin to remove wallpaper glue in earnest, get all furniture and accessories out of the room. If you can’t move everything, at least protect it with a plastic tarp. Use another tarp to cover the floors.
As a further precaution, we recommend using painter’s tape to cover the electrical outlets in the room. In fact, it’s not a terrible idea to cut off power to the room altogether.
The last thing needed to prepare the work area: trash bags, and plenty of them. Things are about to get messy.
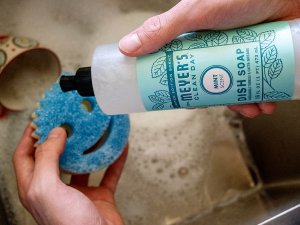
Step 2: Mix hot water with dish soap and baking soda, possibly even vinegar.
In a bucket, combine hot water, liquid dish soap, and a heaping tablespoon of baking soda. For particularly stubborn adhesive, add one cup of vinegar for every gallon of water used.
Step 3: Sponge the hot solution onto patches of wallpaper glue.
Next, soak a sponge in the solution, squeeze out the excess liquid, and gently rub the sponge over a small section of wallpaper glue.
Having done so, test the glue with your fingernail. You’ll notice that the wallpaper glue has softened considerably and seems willing to budge.
Continue applying the solution to the wall.

Tried-and-True Advice
“When I was removing wallpaper glue in my old apartment, I found the process could be a bit overwhelming, especially when the adhesive was stubborn. One thing I learned was to work in smaller sections rather than trying to tackle the whole wall at once. Not only does it keep the work more manageable, but it also helps the solution soak in properly without drying out too quickly.
Another trick I discovered is using a plastic spatula instead of a metal putty knife for the scraping. It’s gentler on the wall, and reduces the risk of gouging the surface. Trust me, it’s worth the extra patience!”
—Paul Rankin, Contributing Writer
Step 4: Remove wallpaper glue with a putty knife and cloth.
With a rag, try wiping a small section of glue off the wall. If it’s ready, a good portion of the glue will come right off. At that point, you can reach for the putty knife and scrape away the adhesive.
Because even a speck of leftover wallpaper glue can detract from a future paint job, it’s important remove wallpaper glue thoroughly and completely. Try and get every last bit.
With a clean cloth, use circular motions to wipe the softening solution off the wall. Move on to the next section and repeat the process in Step 3. One finished with the entire wall, let the room fully air out.
Step 5: Switch to a commercial wallpaper remover, if necessary.
If the wallpaper glue seems unfazed, consider purchasing commercial wallpaper remover, such as this fast-acting solvent from WP Chomp. It’s not usually necessary, but different installers use different types of glues, some more stubborn than others.
Step 6: Prep for painting, or restore the room to its previous state.
Remove the painter’s tape and the tarps, and replace the furniture in the room, unless you plan to paint the room. If that’s the case, you’re basically all set to continue working—if you have any energy left, that is!