We may earn revenue from the products available on this page and participate in affiliate programs. Learn More ›
Carpet feels great underfoot as long as it is properly cleaned, cared for, and maintained while it is in the home. Its padded surface tends to be more comfortable to stand and walk on than tile or hardwood. Carpeting can also help to insulate the floor, reducing the transfer of heat and noise between living spaces.
When carpet is installed, however, it needs to be stretched to fit the room. You can either hire a professional carpet installer to do the job or, or if you’re an experienced DIYer with the right tools, take the project on yourself.
Do-it-yourselfers can also restretch an existing carpet themselves and, after a few years of wear and tear on their carpets, may reach a point that they’ll need to do so. When carpet ages, it may start to buckle, wrinkle, ripple, or otherwise loosen and lift. The resulting bumps and wrinkles are unattractive and uncomfortable to walk on. If the deformations in the carpet are not corrected, the wrinkles and ripples can crease and cause lasting damage.
Use this informative guide to learn about the tools that you’ll need for this project, and how to stretch carpet with a carpet stretcher.
Signs That Your Carpet Needs Stretching
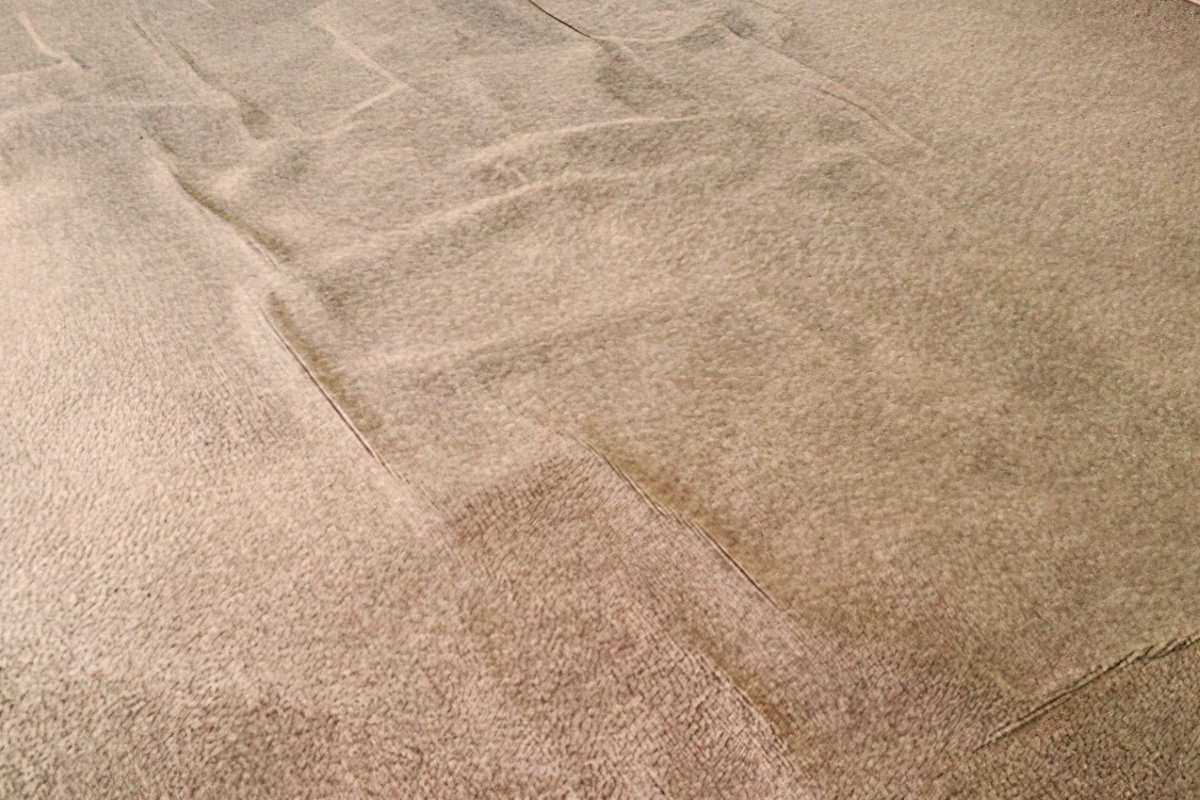
Before calling around to local flooring stores asking how much it costs to stretch a carpet (or how much it costs to rent the tools to do it yourself), determine if the carpet needs stretching. While a new carpet will need to be stretched to fit the room, an existing carpet requires stretching if the carpet has ripples, bubbles, bumps, wrinkles, or signs of buckling.
There are few reasons why a carpet may develop bumps or wrinkles, including high humidity, low-quality carpet and padding, or poor installation. It may also wrinkle and crease if it gets wet.
While carpet restretching cannot fix serious creases in the rug, it can usually help smooth them out. Generally speaking, the longer there are ripples, wrinkles, and bumps in the carpet, the greater the risk of permanently damaging it. If you do not have the skills or time to tackle this job, you can hire a professional for about $60 per hour or $0.30 per square foot.
RELATED: How To: Install Carpet and Transform Your Living Space
Carpet Stretching Tools
One of the reasons many homeowners and inexperienced DIYers call a carpet installation professional for a carpet stretching or carpet restretching job is that they do not have the right tools. Carpet stretching involves the use of two specialized tools: a knee kicker and a power stretcher.
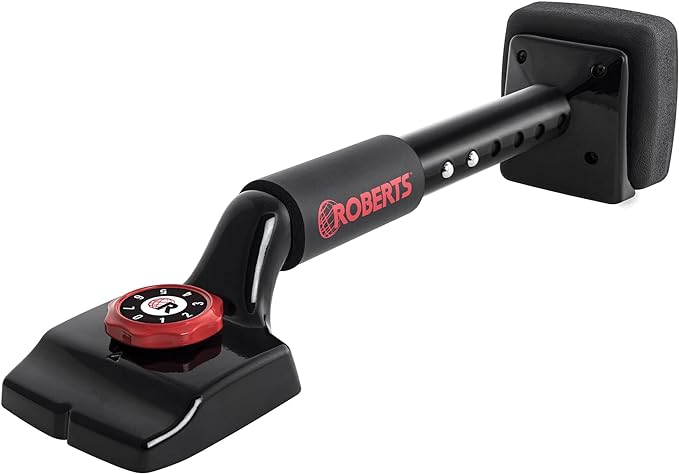
Knee Kicker: A knee kicker is a tool designed for small-scale carpet stretching jobs, but can also be used in tandem with a power stretcher to remove wrinkles and bumps in tight corners or spaces a power stretcher may have difficulty accessing. As the name implies, a knee kicker is used by hooking the face of the tool to the carpet, then the DIYer uses their knee to shift the position of the carpet, stretching it over the area.
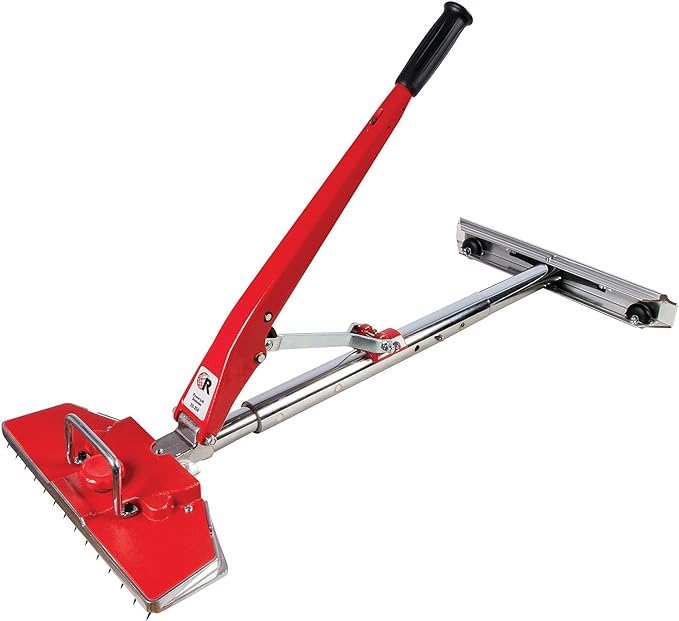
Power Stretcher: A power stretcher looks a bit like a mop, but it has sharp teeth that pierce the carpet pile and grab onto the carpet backing. The base of the tool should be positioned on the opposite side of any bumps, dents, or wrinkles in the carpet. When the DIYer presses the handle, the power stretcher extends, pushing the two ends apart and stretching the carpet.
Tools & Materials
Bobvila.com may earn a commission from purchases made through these links.
Project Overview
Working Time: 4 hours
Total Time: 5 hours
Skill Level: Intermediate
Estimated Cost: $50 to $100, depending on the cost of tool rental in your area
Before You Begin
Before starting this project, make sure you have all necessary tools on hand, including knee pads and work gloves. As you think through the project’s schedule, plan to take regular breaks to stand up and stretch out your legs and back. Otherwise, remaining in a crouched position can become uncomfortable and may lead to cramps, strained muscles, or lingering discomfort.
If you do not own a power stretcher, head to a local home improvement store that rents tools. Renting a power stretcher for one job is typically more cost-effective than purchasing the tool, which costs about $600. If you plan to use the power stretcher regularly, then consider adding this niche tool to your workshop. You can also rent a knee kicker and carpet cutter for a single carpet stretching or carpet installation project.
How to Stretch Carpet
Stretching or restretching a carpet improves both the look and feel of the floor, rejuvenating the appearance of an old carpet or simply stretching out a new carpet to perfectly fit the room. Smooth out wrinkles and bumps by learning the following steps for how to stretch carpet.
Step 1: Clear and clean the carpet.
It’s not easy to stretch a carpet with heavy furniture sitting on top of it, which is why the first order of business is to remove all furniture and other bulky items from the room to clear the space. Next, vacuum the entire carpet to remove dust and debris.
If it has been a while since the carpet was cleaned, take the opportunity to wash it with a carpet cleaner. Alternatively, you can hire a company for professional carpet cleaning if you don’t own or have access to a carpet cleaner.
RELATED: Testing the 7 Best Portable Carpet Cleaners for Spills and Stains
Step 2: Peel back carpet edges.

Make sure you are wearing work gloves to protect your hands from the carpet’s tack strips. Head to one corner of the room and use a pair of pliers to carefully pull back the edge of the carpet.
After lifting the corner of the carpet with the pliers, you can set the pliers aside and grab the carpet with your hands. Tug on the carpet to lift it up and off the baseboard tack strip until you have freed the carpet on three sides of the room. Leave one side in place to anchor the carpet while you work.
Step 3: Remove staples with pliers.
Grab the pliers to remove any staples or nails that are stuck in the carpet or padding. A flathead screwdriver or even a pry bar can remove staples or nails that are embedded deep in the material. As you work, make sure to pull gently and work slowly to avoid damaging the carpet fibers.
Step 4: Remove old tack strips.
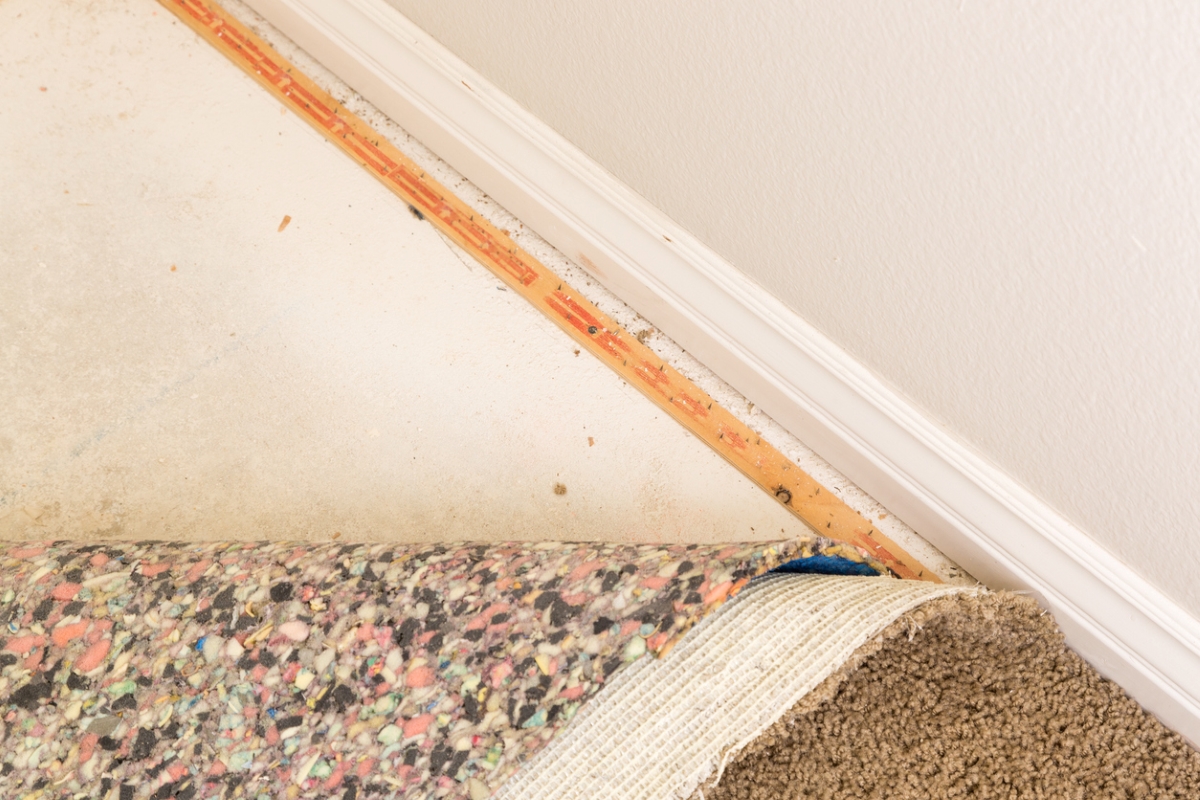
Check the condition of the existing tack strips. If the tack strips are in good condition, then you can leave them in place and move to the next step. If the tack strips are moldy, rotten, cracked, or otherwise damaged, then use the pry bar to remove the damaged tack strips. Keep the gloves on to protect your hands during this process.
RELATED: 7 Ways to Live with Carpet When You Can’t Rip It Out
Step 5: Clean the flooring under the carpet.
After removing the carpet, the base floor will need to be cleaned. Use a broom and vacuum to clean up any splinters, loose staples, dirt, or other debris. If you notice that the underlying plywood is loose or there are significant rises and dips in the subfloor, now is a good time to make any necessary repairs. Use a hammer and nails to secure loose plywood board and use a combination of sanding and filling compound to level the subfloor before proceeding.
Step 6: Install new tack strips.
If the carpet needs new tack strips, position them about ¼-inch from the wall where the old ones were removed. Use a set of tin snips to cut the tack strips to the proper length, then lay the tack strips down so that the gripping nails are pointed toward the wall. Sink the setting nails into the floor with a nail punch tool to secure the new tack strips.
Step 7: Lay carpet padding back down.
Lay the carpet padding down on the floor and check the edges. Ideally, the carpet padding should sit flush with the tack strips so that the carpet has clear access to the gripping nails. Use a utility knife or a carpet cutter to trim along the tack strip, then staple the padding to the floor. Drive staples in about once every 3 inches along the tack strips and any seams in the carpet padding.
RELATED: The Best Utility Knives, Tested and Reviewed
Step 8: Lay carpet in place.
Lay the carpet back down over the carpet padding. If you are putting in new carpet, then it’s a good idea to measure and cut the carpet before laying it down. This will make it easier to fit the carpet within the given space. Keep large pieces of spare carpeting for any carpet patching that may be required in the future.
Step 9: Stretch the carpet with the power stretcher.
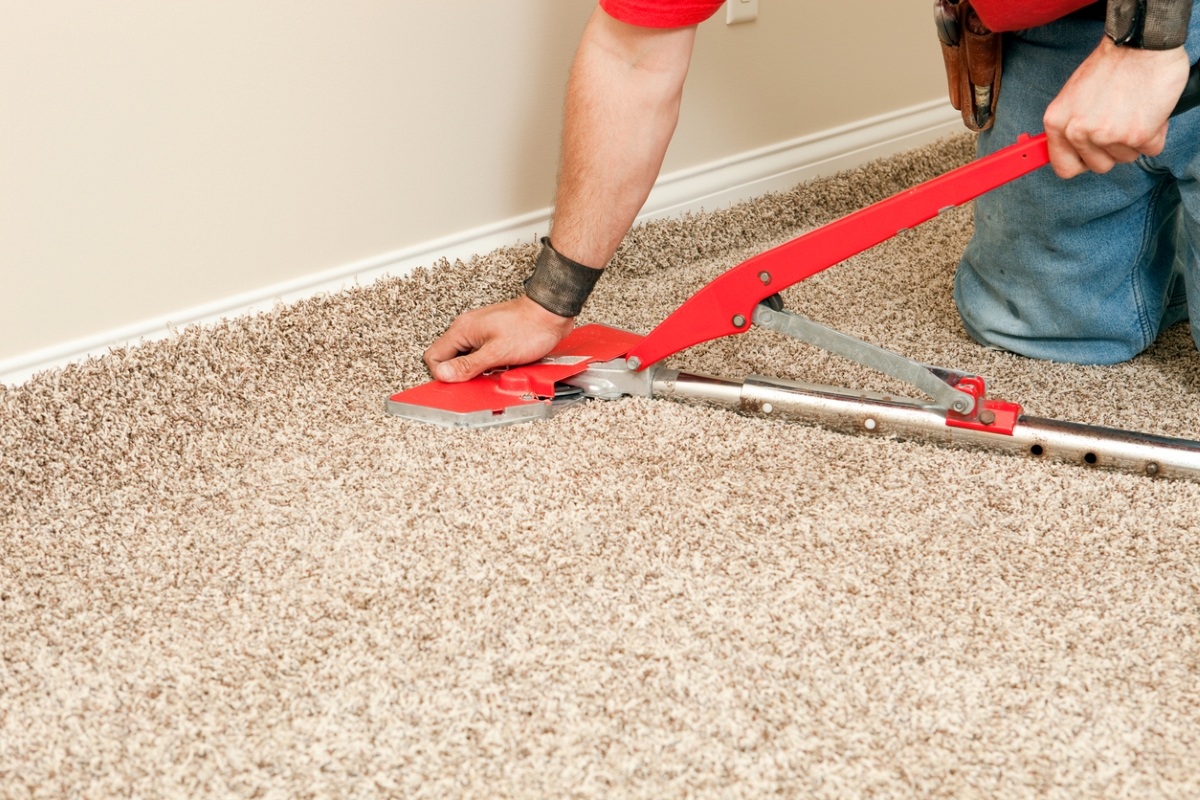
Now that the carpet is in position, it’s time to use the power stretcher.
- Head to the side of the room where the carpet is still anchored and place the base of the power stretcher against the wall.
- Extend the power stretcher so that the head ends up about 6 inches from the unanchored edge of the carpet. Ideally, this should extend almost entirely across the room.
- Use the lever on the power stretcher to stretch the carpet between the base and head of the power stretcher.
If the lever seems to take too much effort to push down, then the carpet is being stretched too tight. Similarly, if the lever is too easy to push down, then the carpet is not being stretched enough.
Step 10: Complete stretching with knee kicker.
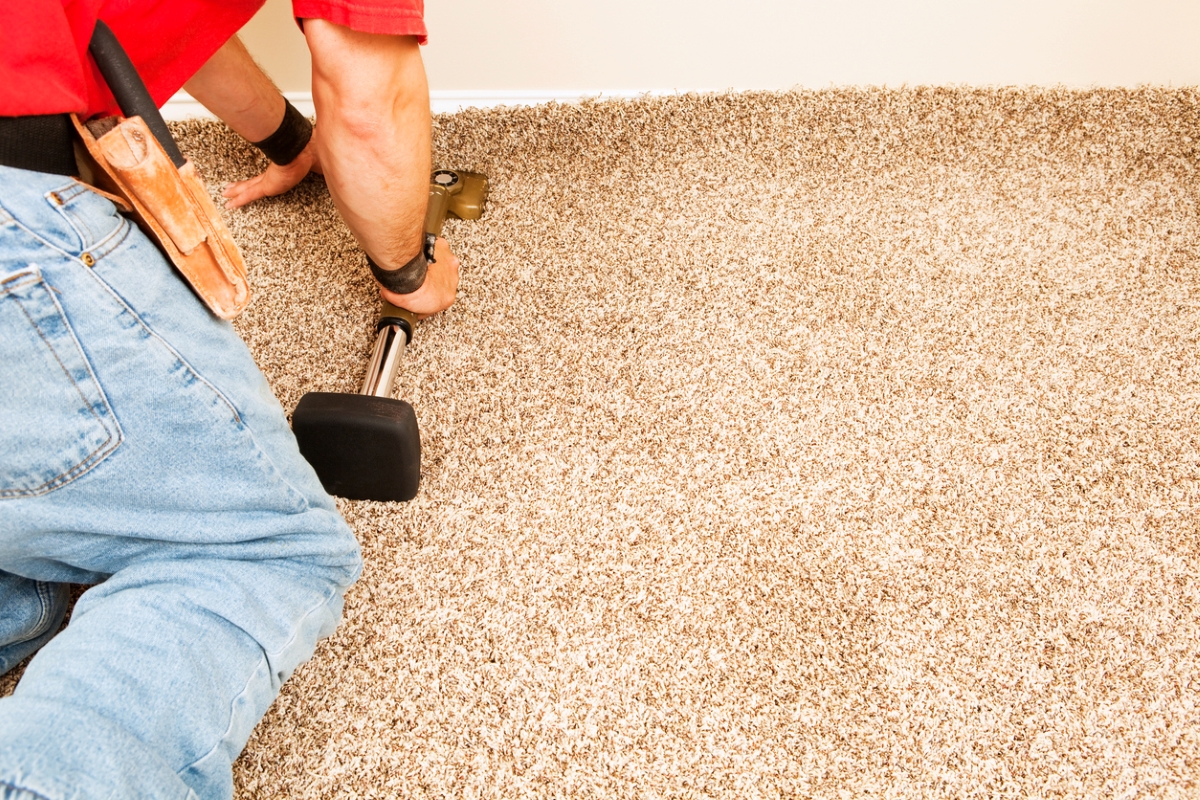
It will be easier to use a knee kicker when dealing with smaller areas of the room, like carpeted closets or tight corners. Use the knee kicker by placing the head of the tool about 6 inches from the wall, then bump the knee kicker with your knee to stretch the carpet. This tool can also be used to go back over any parts of the carpet where the power stretcher had trouble.
Step 11: Cut excess carpet.
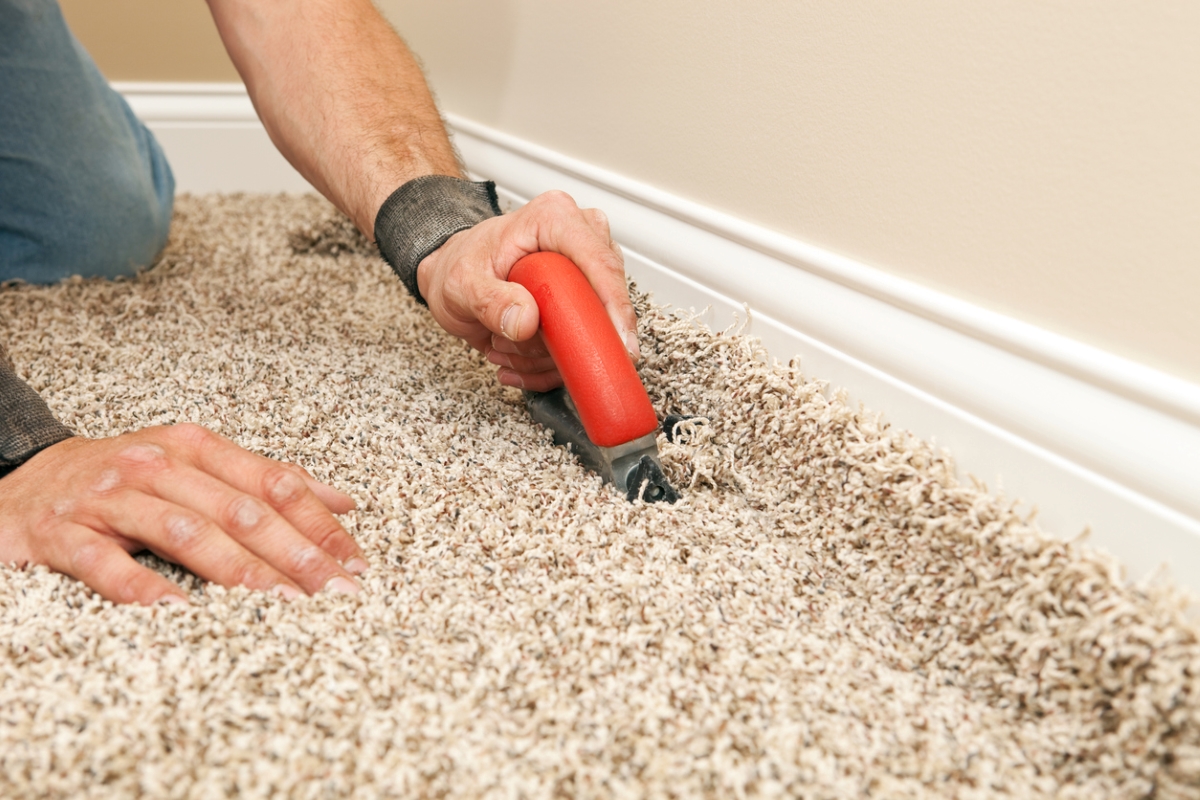
Attach the stretched carpet to the tack strips by pushing the edges down onto the gripping nails. Once the carpet is in place, slide the edges into the space between the tack strips and the wall, then use a carpet cutter or carpet knife to trim away any excess carpet. Make sure to go slow and cut carefully to avoid over-trimming the carpet.
RELATED: How to Dispose of Carpet Properly
Step 12: Secure the edges.
The last step of this job is to secure the edges of the carpet. The carpet is currently held in place by the gripping nails and should be tucked down between the tack strips and the wall. Use a carpet stapler to secure the carpet to the tack strip and carpet pad, ensuring that the carpet won’t shift or come loose during use. When you finish this step, you can clean up, then move the furniture back into the room.
How to Get Wrinkles out of a Carpet Without a Stretcher
Not all home improvement centers rent out tools, and even if they do, there is no guarantee that the tool you need will be in stock at the time of the project. With this in mind, it’s handy to know how to get wrinkles out of a carpet without the help of a stretcher.
- Clean the area and remove any furniture.
- Wearing work gloves, use a set of pliers to lift up the corner of the carpet. Carefully pull the carpet off of the gripping nails.
- Grab the carpet and peel it up, leaving just one side of the carpet securely fastened to the tack strip.
- Clean the floor and remove any tacks or nails that are keeping the carpet pad attached to the carpet.
- Lay down the carpet pad and trim the edges so that it sits flush against the tack strips, then lay down the carpet.
- Start at the wall where the carpet is still secured. Slide a heavy object, like a large sheet of plywood or a weighted roller, across the carpet toward the opposite side to stretch the carpet and remove wrinkles.
- Attach the carpet to the tack strip at the other side of the room and trim away any excess carpet material with a carpet knife or carpet cutter.
- Repeat this process for each of the remaining sides of the room until the entire carpet is smoothed, stretched, and secured.
- Tuck the edges of the carpet between the tack strip and the wall, then use a carpet stapler to secure the carpet to the tack strips and carpet padding.
About the Author
Timothy Dale spent his post-secondary education years working in the plumbing trade. He took on a position in project management that ended up lasting 10 years before segueing into a career as a freelance writer. As a project manager, Dale oversaw plumbing, carpentry, electrical, flood remediation, and water damage restoration water projects on a regular basis. His work experience with restoration and remediation work included pulling up and replacing damaged carpet, repairing carpet, stretching carpet, and installing carpet to restore the property to the condition it was in before a serious leak or flood.


