
We may earn revenue from the products available on this page and participate in affiliate programs. Learn More ›
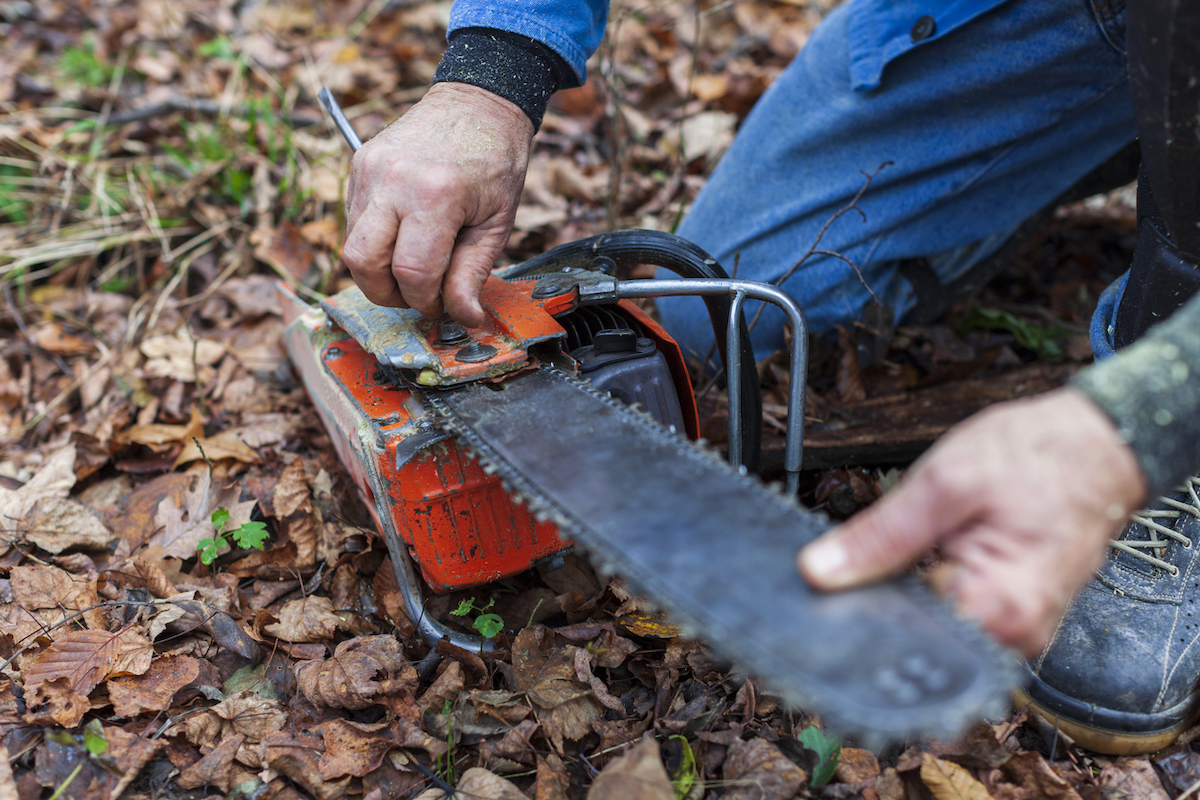
Chainsaw chains are the part of the chainsaw blade that cuts through wood. Over time, the chain can stretch slightly during use, which reduces the saw’s wood-cutting effectiveness, slows down the cutting process, and requires the user to exert more pressure on the saw. If the chain gets too loose, it can even come off the bar.
Loggers and DIY woodcutters are well aware that chains can loosen rather quickly during heavy use. Tightening a chainsaw chain is a simple task that can be done quickly so you can get back to cutting wood.
All chainsaw chains can be tightened in roughly the same way, although some brands may feature a slightly different bolt and tension pin configuration from the one featured in this how-to.
The Danger of Running a Chainsaw With the Wrong Tension

Chainsaws, like many power tools, can be very dangerous if they are not properly maintained. Running a chainsaw with the proper chainsaw chain tension can extend the life of the chain and help safeguard the person using it. If the chainsaw is used with the wrong tension, it can lead to serious injuries. This is why it’s very important to learn how to tighten a chainsaw chain.
- Chain derailment occurs when the chainsaw chain comes off the guide bar. This scenario is typically caused by a loose or improperly fitted chainsaw chain.
- Guide bar warping can be caused by a chainsaw chain that is either too tight or too loose, putting unnecessary strain on the chainsaw.
- Kickback is another serious issue that can occur even with a properly tensioned chain, but if the chain is too loose, kickback is more likely to happen.
- Premature wear is a common problem when the chain tension is set too high, leading to increased stress on the clutch, bearings, and motor.
Mistakes to Avoid When Tightening a Chainsaw Chain
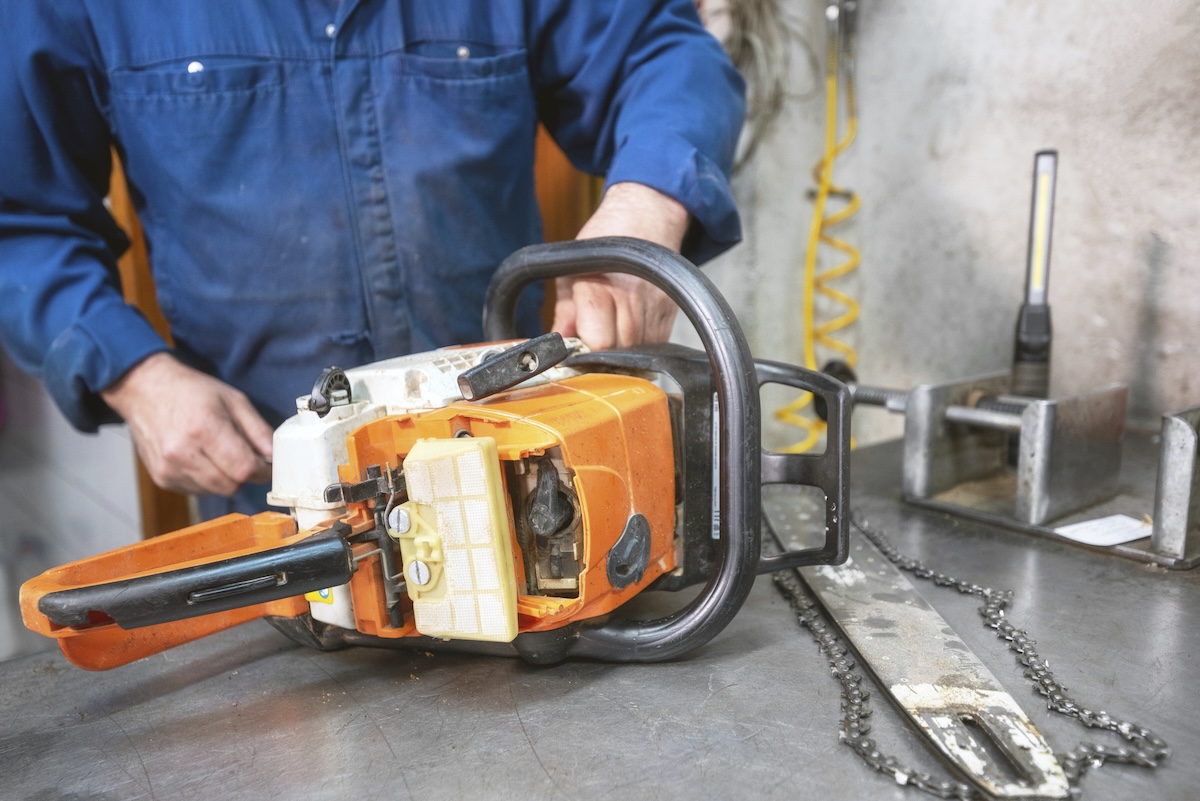
Tightening a chainsaw chain is intended to prepare the tool for safe use, but if you aren’t careful, you may end up causing a bigger problem than a slightly loose chain. Be sure to avoid these common mistakes when tightening a chainsaw chain.
- Tightening the chain immediately after use is a bad idea. The components of the chainsaw heat up to the point where you may burn your hands, so it’s best to wait until the chainsaw has had time to cool down.
- Ignoring the manufacturer’s directions can make it more difficult to locate the tensioning screw, adjust the chain, and check the chainsaw chain tension before use.
- Over-tightening the chain can lead to increased friction, premature wear, and may even cause the chain links to bind in the bar groove. If this occurs, the engine may stall unexpectedly or the chain can jerk the saw uncontrollably.
- Over-loosening the chain reduces cutting efficiency, increases operator fatigue, and can lead to the chain slipping off the guide bar during use or kicking back on the user.
- Neglecting signs of severe wear can impact the efficiency of the tool, but might also put the user at risk if the chain or guide bar breaks during use. Take a few minutes to properly inspect the tool before and after tightening to ensure it is safe to use.
Tools & Materials
Bobvila.com may earn a commission from purchases made through these links.
Before You Begin
Learn to recognize the signs that a chainsaw chain is getting loose, including the need to exert additional force on the chainsaw bar to cut through logs or the chain coming entirely off the bar. If it’s a new chain or a new chainsaw, odds are you need to tighten the chain occasionally to keep the tool in good cutting form.
In many cases, simply tightening the chain will alleviate cutting problems. If the chainsaw still isn’t cutting well after taking the following steps to tighten it, the problem might be that the chain is dull, and requires chainsaw chain sharpening. If the problem isn’t a dull chain, it could be that saw is damaged and requires professional repair. If that’s the case, contact the tool’s manufacturer for further guidance.
5 Steps to a Tighter Chainsaw Chain
A chainsaw chain will typically last for 5 or more years, depending on how frequently you use the saw. However, if the chain does not have the proper tension, it may kick back or slip off the guide bar. Follow these steps for chainsaw chain adjustment and learn how to tighten a chainsaw chain.
Step 1: Locate the chain tensioning adjustment on the side of the chainsaw, near the bar’s base.
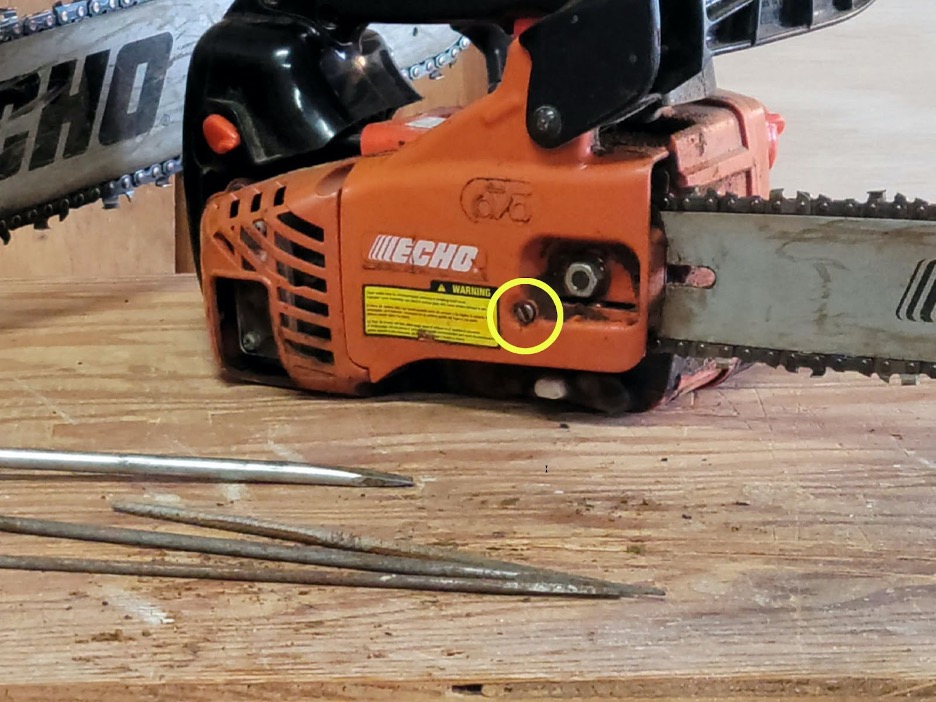
Most chainsaws feature a chain-tensioning adjustment on the side of the chainsaw case—near the bolts that secure the chainsaw bar in place. This resembles a flathead screw, although it is actually a pin that moves the chainsaw bar slightly to create more tension on the chain.
Depending on the individual chainsaw model, there may be one bolt, two bolts, or even three. These bolts are essential during the chain-tightening process, and they’re also instrumental in holding on the side plate that covers the chain and gear assembly.
Step 2: Loosen the bolt(s) that secures the chainsaw bar before adjusting the chain tension.
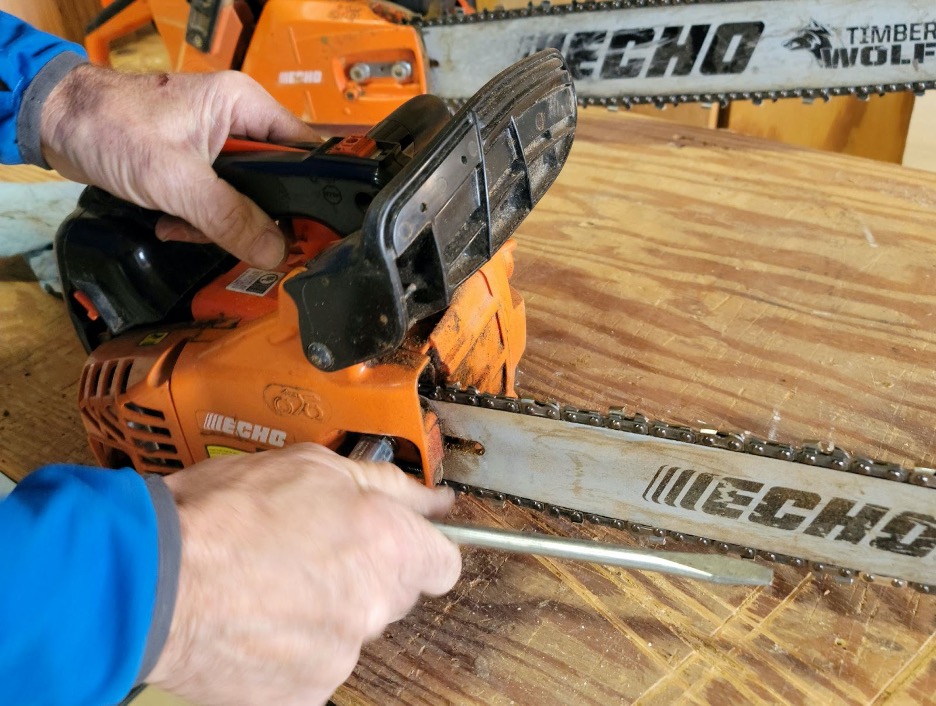
Before adjusting the tensioning pin, you must loosen the bolts that hold the side plate in place. Use the socket end of a scrench (a screw/wrench combo) to loosen the bolts slightly.
These bolts also secure the bar beneath the side plate. Don’t take them off—that isn’t necessary—just loosen them slightly (about ½ turn, or so) until you can wiggle the chainsaw bar a little bit. Now, you’re ready to tighten the chain.
Step 3: Use the screwdriver end of the scrench to turn the tensioning pin.
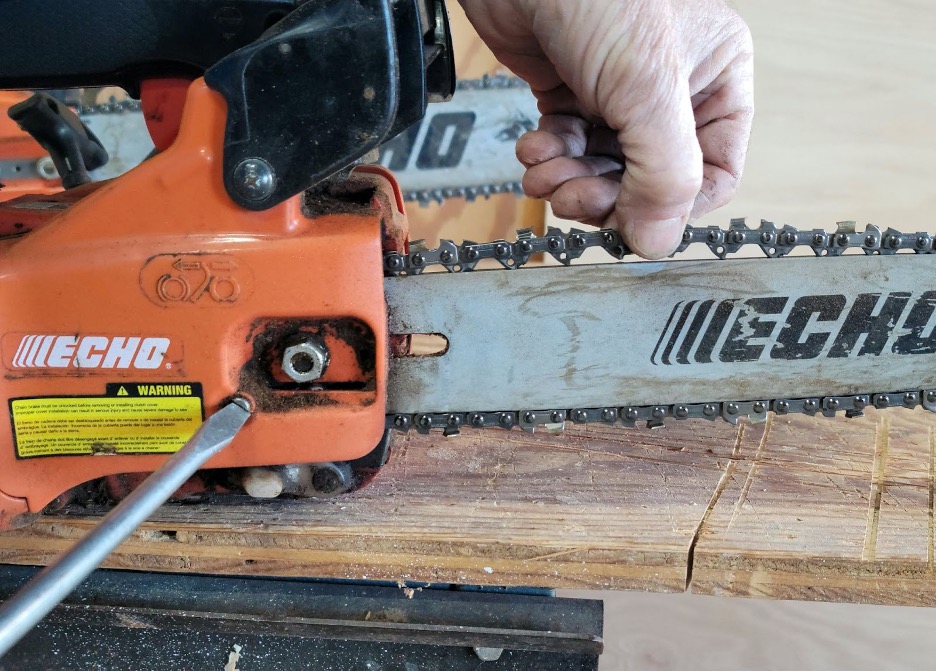
Once you’ve loosened the bolt(s) on the side of the chainsaw, you can tighten the chainsaw blade. Insert the screwdriver end of the scrench into the flathead tensioning pin (the chain tightener) and turn it clockwise to tighten the chain. The chain isn’t actually becoming tighter—instead, as you turn the tensioning pin—it pushes the chainsaw bar out a little bit, which takes up the slack on the chain.
During a typical afternoon wood-cutting session that lasts 2 to 4 hours, you may need to tighten the chain two or three times. But, it’s quick and straightforward since you don’t need to disassemble the saw. Keep a scrench nearby for tightening.
Step 4: Test the chain’s tension to determine when it’s tight enough.
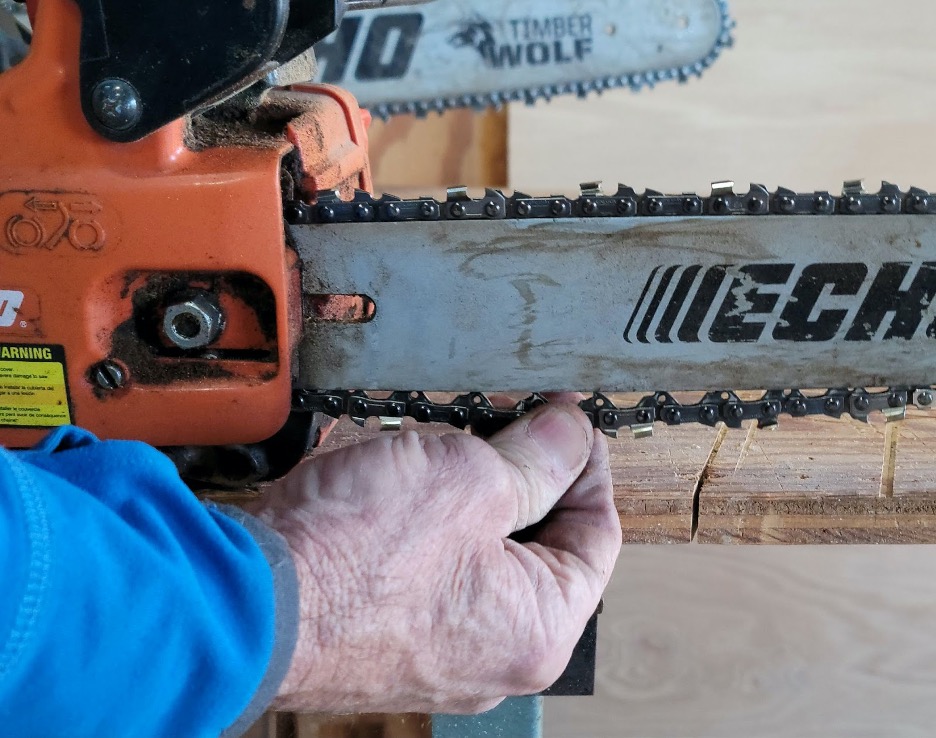
How tight should a chainsaw chain be? Chainsaws don’t come with gauges that indicate when the chain is at the correct tension. We have an easy way to test chainsaw chain tension.
After adjusting the tensioning pin, grab the chain at the bottom of the saw blade between a thumb and finger and pull it downward. You should be able to pull the chain sufficiently to see a small space between the links and the bar. However, the inside tips of the links should still be positioned in the bar groove.
If you can pull the entire chain below the bar, it’s still too loose. If the chain doesn’t budge at all—it’s too tight, and you can turn the tensioning pin counterclockwise to loosen it a bit.
Step 5: Retighten the bolts after adjusting the chain tension.
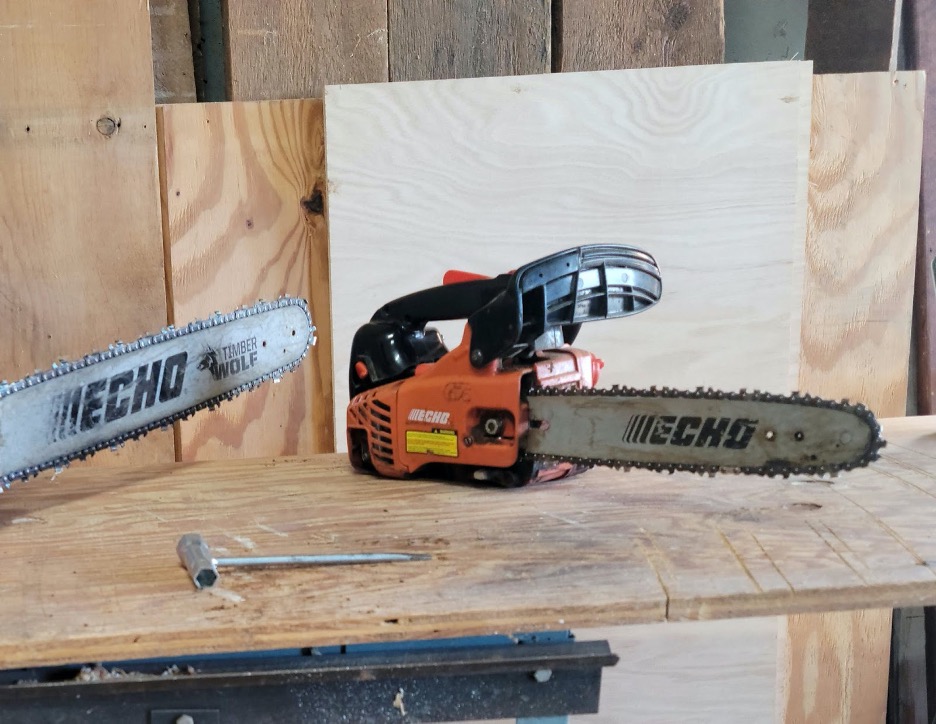
The final step in the process is to retighten the bolts after adjusting the chain tension. Using the socket end of the scrench, turn the bolts until they’re snug. This won’t take much, just 1/2 a turn or so.
Now, you’re ready to get back to cutting wood. But be careful: Chainsaws are powerful tools that demand care and respect.
Final Thoughts
Chainsaws are formidable power tools. Although more battery-operated models are available today, many still run on gas or diesel and create ear splitting noise during operation. Operating one requires physical strength and attention to safety, such as careful attention to the direction of the chainsaw blade. When a chainsaw chain is too loose, it increases the risk of the saw kicking back or the chain coming off, both of which can lead to injury.
As a general rule, users should check the chain’s tension before using the saw every time and frequently during use. Once you master the chain-tightening process, it won’t take more than a couple of minutes, and the only tool you’ll need is a scrench.
Tightening the chain isn’t a cure-all for a worn-out chain, however. Over time, usually a few months of frequent use, the chain can wear out and the blade links can become dull or worn down. When you start tightening the chain twice as often as you did when it was new, it’s probably time for a new, quality chainsaw chain.
FAQs
The easiest way to tell if the chainsaw chain needs to be tightened is to gently pull the chain away from the guide bar to check the tension. If the chain is properly tensioned it should be able to move smoothly along the guide bar with little force. A chain that is too loose will no longer fit along the bottom of the guide bar and may slip off during use.
Generally, it’s a good idea to sharpen the chainsaw chain before each use. This helps to ensure the chain is in good condition, properly tensioned, and prepared for the job. However, if you rarely use the chainsaw, you may be able to avoid sharpening the chain for about two tanks of fuel before needing to touch up the blade.
Breaking in a new chainsaw chain helps to smooth out tiny irregularities on the friction faces and also allows the chain to property seat the rivets. To break in a new chainsaw chain, first ensure the chain is thoroughly lubricated, then run the saw at low speed for about three minutes. Check the chain tension and tighten the chain if necessary before use.
The chainsaw chain may come loose if the chain is not set properly, but if you have checked the position of the chain and it still keeps coming loose, then it may be due to a damaged chain or guide bar. Additionally, the chain may be stretching as a result of overheating, poor lubrication, or overuse.
Lubricating the chainsaw chain can help ensure that it moves freely during operation. If the chain is not properly lubricated, then stretching can take place very quickly. Keep the chainsaw lubricated to reduce the risk of stretching. Similarly, there is a greater chance that the chain will stretch if it is hot, so take regular breaks while cutting to give the chain time to cool down.
