We may earn revenue from the products available on this page and participate in affiliate programs. Learn More ›
From the pressure of people sitting to the constant opening and closing of the lid and/or seat, your toilets probably get more traffic than any other seat in the house. So it’s understandable that the seat could loosen and wiggle a bit from side to side. The bolts that attach the seat to the commode, located just behind where you sit, are causing the problem. This is no mere annoyance but a potentially unsafe situation, should the lid separate from one of its bolts while someone’s using it, causing injury. Fortunately, the fix is bound to be an easy DIY job—whether you simply need to adjust the bolts or replace them entirely. Read on for two ways to go about how to tighten a toilet seat.
Plan A: Tighten the Bolts
TOOLS AND MATERIALS
– Flathead screwdriver
– Toilet seat hinge washers (optional)
– Ratchet wrench
– Adjustable wrench (optional)
STEP 1
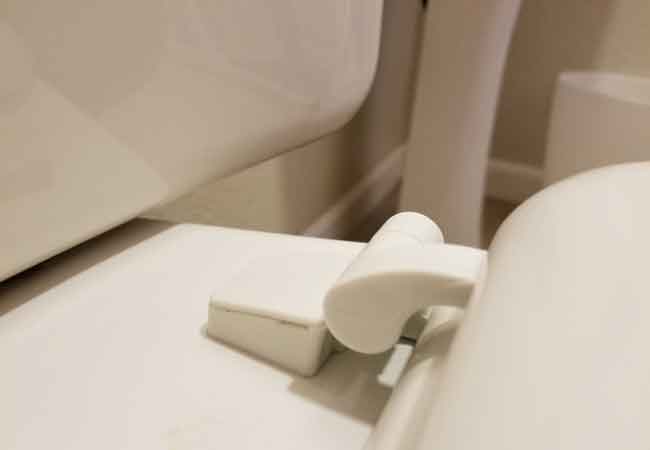
Locate the two bolts that attach the seat to the commode. If there are small plastic cases covering the bolts, use your fingers to pop them open the same way you might access a shampoo cap; many modern toilet seat bolt covers are manufactured with this feature. If not, use a flat head screwdriver to gently pry them loose and expose the bolts.
STEP 2
Use the screwdriver to tighten the toilet seat bolts, which are now exposed, screwing clockwise until they resist. Be sure to stop when each bolt stops turning; you don’t want to strip or break them altogether. Alternatively, consider adding a toilet seat hinge washer (less than $1 apiece) to each bolt. These washers were designed for the specific purpose of keeping a toilet seat in place. If you choose to do so, proceed to the next step.
STEP 3
To install the seat hinge, unscrew the bolts entirely using a counterclockwise motion with your screwdriver. Slip the washers into place where the bolt will meet the commode before reinserting the bolts and screwing them back.
STEP 4
If bolts fail to tighten, try holding the nut at the base of the bolt in place with a pair of pliers in one hand while turning the bolt clockwise with the screwdriver in the other hand. Once again, take care not to go too far and damage the bolt or strip it; once it stops turning, you’re done.

Plan B: Replace the Bolts
TOOLS AND MATERIALS
– Miniature hacksaw
– Toilet seat replacement kit
– Replacement nuts and bolts with rubber washers (optional)
STEP 1
If the bolts are frozen in place and just won’t budge, cut them off with a miniature hacksaw. Place the saw blade just beneath the bolt’s head and saw slowly until you’ve gone all the way through the metal.
STEP 2
After sawing through the bolt, the severed piece may be hot to the touch, so use caution when removing it. Repeat the process on the other bolt, then clear away any debris on both sides. Remove each nut by spinning it counterclockwise, then pull the bolts out and discard them.
STEP 3
If you need to replace hinges as well as the bolts, it’s best to buy a toilet seat replacement kit for less than $10 at your local hardware store. This includes nuts, bolts, and hinges with screws. Otherwise, you only need replacement nuts and bolts with rubber washers.
Then, with old or new hinges securely in place, screw the bolts in one at a time by holding each nut at the base, dropping the bolt into the center of the nut, and using your screwdriver to secure each bolt in a clockwise motion. This should do the trick to tighten the toilet seat. Test the seat to make sure it doesn’t move side to side, and you should be sitting pretty!

