We may earn revenue from the products available on this page and participate in affiliate programs. Learn More ›
A handheld belt sander will rip through old paint or varnish in minutes. It can smooth flooring or decking at remarkable speed, and rapidly flatten rough lumber and boards. Yet while often seen as a heavy-duty tool, a mini belt sander is light enough for more delicate work. There are also benchtop belt sanders that can be used for fine shaping and finishing.
The key to getting the most from any belt sander is understanding its capabilities. In this article we look at the different types of belt sander models, and share how to use a belt sander for both rapid material removal and for projects where more precision is required.
RELATED: The Best Detail Sanders, Tested and Reviewed
2 Types of Belt Sanders DIYers Should Know
Belt sanders fall into two basic categories: handheld belt sanders that can be easily taken to the workpiece and bench models where the work is taken to the stationary machine. For a
1. Handheld Belt Sander
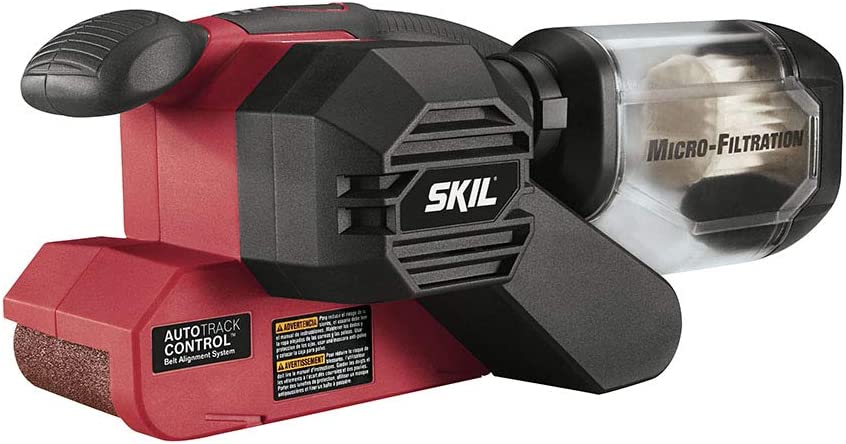
Handheld belt sanders are commonly used for DIY and remodeling tasks. They can be moved back and forth across large surfaces, rapidly stripping old finishes from doors, tables, beams, or joists. Their ability to remove material quickly also makes them ideal for flattening rough boards or initial sanding to remove imperfections.
Handheld belt sander sizes can vary considerably. A wide belt sander is usually a woodworking tool, and it invariably includes a dust bag. Those with narrow belts (also called power files) can often be used on metal, and may not have a dust bag.
Some woodwork enthusiasts build a stand for belt sander use. These either invert the tool, turning it into a light-duty bench sander, or mount it sideways to create a basic belt sanding table. Plans are widely available.
Our Recommendation: Get the Skil 7510-01 Belt Sander at Amazon for $39.99.
The Skil belt sander is a feature-packed, budget-friendly belt sander that can tackle a wide range of DIY and home woodworking projects.
2. Benchtop Belt Sander
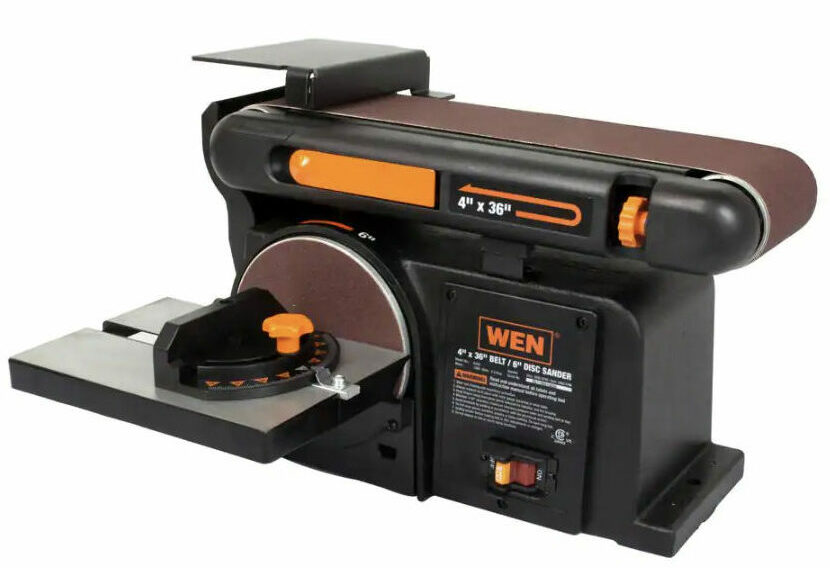
As the name suggests, a benchtop belt sander is usually fixed to a bench. The belt can run horizontally, and it can also be tilted at any angle up to 90 degrees on many models. In addition to sanding flat surfaces, they are often very useful for shaping.
Many models also incorporate a disc sander on the side of the machine. This comes with a sanding table that can often be tilted up to 45 degrees and a miter guide. Combining these two features allows for compound angles to be set, thus increasing the range of belt sander uses. These are generally woodworking tools, though changing the abrasive allows some to sand metals.
Our Recommendation: Get the WEN 6502T Belt and Disc Sander at The Home Depot for $99.
With its cast iron base for stability, powerful 4.3-amp motor, 36-inch belt, and 6-inch disc, this is a durable, pro-grade tool that offers excellent value for money.
Parts of a Belt Sander
Knowing the purpose of the various parts will help you better understand how a belt sander function, and thus get the maximum benefit out of the tool. Some parts are common to both handheld and bench sanders, but there are also key differences.
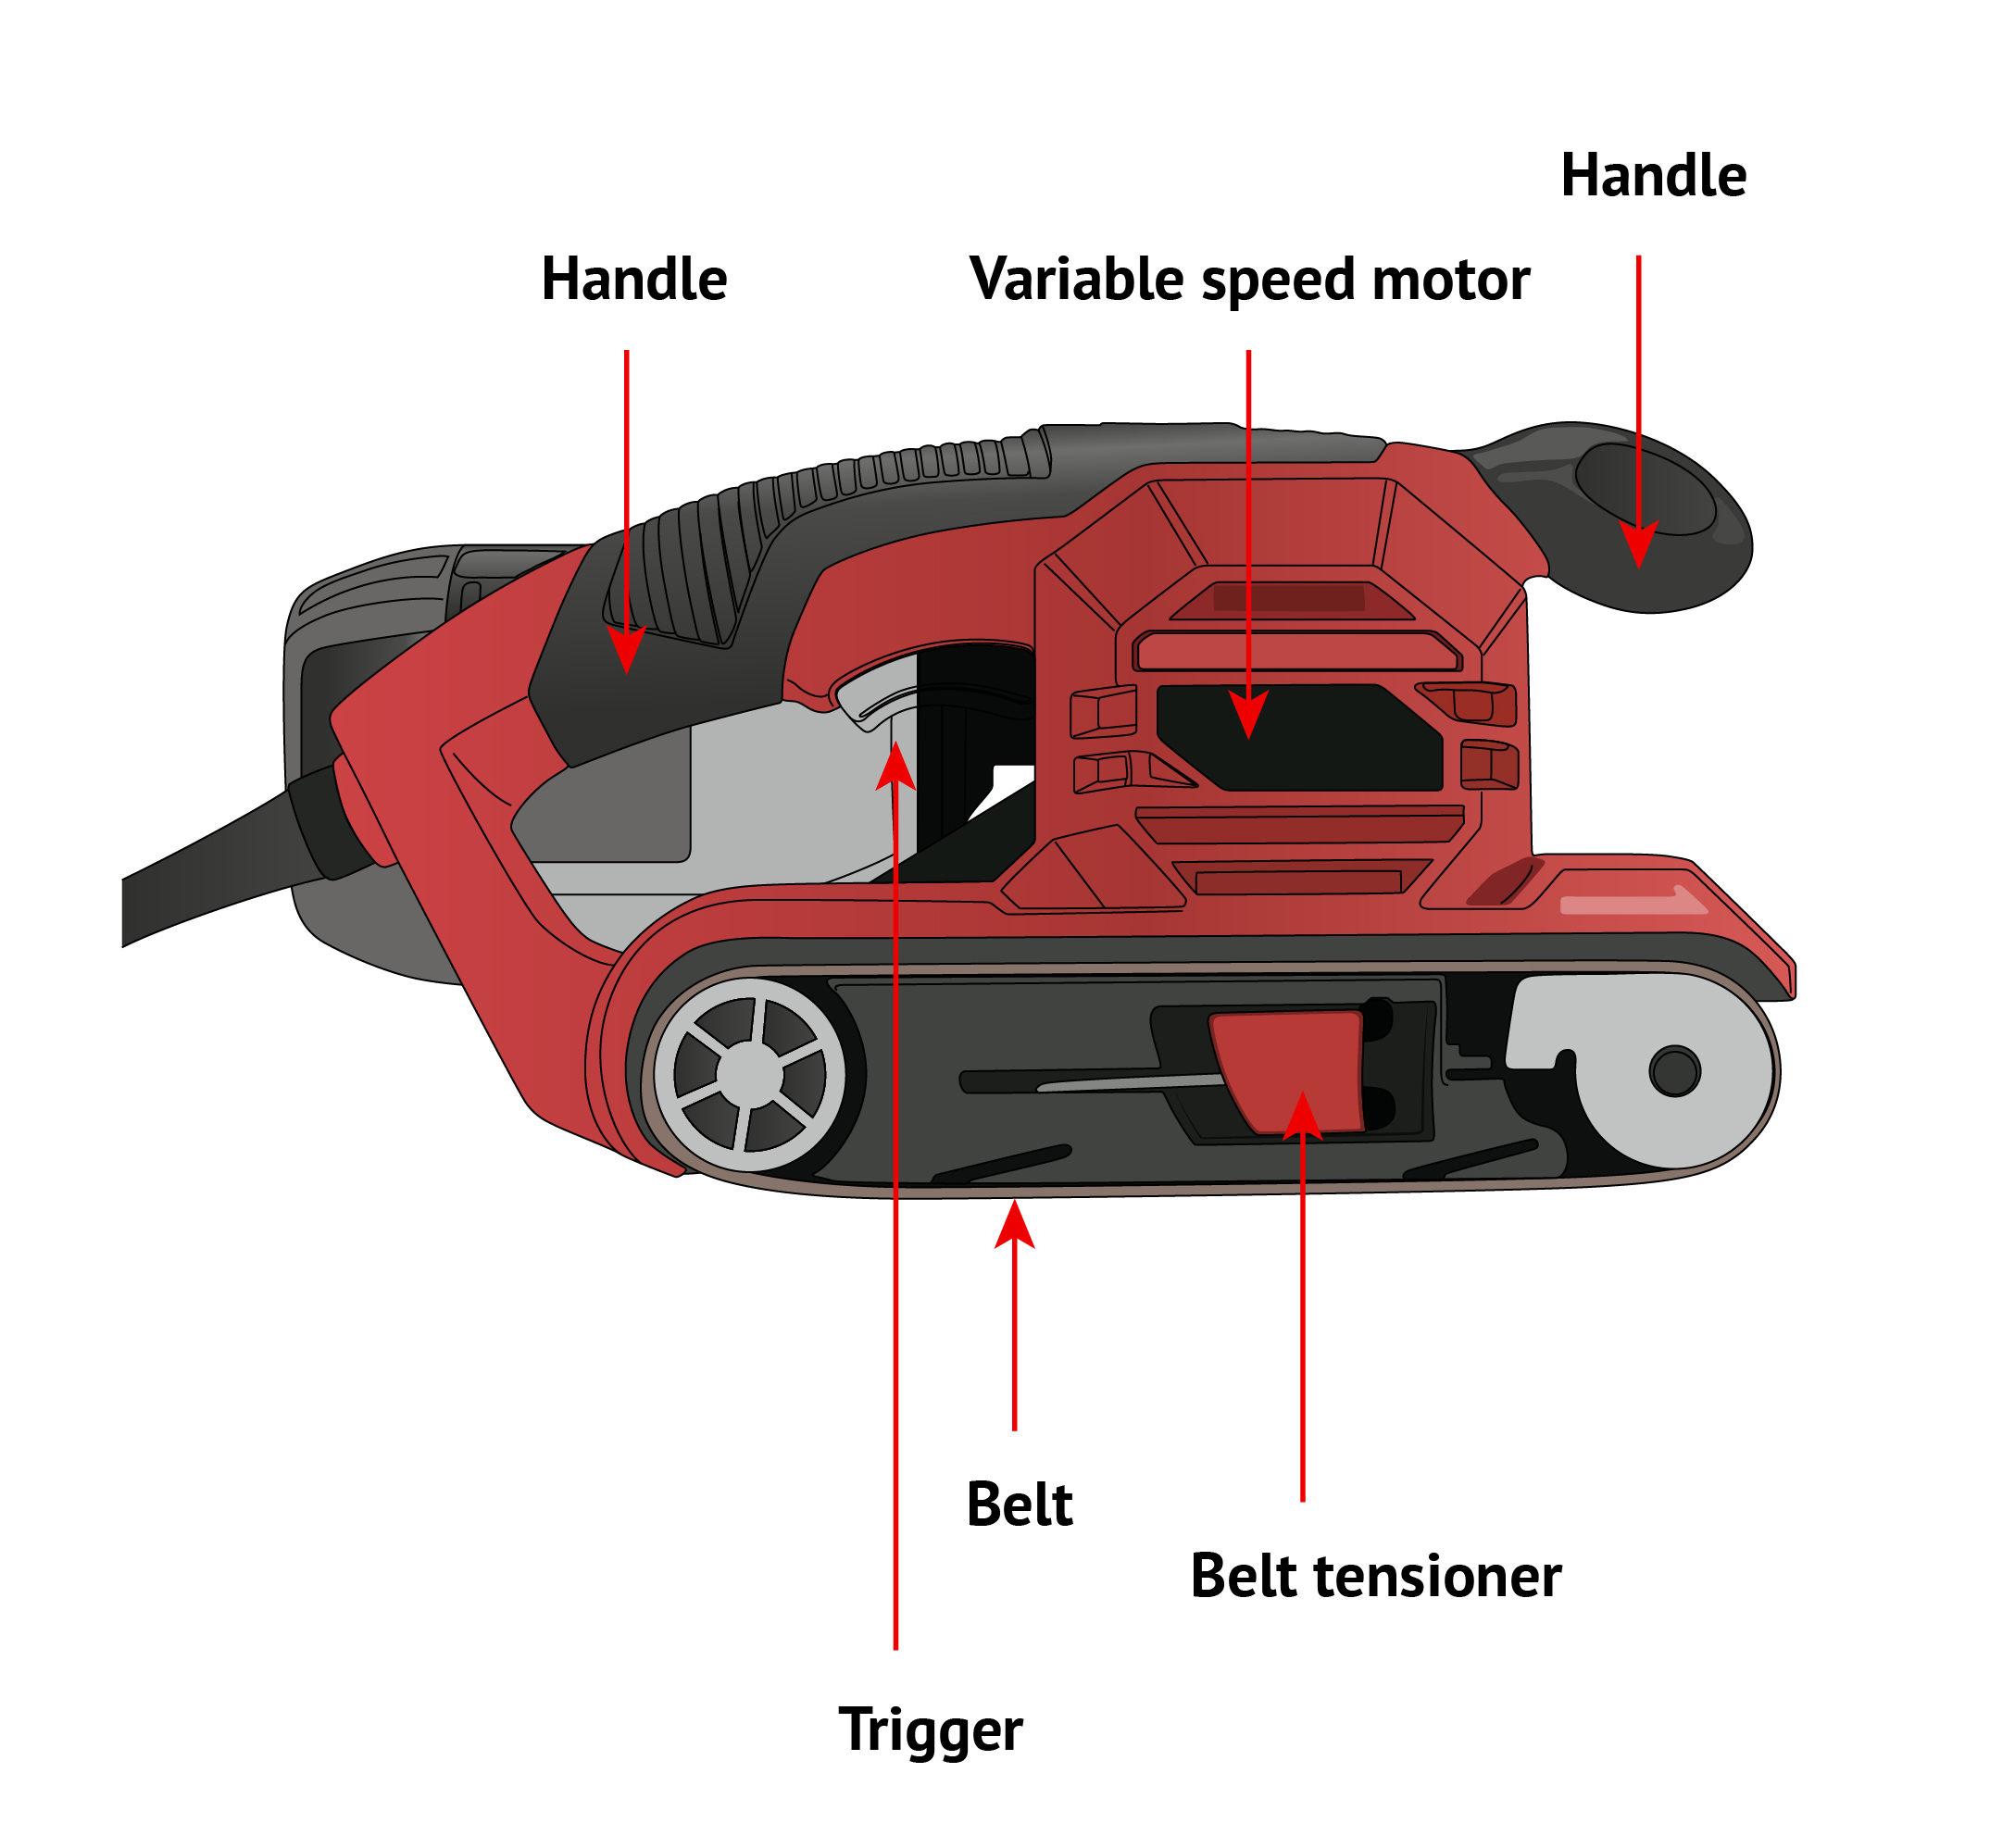
- Belt: The belt sander gets its name from an abrasive belt that runs around two rollers, one of which is driven by an electric motor.
- Belt tensioner: Both types of belt sander have a tensioning lever that allows for quick changing of belts once worn.
- Handles: Handheld belt sanders have two handles: back and front. These allow for maximum control.
- Trigger or on/off button: Handheld belt sanders have a trigger in the rear handle, and often a lock-on button for constant running. Bench sanders have a simple on/off button.
- Dust port: All belt sanders have dust ports. Handheld models typically include a collecting bag. Benchtop models can be attached to a shop vac or other extraction system.
- Tracking control: This feature ensures that the belt remains centered on the rollers. Control is automatic on some belt sanders.
- Pressure indicator: The most user-friendly handheld belt sanders have a light that illuminates when the correct amount of pressure is being applied.
- Variable speed motor: Handheld belt sanders may also have speed control for improved performance and manageability. On bench sanders, the belt and disc may run at different speeds but they are not variable.
- Disk & table: As mentioned above, most benchtop belt sanders also have a sanding disc and table. These add versatility, and they allow for accurate sanding of small pieces.
Belt Sander Safety Tips
Using a belt sander safely is largely a question of common sense. However, these tips will help avoid unnecessary injury.
- Always keep a firm grip on a handheld belt sander using both handles. Don’t be tempted to just use the rear handle. Changes in material surfaces may result in sudden material grabbing or torque reactions that can cause nasty wrist injuries.
- Never wear loose clothing when belt sanding, as it can get caught in the belt or rollers. Neckties, necklaces, and bracelets should be tucked inside clothing or removed.
- The Occupational Health and Safety Administration (OHSA) warns that wood dust can cause respiratory problems, and allergic reactions. Always wear a dust mask and safety glasses.
- Empty the dust bag regularly or attach some form of dust extraction for benchtop models.
- Keep hands and fingers as far from the sanding belt as possible while working. Skin abrasions caused by sanders are very painful. Wear lightweight leather gloves (not wool or fabric) when practical.
- Always turn off the power or remove the battery from a cordless belt sander before changing the belt.
Initial Setup and Calibration
Belt sanders are straightforward tools that require little setup beyond fitting the belt and adjusting tracking on models that don’t do this automatically. That said, you’ll always want to read the owner’s manual before operating this or any power tool.
It’s also worth spending time thinking about the right sanding grit for each task. Sanding belts are not terribly expensive, and the right grit has a dramatic impact on belt sander performance.
How to Use a Belt Sander by Hand
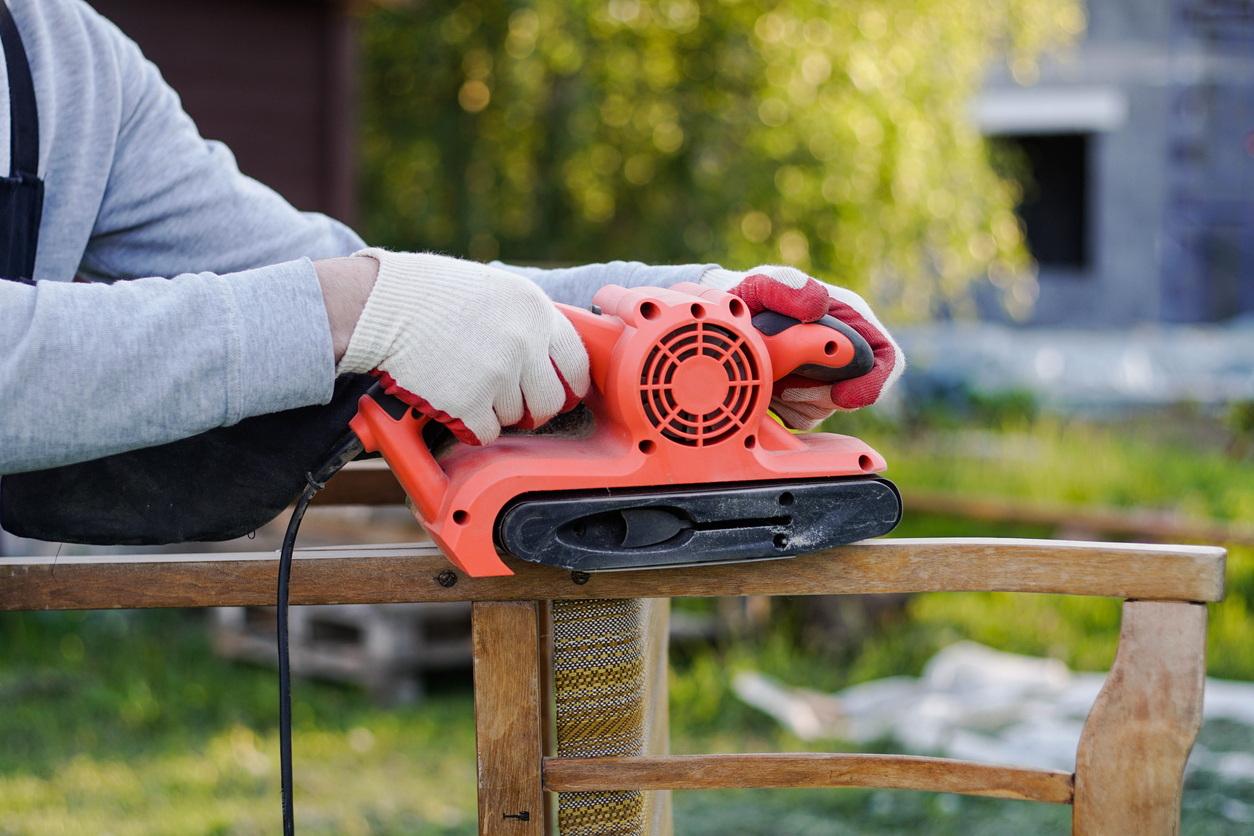
Handheld belt sanders come already assembled. All you need to do before turning it on is to attach the dust bag and fit the abrasive belt.
Step 1: Apply the rear edge first.
The best way to use a belt sander of this type is to lower the rear roller gently onto the surface, and let the front drop naturally as the belt rotates. Use a firm grip to maintain control. Applying the front roller first can result in the tool snatching at the wood, and it can cause deep gouges that can be difficult to rectify.
Step 2: Press gently.
Heavy pressure isn’t required for efficient sanding. In fact pushing too hard can stall the tool, putting unnecessary strain on the motor. It might also burn the wood.
While a few of the best belt sanders have pressure indicators, most rely on user control. If material isn’t being removed as quickly as expected, more pressure can be applied, but this should be done progressively.
Step 3: Check your progress frequently.
Large handheld belt sanders are powerful machines that can strip through surface finishes or remove material extremely quickly, especially when the belt is still relatively new. Pause regularly to check your progress, and avoid removing more than necessary.
Using a Belt Sander for Stationary Sanding
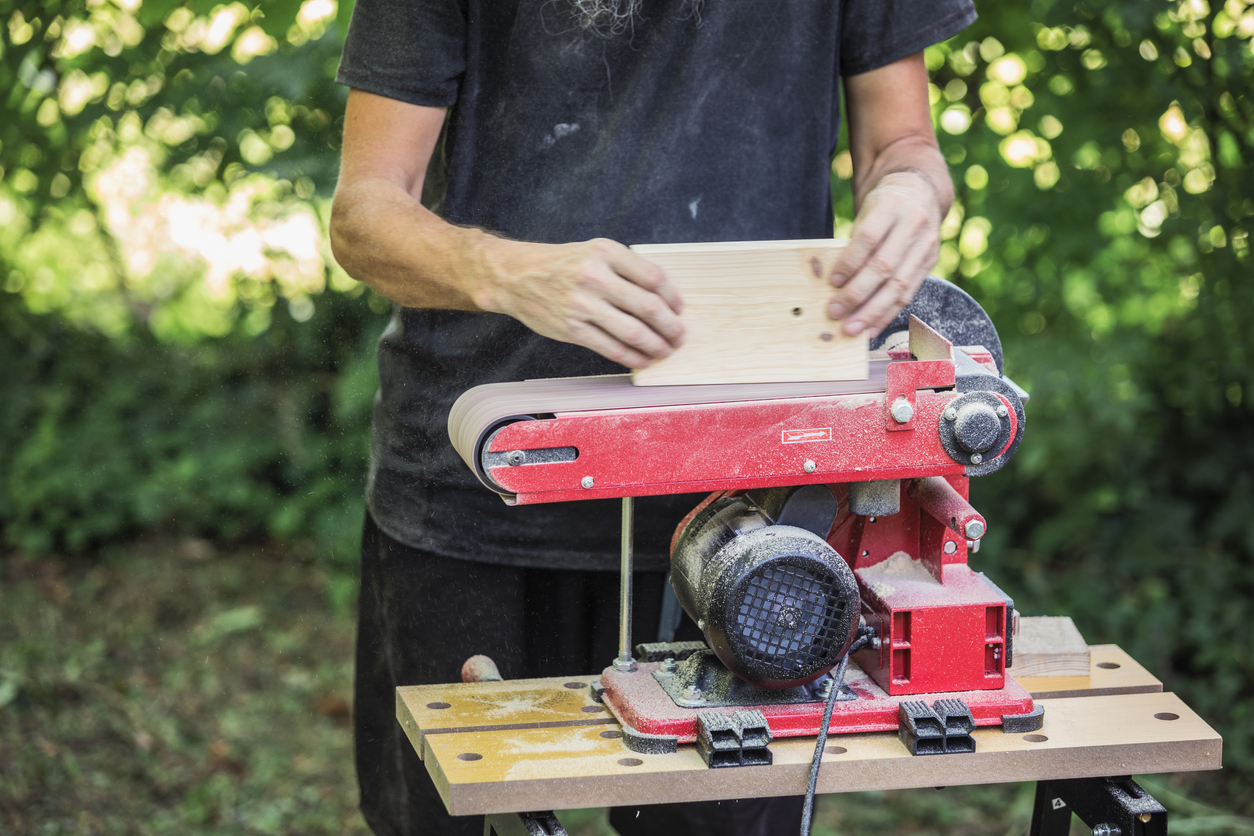
Stationary benchtop belt sanders often require some assembly. You’ll want to assemble it where the tool will be stationed.
Step 1: Assemble and set the belt sander in place.
Benchtop belt sanders may need some minor assembly. In addition to fitting the belt, the table and miter guide often need to be bolted in place. This is not complicated, and should only take a few minutes.
Step 2: Use the correct workpiece presentation.
Always work against the direction of belt travel. This provides maximum control, and prevents the belt snatching the workpiece out of the hands. When using the sanding disk, rest the piece on the table, on the downward (clockwise) side of rotation. This prevents the danger of it being thrown into the air.
Don’t try to remove too much material in one pass. Using multiple passes avoids overheating and burning the work.
Step 3: Check your progress frequently.
As with any sanding task, pause to check your work frequently. It’s always possible to sand off a little more, but you can’t go back and glue the sawdust on if you remove too much wood.
Belt Sander Maintenance Tips
Belt sanders are very easy to look after. The following two steps will maximize performance, and extend working life.
- Sanding belts can clog quickly, reducing the cutting action, and often causing burning of wood surfaces. Rather than replacing the belt, its life can often be extended by using a low-cost belt cleaner like this abrasive cleaning stick.
- Sawdust and metal shavings can cause severe damage to the moving parts and motor of a belt sander. Always clean the tool after each use. A few minutes with a soft brush and vacuum is all that’s required.
Final Thoughts
Belt sanders are not complicated tools, but the variety of sanders from which to choose sometimes leads to confusion. Handheld models are usually the heavy-duty option for stripping off old finishes from large pieces and flattening rough boards. Benchtop versions can also remove material in a jiffy, but offer the versatility for detailed work, too. Knowing the key features, important safety advice, and practical tips for how to use a belt sander will help tool you get the best results.

