
We may earn revenue from the products available on this page and participate in affiliate programs. Learn More ›
There’s no disagreement here: Concrete ranks among the most durable, longest-lasting of all building materials. That said, particularly in spaces where moisture accumulates—the basement, for example, or the laundry room—it’s not uncommon for depressions to form in even the most expertly poured concrete. There are at least a couple of reasons to repair these dips early and often.
First of all, doing so works to prevent such surface imperfections from becoming deeper, structural problems. Second, if you’re planning to install flooring over the slab, the concrete needs to be level if it’s going to function properly as a subfloor.
If you’re tackling a concrete leveling job in the future, start getting to know Concrete Leveler. A user-friendly, self-leveling compound from CTS Cement | Rapid Set, the Concrete Leveler spreads across uneven slabs, filling in low spots as it goes along and creating a new, level surface in the process.
Once it begins to set, the product cures with remarkable speed and strength. In fact, assuming ideal conditions, you can expect to be walking upon—or installing a new floor over—your now freshly flat concrete surface within a matter of hours. Suitable for outdoor as well as indoor use, Concrete Leveler dramatically simplifies what could otherwise be a tricky, demanding job, making it an easy weekend project even for those with no special skills or prior experience. Keep reading to discover just how easy it can be!
Before You Begin
Rather than jump right into the process, start by assessing the condition of the concrete surface. Your goal is to determine not only the scope of the project, but also how much Concrete Leveler you’re going to need.
A key question: Are you ultimately going to install flooring over the slab, and if so, what type? Carpeting, click-and-lock vinyl planks, and engineered wood flooring tend to be forgiving of minor variations in subfloor grade. But for a successful installation of solid wood or tile flooring (particularly larger-size tiles), the slab needs to be more or less perfectly level. Here, the difference between the lowest and highest point on the floor can be no greater than a quarter inch.
So, if you intend to leave the concrete exposed, or if you’ve opted for one of the forgiving floor materials, the best solution is to address just the specific problem areas with a patching compound like Cement All.
Meanwhile, if you would like to prepare the slab to make way for a flooring material that requires a uniformly level base, then be sure to equip yourself with enough Concrete Leveler to cover the full square footage. At half-inch thickness, a 50-pound bag of Concrete Leveler will sufficiently cover 12 to 15 square feet. For a quarter-inch-thick application, the same size bag would cover between 24 and 30 square feet.
Prep Work
Having taken everything out of the room—including the baseboard moldings—clean the concrete surface as thoroughly as possible. Remove dirt and loose debris, including but not limited to flaking paint, peeling adhesive, and chipped concrete. Pay special attention to stains resulting from grease and oil spills, as their residue could compromise the bond between the existing concrete and the added leveling layer.
For best results, lightly shotblast the surface to facilitate proper adhesion. CTS Cement | Rapid Set recommends shotblasting to a specific degree—Concrete Surface Preparation 3, as defined by the International Concrete Repair Institute. (Note that local home centers typically rent out shotblasting equipment for reasonable half-day rates.)
Afterward, pin the locations of any control joints in the slab. Later, after applying the leveling layer, re-cut those control joints so as to protect the concrete from cracking due to shrinkage and temperature changes.

Next, with a piece of chalk, mark any obvious depressions in the surface. After that, follow up with a carpenter’s level and, working section by section, let the tool reveal any low points your naked eye may have missed.
Be on the lookout for mounds as well as dips. After all, leveling out a slab with especially pronounced mounds would force you to employ an excessive quantity of leveling compound. For that reason, think about using a concrete grinder to grind down the most extreme ridges. Like shotblasting equipment, a concrete grinder can likely be rented at your local home center.
Primer Application
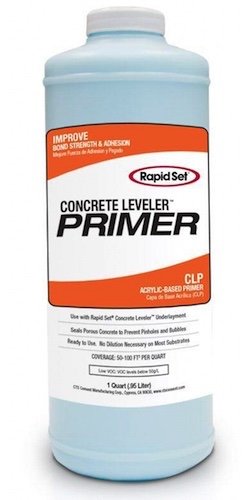
After you’ve planned your approach and prepped the surface, move on to coating the concrete with an application of Concrete Leveler Primer. Specially formulated by CTS | Rapid Set to work in tandem with the Concrete Leveler, the priming agent performs one critically important function: It seals the surface of the existing concrete, preventing water loss and making it so that neither pinholes nor bubbles end up jeopardizing the leveling layer. The primer also enhances the adhesion capabilities of the leveling compound, helping it grip and hold on to the existing concrete.
Apply Concrete Leveler Primer with a soft-bristle push broom, being careful to spread the liquid evenly across the surface without creating puddles. As you go along, make sure the primer reaches and gets down into the so-called pores of the concrete. Depending on the condition of the surface, one quart of primer can cover anywhere between 50 and 100 square feet. The gallon-size container would be the appropriate choice for larger areas up to 400 square feet. Upon application, allow the primer to dry for at least three hours, but no longer than a full day.

Concrete Leveling
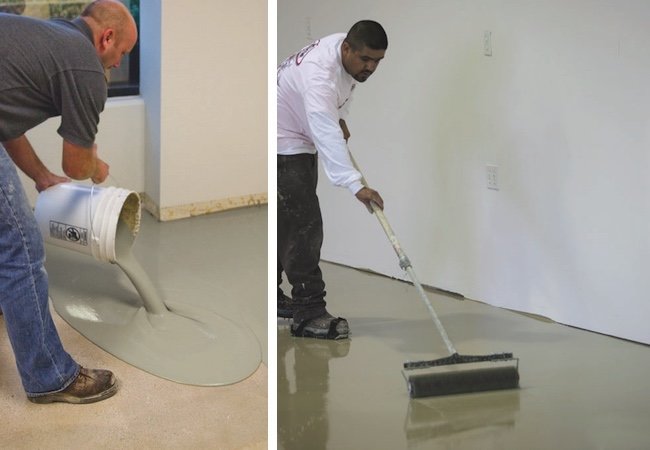
When the primer has dried, it’s time to apply the Concrete Leveler. To do so, of course, you must first prepare the compound. In a bucket or mixing bin, combine the contents of one 50-pound bag of Leveler with four and a half or five quarts of water. Mix the two with a drill-mounted paddle-type mixer. For convenience, assuming a temperature of 70 degrees Fahrenheit, Concrete Leveler boasts a 15-minute “flow life” and remains workable for virtually twice as long.
Using a long-handled squeegee, push and pull the Concrete Leveler compound across the concrete surface, getting all the way into the corners and along the edges. Though the process can be helped along with a squeegee, broom, or trowel, you can expect gravity to do most of the work in bringing the liquid to a level. Soon, a smooth wear surface will have formed. Within four hours, the material will have set up enough to be walked upon. And within 24 hours, it can accept rubber wheel traffic.
If you are planning to install a new floor over the now-level surface, you can do so in remarkably short order. For hard-surface flooring materials, such as tile, you can begin installation within four to six hours. For carpeting and other resilient, moisture-sensitive flooring materials, wait 16 hours before starting work. Alternatively, finish the floor with another CTS | Rapid Set offering—NewCrete Concrete Resurfacer—which provides a beautiful concrete floor surface that will last for years.

This post has been brought to you by CTS Cement. Its facts and opinions are those of BobVila.com.
