We may earn revenue from the products available on this page and participate in affiliate programs. Learn More ›
When you’re paring down your renovation budget there are a few places you can’t scrimp, like appliances, electrical wiring, and plumbing. When it comes to the floors, however, there’s room to negotiate. Not only is tearing up and replacing floors costly, but it’s also a major job that can kick up dust, aggravate allergies, and lead to even bigger repairs if something goes wrong. If you have the time and are willing to put in the effort, painting tile floors is a DIY project that can completely transform a room.
1. Star Tile
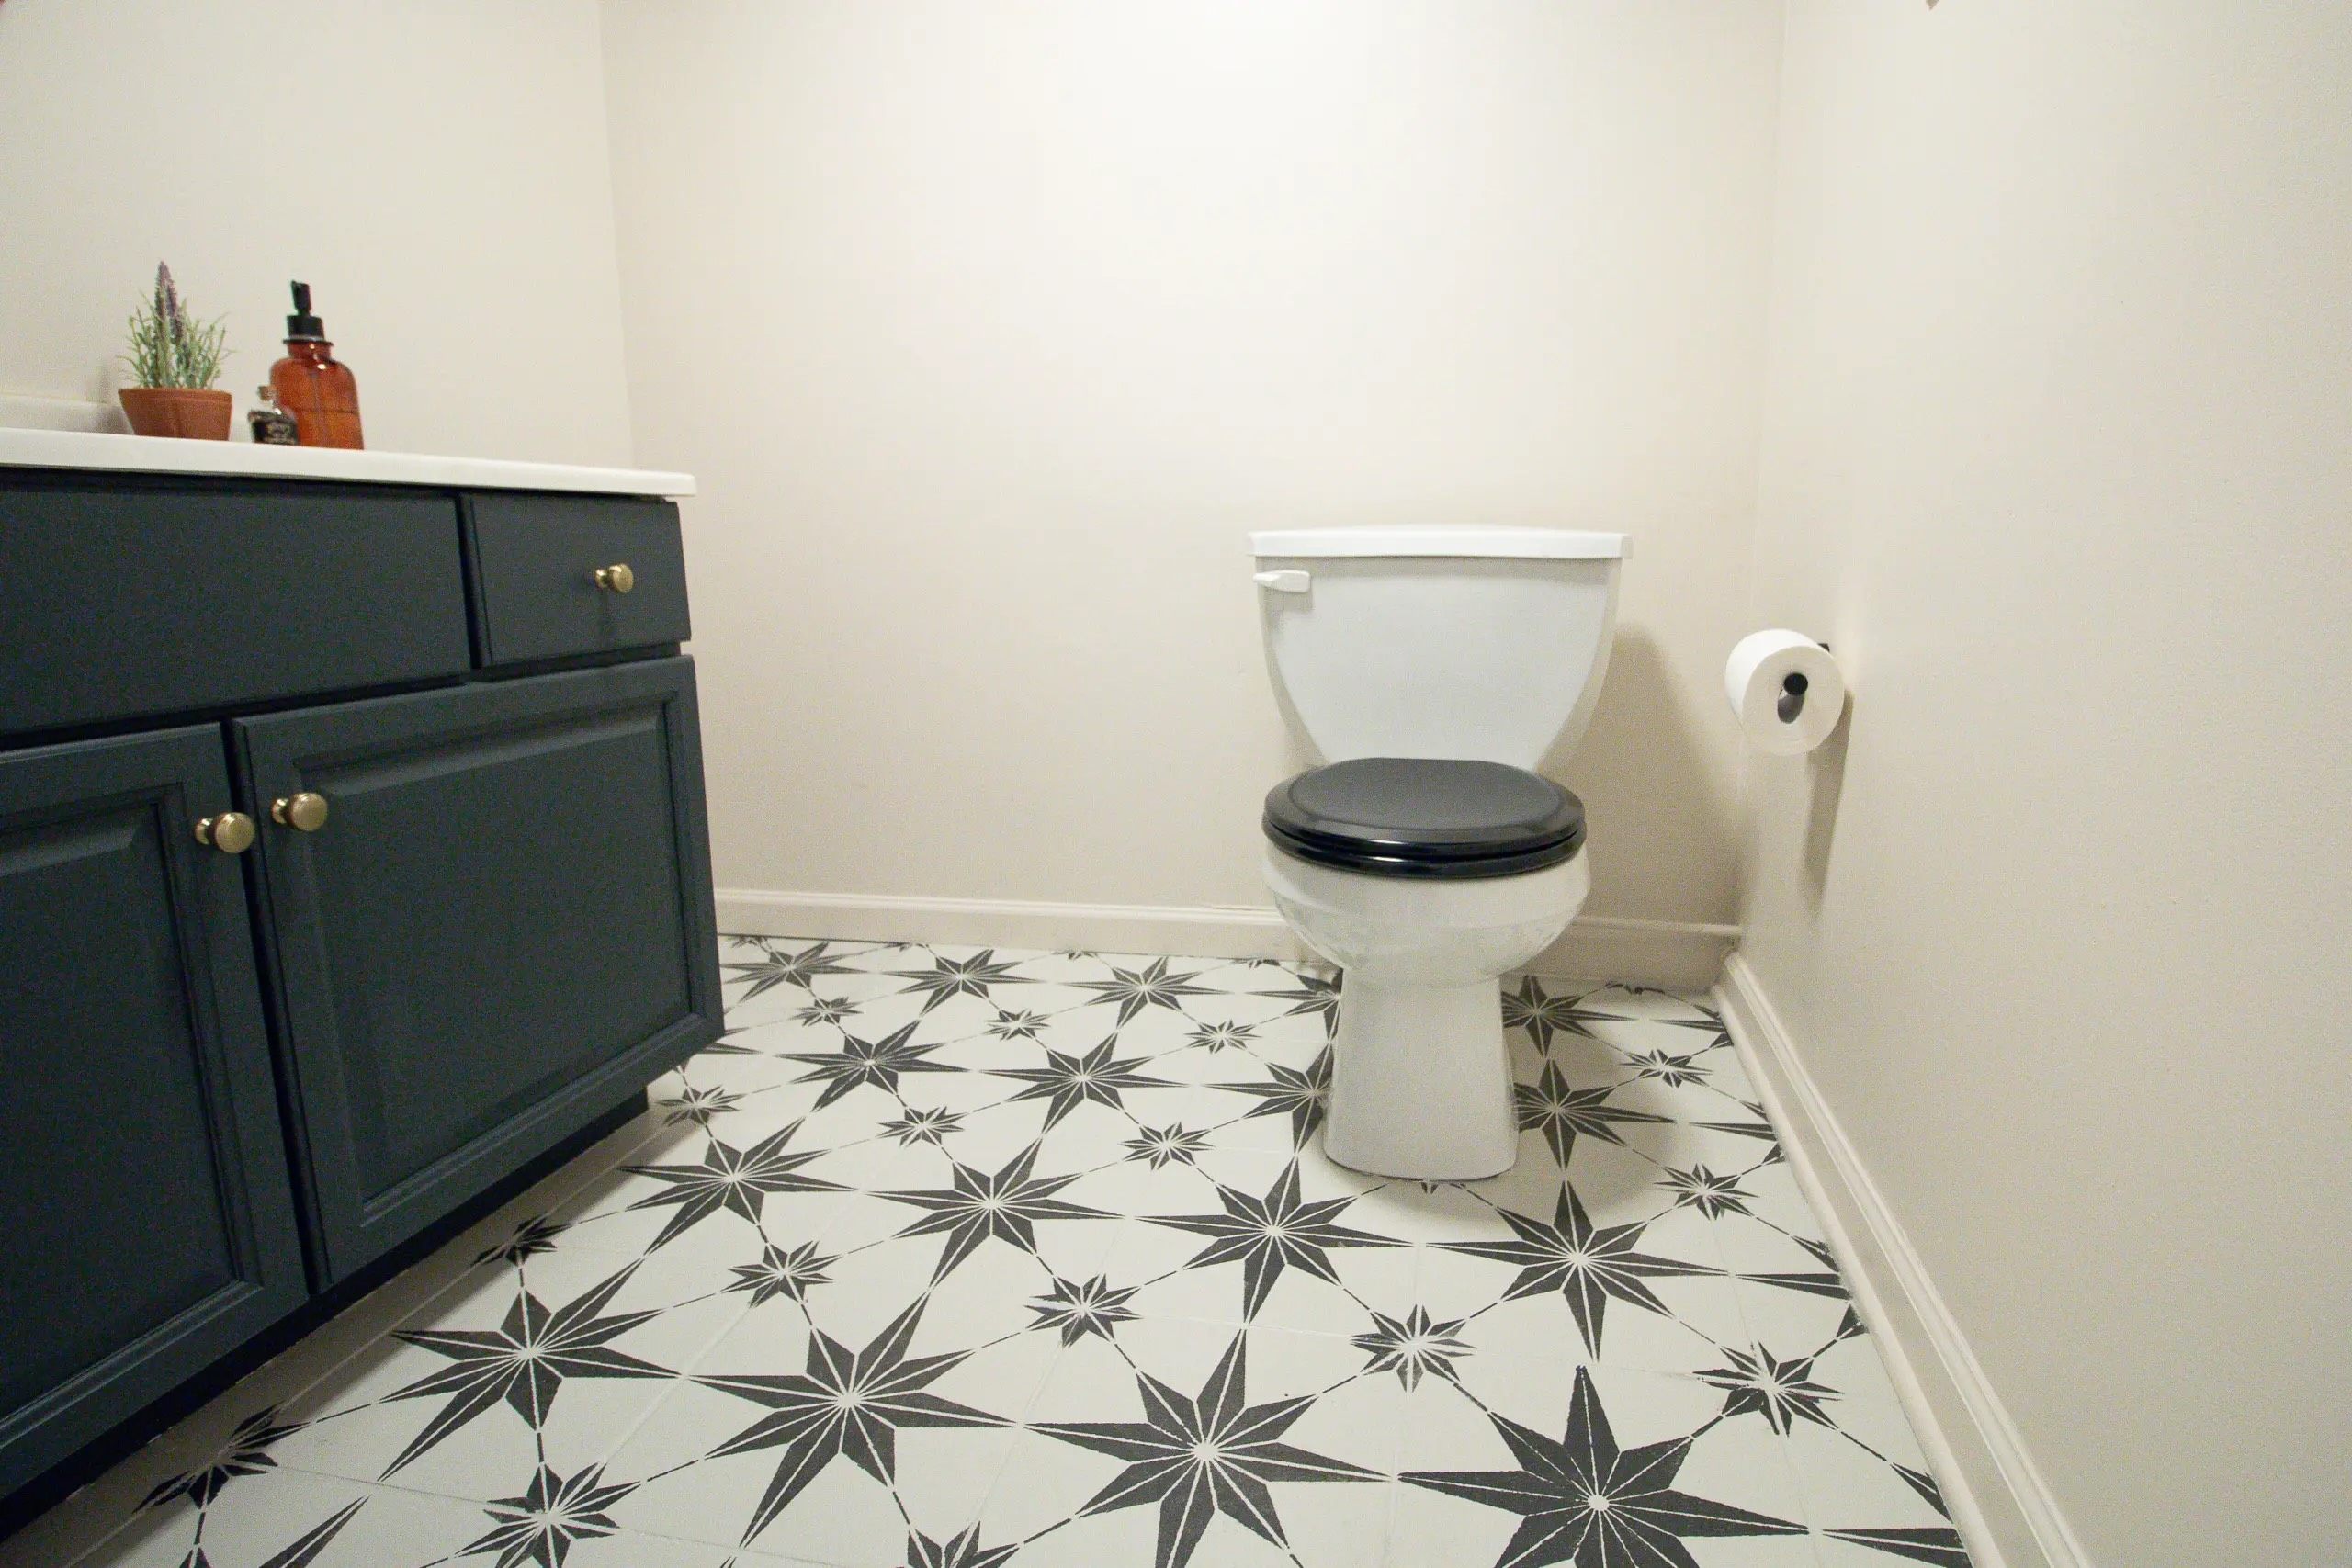
Blogger Casey Finn of The DIY Playbook was so impressed by her first tile-painting endeavor in her guest bathroom that she decided to make over the floors in her basement bathroom too. According to Finn, “you’ll want to use the Rust-Oleum Home paint,” because paint intended for walls will not hold up on tile floors.
As with any paint project, prep work is super important. “I would suggest spreading this project over the course of two days,” Finn says, who made sure the floors were completely cleaned before applying paint. To achieve this complex pattern, she recommends buying two to three of each stencil you plan to use. “Your main stencil will get pretty beat up after a while,” Finn explains. To finish off her new floors, she used a stencil brush to paint the darker painted design and Miracle Wipes to clean up any mess.
RELATED: Thinking About Painting Your Tile Floors? Here’s What You Need to Know
2. Geometric Tile
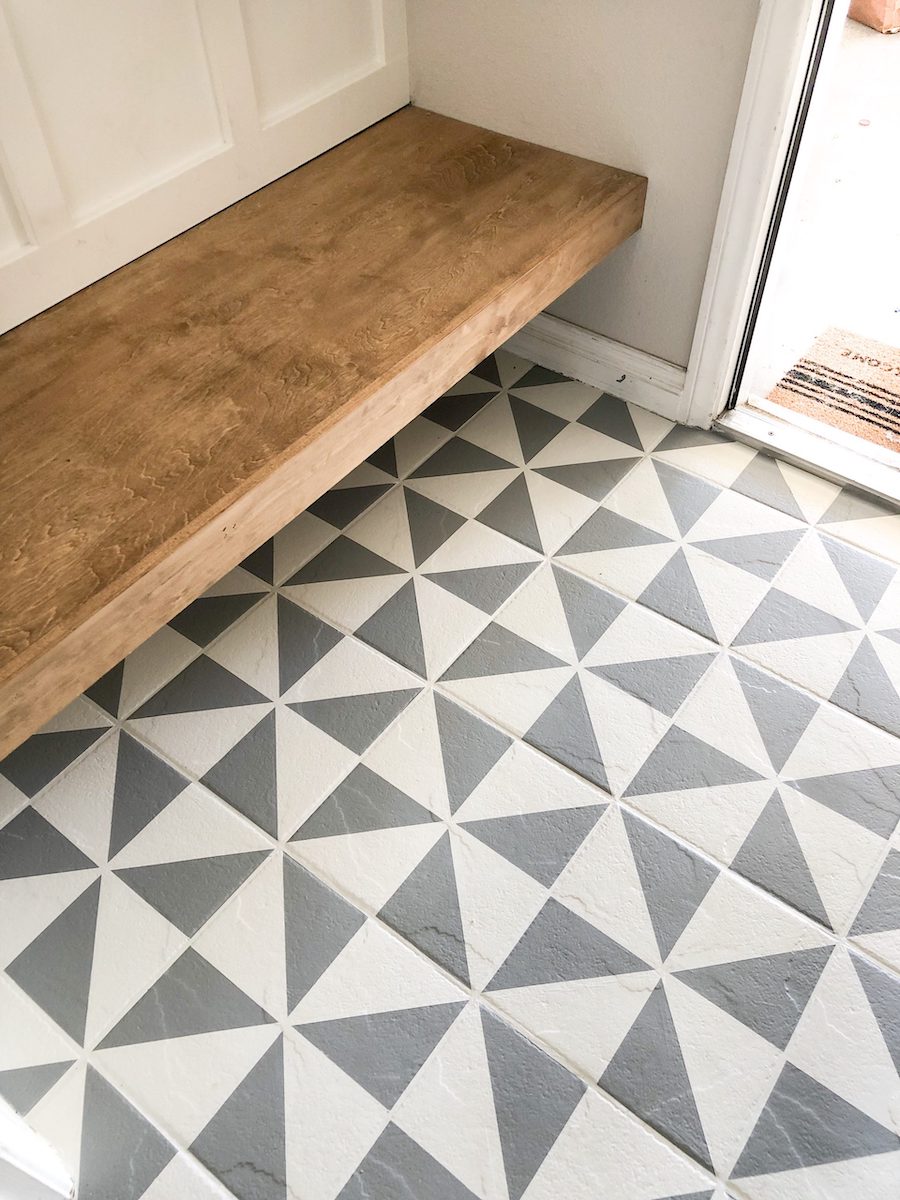
DIYer Angela Rose at Angela Rose Home used ¼-inch painter’s tape to achieve this stylish geometric design for her entryway. “Before you do anything, you need to make sure your floors are clean,” she says; she used Krud Kutter to get rid of grime before undertaking the painting.
The base color for this design is Rust-Oleum’s Steam Gray; Rose recommends using a paint brush or roller to paint your pattern—and a durable top coat, of course.
3. Paisley Tile

With just a little over $100 in materials, you can create this beautiful paisley design on your tile floors, like Zoe Hunt at Pine + Poplar did. To get this look, she used Behr Concrete and Masonry Bonding Primer and Premium Low-Lustre Enamel Porch & Patio Floor Paint in Ultra Pure White for the base, and Behr Premium Low-Lustre Enamel Porch & Patio Floor Paint in Space Black for the stencil.
“The stencils tend to bleed a little bit,” says Hunt, “so we went back afterward and hand painted all of the edges to make the design nice and crisp. If you don’t want to go through the extra effort of cleaning up all of the lines at the end, you may consider using a sea sponge to apply the stencil color instead.”
If you’re wondering how well a painted tile floor holds up after time, read Hunt’s two-year update on the project.
RELATED: 6 Things to Know Before Painting Bathroom Tile
4. Primavera Tile
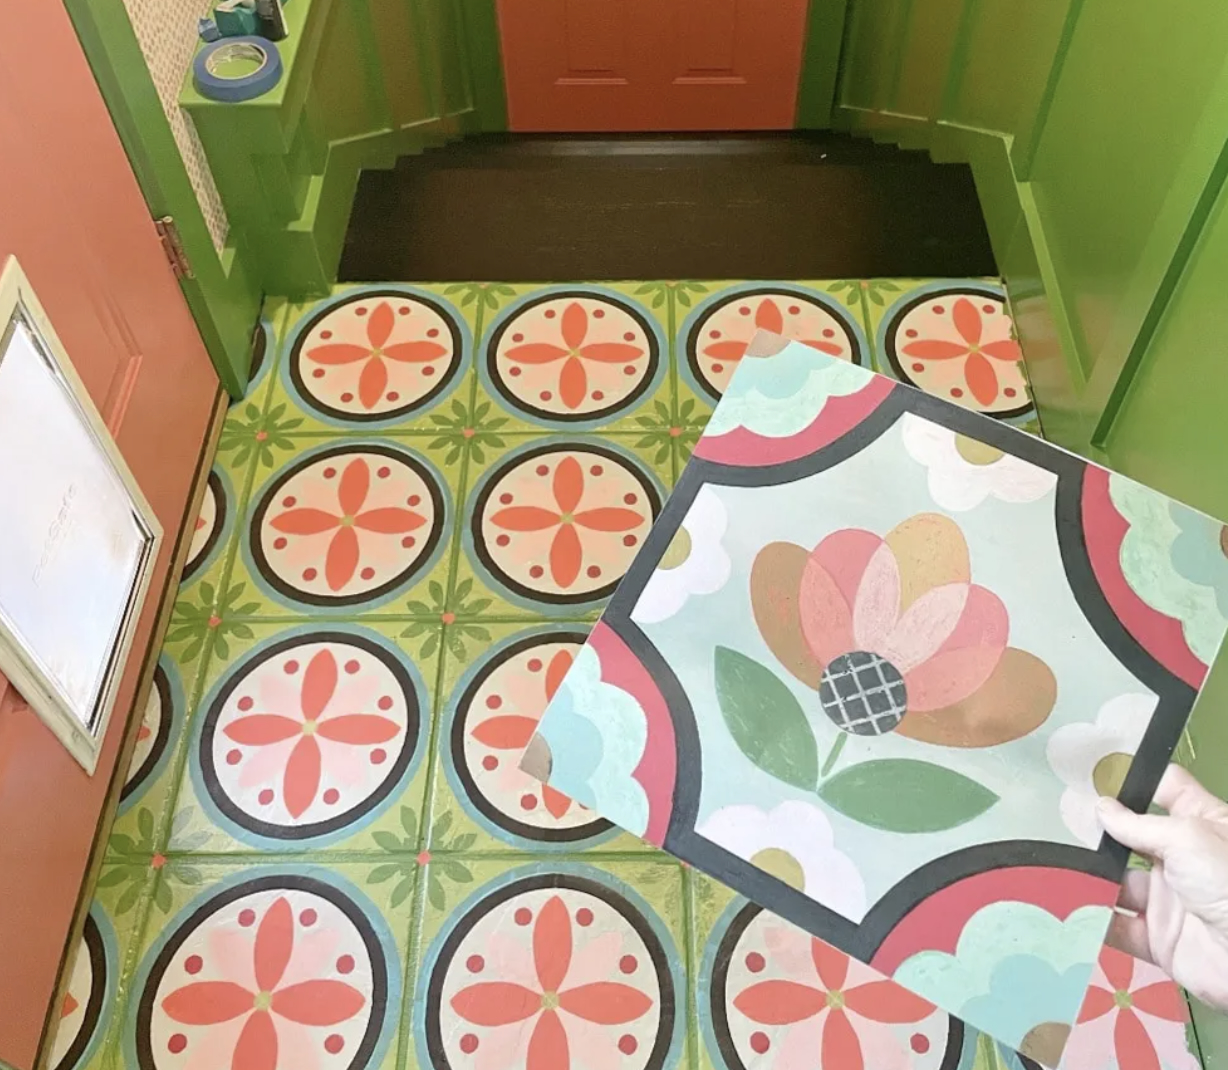
To achieve this colorful patterned floor, Maggie Overby of Maggie Overby Studios used this Primavera tile stencil and added some of her own hand painted details. While the final look took a bit of work due to the numerous colors and hand painted elements (and a few coats of Minwax Polycrylic to protect the finish!), Overby was able to achieve the entryway of her dreams. Follow her process at Maggie Overby Studios.
5. Tumbling Block Tile

This tumbling block-style tile by Brittany Jepsen of The House That Lars Built was inspired by classic French interior design, and according to Jepsen, was fairly simple to create. With a bit of painter’s tape, a good primer (Jepsen used a Farrow & Ball primer), and patience, you can recreate this geometric look. The House That Lars Built has the full tutorial.
6. Santa Ana Tile
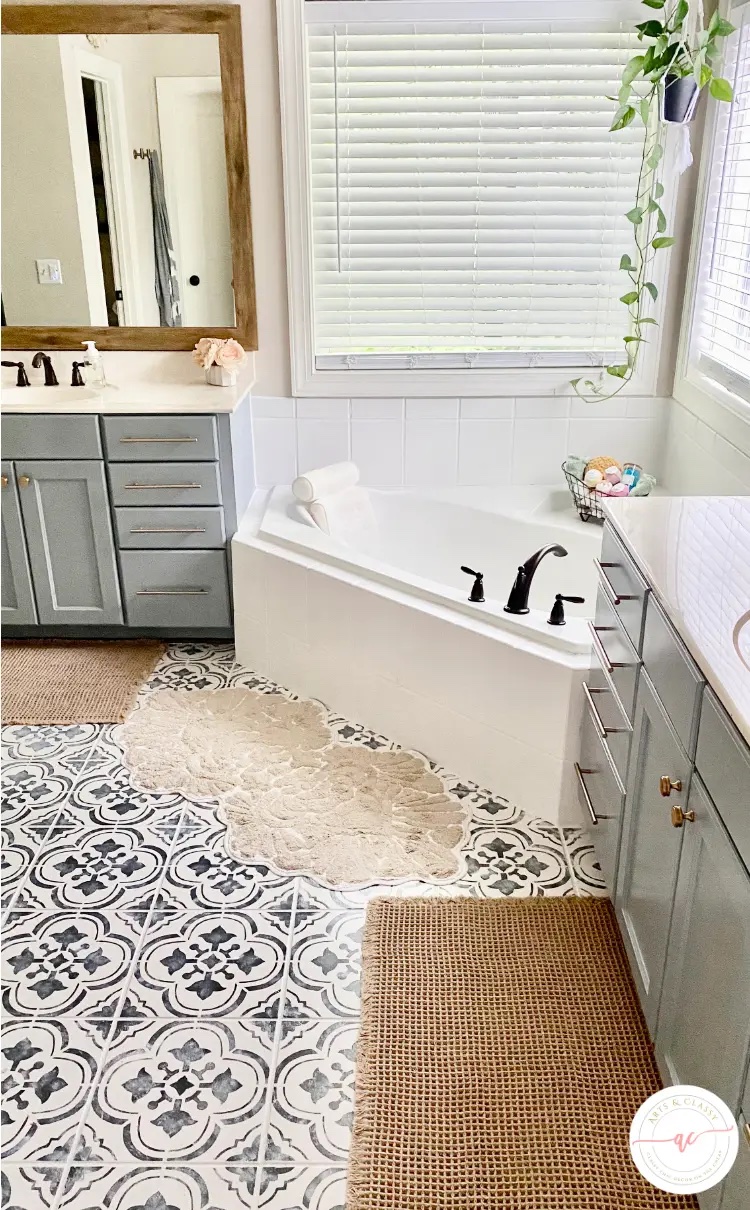
“Before diving into any painting project, it’s important to prepare your workspace properly,” says Meredith Schneider of Arts and Classy. “I didn’t want to risk the possibility of peeling. I chose the Stix waterborne bonding primer,” Schneider writes. She used a large paint roller with an extension pole to paint over the old tile, and the Santa Ana stencil from Cutting Edge Stencils for the design. After a few coats (and a week to allow the project to dry), she’s got brand new master bathroom floors.
RELATED: 10 Flooring Surprises That Look Like Other Flooring
7. Inverted Star Tile

According to AZ House of Order’s Shalae Price, the hardest part of this project was cleaning the stencil after painting each tile (which is why it’s a good idea to buy multiples of the same stencil to make the process easier). Price used Rust-Oleum Floor Base Coating for the base color, and black chalkboard paint for the stenciled design. “This DIY project truly transformed the entire space in both bathrooms,” she writes.
8. Pink Tumbling Block Tile
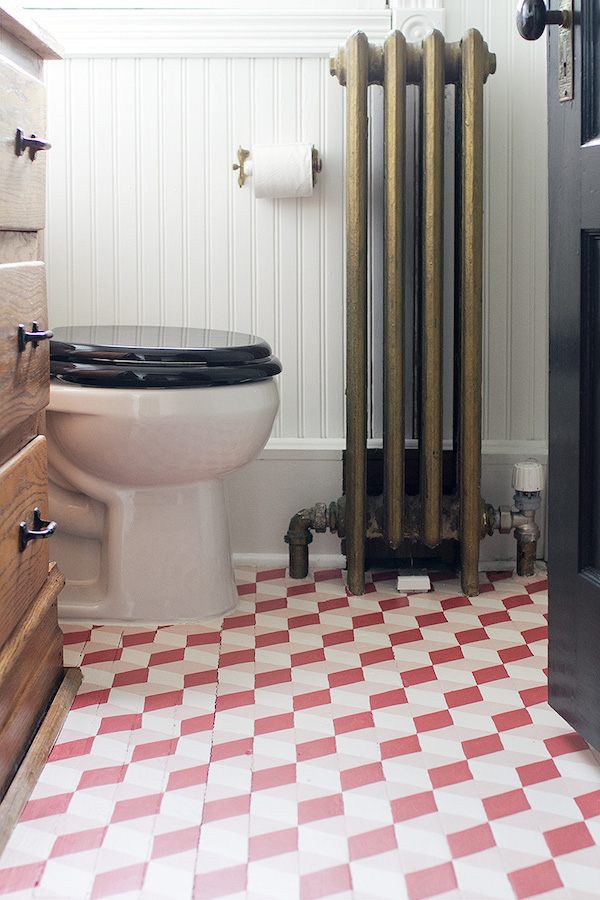
Making It Lovely blogger Nicole Balch found a classing tumbling block pattern online, and reworked the style to her liking in Photoshop. “I decided to go with the more colorful scheme inspired by this encaustic cement tile from Mosaic House,” she writes.
Balch wanted a pink-and-red color scheme that wasn’t too bright, so she opted for a quart each of Benjamin Moore’s Puppy Paws, Odessa Pink, and Crimson. Her advice for other DIYers? Start “at the doorway where the pattern is most visible. That’s the recommendation when working with tile too. You want to start your pattern where you are most likely to be looking at it, and if it’s going to go wonky, you want that hidden toward the back.”
9. French-Style Tile

This classic cement-inspired tile floor transformation cost less than $40. After some trial and error with primer, Blogger Erin at Lemons, Lavender & Laundry recommends using an oil-based primer, which she finds more durable. For paint, she used Valspar Porch, Floor & Patio paints in white and Grey Flannel.
“I cannot tell you how important it is to practice, practice, practice before taking that stencil to your floor,” Erin says—and a little paint goes a long way. She let the floor dry for 24 hours before sealing it with a coat of Minwax Polycrylic.
RELATED: 12 Painted Floors You Need to See to Believe
10. Tiny Flower Tile

For less than $50, you can achieve this simple yet stylish hand-painted flower tile design by Danae from The Homebody House. After prepping the floor with Krud Kutter and a scrub brush, Danae used Rust-Oleum Home floor base coat in black. For the floral design, she hand-painted each flower with a small artist brush and Rust-Oleum semi-gloss white paint. “The less paint, the better,” Danae writes.


