We may earn revenue from the products available on this page and participate in affiliate programs. Learn More ›
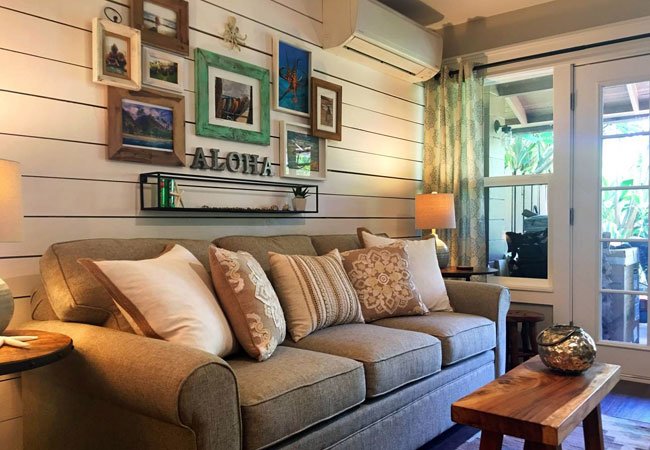
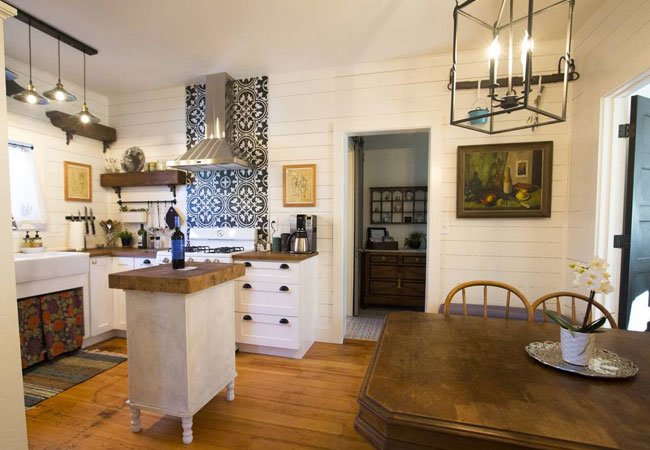
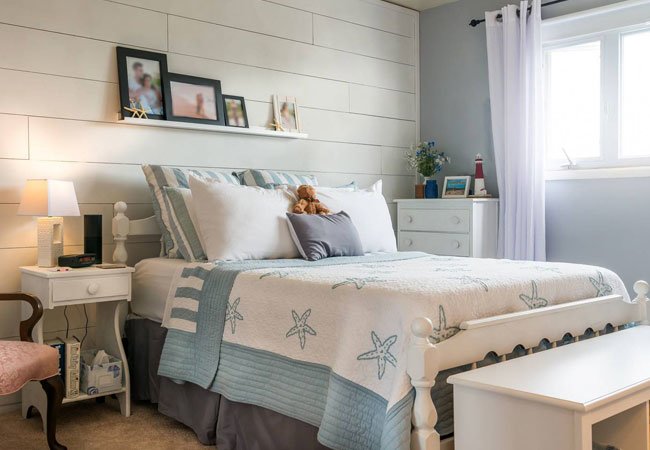
Shiplap has been popping up everywhere lately. The rough-sawn wooden planks arranged as horizontal panels can take any wall from drab to dramatic. Homeowners love the rustic texture of shiplap as well as the ease of installation and budget-friendliness of the project. What’s more, shiplap works with any existing style of decor—from cozy cottage to beach bungalow. If you’re interested in installing shiplap in your home, consider the following tips and tricks.
What Is Shiplap?
Shiplap paneling takes its name from the horizontal planks once used to construct boats. Thanks to the grooves cut into the top and bottom of the boards, builders could fit shiplap panels tightly together to keep out the water. In fact, shiplap boards were so effective that builders began adapting the material for use as exterior sheathing on homes to block cold winds. Until the advent of plywood, shiplap boards were commonly used to construct the sheathing between a home’s structural framing and its exterior siding.
RELATED: 17 Times Shiplap Made the Room
Nowadays, people often find shiplap sheathing underneath the wood siding of historic homes during exterior renovation projects. The wooden planks, which are highly coveted as reclaimed construction materials, can be carefully salvaged and brought indoors for use as decorative wall coverings. Homeowners looking for an affordable alternative to traditional shiplap may choose to mimic the look by installing long boards ripped from sheets of plywood, leaving slight spaces (the standard gap is 1/8 inch) between each panel.

Creating Character
When used indoors, shiplap shifts from functional to purely aesthetic. The wood panels add visual character and texture to otherwise blank walls in a home, and have the ability to adapt to any decorative scheme, depending on how the homeowner chooses to incorporate the material.
For example, crisp white shiplap paired with natural wood flooring and neutral accents creates a fresh Cape Cod look. Similarly, a shiplap wall accented with a ruffled slipcovered sofa, soft pillows in muted floral shades, and painted wicker end tables can evoke a romantic feeling.
Alternatively, homeowners can achieve Scandinavian style by pairing natural wood panels with equally simple furnishings. No matter your home’s style, installing shiplap paneling on one or more walls will enhance your decor.
For more adventurous designers, shiplap can go beyond standard wall coverings. Consider installing it as wainscoting, or use it to cover the backs of built-in cubbies or bookcases. Shiplap can also frame a designated picture-hanging area above a fireplace.

Installing Shiplap
While you don’t need to be a professional carpenter to install shiplap paneling at home, you should be familiar with basic woodworking skills like measuring, sawing, and nailing. The most common (and affordable) way to re-create a shiplap look from scratch is to use plywood. Look for ¾-inch AC plywood (which is pre-sanded on one side) and avoid the cheapest variety of plywood (which is rough on both sides and has a tendency to chip). A 4×8 sheet sells for around $30—that’s just under $1 per square foot of a wall.
You’ll need a saw to cut the ends of the boards to fit your space, and you’ll also need a power sander and nail gun. Other necessary materials include a level, a chalk line, spacers, spackle, and paint to finish the look in a neutral of your choice. Once you’ve equipped yourself with the required tools and materials, installation will follow these seven stages.
- Cutting the Boards: Before installing the plywood boards, you’ll need to “rip” them (cut them parallel to the grain) to the correct width, either using a table saw to do it yourself, or by seeking the help of employees at the hardware store where you purchased the wood. Any width of board can be ripped from a sheet of plywood, but 5-7/8 inches is a safe starting point for shiplap panels. This cut will give you exactly eight 8-foot-long boards from every sheet of plywood (because the saw eats ⅛ inch with every cut).
- Sanding the Boards: The surface of AC plywood is smooth, but the edges require sanding since they’ll be rough from the ripping process. For the best results, sand sufficiently to create a slight bevel on the edge of the boards. This is called “sanding a chamfer.”
- Painting the Boards: Apply a first coat of paint before placing the boards on your wall, because the gaps between the installed boards will be too narrow to fit even a detail paintbrush once the boards have been attached to the wall.
- Prepping the Wall: Remove everything from the wall, including outlet covers, pictures, and any baseboard at the bottom of the wall. If you’re installing the shiplap boards around a door, take off the door casing and reinstall it after the shiplap is in place. Next, create a visual guide for nailing the boards into the wall studs, which will offer the best support for the weight of the wood panels. To do so, locate the center of each wall stud with a stud finder and pop a vertical chalk line at every stud, from the bottom of the wall to the top.
- Attaching the First Board: Attach the bottom board to the wall with two 2-inch nails in every wall stud. The entire design depends on the first board’s being perfectly level; if the panel is even a few centimeters off, the entire wall will appear slanted. Rely on a level to install the boards carefully and accurately.
- Spacing the Boards: Enlist spacers to create uniform gaps (typically 1/8 inch) between each board. You can use any type of spacer you’d like, such as the edge of a carpenter’s square or tile spacers. Make sure that you position each board using the same spacer so the boards appear evenly spaced.
- Attaching the Other Boards: Attach the rest of the boards to the wall with two 2-inch nails in every wall stud, aligned vertically and evenly spaced. Don’t skip studs. For a more rustic look, you can hand-nail with 8d nails, which will leave visible nailheads. Use finish nails for a smooth look.
- Finishing the Look: If you used finish nails, fill the nail holes with spackle. Let them dry and then sand the surface lightly with 400-grit sandpaper before brushing a final coat of paint on the surface of the boards. Since you have already painted the edges, you shouldn’t have to paint them again—touching up the surface should be sufficient. Let the paint dry, then proceed to fill the newly shiplap-covered walls with framed artwork, mirrors, and other decorative accents—whatever you’d like!


