We may earn revenue from the products available on this page and participate in affiliate programs. Learn More ›
Stylish storage solutions is a home design goal that many of us share. While wire shelves and metal cabinets are fine for storing utility items in the garage or tucked-away places in our homes, they lack the polish that built-in cabinets offer. And when we use stock cabinets to create custom furniture and built-ins, it’s even easier to achieve that sophisticated vibe in our homes.
Designers and creators have chosen to build a variety of built-ins with stock cabinets because of the simplicity, modularity, and flexibility they offer. “Using stock cabinets made the project feel attainable,” says Sarah Beckler from The Beckler Abode. “They provided the foundation, both literally and figuratively, for the design I wanted for this space in my home.”
Here are some of my favorite stock cabinet ideas to inspire your next DIY project.
1. Built-In Desk
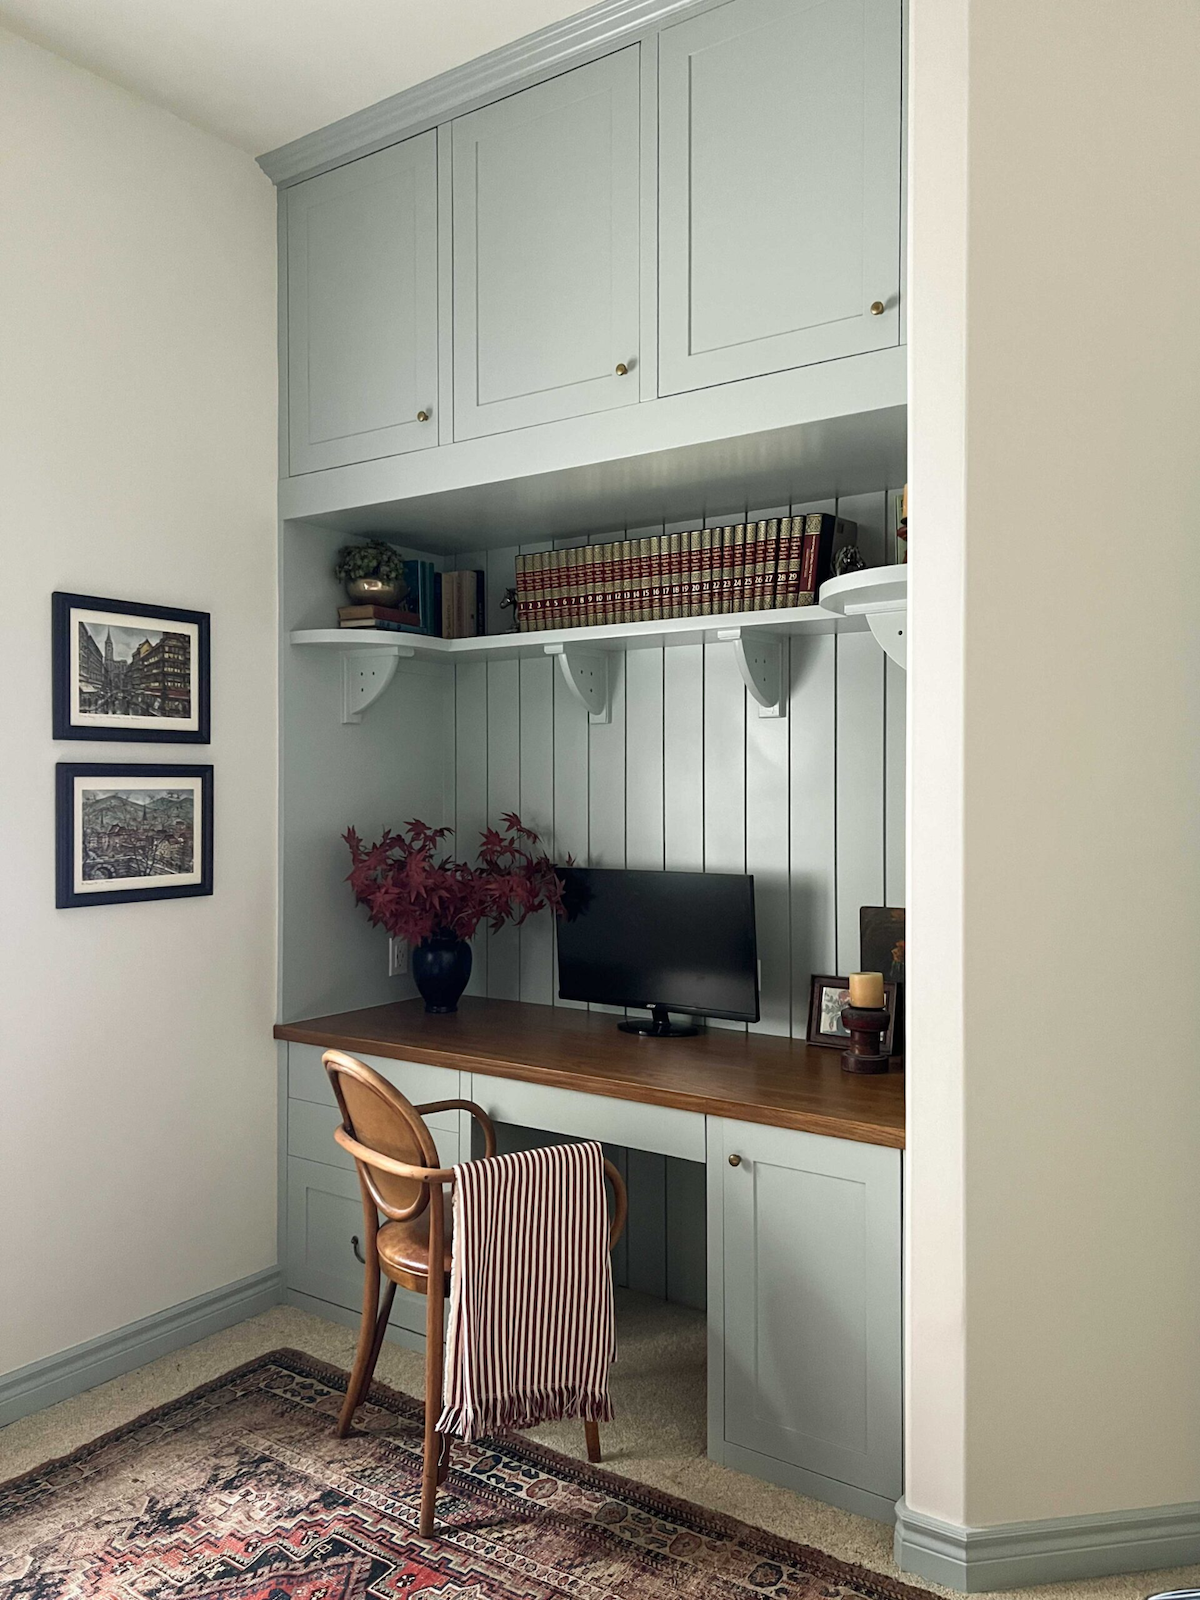
Designer Erin Zubot had an underused closet in her home that was ripe for new use. She took the opportunity to transform the space into a built-in desk. After she demoed the closet, she created the workspace using three IKEA Sektion lower cabinets as a gang of uppers to give the desk area depth. Then she installed two more cabinets that support the IKEA tabletop stained with Osmo Wood Wax.
Using an airless spray gun, she applied paint in Silver Marlin by Benjamin Moore. By sanding between each coat, she was able to achieve a perfect finish. Shiplap on the back wall and antique brass drawer pulls finish the look.
Erin’s Tip: “When painting raw MDF, you have to be sure to use an oil-based or shellac-based primer. MDF sucks up the water in water-based paint and it will result in a rough surface if you don’t use the right primer!”
2. Wall Storage
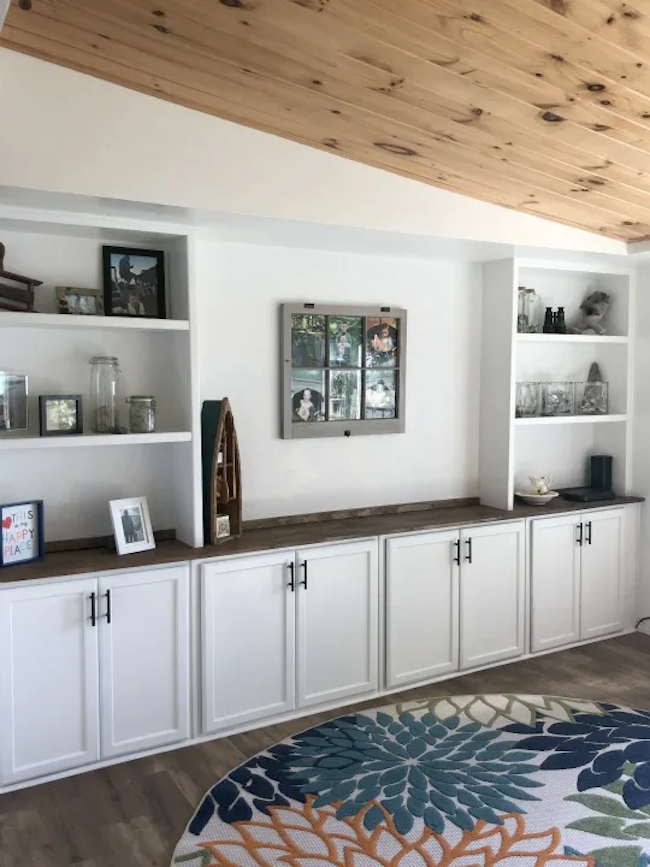
Creating purpose out of a blank wall was the project goal for Tara Boettger from Just Call Me Home Girl. After picking up four unfinished upper stock cabinets—two 30-inch by 30-inch uppers and two 36-inch by 30-inch uppers—from Lowe’s, she set to work creating a stylish storage wall for her lake cottage.
“I love working with stock cabinets because they can add storage to any room, not just the kitchen,” says Boettger. “They’re easy to build out, customize and help make many projects a one-day project.”
Even with the bank of cabinets, there was still a 5-inch gap on either side, so she filled the gap with scrap wood and then covered it with a 1×6, attaching it with a brad nailer. To complete the look, she painted the cabinets and shelves using Benjamin Moore’s Advance paint in Simply White.
Tara’s Tip: “We purchased basic stock, unfinished cabinets from Lowe’s. You could easily find used cabinets in good condition on Facebook Marketplace or your local ReStore as well!”
3. Laundry Center
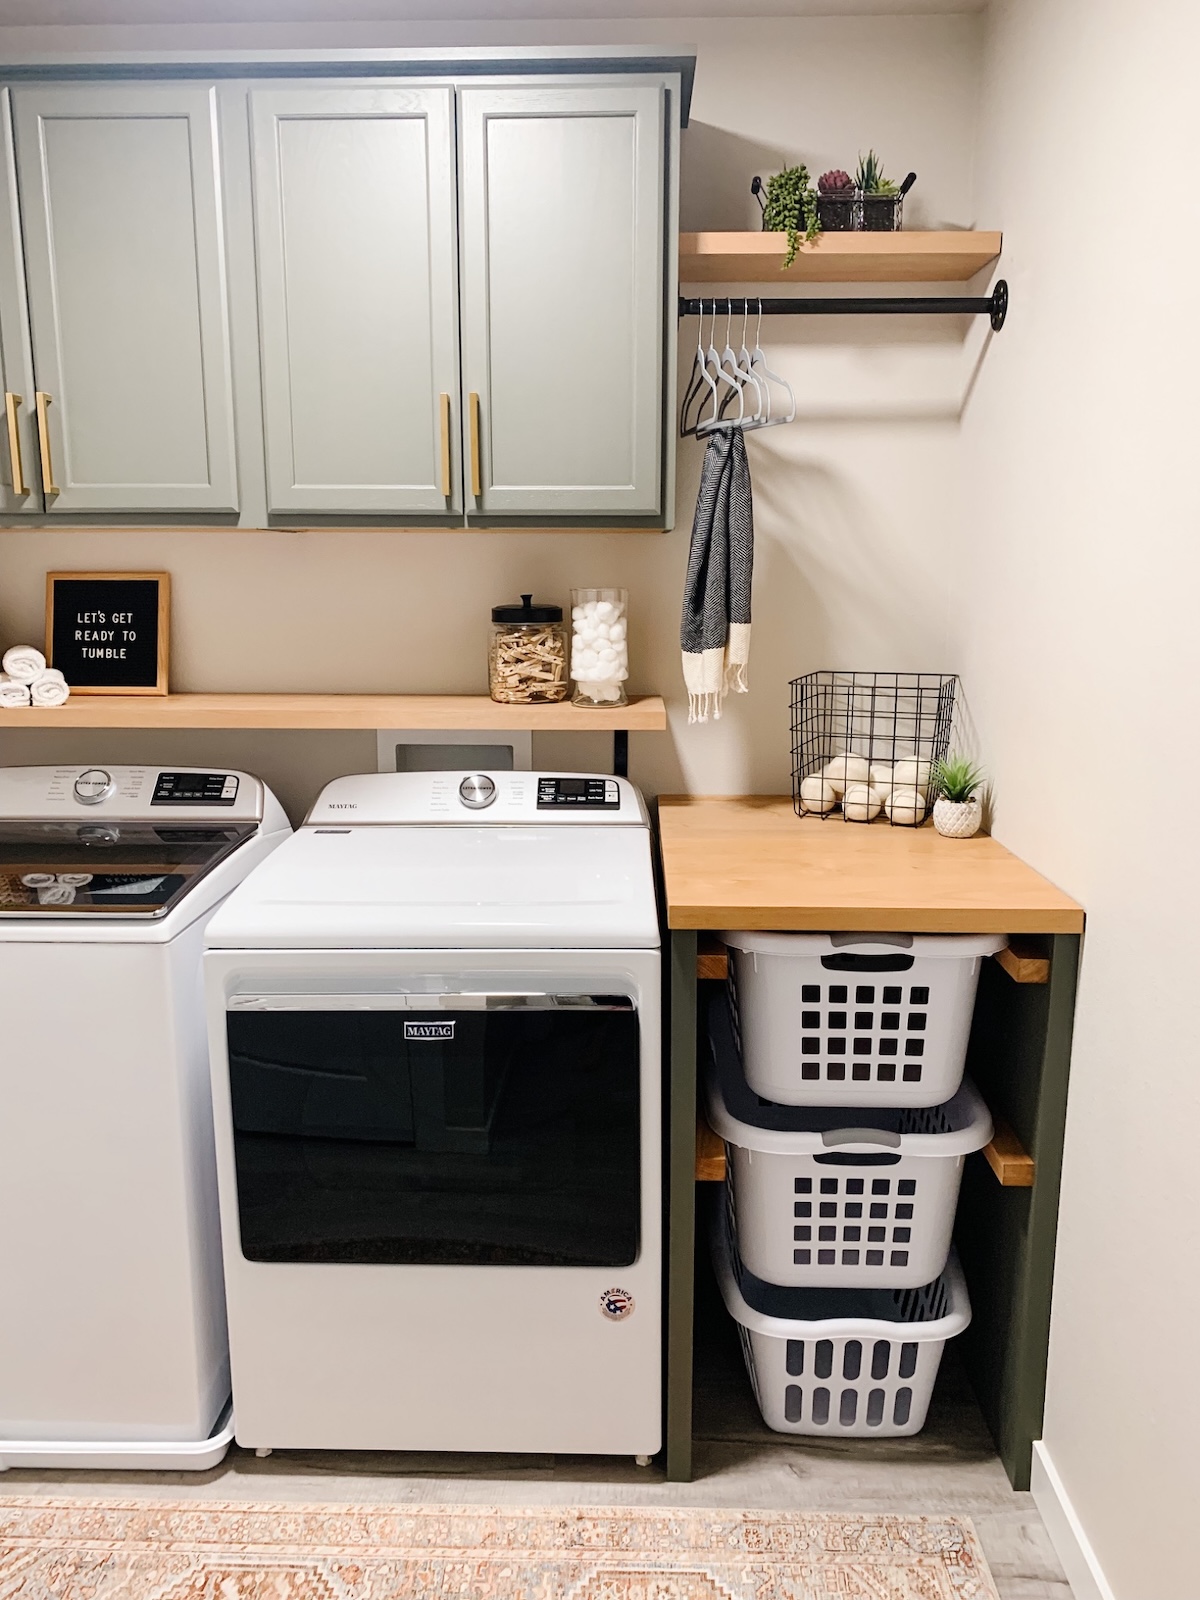
“When we moved into our builder-grade home, the first room I knew we needed to tackle was the laundry room,” says Melinda Malmgren from Welcome Idahome. “It had one high wire shelf and was not functional for our family.”
I think a lot of us can relate to the disappointment of the wire shelves, and the desire to upgrade them into a sturdier and more pleasing-to-look-at storage solution. “Adding these stock cabinets gave us some hidden storage and brought color into the room. We then built the basket cabinet and countertop, which added so much more functionality to the space! Laundry is so much easier now with a place for everything,” says Malmgren.
Melinda’s Tip: “When hanging upper cabinets we temporarily installed a level 2×4 to the wall underneath the cabinets so they could rest on it while we were securing the cabinets to studs and each other without worrying about them being level. Once the cabinets were installed, we removed the 2×4.”
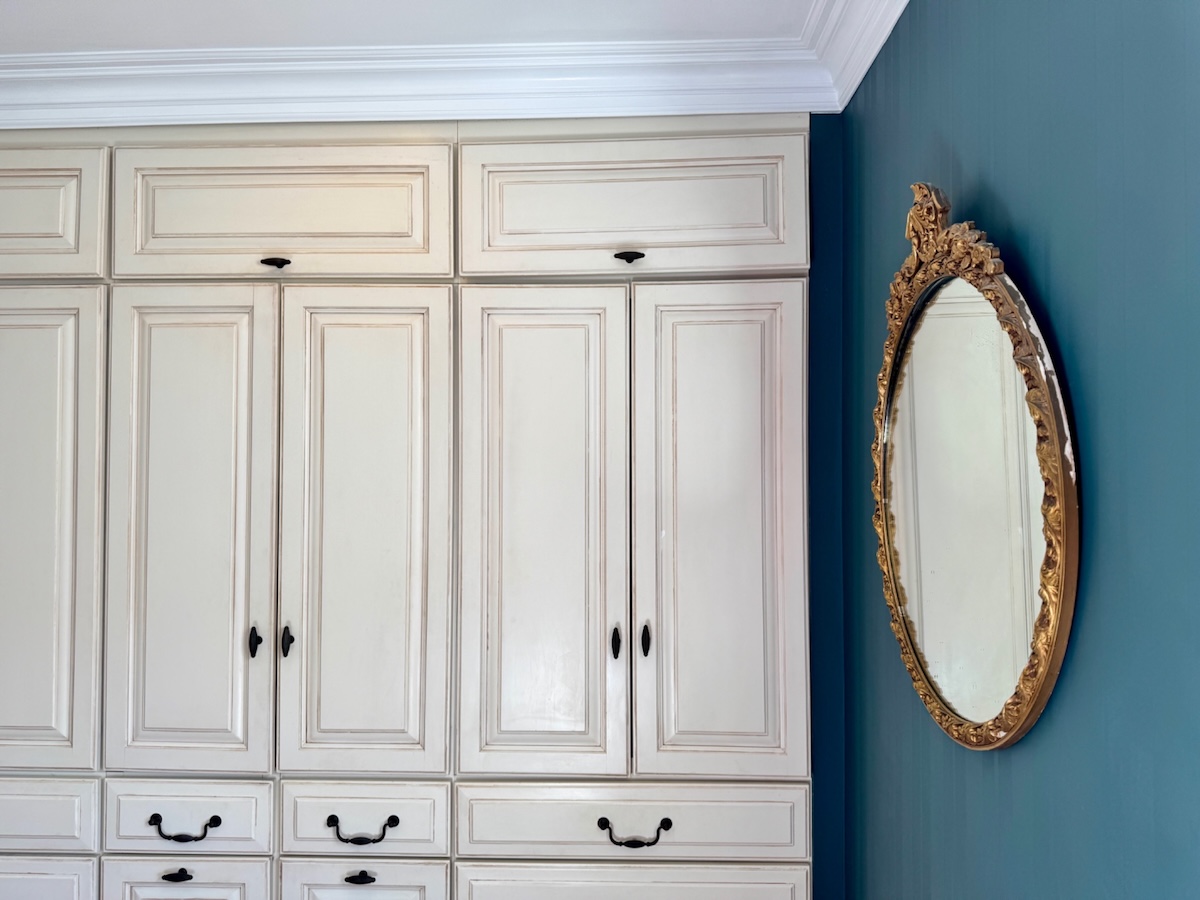
4. Built-In Closet
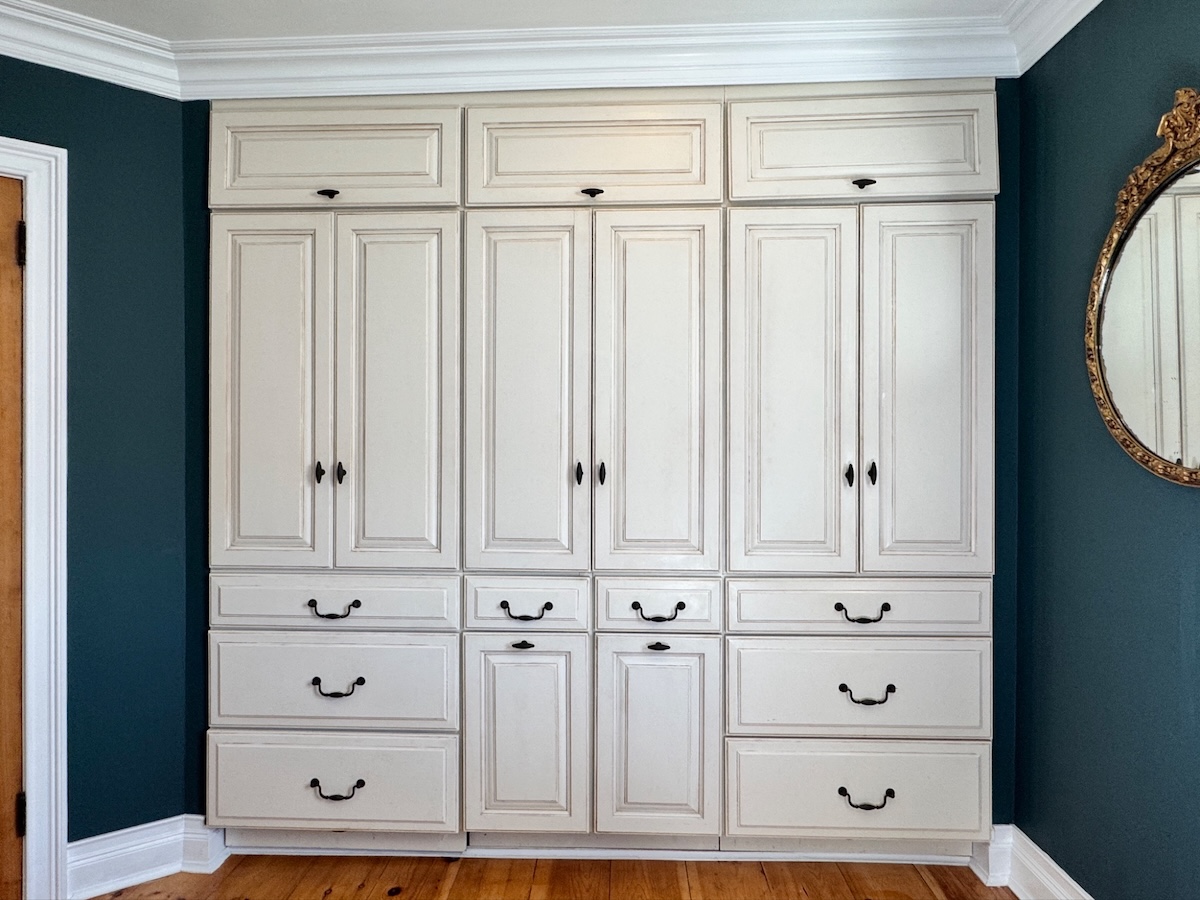
Our 1903 American Foursquare only had two closets before we renovated. Not exactly the storage support needed for a modern family. Creating more storage spaces was part of our mission when we started updating the entire house. As the rooms weren’t spacious, we decided to create built-ins instead of relying on freestanding furniture. For this bank of cabinets, we set the cabinets into the wall to create a seamless look. (The other side of this cabinet wall is a Murphy bed in another bedroom.)
Cabinet accessories that are designed for kitchens offer a world of opportunity to organize a wardrobe and accessories. In this built-in, the lower pullouts in the center are designed for kitchen trash cans, which we use for laundry. And we use flatware drawer organizers in the top row of drawers to organize jewelry, cosmetics, and other small items. And at the bottom, there are toe-kick drawers that offer a little extra space.
Mark’s Tip: “If you’re installing a long run of cabinets, establish a level line. In a newer house, you could maybe get away with using the floor. In an older house, a level line will help you figure out if the floor has a high or low side. Then you’ll be able to adjust the cabinets so the run is level—no matter what the old floor is doing.”
5. Entertainment Center
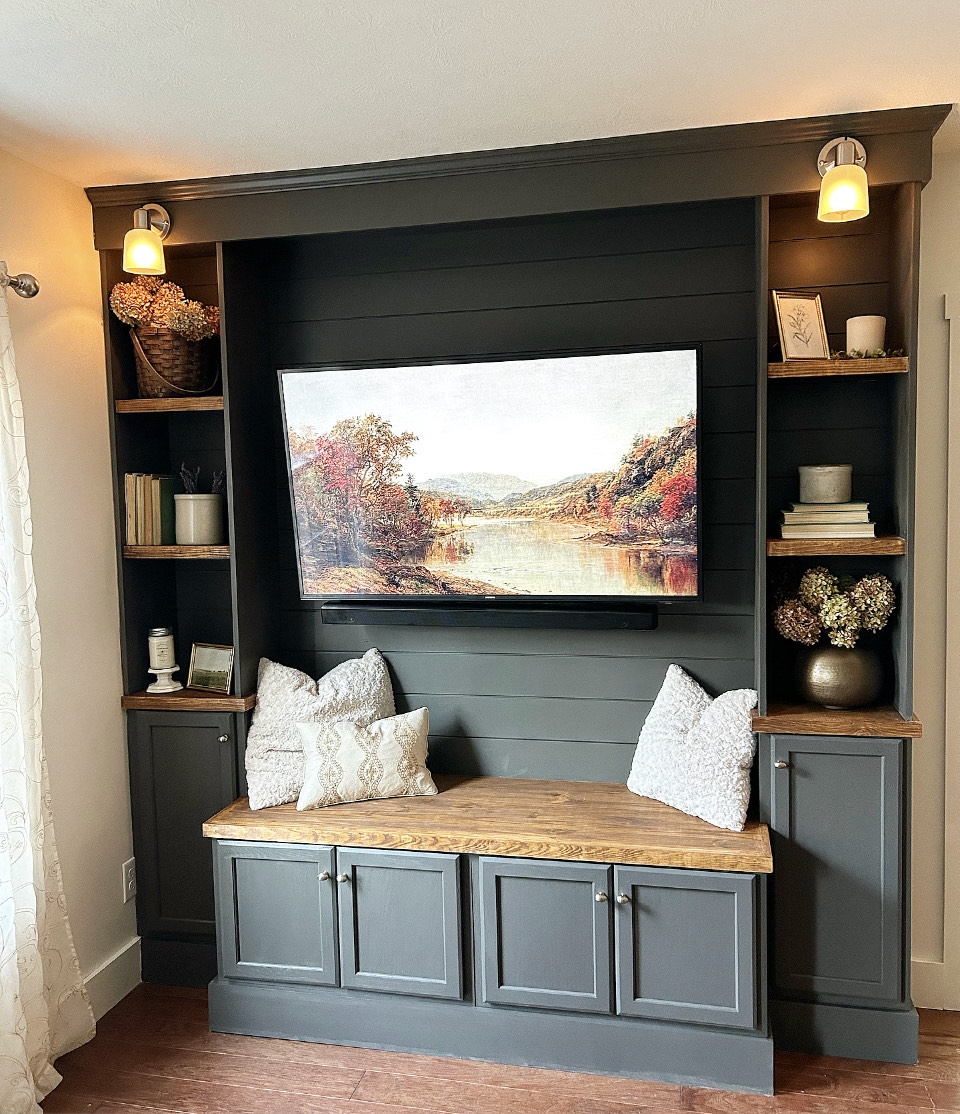
Maximizing the space around a TV, Melinda Edwards, blogger and content creator at Edwards Farmstead, built this charming entertainment center out of unfinished stock wall cabinets from Lowe’s. Using a miter saw, circular saw, finish nailer, brad nailer, and cordless drill for this project, she built the base from 2x6s to match the height and thickness of the surrounding baseboards. She then constructed the shelves from pine, and installed shiplap on the back wall behind the TV.
“I had seen so many beautiful built-in projects using stock cabinets and wanted to attempt to make a built in entertainment center for our living room,” says Edwards. “I loved the idea of using the unfinished cabinets instead of building them myself. I followed a tutorial from Thrifty Decor Chick.”
Melinda’s Tip: “You can do it! I didn’t have plans and had never attempted anything like this before and it was surprisingly easy to build using the stock cabinets. I looked up several tutorials on the internet and YouTube that were helpful!”
6. Coffee Bar
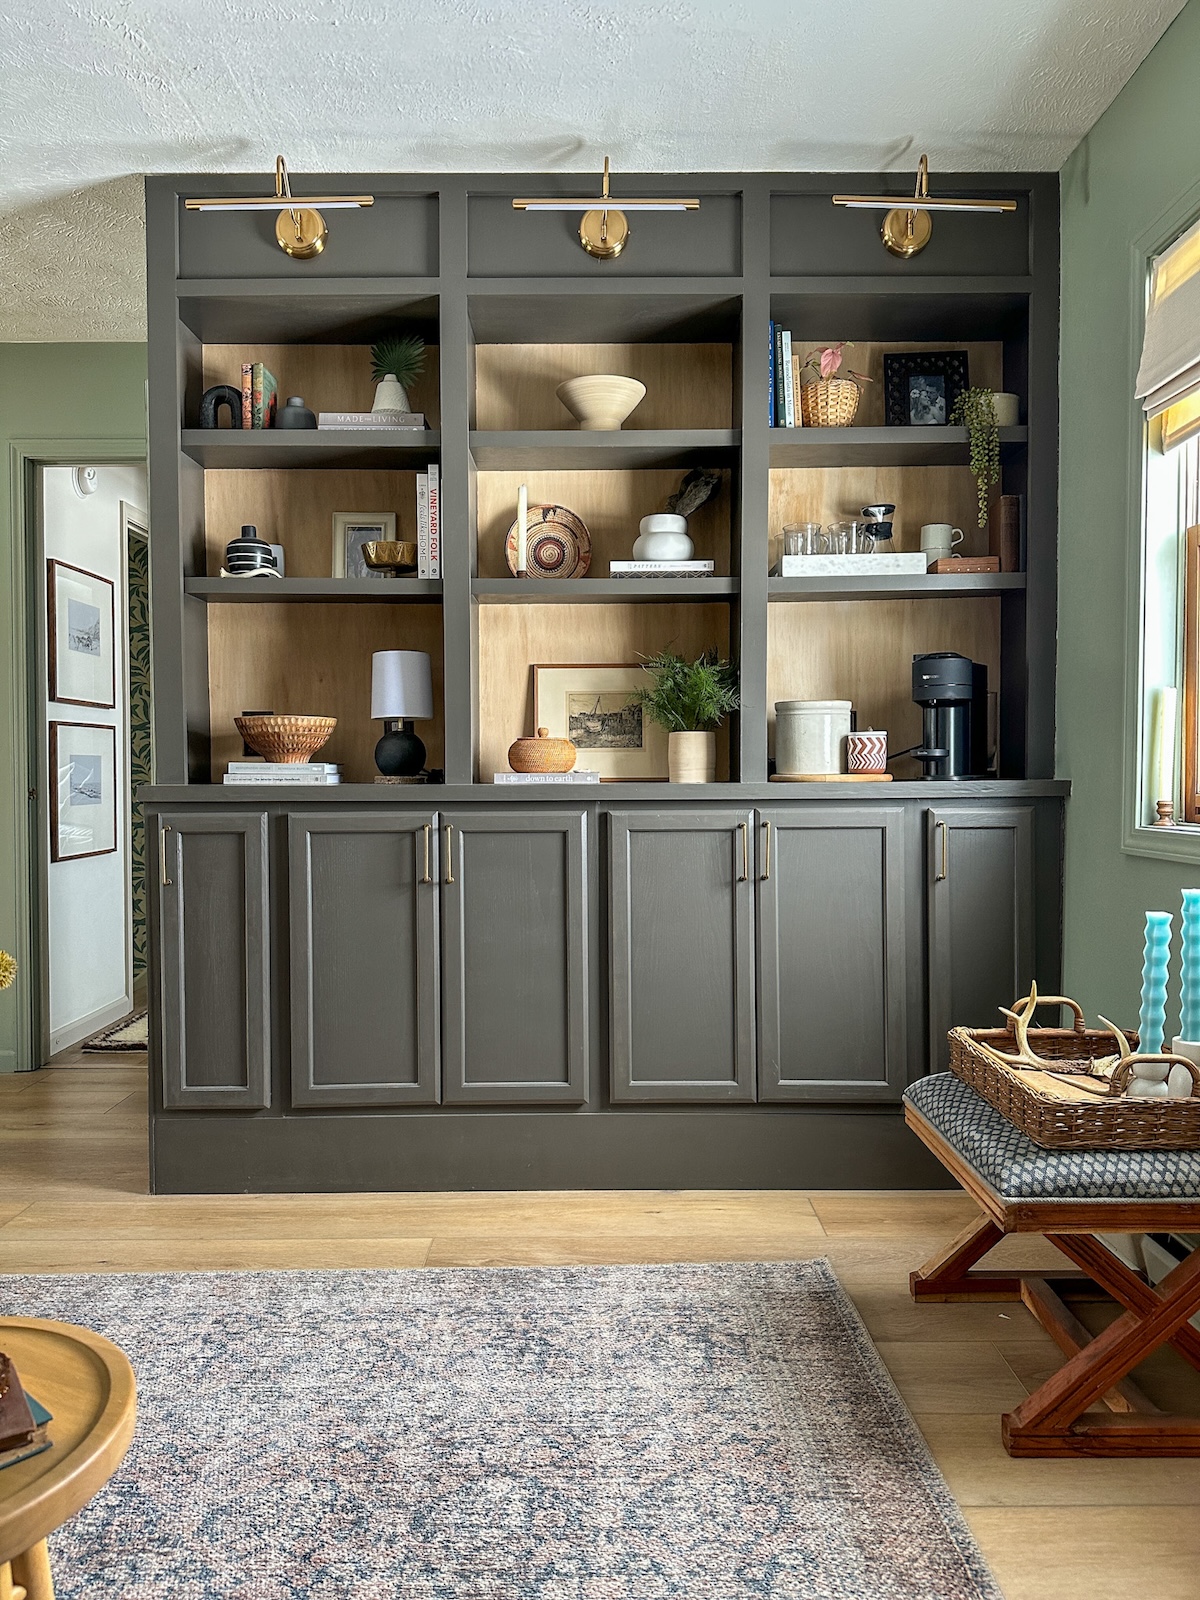
Sarah Beckler from The Beckler Abode built this coffee bar from wall cabinets and ¾-inch plywood for the countertop and shelves. The backing is ¼-inch plywood and she trimmed it with simple 1-inch boards using a circular saw, miter saw, jigsaw, nail gun, drill, and corner clamps. Painted in Urbane Bronze from Sherwin-Williams with a whitewashed back that’s stained in Minwax’s Golden Oak stain, the finished product gives an upscale coffee shop vibe.
“I used stock cabinets for the project because this was my first woodworking project, and I didn’t feel confident enough to build cabinets from scratch,” says Beckler. “I had done some smaller design updates, like board and batten, trim molding, and a fluted door makeover, and had even renovated a camper before this, but this was the first woodworking project I’d built from scratch.”
Sarah’s Tip: “Start with a plan, but be prepared to adjust along the way. I started with a general vision of what I wanted it to look like, but kept myself open to inspiration, which is how I got the idea to paint the cabinets and shelves and stain the back for a distinct look. That was not part of my original vision, but I’m so in love with how the design turned out!”
7. Sideboard
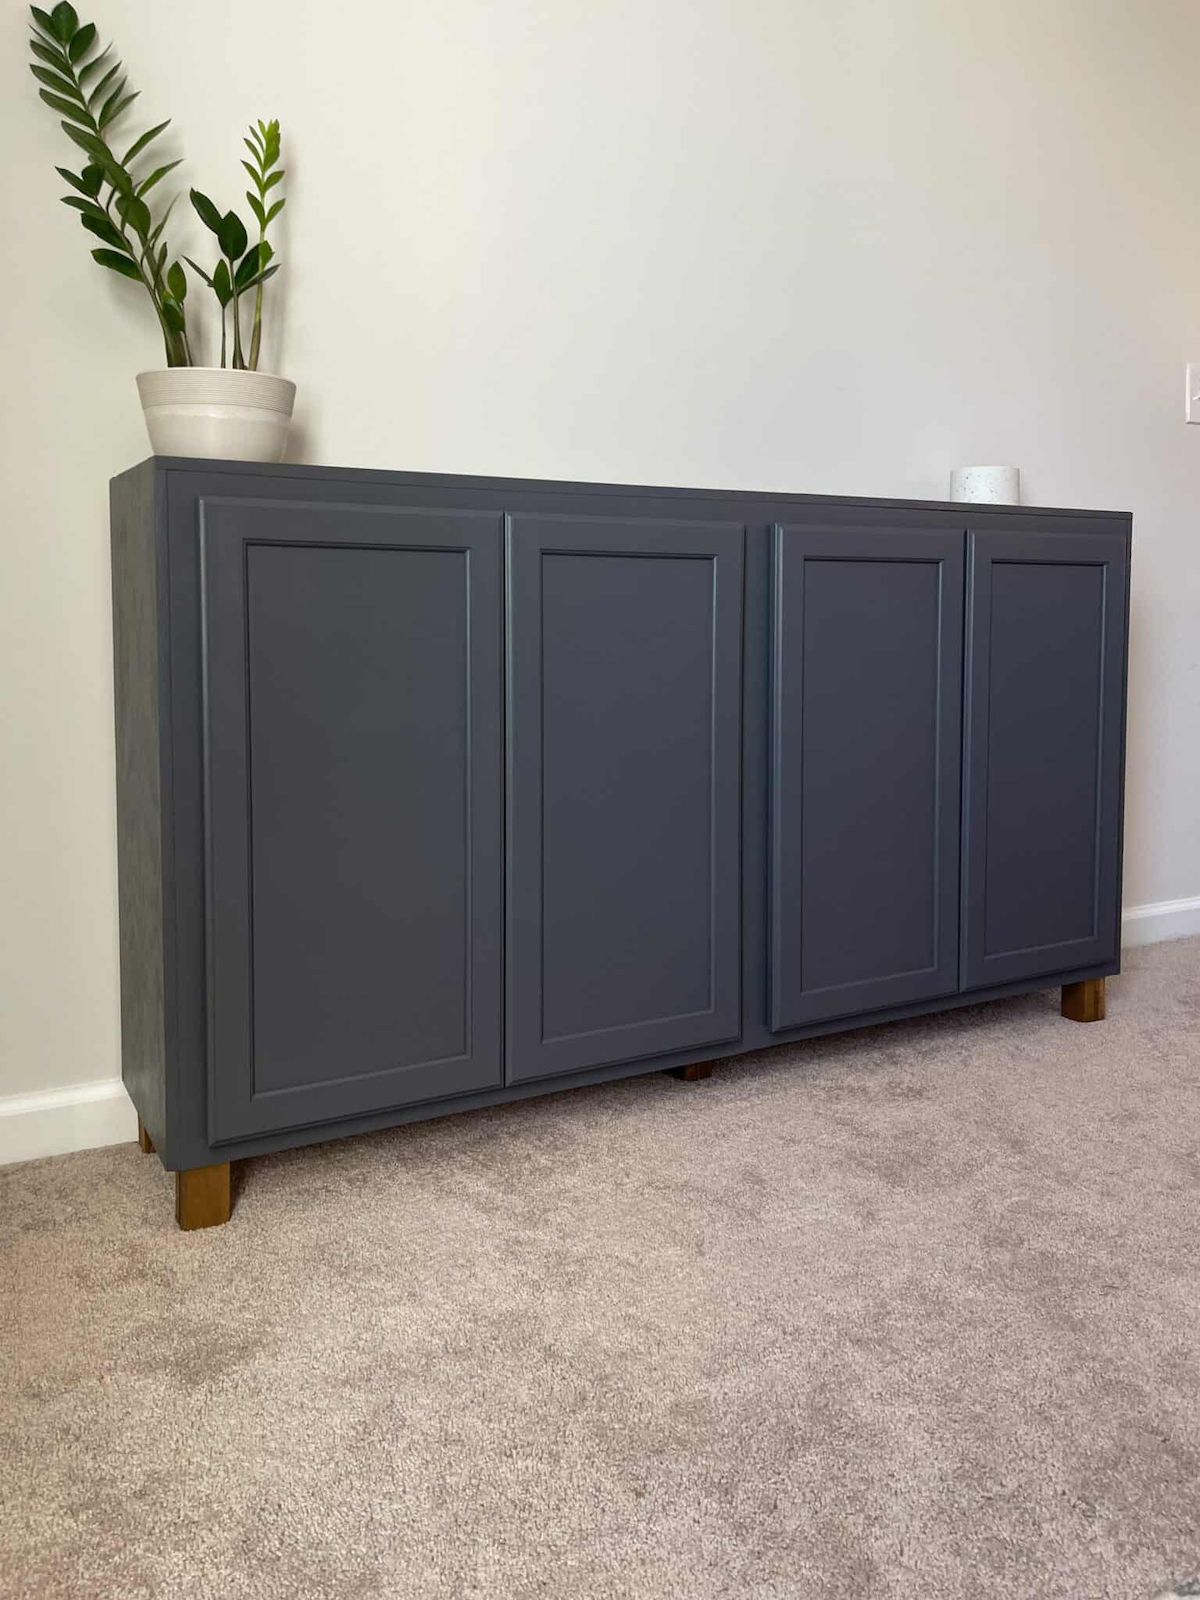
Using two cabinets from a local hardware store, Kristen from SimplyDIYHome.com built this modern sideboard. “I decided to use stock cabinets for the project just to speed up the process and make it easier for people who don’t know how to build cabinets or don’t want to go through the hassle of building cabinets,” says Kristen. “With careful planning and attention to detail, your DIY sideboard can look like a high-end custom piece at a fraction of the cost.”
After attaching the cabinets with wood screws, she secured the 2×2 square dowel legs and attached the ¾-inch birch plywood top with wood glue and a nail gun. After filling nail holes and sanding, she finished the sideboard in Peppercorn satin paint from Sherwin-Williams.
Kristen’s Tip: “Throughout the entire process, measuring accurately is key. Taking the time to double-check measurements, ensuring everything is level, and planning each step before making permanent cuts or attachments will make a huge difference in the final outcome.“
