
We may earn revenue from the products available on this page and participate in affiliate programs. Learn More ›
HVAC systems are widely used to carefully heat and cool homes, but even the most energy efficient systems can largely go to waste without appropriate exterior wall insulation and ceiling insulation. Properly insulating a house reduces the flow of heat through the walls and roof, so that a house doesn’t lose heat in the winter. The layers of insulation also prevent heat from entering during the warmer months of the year, helping keep a home cool and comfortable.
With this in mind, if you find that your home is lacking in-wall insulation, it’s important to invest in the installation of insulation to improve the energy efficiency of the property. This project is relatively straightforward and budget-friendly, making it a great opportunity for beginner DIYers to learn how to place insulation. Once you gather the necessary supplies, follow the steps provided in this guide to discover how to install insulation in walls.
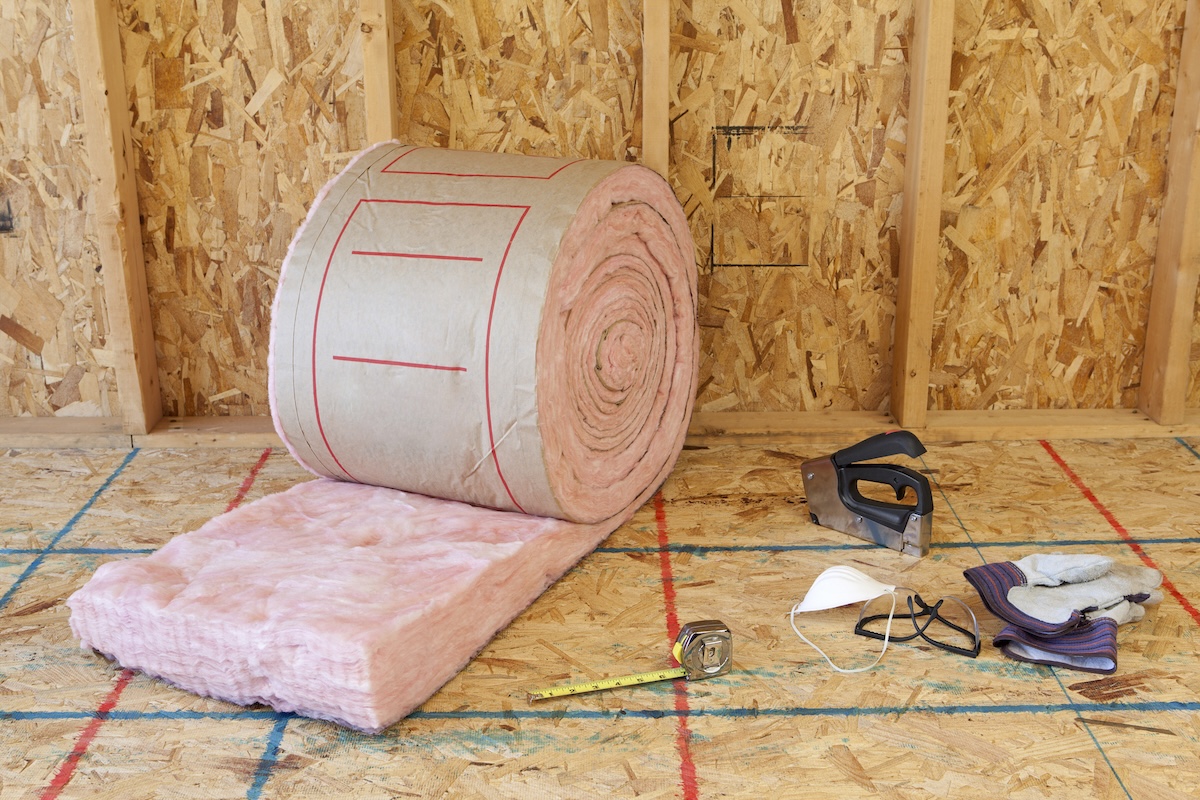
Tools & Materials
Bobvila.com may earn a commission from purchases made through these links.
Safety Precautions
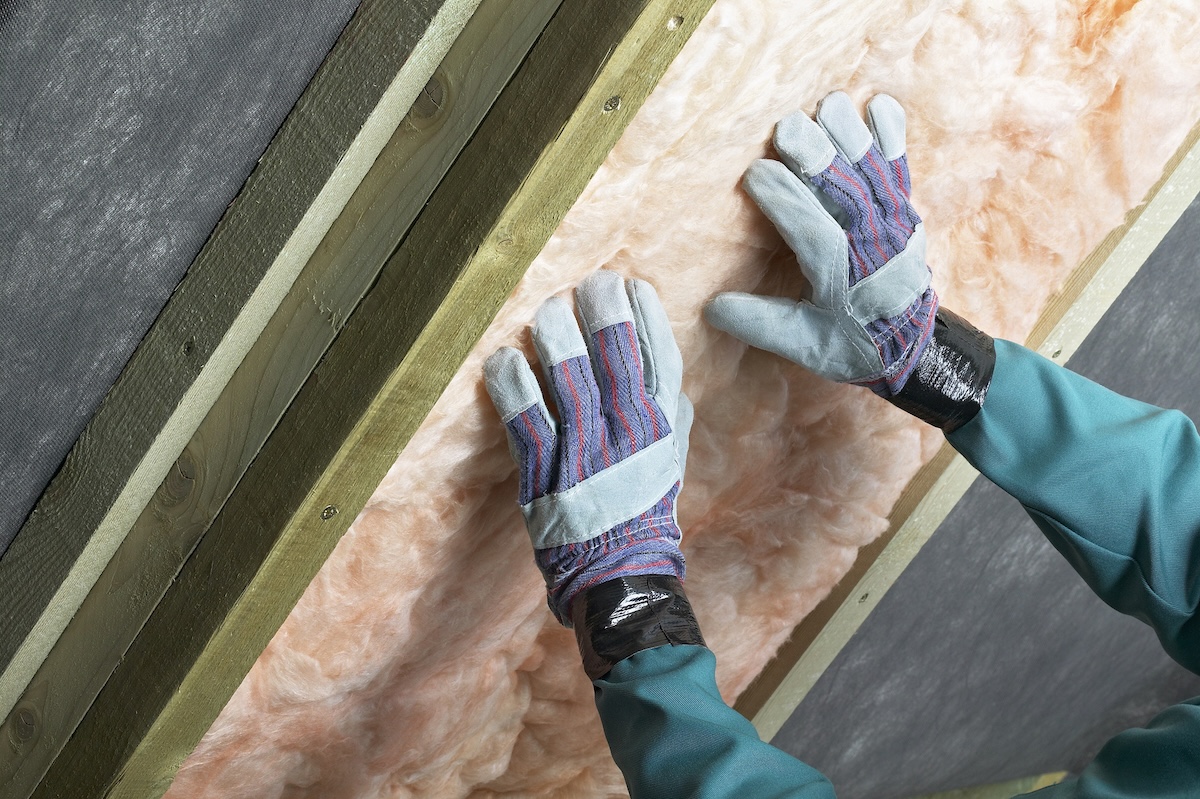
Working with any type of insulation comes with risks, so it’s necessary to take steps to protect yourself before you begin. “Fiberglass insulation causes skin, eye, and lung irritation; hence, always wear gloves, goggles, and a dust mask,” mentions Daniel Cabrera, restoration professional and owner of Fire Damage House Buyer.
Make sure to properly ventilate the area, especially when installing insulation for walls in the basement where there isn’t typically a lot of airflow. Check the gaps where any fiberglass wall insulation will be installed to identify any electrical wiring or outlets and avoid overpacking the space provided.
Also, ensure that you have a clear, stable work area and a second person nearby to hold the ladder if you are installing ceiling or attic insulation or working in any other areas that may require you to be on a ladder.
How to Install Insulation in Walls
Installing rolled insulation or batt insulation is relatively easy, but if you want blown-in insulation or spray insulation, it’s better to hire a professional who has the skills, experience, and necessary tools. This guide will walk you through how to install batt insulation in an open wall where the studs are accessible.
Step 1: Measure the area of the walls that will be insulated.
Before you can start the installation project, you will need to know how much insulation you need to complete the job, as well as the height and width of each gap to ensure you purchase the right insulation material. Use a tape measure to take measurements of the total area of the walls to be insulated, and count the number of wall bays.
Typically, studs are built at uniform spacing and batt insulation is made to fill those gaps, though there may be some discrepancies, so it’s always a good idea to purchase a little extra insulation to ensure you won’t run out.
Step 2: Select and purchase fiberglass batting.
Before purchasing insulation, it’s a good idea to know about R-value. Insulation is rated based on R-value and different R-values are used depending on where the home is located and what part of the house you are insulating. Generally, the higher the R-value, the more effective the insulation.
Similarly, you will need to decide on whether this will be an unfaced vs. faced insulation installation before purchasing the materials. Faced batts have a paper layer on one side to help control moisture, while unfaced batts do not have this paper layer.
Step 3: Measure and cut the batts to the right size.
With the batting purchased, the next step is to measure each batt so that they are the correct height and width for the gaps between the studs. Use your tape measure to check the size of the bay between the studs, then use this measurement to determine the right size for the insulation.
When you have the necessary measurements, use a utility knife to cut the batts to the correct size. “Place batt insulation on a flat surface and cut with a utility knife and straightedge, slightly wider than the cavity it will fill by about ½ inch,” says Cabrera.
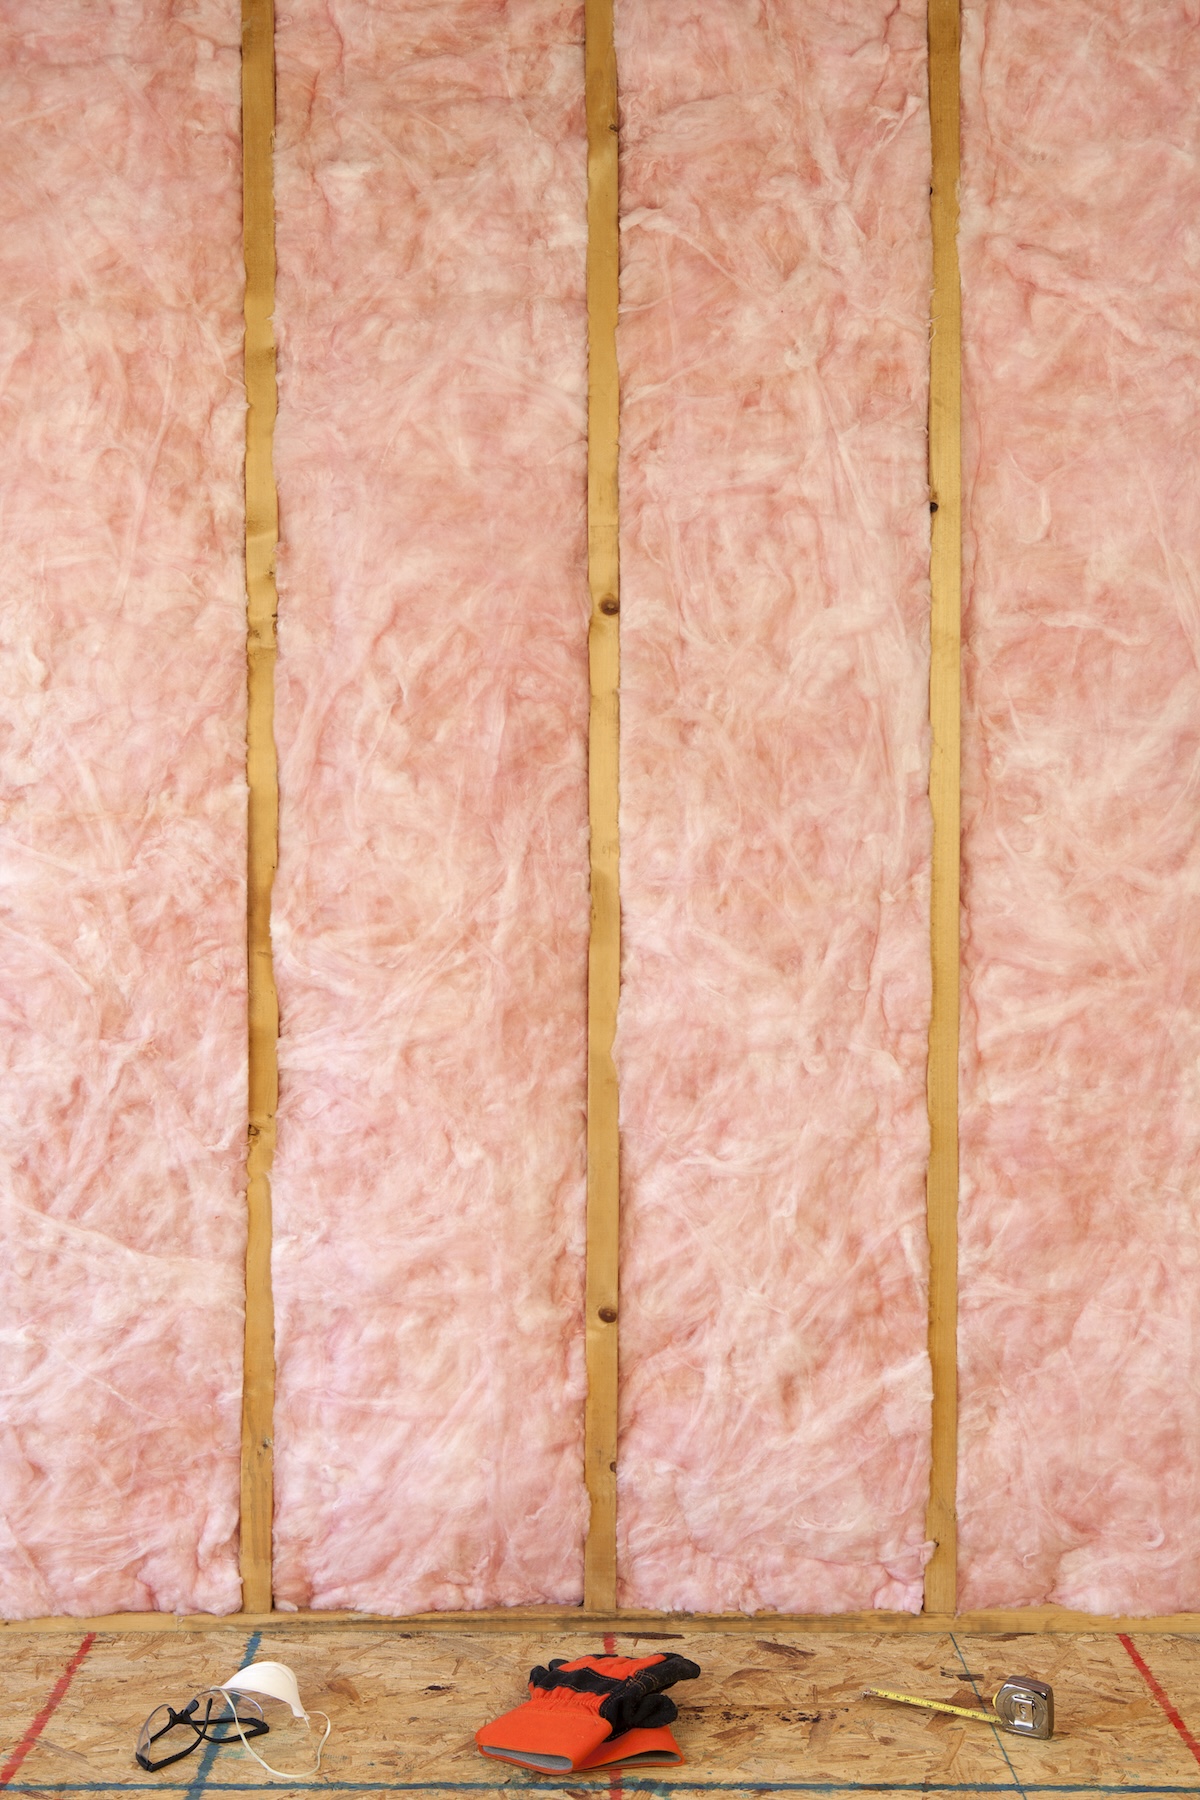
Step 4: Push the batting into the gap between the studs.
After measuring and cutting the batt insulation, the next step is easy. Just make sure that your hands, arms, face, and mouth are properly protected and covered to avoid skin, lung, and eye irritation. Grab the first insulation batt and push it into the gap between the studs. If you are using faced insulation, make sure that the paper side is pointing outward.
“Check for voids, overlaps, or insulation not being flush, then fill gaps with smaller pieces of insulation,” instructs Cabrera. If all looks good, use a staple gun to secure the edges of the batting to the studs, roughly about every 7 inches.

Step 5: Apply vapor barrier over batting for exterior walls.
If the insulation will be installed in the exterior walls of the home or you are insulating a garage, then apply a vapor-retardant film over the batting to create a vapor barrier. Have a second person help to pull the film tight over the batting, then use a staple gun to secure the vapor barrier to the studs. Staple the vapor barrier about once every foot to ensure the film is properly secured, then use your utility knife or a pair of scissors to trim any excess film.
Final Thoughts
Installing insulation is a great way to improve home efficiency and protect the property from freezing temperatures in the winter. “Proper insulation keeps the building from experiencing very high heating and cooling costs through uniform indoor temperatures, while insulation reduces drafts and keeps the living space comfortable throughout the year,” explains Cabrera.
Make sure to check for any pipes, electrical systems, or other obstructions before you begin and select the right insulation to meet your R-value needs. While fiberglass is a common choice for batt insulation, you can also use mineral wool, sheep’s wool, cotton, or cellulose insulation to complete this job.
