We may earn revenue from the products available on this page and participate in affiliate programs. Learn More ›
This content is presented by The Home Depot. The included facts and opinions are those of BobVila.com.
After the walls, the flooring is often the next big design feature that people notice when they enter your home. Great if you are proud of your floors, but not-so-great if you have old carpet, cracked tile, or faded hardwood.
Even if the judgment from guests doesn’t matter, it can be personally disheartening to look at worn-out flooring day in and day out. If you have the time and required skills, you can update the existing flooring with laminate, vinyl plank, or hardwood.
Don’t wait until your floors are warped, broken, and peeling to learn how to replace flooring. Find out now with this helpful guide.
Choosing New Floors
The first step to installing new flooring is to decide on the best type of flooring for each room in your home. The ideal floor depends on a variety of factors, including where the floor will be installed, how much foot traffic the floor will need to manage, the appearance and required upkeep of the flooring, the cost, and installation difficulty. Consider these factors to help narrow your choices to the best pick for your situation.

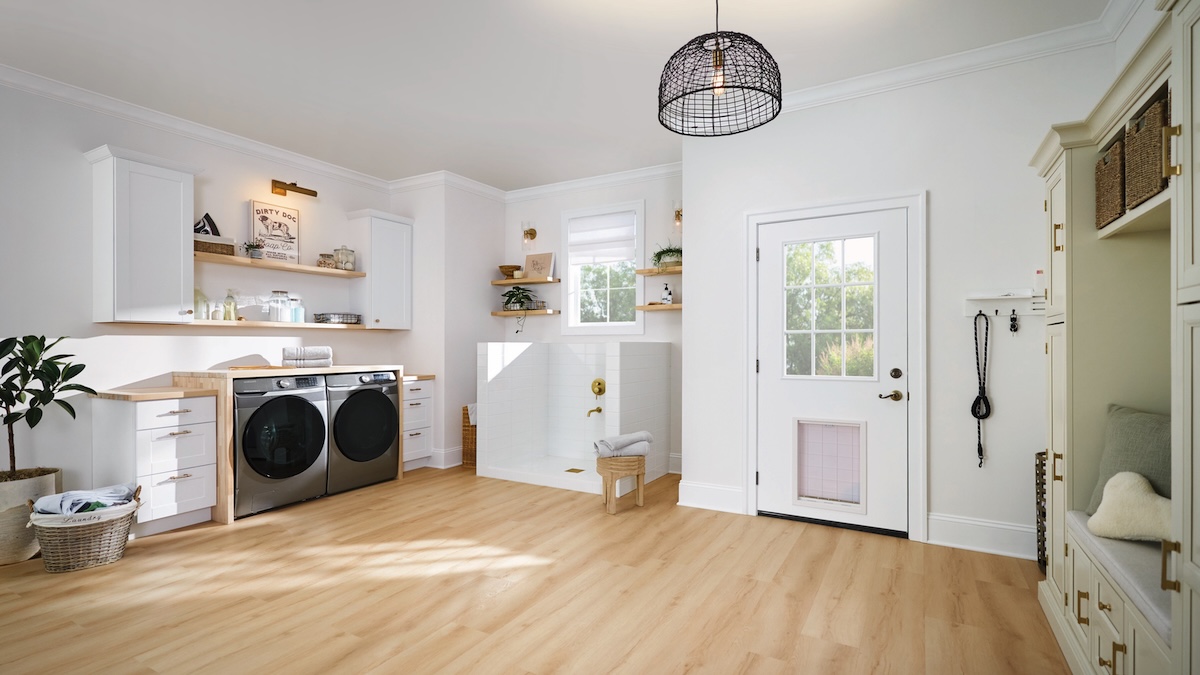
- Location: If the room is a common area of the home that sees a lot of foot traffic, like the living room, then it may be a good choice to go with a material that is easy to clean and maintain, like vinyl plank flooring. For example, Lifeproof Vinyl Plank from The Home Depot offers a wear thickness layer that’s built for high traffic. It’s also 100-percent waterproof—not just water-resistant—making it an ideal choice for rooms prone to moisture, like a kitchen or bathroom.
- Durability: Homes with only one or two people and no pets may not need highly durable floors, but if you have a full household (including kids and pets), then it’s important to choose a flooring option that will endure under constant use, such as Lifeproof Vinyl Plank that features a 22-mil scratch- and dent-resistant wear thickness layer. Additionally, if the floor is installed in a high-traffic location, then it will need to be more durable than flooring installed in low-traffic areas, like a bedroom.
- Maintenance: After installing the new floor, you will need to keep up with regular maintenance to ensure the flooring lasts as long as possible in the best condition possible. Carpet is notoriously difficult to maintain, while hardwood, vinyl plank, and tile are all relatively easy to keep clean. However, hardwood may require refinishing every few years. If you like the look of hardwood but need a more budget-friendly option, consider engineered hardwood from the Home Decorators Collection. It is designed to withstand everyday wear and tear and can be sanded and refinished as styles change (though not as many times as a solid hardwood).
- Cost: The average cost to hire a professional to install flooring ranges from about $3 to $22 per square foot, according to a survey of Angi customers’ projects; meanwhile, DIYers may be able to install the flooring on their own for about $0.50 to $15 per square foot. Given the wide price range, it’s important to research various flooring options to find one that suits your home and your budget. For reference, The Home Depot’s engineered hardwood from the Home Decorators Collection costs $2.99 per square foot, and Lifeproof Vinyl Plank starts at $3.29 per square foot.
- Ease of installation: Not all flooring follows the exact same installation process, so if you choose to install flooring on your own, it’s a good idea to select a flooring option that falls within your skill set. Typically, laminate and vinyl flooring are straightforward to install, while hardwood, carpet, and tile flooring are more difficult for beginner DIYers. Lifeproof Vinyl Plank is exceptionally easy to install due to its click-lock system and attached underlayment.
- Appearance: A top consideration for most homeowners is the appearance of the flooring. Not only should the flooring look good on its own, but consider how it complements the existing aesthetic of your home. Take your time to think about the best colors, patterns, and textures to suit your home decor. And before you commit, try out The Home Depot flooring visualizer online.
How to Replace Flooring
Learning how to replace flooring takes time and effort—and it can be disruptive in a household—so it isn’t a project you should start on a whim. Make sure you set aside at least a full day or more, depending on the size and complexity of the room, and do your best to share the workload with one or more helpers.
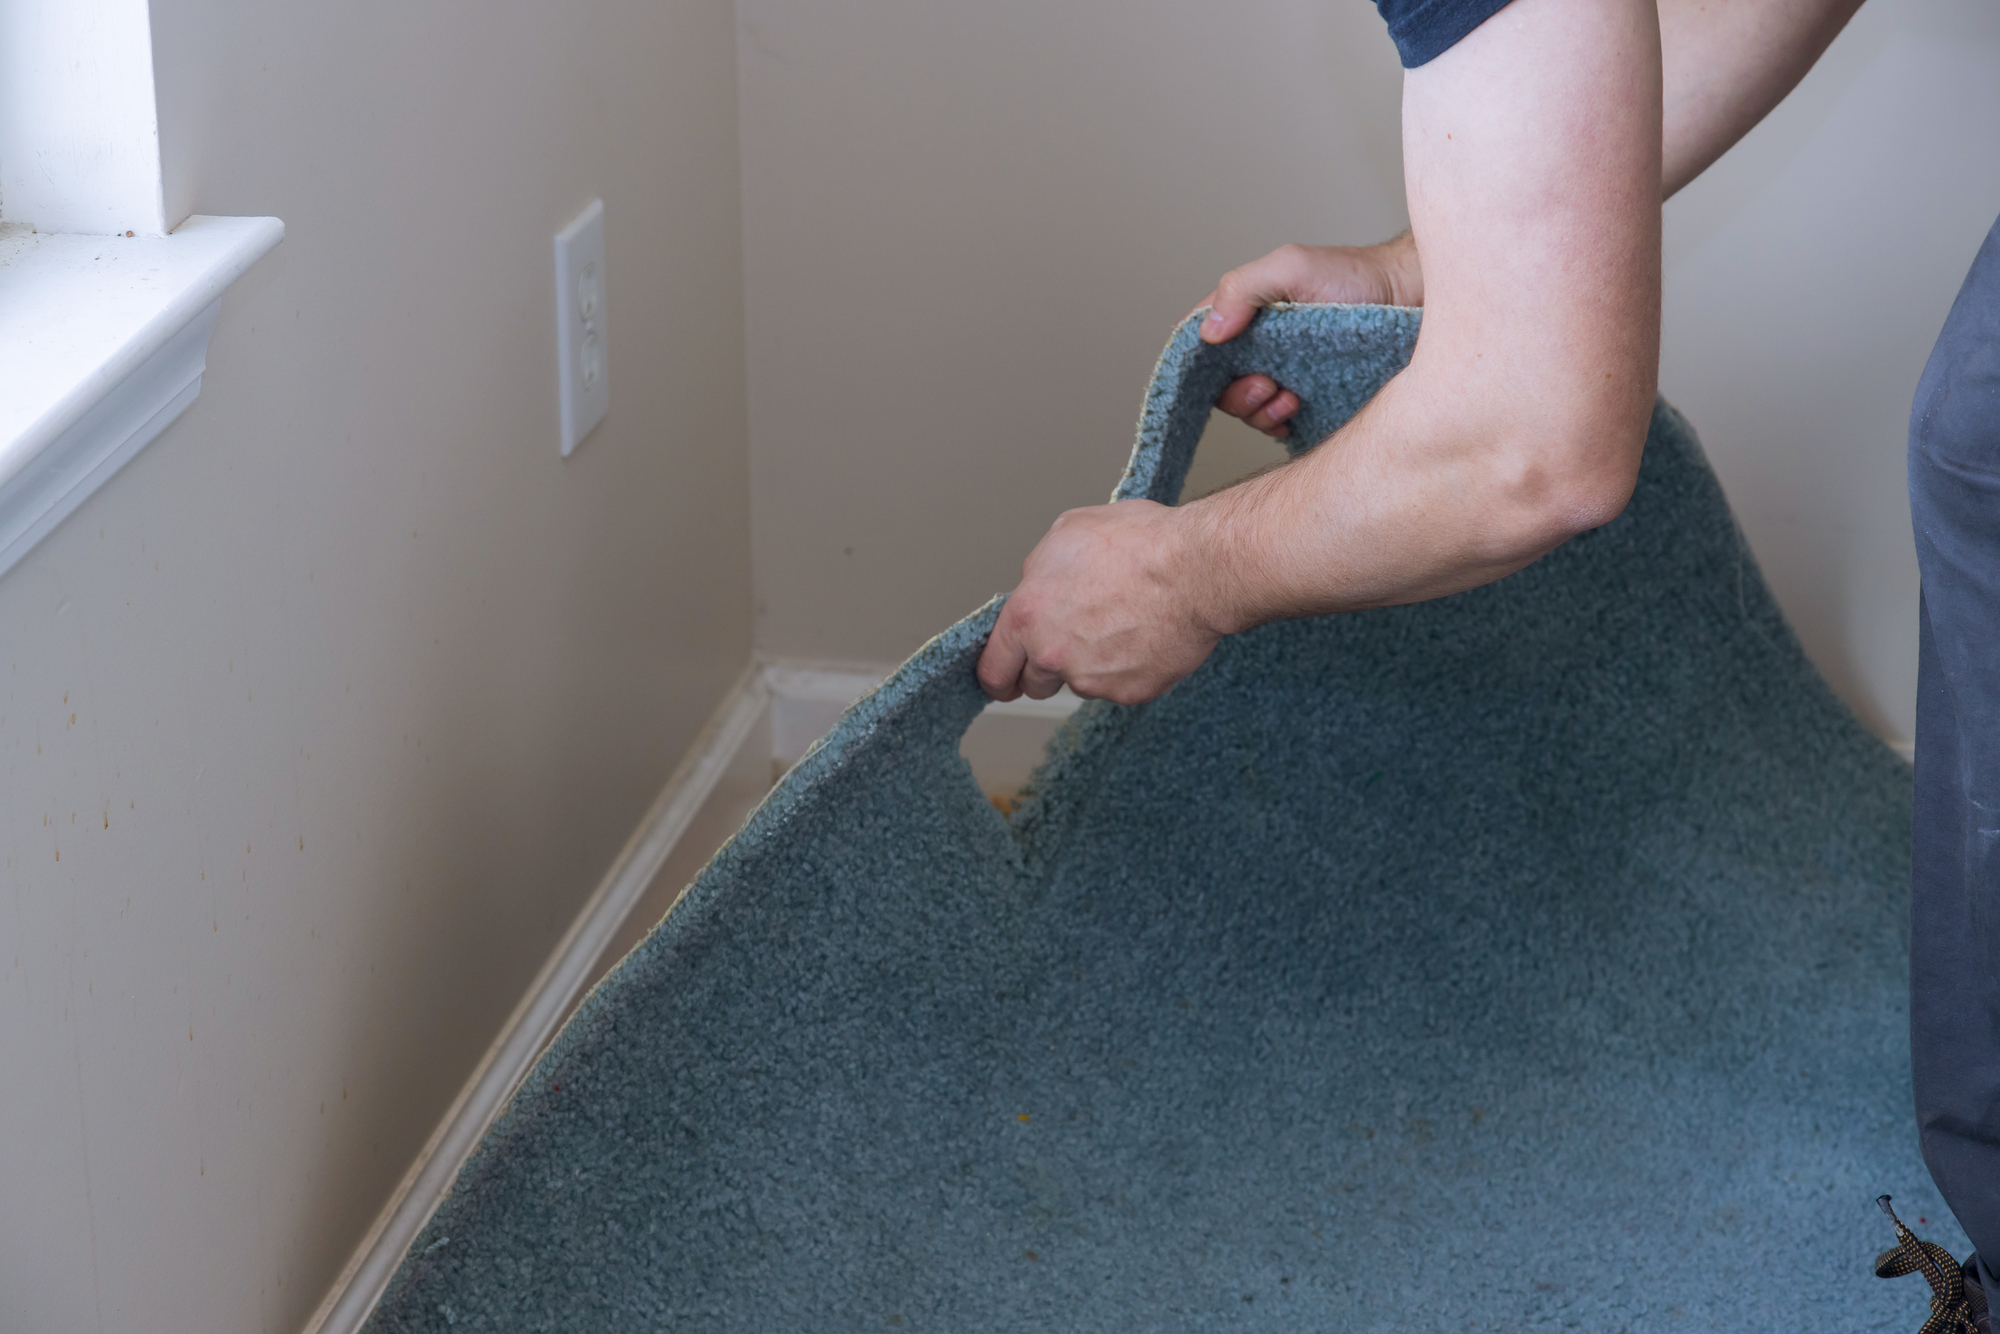
Step 1: Remove trim, molding, and existing flooring.
Before you can install the new floor, you will need to remove the old flooring. Start by using a pry bar to remove any trim or baseboard molding around the perimeter of the room. If you plan to reuse the base trim, work slowly to avoid damaging the molding. Similarly, any transition strips that currently bridge the gap between rooms should be removed with a pry bar or screwdriver, depending on how they are currently secured.
Next, you will need to remove the old flooring. The method to remove the flooring differs based on the type of flooring:
- Laminate and vinyl planks can typically be peeled up with a pry bar.
- Vinyl sheet flooring is often secured with an adhesive, so you will need to cut the flooring into strips with a utility knife, then use a floor scraper to scrape up the flooring and adhesive.
- Hardwood flooring may be able to be lifted up with only a pry bar. You may need to use a circular saw to cut along the ends of the boards before carefully prying them up. In some cases, the hardwood floor will be secured with nails that will need to be removed as you go.
- Carpet is secured to the floor using tack strips around the room’s perimeter. Pull the carpet up and use a utility knife to cut it into manageable strips. Once the carpet and padding are removed, use a pry bar to pull up the tack strips.
- Mortar-set tile is one of the most difficult floor materials to remove. You will need a hammer and a masonry chisel to break up the grout and chip away the tile and mortar. Plan to spend a lot of time and effort on this part of the job.
Step 2: Prepare the subfloor.
After the old floor has been removed, inspect the subfloor for any damages, signs of moisture, or unevenness. Patch up any minor damages and make sure the entire subfloor is completely dry before proceeding.
Check the floor with a level to ensure that it’s flat and even. Use a self-leveler, available in powder or premixed forms, to fill any low spots and sand down any high spots to create a flat, smooth surface.

Step 3: Measure the room and plan the layout.
Take measurements of the entire room to find out exactly how much flooring is needed. Measure the length and width, then multiply these measurements to get the total square footage. If the room is oddly shaped, break it down into individual spaces and measure each space separately, then add them together to get the total square footage.
Pinpoint the area of the room with the greatest width and measure this space from wall to wall, then divide the width of the room by the width of your flooring planks. Use this measurement to determine how many planks you will need from one side to the other and to find out exactly how wide the last row will need to be to fit properly. Just make sure that when you are taking measurements you include a ½-inch gap around the perimeter which will form the expansion gap. (The baseboard trim will cover this gap.)
Step 4: Install underlayment.
Depending on the type of flooring, you may need to install underlayment, which will protect the floor from damage and moisture. However, some flooring material comes with pre-attached underlayment, in which case, you can move on to cutting flooring planks to length.
If you do need underlayment, start in one corner and roll out the underlayment. Trim the underlayment to the correct size and use seam tape to secure the edges and the sections where the underlayment connects.
Step 5: Set expansion gaps.
Add ½-inch wooden spacer blocks around the perimeter of the room along the wall to form the expansion gap between the wall and the flooring. This prevents the flooring from bulging or buckling when it expands in response to heat or humidity.
Snap a chalk line parallel to the starting wall, while accounting for the ½-inch expansion gap. The first board will be placed along this line with any grooves facing the wall. If your wall isn’t perfectly straight, then you may have to scribe the first row to fit the contours of the wall.
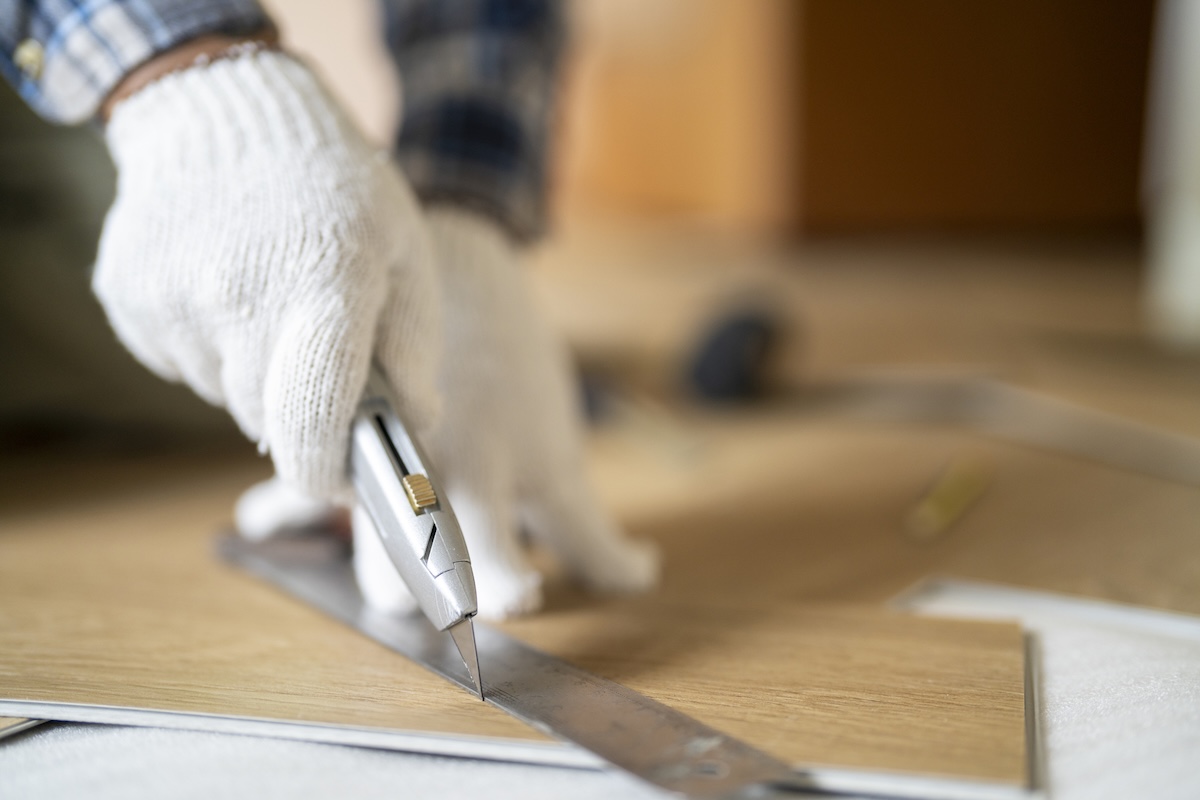
Step 6: Cut flooring planks to length.
With your measurements in hand, use a miter saw to cut the flooring planks to the proper length, keeping in mind that you want the joints to be varied. This means you need to start and finish with different lengths of flooring for each row. (Use a table saw to rip your last row to the correct width to fit your floor.)
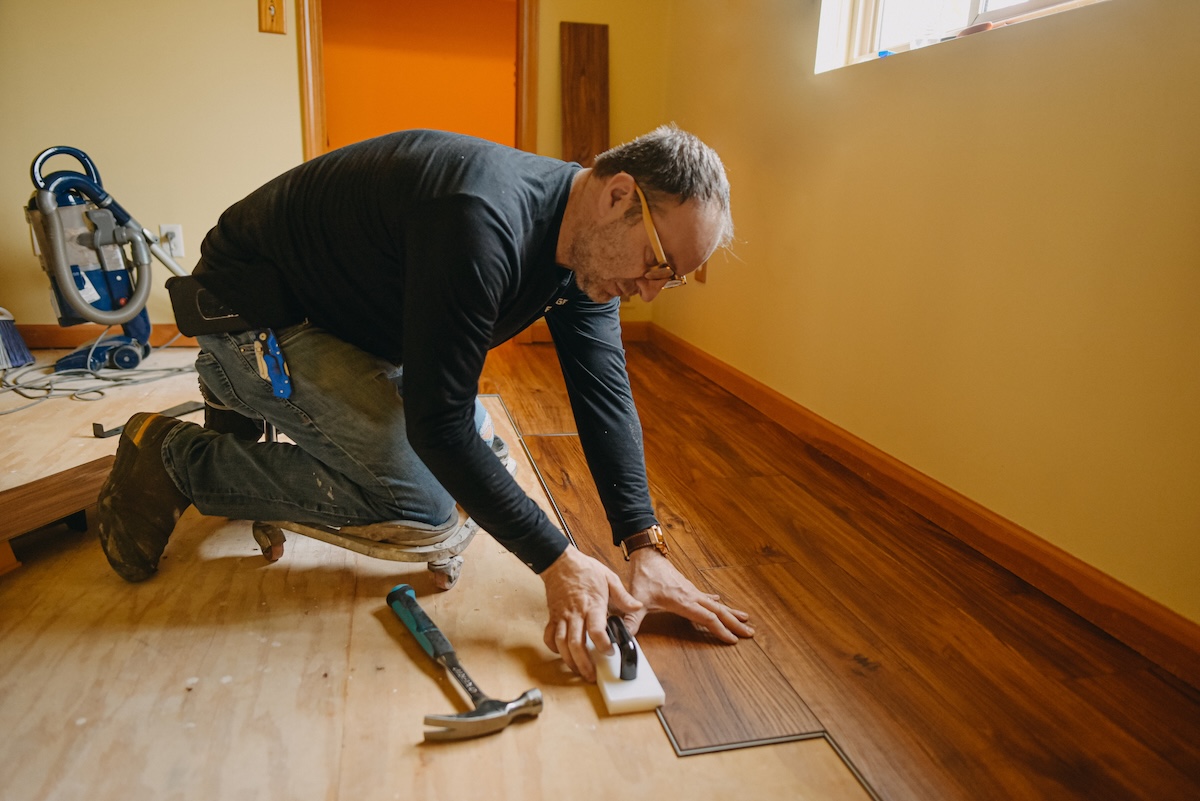
Test the first three rows of flooring with a dry fit installation to ensure everything works as intended and stagger the joints by about 6 inches for the ideal result. Continue with the installation pattern across the entire length and width of the floor, ensuring that you keep the ½-inch expansion gap around the room’s perimeter.
Secure the flooring according to your chosen installation method.
- Glue-down method: Apply adhesive to the subfloor, then lay the planks on top.
- Nail-down method: Use a pneumatic nailer to drive nails through the tongue of each board.
- Click-lock or floating floors: You only need to use nails to secure the first row of boards.
Step 7: Install the last row and reinstall trim/molding.
Check the width of the last row of flooring and rip it to size using a table saw, if necessary. Slide the final few boards into place, keeping a ½-inch gap between the final row and the wall. Once the last row is installed, remove all spacers, then reinstall the trim and molding to complete the project.
Tips and Tricks to Know When Replacing Flooring
When you are learning how to replace flooring, a few tips and tricks can help make the entire process easier to manage. By heeding these tips during the planning and execution stages, you can save yourself a lot of hassle and ultimately complete the project within a shorter timeframe.
- Start with a sample, because it’s a better representation of color and pattern than an online listing alone.
- Buy 10 percent more flooring than necessary to avoid making more than one trip to the store. Some pieces may break or may need to be cut to fit the space, so if you already have extra material on hand, you don’t need to pause in the middle of the project to purchase more.
- Bring your measurements to the store when you are purchasing flooring material. Having the measurements on hand will reduce the risk of making a mistake and you can consult with a store associate or flooring dealer to help decide on how much flooring you will need to complete the job.
- Install flooring parallel to the longest wall in the room for the best results. This placement is typically the easiest, especially for beginner DIYers, and usually looks the best when the job is finished.
- Acclimate hardwood flooring for 48 hours before installation to give the flooring a chance to expand and contract in response to the normal humidity levels inside the home. This means putting the boxes of flooring in the space where they will be installed.
- Use a pull bar to draw the last few rows against the previous row by placing the pull bar against the wall, then hooking it over the edge of the board. Once in place, tap the other end of the pull bar with a hammer to gently draw the board into position and close any gaps.
