We may earn revenue from the products available on this page and participate in affiliate programs. Learn More ›
Despite their name, dead hedges are teeming with life. Constructed from twigs, sticks, and other woody plant debris, dead hedges attract butterflies and fireflies, provide nesting sites for songbirds, an make gardens more bee-friendly. These simple structures are easy and inexpensive to create, yet they make a big impact in pollinator habitats and add structure and privacy to flower beds and woodland gardens.
If you’re rewilding your property or just want to add an attractive accent to your yard, this guide will teach you how to make a dead hedge with a few basic supplies. Keep in mind, however, that this style of fence is not the best choice for wildfire-prone regions.
What Is a Dead Hedge?
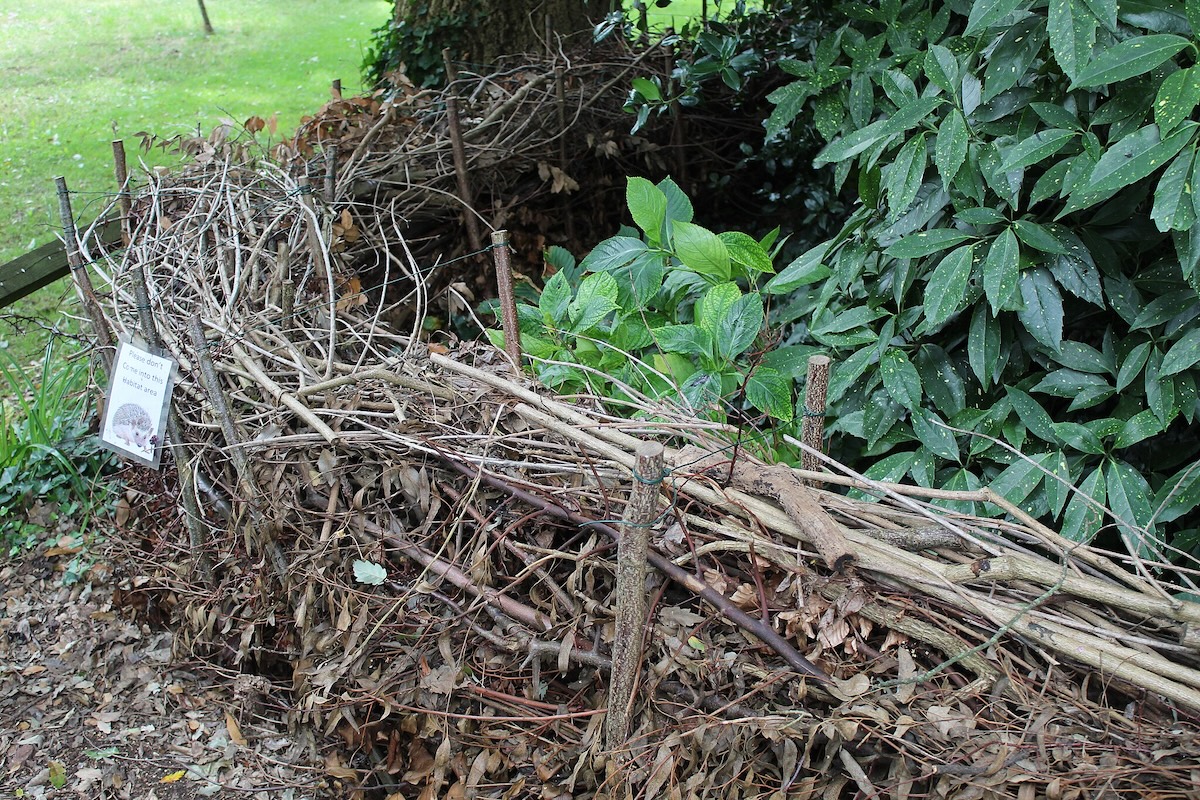
A dead hedge is a simple, fence-like structure made of twigs, woody vines, and other plant material woven between vertical branches or stakes to create an inexpensive garden fence. While dead hedges provide privacy, they also create a microhabitat for pollinators, birds, and other wildlife looking for cozy winter shelters or nesting spots for their young. Dead hedges can be as small or large as needed and they can be built up over time with plant prunings to keep gardens tidy.
Benefits of Dead Hedges
“When thinking about a wildlife garden, people tend to focus on flowers,” says Matthew Shepherd of the Xerces Society. “But if you want a garden that truly helps insects, you need to consider their entire life cycle, including where insects lay their eggs and shelter through the winter.” That’s where dead hedges come in.
Shepherd notes that dead hedges are especially helpful for native bees that hibernate and nest in hollow plant stems, like mason bees, leafcutter bees, yellow-faced bees, and small carpenter bees.
Dead hedges also provide habitat for mourning cloak and common buckeye butterflies that overwinter as adults, and they support the hanging chrysalises of monarch and swallowtail butterflies. On top of that, dead hedges also commonly attract beetles, moths, spiders, small mammals, frogs, toads, lizards, and songbirds.
Beyond the benefits they provide to wildlife, dead hedges also offer a few key perks to gardeners, including:
- Extra privacy. Dead hedges can be used like fencing to delineate garden spaces and separate homes from noisy roadways.
- Aesthetic appeal. Woven hedges are attractive on their own, but they’re also handy for concealing unsightly electrical boxes.
- Plant support and protection. Dead hedges can be used as windbreaks for sensitive plants or trellises for climbing vines.
- Simplified maintenance. Compared to living hedges that need to be pruned, watered, and fertilized, dead hedges are much easier to maintain.
- Less waste. After pruning shrubs and trees, add those prunings to your dead hedge to reduce yard waste.
- Soil improvement. As the materials in dead hedges break down, they add nutrients to the soil and boost garden fertility.
- Inexpensive. Dead hedges are less expensive than standard fences. In fact, if you source the materials from your garden, they can be free to make!
How to Make a Dead Hedge on Your Property
Dead hedges can be built in a straight line to follow the perimeter of your garden, or they can be constructed in curves, circles, or other fun shapes. Typically, hedges stretch between 3 and 5 feet tall and can be as long as needed. Here’s how to build a basic dead hedge:
Step 1: Prepare the site.
Select a flat location and clear away large rocks. If you’re designing an elaborate hedge shape, use a string to mark out the general structure of the hedge.
Step 2: Collect your materials.
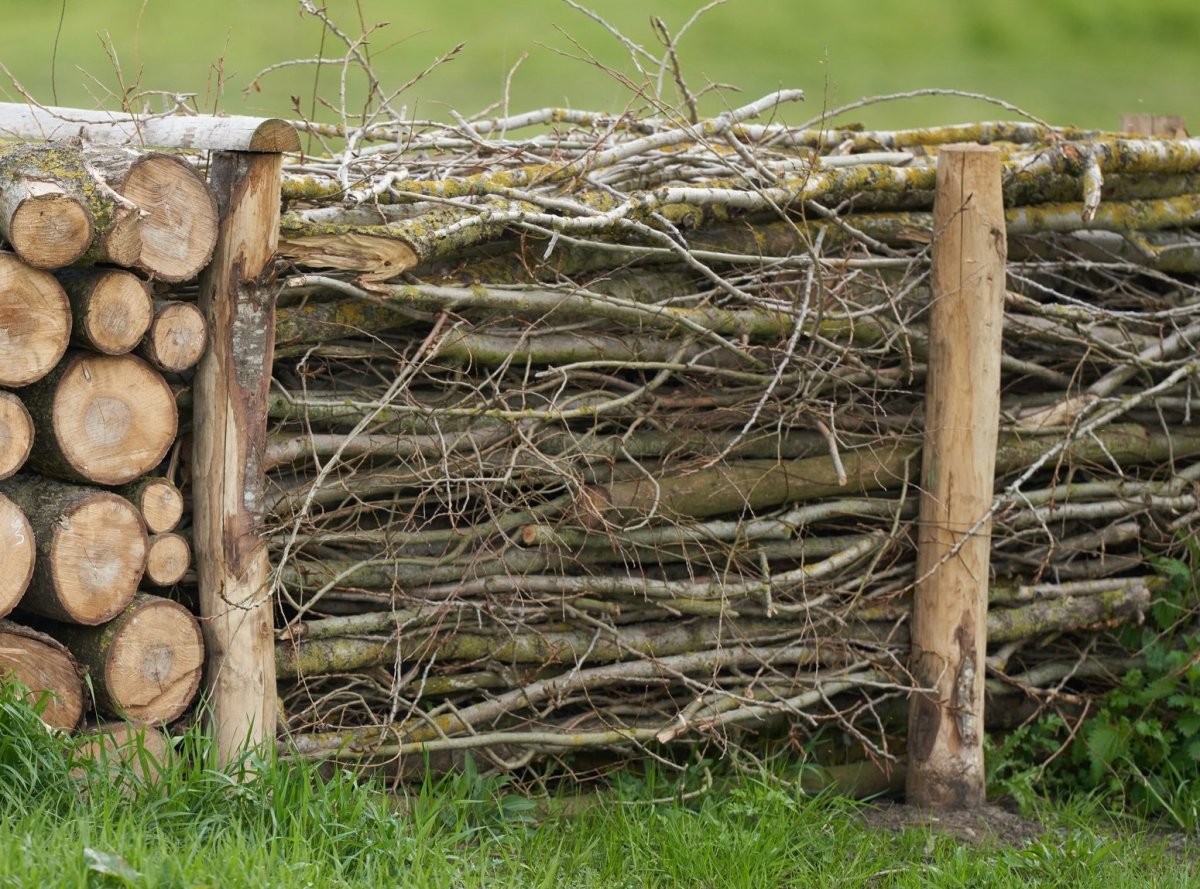
Gather twigs and other woody plant material for the center of the hedge and collect sturdy, straight branches to use as vertical stakes along the hedge perimeter. Vertical stakes should be about 1 to 1½ feet taller than the hedge you’d like to create. Sharpen one end of each stake to a point for easier installation.
Step 3: Install the vertical stakes.
Use a mallet to drive two rows of vertical stakes into the ground to form the hedge perimeter. Space the stakes 3 to 5 feet apart with 1½ feet of space between the two stake rows. Offsetting the stake rows a few inches makes weaving easier and creates a more structurally sound hedge.
Step 4: Start weaving.
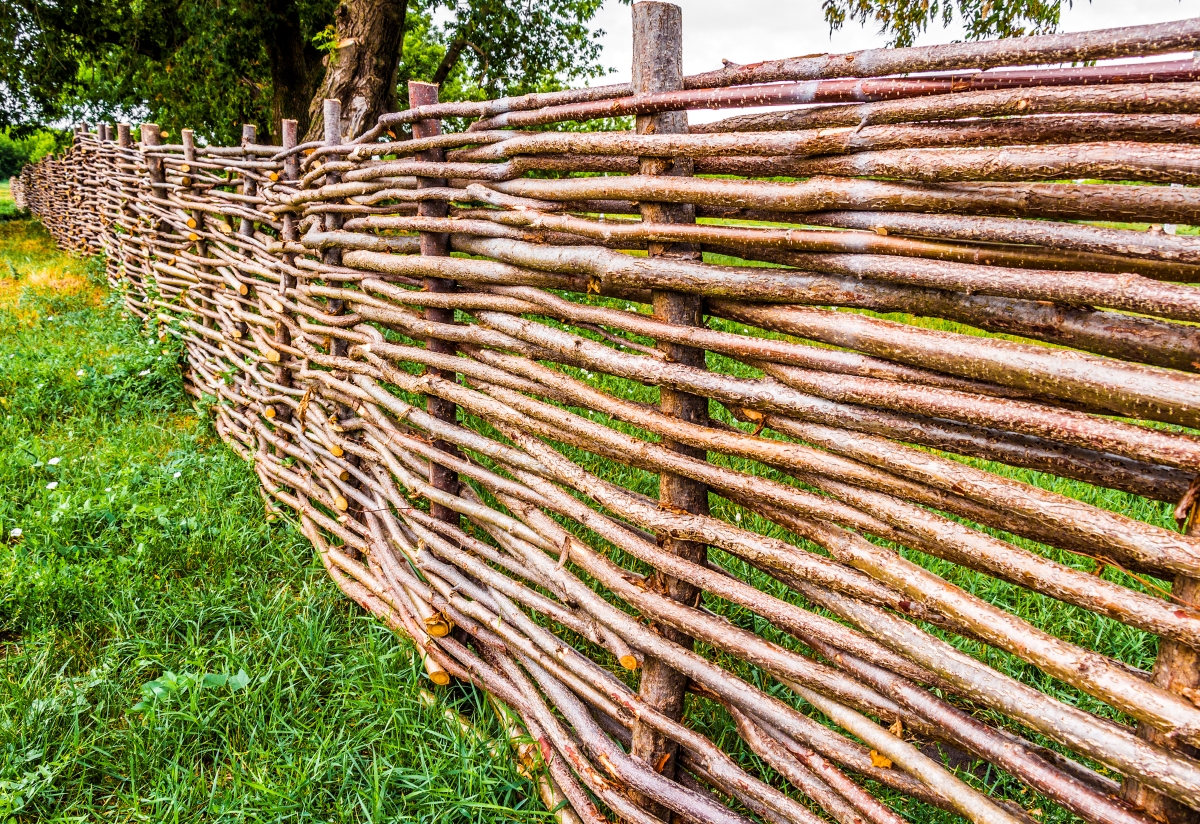
Lay large branches and twigs in between the two stake rows, then weave thinner branches and vines between the larger branches and the vertical stakes to fill in the hedge center. Continue adding plant material until you run out of prunings or reach the top of the vertical stakes.
Maintaining Dead Hedges
As dead hedges break down over time, add woody plant material to the hedge center when you have fresh prunings, and hammer in additional vertical stakes to keep the hedge strong. You may also want to clip away unwanted weeds growing near your hedge and plant flowering vines and wildflowers nearby to make your hedge even more appealing to wildlife.