Hi I'm Bob Vila.
Welcome home again.
Today's a big day.
We're gonna get started with a tour of the new spaces, especially the kitchen.
And we've finally finished all of our structural repairs, so we're going to be laying out some of the new partitions, wooden walls as well as metal studs down in the basement.
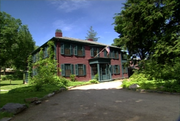
And I'm taking you on a tour of a neighboring house.
The Longfellow house, one of the greatest historic houses in America.
George Washington was headquartered there and the famous poet Longfellow lived there for many decades.
Stick around, it's good to have you home again.
Well the re-framing of the kitchen space is complete now and I wanted to explain it to you because, you know, this is an 1890's Victorian house, and what we started out with was a collection of pantries in small, tight spaces.
We've blown everything out of the way now so that it's 18 by 25.
Plenty of room for large eating kitchen, big cooking area and here the way we framed it here we're creating a small mud room.
We'll have a bench, and we'll have hooks on the wall, and back here we'll have pantry cabinets for stuff that you don't need all the time.
This corner of the kitchen becomes, well basically an office.
A computer center and a kitchen office, with lots of built-ins.
And the major change is that we've taken, and we've put in a window here, and a double window here, that really face east and south.
And when you think about it, that's the best light in the morning.
And this is a kitchen space that you're going to be using it in the morning.
One of the things that makes it plausible to put big openings like this with glass, into old, hundred year old frames, is the use of what you're looking at up there, which is basically an engineered lumber product.
A structural, a product that won't shrink in the frame, so that it's not going to make any twists or any changes to the frame.
These are Strucklams.
There's also Microlams.
There's many different brands.
But it's basically engineered and it's very stable.
The other thing we've done to.reframe
this space involved the actual second floor system.
Which was very compromised because one of the earlier remodelings had removed some load-bearing walls here.
What had happened was that we had a very, very unstable floor system.
Earlier in the project we put in that very, very large carrying beam that you see there and now we've completed it by putting in more of these structural lumber pieces, these engineered lumber pieces, throughout the whole area of the second floor.
Let's go, now, to the second floor.
We'll touch base with Greg Rockman, the architect, who is up there, as well as Riley who's doing some of the framing.
The second floor has really seen a lot of changes, also.
It's basically gutted.
And we have taken out one of the bedrooms.
It had four bedrooms, it's now going to have three.
So that we can have his and her baths off of this main room, which is the master bedroom.
Hi, Greg,
Hi, Bob, how are you?
Things are looking good up here.
Yes, they are.
Now, you've had some major structural changes to take care of in this room.
Because the original partition for the room went along here, and we've moved it back.
That's right.
To this location.
This is a new bearing wall.
It holds up the third floor.
It was here where the joist from the two spaces were joined.
Yeah.
And we added a structural member to each joist and then bolted the old joist to them to stiffen them.
And these are the same as we used in the kitchen area.
That's right.
So that we're now taking the third floor load right across the whole span here, which is now what?
About eighteen feet.
Eighteen feet.
So it'll be a very good size.
Now is the project on schedule?
No, we're about two weeks behind.
We spent a lot of time re-framing the second floor due to damage and some errors that were made in the original 1898 frame.
So there were original errors, but then the plumbers really did
Well
The early plumbers
The early plumbers really did a lot of damage.
We had to replace a lot of joist before we could build any partitions on top of it.
Are we going to be able to catch up?
Yeah, I think we will be.
Alright I know we've got Riley trying to catch up in the next few months.
Yes.
See you later.
Hi, Riley.
Hi Bob!
And on this other side of the house what we've got is essentially two rooms that are about twelve by sixteen, and this center area which will have closets and over here a bathroom.
This is where we really had some very badly chopped up joist work, right Riley?
Oh yeah this was a mess in here.
Yeah this was, and we are now looking, the new framework that has been put is, again, using engineered lumber, and still we got three or four inch waste pipes that have been run through there but here the span is so short that is doesn't make any difference.
It's really solid enough.
And we've actually put these cleats down on either side of it, so that when the subfloor plywood is installed, it's flush with the tops of, the tops of the joists.
And that just affords us an extra three quarters of an inch of depth, if you will, so that when we put down a mudjob and ceramic tile, we're not taking up too much space and we're not taking too much away from the head room.
Are you ready to go in with us now?
Yep, this is all set, ready to go.
Jordy, are you gonna give him a hand?
We're just doing all of this partitioning with regular two by four stud lumber as opposed to metal.
Here we go.
And this of course is on 16 inch center.
16 inch center.
Now do you nail it first on the bottom or the top?
Yeah you definitely want to nail the bottom first and then once we get that secured we'll plumb the wall.
Exactly, if you went and started nailing the top first then, you wouldn't really be able to plumb it to make sure that it was perfectly straight up and down.
Alright, let's get a level on it.
Yeah?
You need your, OK, here you go.
OK, well that's the first of several partitions for this whole bathroom area, and I know it'll be a full day to get it all framed and we've got to break for some messages.
Don't go away, because when we come back, we are going to be touring one of Cambridge's most important historic homes: the Longfellow House.
Stick around.

