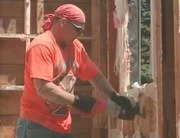
And here in the master bath Eddie Zuiko has gotten a head start with some of this beautiful material.
And he is working on the shower.
But, I wanted to get a close look at this, this tumble marble.
Because right now it is kind of in a rust stage look like ancient stone, but when it sealed later on, they look like that, of course Eddie already
got it place here.
And you can see this going to be just a beautiful contrast between this terracotta brisk right here, that's you know what you see is what you get.
And then this stone, but we are in the shower you know the key thing when you building a shower is to make sure that it's not going to leak.
And I want you to take a look at the flashback that we shot about a month ago really.
Where we went through all the different steps of waterproofing this area, watch.
And joining us now as Frank got to roll our plumbing contract.
We are talking the shower stolen in my bathroom here, Frank.
Why do we have to have a cop.
Pan in a shower stall.
Well its actually what we call a safe pan.
What it does is collect any of the water that leaks through the tile, or through whatever material is Do you use to finish the shower off.
Especially we have a some sort of a grout failure.
And it start to get water seeping in between the ceramic tiles.
We are going to have a very high quality American made ceramic tile in here.
But still, you never know, the grout won't fail at some point.
Exactly.
So your working on the drain area.
What kind of drain is that?
Well this is a shower strainer and its adjustable so that we can adjust the height for.
the pour, which is the cement floor into the pan that is going to be the base of the of the tile you want to put in.
Right, it'll be a mud job and what you're saying is into that piece you bring the second piece, which is the finish has over an inch of adjustment so that you can have that much mud thrown in there, right?
Exactly.
OK.
So do you have to sadder this now?
Yes, I will.
I just flexed it up Bob, so I'm going to.
Give it a little heat, and I'm going to fuse the shower strainer to the pan.
We've got two different thickness of metal here, Bob.
And what's important is that we make sure that we get the correct temperature, which is 450 to 500 degrees in both metals, and that we melt the solder at the same time we reach that temperature.
So it's kind of a touch and go situation between the using of the torch and the solder.
But how can you tell when they're both hot enough?
When the solder starts flowing, and it sticks to both pieces of metal then we know we're blowing.
If it doesn't then I have to work it until it does, it's starting to flow right now.
So you can see, I'm starting to move the solder along the the thing behind me is the finished product.
There's two ways of doing this.
You can do this with soldering iron, or you can do it with a torch.
The thing with soldering iron is that you got to continually use hot irons, and sometimes you have to stop and wait for the iron to heat up.
But with a torch, if you can see I got a continuous flow here and I'm doing, doing a continuous job of soldering along this pan.
Terrific.
Now, aren't you worried about burning the PVC pipe there?
No Bob, because this is temporary, it's what we call a gunner and its only to line up the picture that we are installing in the proper location.
We remove this and place the permanent piece in later on.
Ok.
Now in addition to all this preparation, the walls of the shower stall are gonna be tiled in actually a marble product, and because marble is somewhat porous We want to take extra precautions, so Danny Rufini is helping us to put on a moisture barrier.
Which is the same material that you use as a icened water shield on the roof.
Let's see this of course is pretty forgiving stuff so that we can trim it as we need.
Alright, onto the studs over the insulation's since we are questions outside wall here need to put a little bit of a cut on this corner over here.
There we go.
This is number three.
Alright, now we're installing the sementitous board, right over the felt paper and the moisture barrier.
And we're using a double-threaded screw made out of a corrosion resistant metal.
And were taking all of these precautions as I said, because you know you don't want to have to repair a shower stall do to any kind of water damage for many, many years to come, if you can avoid it.
All right.
And we put these in every couple of feet right there?
Yeah, every foot or so.
OK.
We've got to break for some messages.
Don't go away.
The tiles that we selected from my bathroom here are a combination of beautiful wall tiles from Italy.
And then this exquisite border and floor tiles that are actually made by artisans in California.
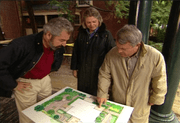
And Greg Rockland, our architect had a pitabal role in putting together the design.
Why don't you explain it because its one thing to have a client deal with a tile setter, if your just doing a plain simple bathroom, but with something this complicated, you need help?
Yes, you do, I think.
Each one of these tiles has a way of going together and you have to be very careful when you do the whole bathroom as the tiles all the way come around, they still meet, and the design flows all through the bathroom.
Right.
And this was done through a set of drawings which were prepared on a computer.
Computer is very useful cause I can repeat patterns which often happens in tile situations.
And on the floor we had very difficult design to resolve in this border which is very nice.
nice.
Was, had no corners.
And one we had to turn 135 degrees or over here ninety degrees.
Yeah.
You have to find a place in the tile pattern that'll make that turn.
Yeah, because when you say it has no corners, if you look at the straight run of it, the design of the tile is just almost like a chain, in continuous links.
But when you try to, well you'll explain it?
Yeah, when you try to make it go here is just a 135 degree cut you see this doesn't work.
But you can find a place where this, move the towel back and forth like we did here where the pattern does continue so we can get the chain to go around this corner.
So that all the green lines at least intersect here and create another shape.
But at least it comes out logically correct.
That's right.
And this is the kind of thing that an architect can do.
So when the mason gets to lay the tile he doesn't have to try to figure this out in the field.
Now, what about the whole issue of ordering and , and the inventory that you need.
And not ordering too many.
Because these are not inexpensive.
Yes, once you draw All the bathroom walls which I did, then you can count the tiles up, understand which shapes you need, and you can make sure the tile order is complete, 'cause once the mason starts laying this,
Yeah.
You're going to want all the tile here.
Right, and the complexity of this also has to do with ordering tiles from different parts of the world.
That's right.
Pretty complicated.
Thanks a lot.
We're running out of time.
I hope you can join us next week.
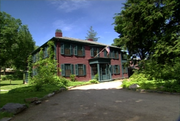
We're going to be working on the landscape, interesting stuff, Hard-scape really, creating a retaining system , retainer wall for a terrace and then a large blue stone paved terrace in the backyard.
And a little trip to the home of Fredrick Law Olmsted, the landscape designer, who designed Central Park in New York.
Hope you'll be around.
'Till then I'm Bob Vila.
It's great to have you home again.

