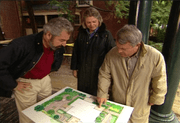
Well, let's check in with Riley now and talk about our front steps.
Hi, Bob.
Hi, Bob.
So we have a rather elaborate set of front steps that we're building, how wide will they be?
They're going to be the same as the walkway coming in which is five feet.
Mm-hmm.
And , we're going to be using six stringers in here, reason being on either side we have a post which is going to be sandwiched in between between a couple of stringers.
Yeah.
And then we're going to cut the span in the middle.
It's too long.
We will get to that a little bit later, but that is a good way of supporting the posts for the railings.
Right.
The railing system in this, the existing porch.
What we had here, the 1897 railings are very pretty and graceful and all that but they only come up to about mid-thigh, they're about twenty-four inches.
And in order to meet code we've got to replace them, and we found something, these are two bucks apiece at the home center.
And so, I think we're going to make out all right.
We'll get to work on that a little bit later, but they will surround the porch as well as going down.
How did you determine You're, you're stringer.
You've got all your stringers cut out here.
What's the height?
The height, well, what we've done is, we've just level across from the finished deck to the finish, walk way down here so you have got finish to finish.
Finish to finish, that's right.
And use a level to get an exact measurement.
That's right and what we've got is exactly 39 inches.
Okay, and then, what does that mean in terms of your cuts?
Well we wanted to have a shallow step, so we're gonna use six risers at six at a half inches a piece.
Brings us right to 39 inches.
Yeah, 39 divided by 6 so we got 6 and a half inch.
Risers.
Right.
That is very comfortable.
And 12 inch treads.
Yeah.
A nice comfortable lot.
Yeah, what did I just interrupt, what are you?
Well I'm just ready to cut off my last mortars here to receive their stringers.
Great.
Alright now putting all these consecutive
cuts it like this.
Obviously, it's the quick and easy way to put these notches in the lumber, but it is something that, if you're a do-it yourselfer, you should practice first on the horizontal plane and get real comfortable with that saw.
You really have to be handy with the circular.
Yeah, and it's a good way of plowing things out.
And a good sharp chisel.
Whoops.
Boy, that's good looking lumber, that's a 100 year old piece of timber, probably a good 6, I'd say it's a 6x8.
It is a 6x8.
It is nice, yes.
Beautiful I can smell it.
OK, now are we ready to bring that up?
Yes, we are.
Sorry.
And we're putting the last nail in the top riser.
The risers, of course, are giving stability to these stringers which we have attached up there and now we are ready to start figuring out about the skirt board.
Right.
And you got a tricky way of marking it off.
Right, well, it's pretty, it's been around for a while, I want to attach this
first so that it's secure.
And we just use this fork.
Yeah, this is simply a piece of stock that he has taken and he's cut out, a three-quarter inch slot in, and show us how it's going to transfer that line for you.
I'm just going to take the plane of the riser, and put it on the outside of my skirt.
It's a quick way to get that line.
And then we're going to go through that with a circular saw at 45.
Exactly.
Now, the only other thing I need is the level-line coming across where the tread's going to be.
Look good?
That's good right there.
Alright , now we'll take it over to the bench and put all these cuts into place.
OK.
alright, so it's already set at a 45 degree angle.
Right.
Because it's a mightier cut.
OK, now reset the saw to 90 degrees.
And get all our straight cuts for the treads.
Right.
Looks real nice up here.
Yeah they come out good.
Yeah.
That's a great tip because you get all your cuts marked off there and its nice.
Yeah.
So are you going to nail it on there?
Not yet, I've got the other side to do and then we want to prime these first and then move on to the treads.
Then we'll get on the treads.
Alright, because these are the approach to the house and the first thing that people see, we're taking special care.
We're using a redwood which will, weather really beautifuly here, but we've also put in a picture frame.
around each step and then we're inserting the redwood one-by-fours.
And, I should add that we're using stainless steel nails because they really won 't bleed or corrode with the Redwood.
That's gonna look terrific, Riley.
We got to break for messages, don't go away.
Well, we're running out time.
Come home again next week.
The kitchen appliances are all in place.
And we'll go up in the third flood to look at the complete media center, with some incredible sound, surround sound by Bose.
Don't miss it.
Till then, I'm Bob Vila.
It's good to have you home again.

