We may earn revenue from the products available on this page and participate in affiliate programs. Learn More ›
Redo the Door
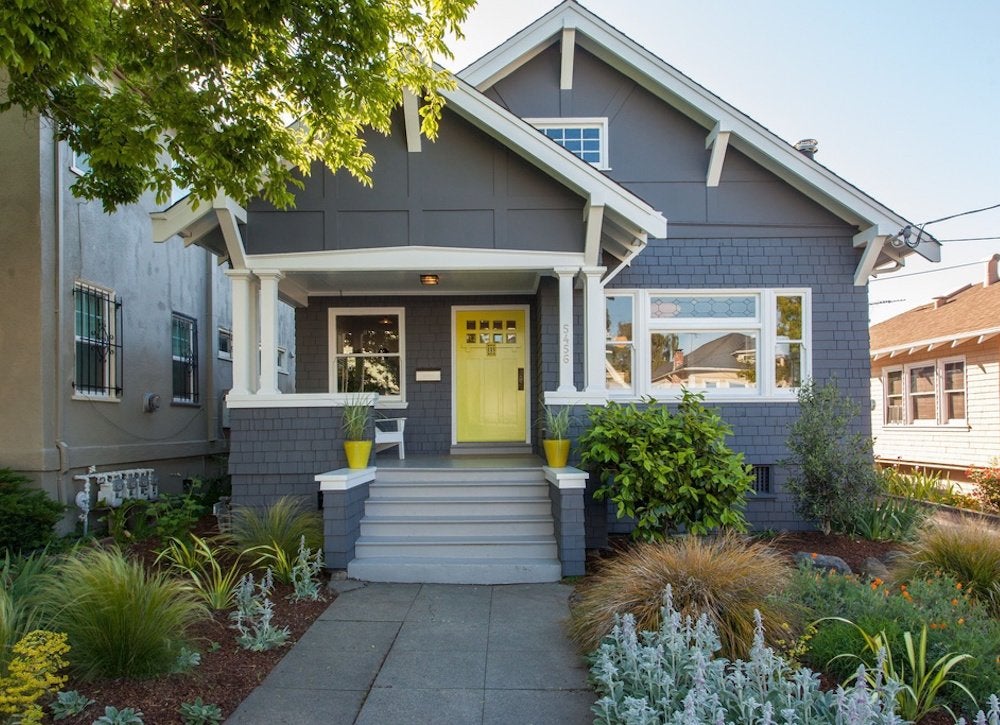
Zillow Digs home in Oakland, CA
Here’s an open-and-shut case of color therapy sure to make your entrance more exciting. Peruse some hues, then tape a few of your favorite swatches to the door. Study them at various times of day to select the one that best complements or contrasts with your home’s exterior paint. When you’re ready to commit, opt for exterior acrylic paint—its flexible, anti-mildew formula is ideal. Remove locks and knobs (or tape them if you promise to paint very carefully), and prep the door by wiping, washing, and sanding it down for optimal adhesion. Prime first, then paint, using a brush for the trim and a roller for wider surfaces.
Related: How to Pick a Front Door Color
Upgrade Your Mat
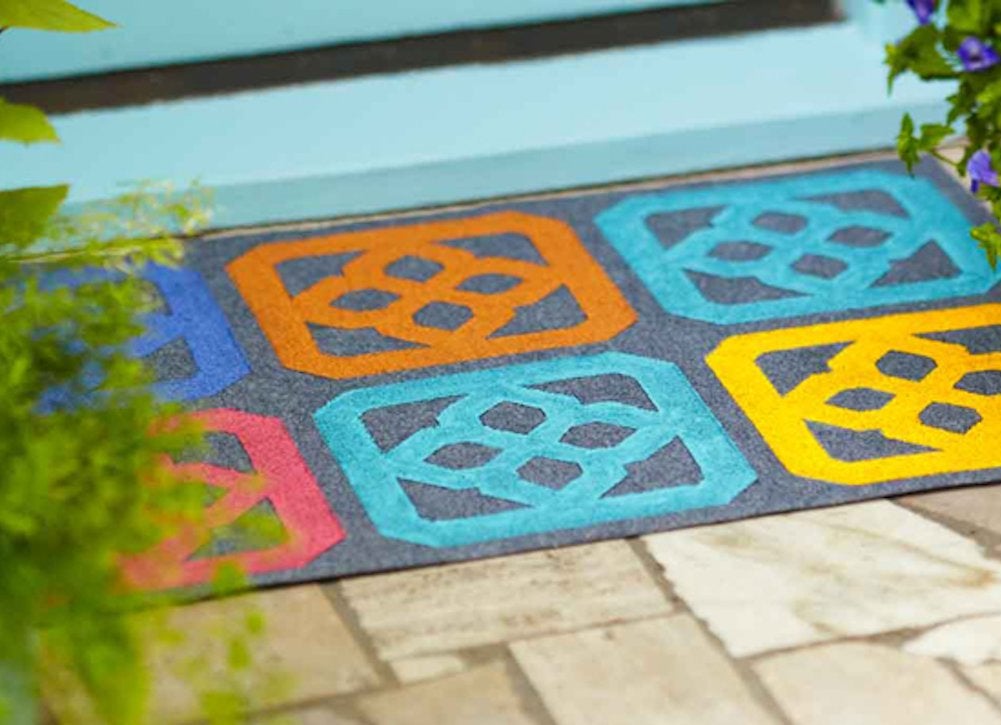
Nothing says, “Come on in!” like placing something pretty at your doorway—and with this free downloadable pattern, perfect for a 40-inch doormat, you’re halfway there. Print and assemble the pattern, cover it with packing tape to stiffen, and then neatly cut out the shaded areas. Use painter’s tape to block off 12-inch squares on the mat, trace the stencil into each square with a pencil, and then fill in with exterior paint in your choice of colors. Don’t care for the pattern? Check online for others or go freehand!
Related: DIY Lite: Make a Wood-Slat Doormat for Almost No Money
Dress Up Your Address
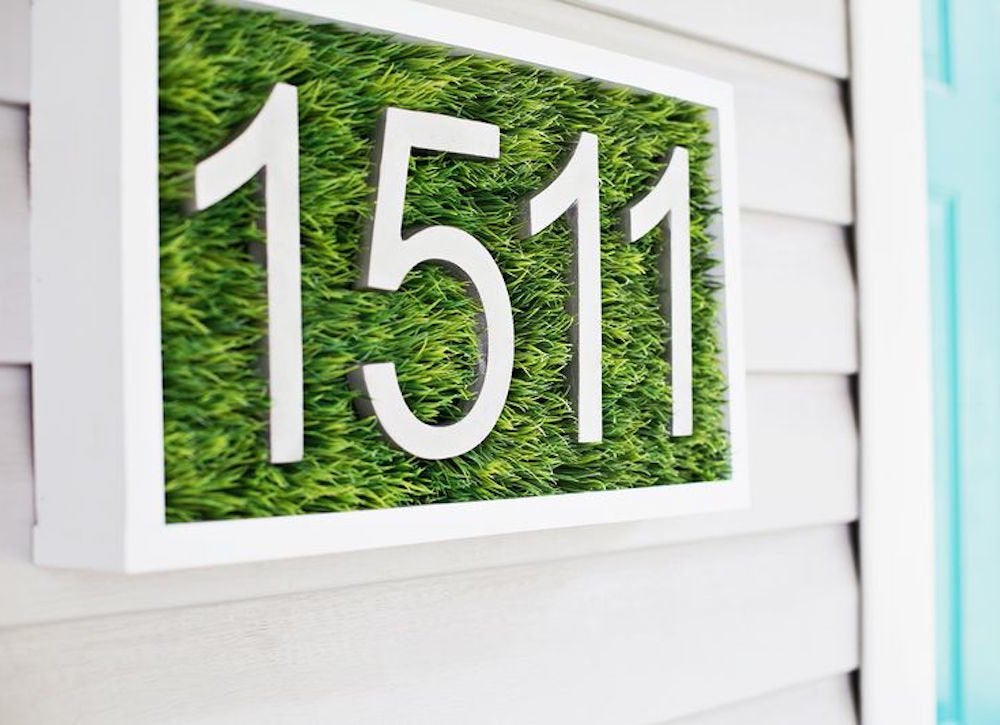
Who says the grass is always greener on the other side? Keep greenery front and center by first painting a wooden shadow box in a shade that complements your home’s exterior. Then, grab some faux grass (available at craft stores), cut it to fit the case, and secure it with multisurface glue. To make your house numbers look like they’re nestled in the blades, use wood screws that are a little shorter than the grass. After you’ve installed the digits, mount the assemblage on your house with appropriate hangers, such as vinyl or brick clips.
Related: 12 Easy and Inexpensive Ways to Upgrade Your Home’s Exterior
Make Your Beds
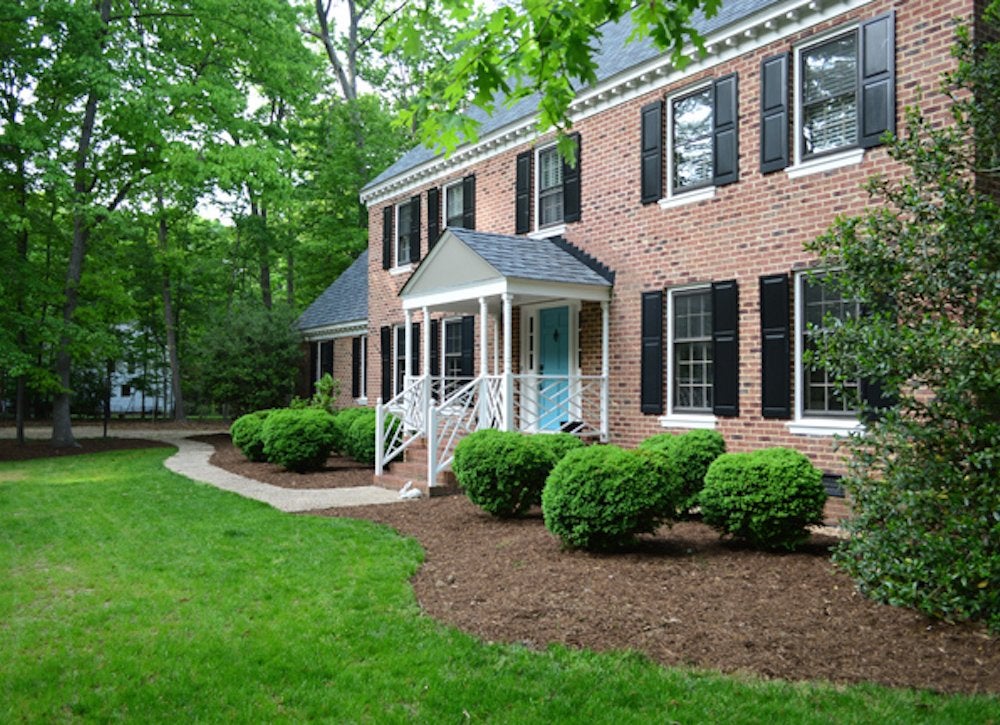
Mulch, whether in the form of decaying leaves, bark, or compost, keeps soil healthy and moist and looks great doing it. Plus, chances are you can have the stuff delivered. The key to putting in mulch beds with pro appeal? Outline the shape you want with a garden hose, then dig up the earth inside the line and remove any weeds or crabgrass. Spread mulch in the tidy beds and be impressed at the results.
Related: 19 “Zero Dollar” Garden Hacks
Make Over Your Mailbox
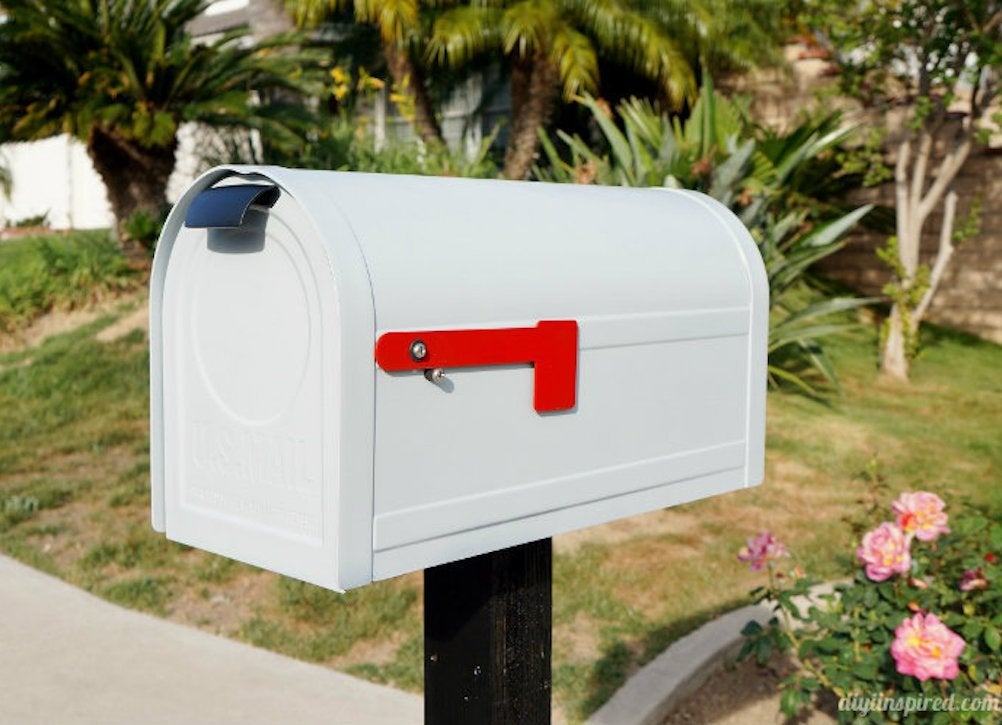
Because it’s constantly exposed to the elements, a metal mailbox really takes a beating. To rejuvenate yours, remove it from its post and take off the hardware. If it’s rusty, gently scrub it with a wire metal brush and then wipe away debris. Then, shake up some indoor/outdoor spray paint in a formula appropriate for metal and apply it to the mailbox, holding the can about eight inches away. Don’t forget to paint the flag in a bold, contrasting shade so the mail carrier will notice it.
Add Wow to Your Windows
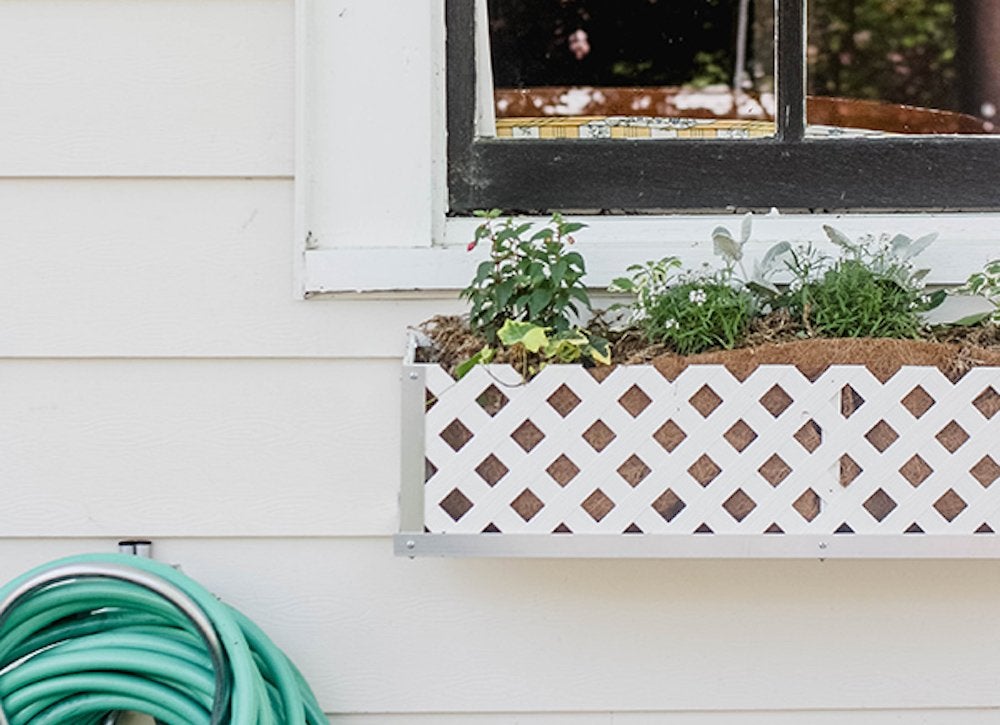
Think inside the box to beautify your home! With a window box, you can hang a colorful miniature garden right on your house. This one, framed out of angled aluminum and white vinyl lattice, has true cottage charm—just be sure to add a piece of plywood or MDF board to the center of the structure for stability. Fill with a basket liner, add potting soil, and put in pleasing plants that are appropriate for the light conditions.
Related: 25 Ways to Upgrade Your Outdoor Living Space for Almost Nothing
Create a Country Chic Garage Door
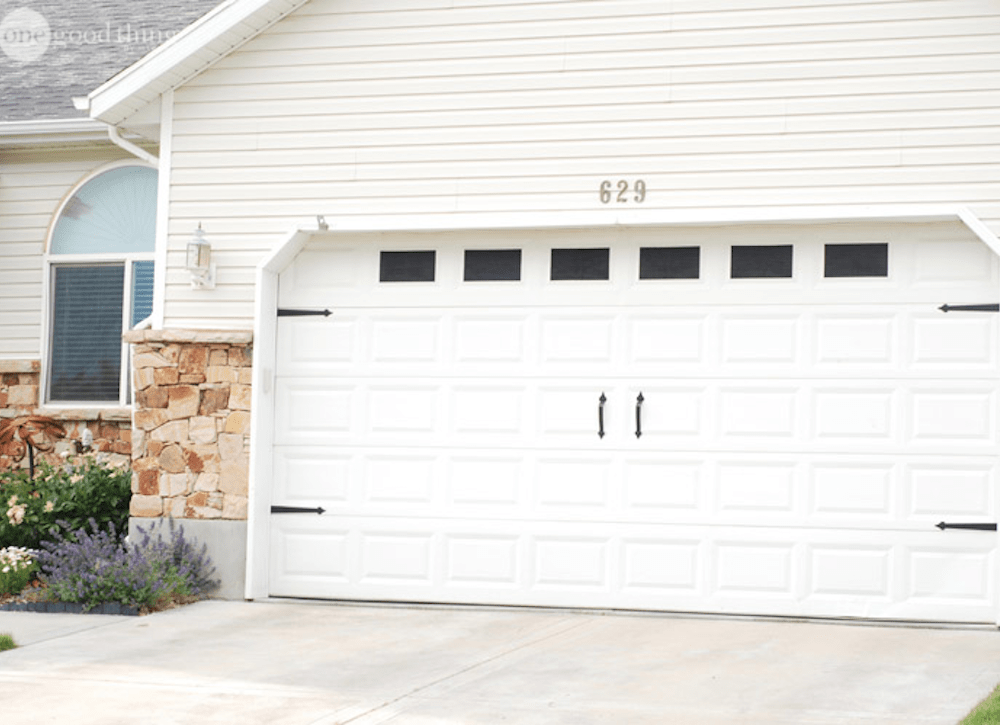
All it takes is black paint and a few pieces of hardware to bring carriage-style charm to a generic garage door. For about $20, you can purchase a set that includes metal handles and hinges as well as magnets to attach them. Once you’ve installed the hardware, tape off a row of rectangular panels toward the top of the door, then prime and paint with black exterior paint to create the illusion of windows.
Refresh Your Porch Furniture
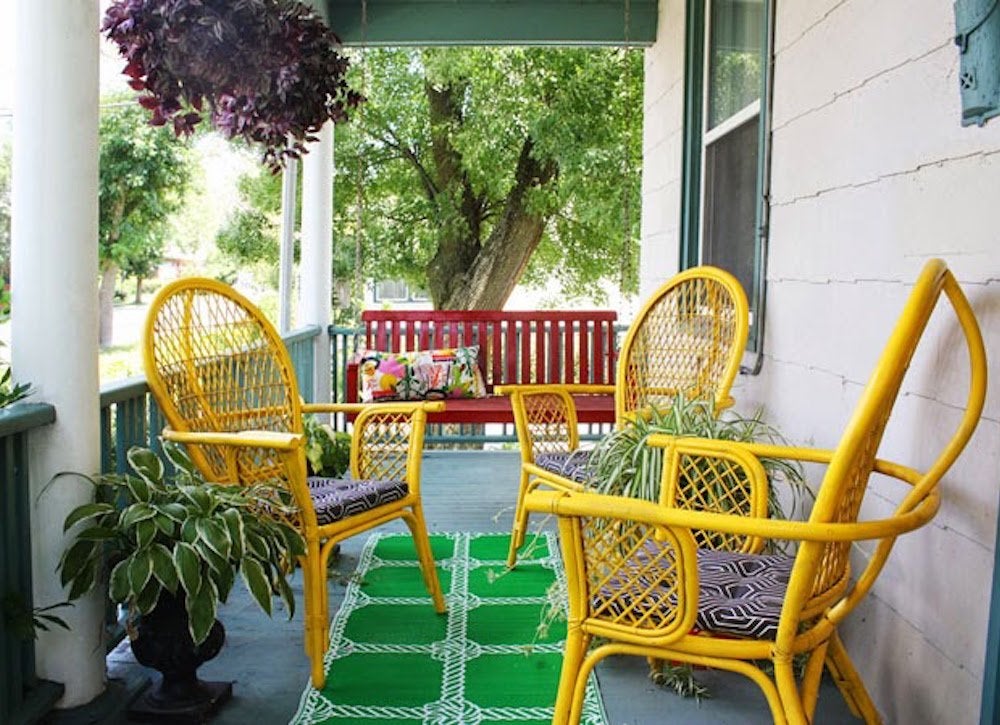
Color makes everything cuter, and older outdoor furniture can usually use an infusion of cuteness. Fortunately, pieces like the bamboo chairs shown here are pretty easy to spray-paint. To ensure long-lasting results, don’t skimp on prep: Wash and rinse the pieces well, and let them dry thoroughly. Protect the area with drop cloths, spray on primer first, then when it’s dry, apply your shade of choice, holding the can about eight inches from the surface and using a sweeping side-to-side motion.
Related: 22 Transformational Front Porch Ideas Your Neighbors Will Want to Copy
Shutter Up!
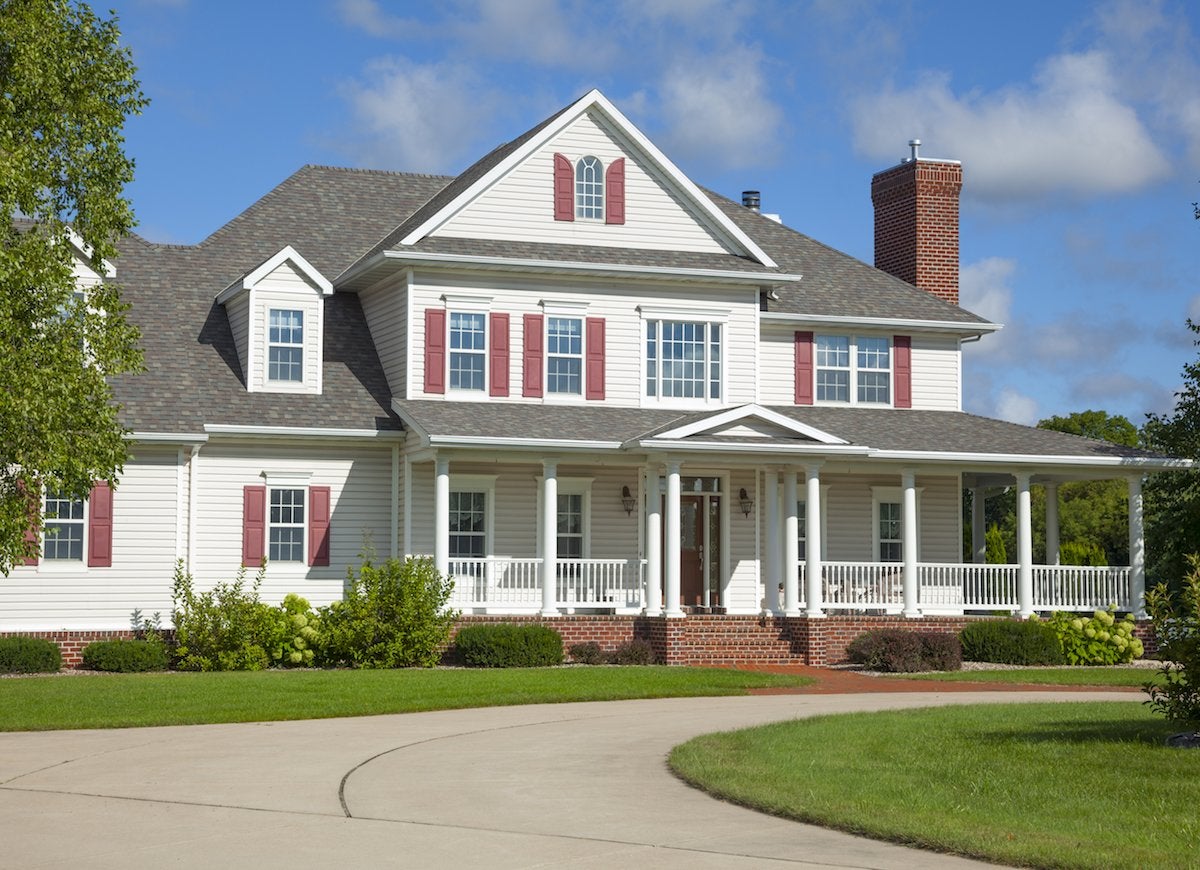
Shutters are a stately presence on a home’s facade, but they’re not necessarily just about looks. Functioning shutters, when closed, provide privacy and help insulate the house, keeping it cooler in summer and warmer in winter. Even if you opt for purely decorative shutters, eschew the cheap-looking vinyl variety. Make sure the shutters are the right size and shape for your windows, and for authenticity mount them to the window casings, not directly on the house.
Related: 7 No-Fail Exterior Paint Colors
Enliven With Lighting
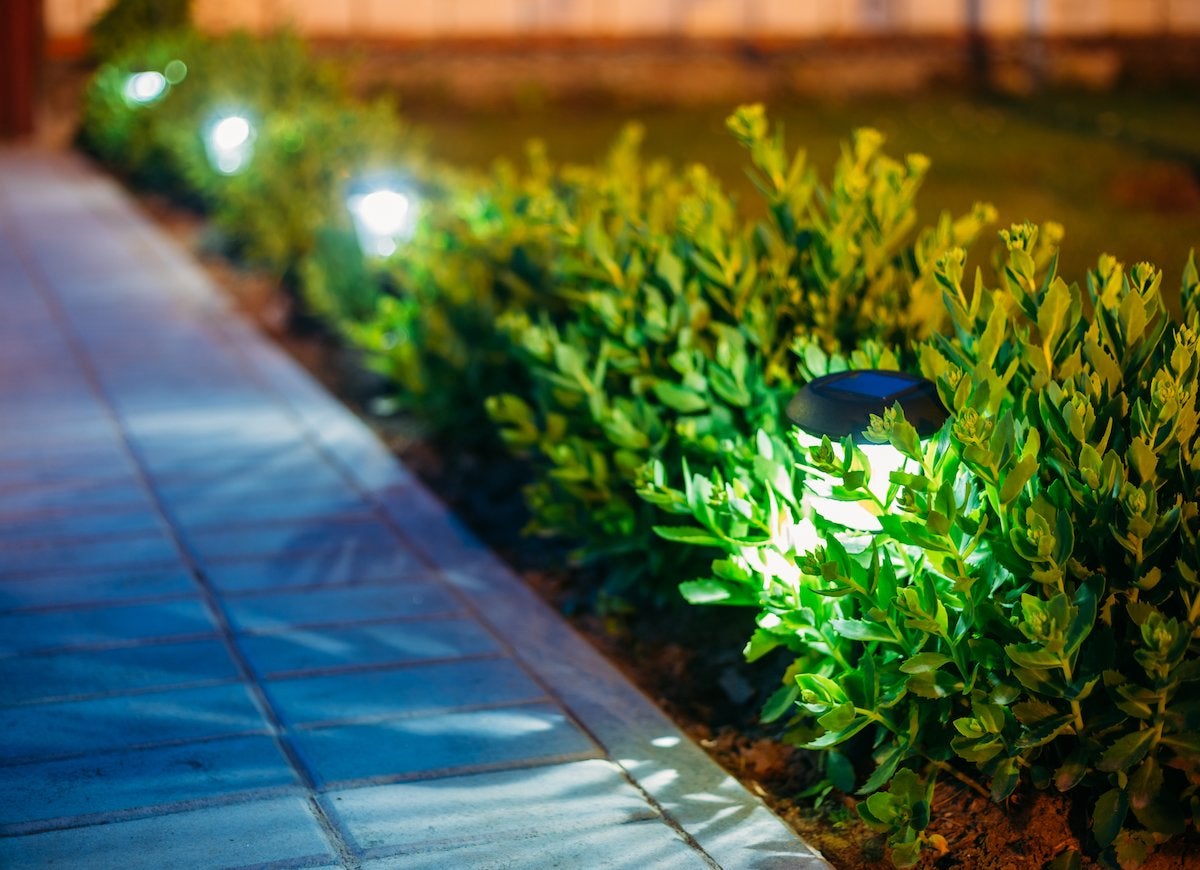
Illumination enhances your outdoor spaces, but it’s also important for safety and security—and these are all good reasons to brighten up your yard. Start by purchasing low-voltage landscape lighting, which plugs into any outdoor GFCI outlet. Plan the placement of the lights, dig a narrow trench to bury the cable, then plug in the transformer. Then, make the electrical connections and install the lights. If this all feels like too much effort, think solar—lights that have no wiring are snap to set up!
Related: 8 New Ideas for DIY Outdoor Lighting
Step Up Your Stair Game
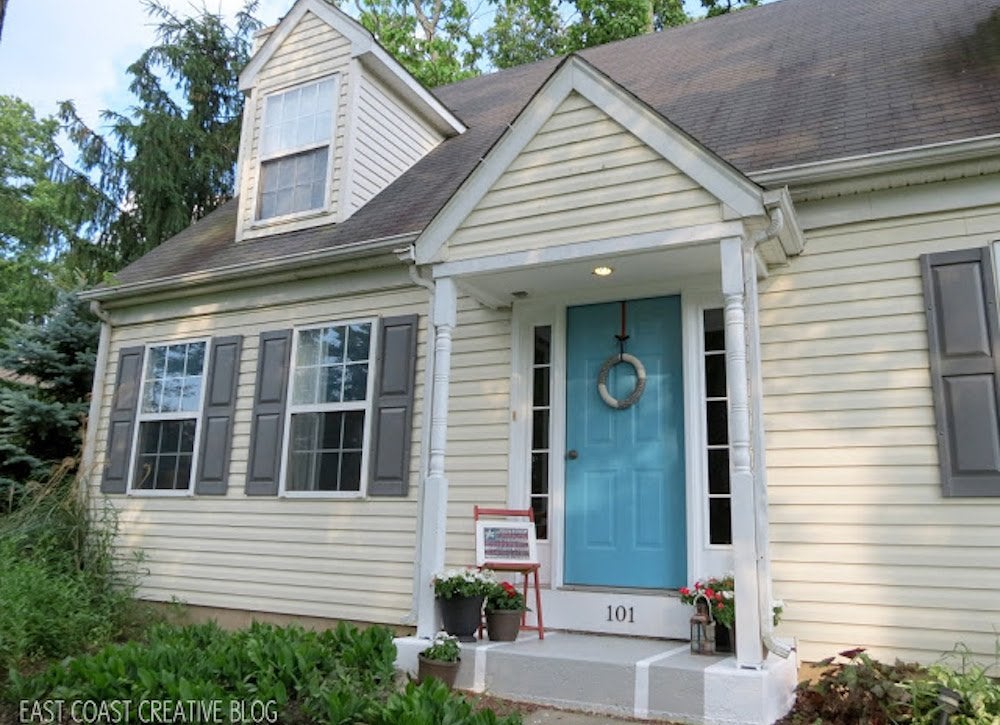
Just because you walk all over your concrete steps doesn’t mean they can’t look cool. A fresh coat of paint will spruce them up, or go the extra mile and give them a bold stripe. Start by washing them thoroughly with soapy water. When they’re dry, apply concrete primer. (Its thinner formula seeps into the material.) Use a roller to apply paint, and when it’s dry mark off stripes with painter’s tape. Apply a second coat in a contrasting color, and when that coat’s dry, pull off the tape and admire your handiwork.
Get Potted!
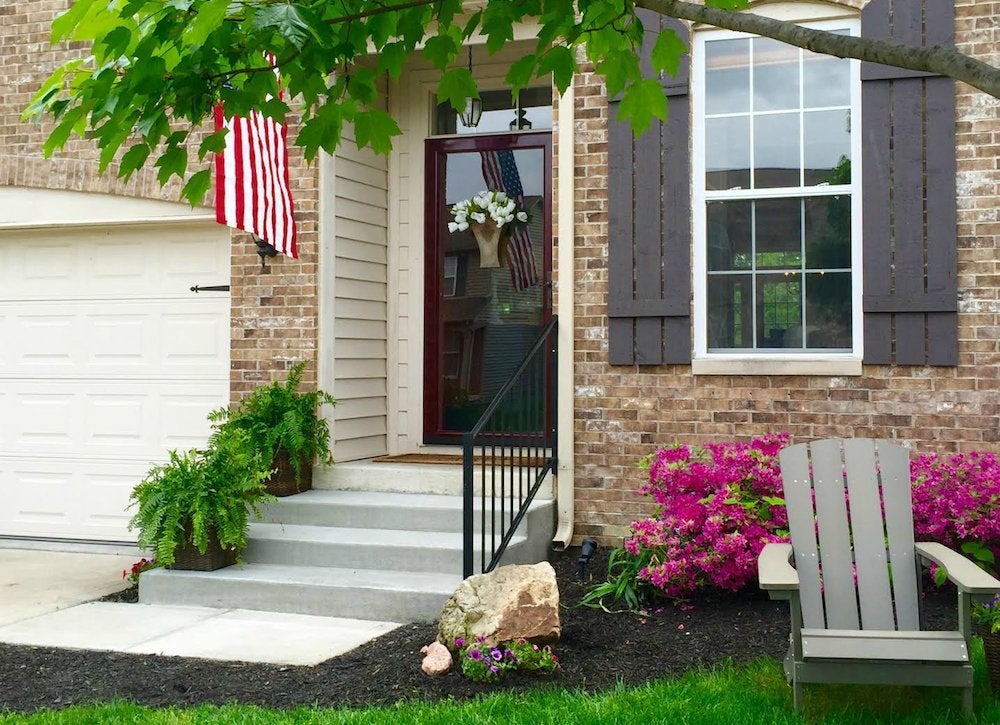
If you’re fickle about your outdoor decor, porch planters are the perfect solution. You can change the blooms and greenery according to the season or your mood, and you can DIY planters out of all sorts of things, from old washtubs to wooden crates. Drainage is key, so be sure to drill a few holes at the bottom. Once your planters are in position, what you put in them is up to you! Think coleus or petunias in summer, mums or decorative cabbages in fall, or ferns for a lush yet easy-care look.
Related: 25 Easy-Care Plants That Survive With or Without You
Go Big
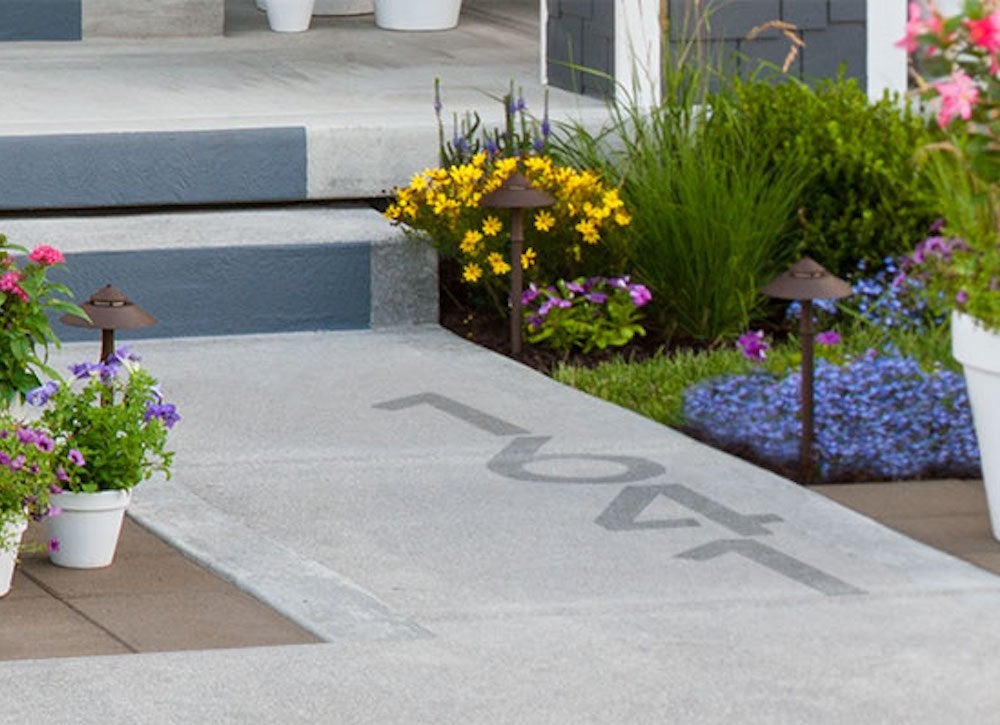
With house numbers this large, no one will ever again have trouble finding your house! These distinctive digits were created with NeverWet, a superhydrophobic coating that repels water and won’t get slippery. Look online for stencils or make your own out of cardboard or mat board, cutting them out with a razor blade to ensure crisp, neat edges. Wash your sidewalk well with detergent and water, and rinse with a hose. When it’s dry, position the stencils, hold them in place with duct tape, and then spray on the coating according to the manufacturer’s directions.
Plant a Mailbox Garden
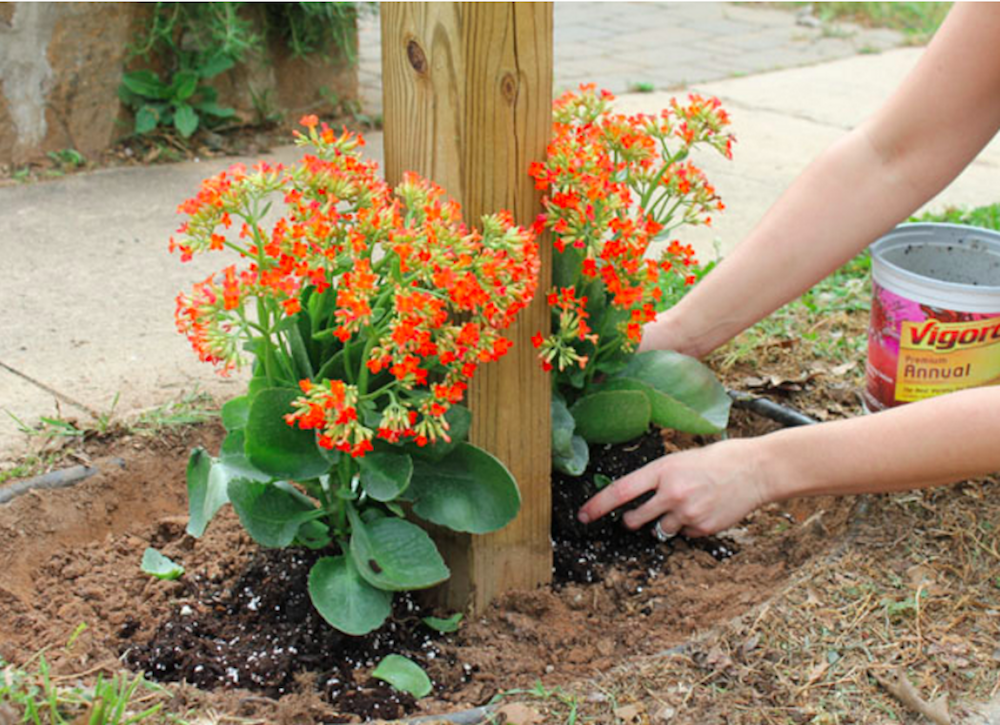
A mailbox doesn’t have to be boring! Perk up the base of yours with brightly colored flowers. Purchase annuals that tolerate full sun (most curbside mailboxes get direct exposure), dig up the soil, and plant away. You’ll brighten your local mail carrier’s day and enjoy your own trips to the box, even if all it contains is bills.
Related: The 15 Best Trees and Shrubs to Grow for Backyard Privacy

Everything You Need for a Lush and Healthy Lawn
Keeping your grass green and your plants thriving doesn’t just take a green thumb—it starts with the right tools and supplies.

