
We may earn revenue from the products available on this page and participate in affiliate programs. Learn More ›
Home Advice You Can Trust
Tips, tricks & ideas for a better home and yard, delivered to your inbox daily.
By signing up you agree to our Terms of Service and Privacy Policy.
The Wild Side of Your Wallet
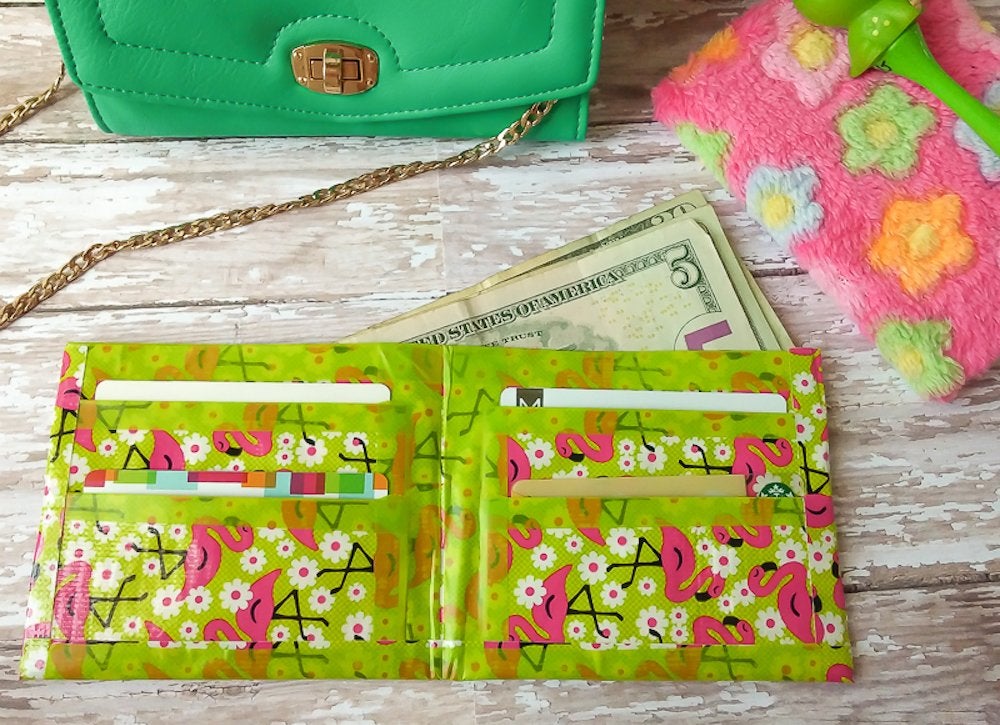
Why use duct tape to patch up holes in an old billfold when you can use it to construct an entirely new—and even more distinct—wallet? Pick up a roll of solid colored duct tape, or a wild patterned alternative like this flamingo-themed duct tape. Cut and place strips sticky-side together to create a sheet of double-sided duct tape. Fold the sheet into a bifold wallet, attach short strips of tape to each inner sleeve to form card slots, then seal the sides of the wallet with a small piece of duct tape before filling the slots with your bank cards and hard-earned green.
Perked up Placeholders
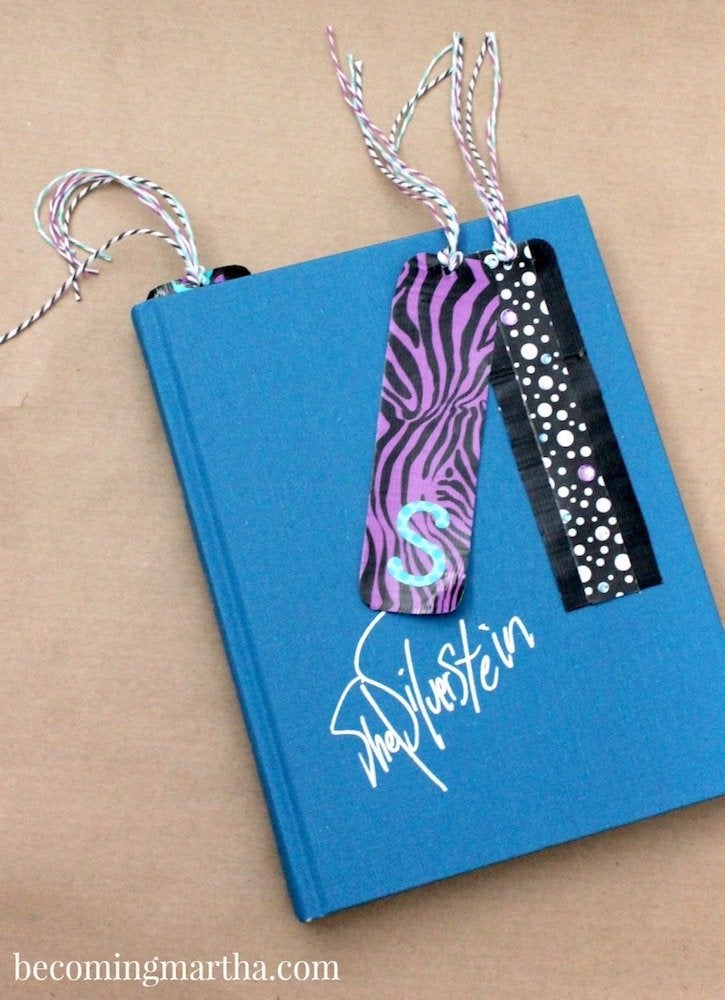
If you’re guilty of using old receipts, ticket stubs, and postcards for bookmarks, take a few minutes to fashion a real one from two bargain craft store finds: duct tape and baker’s twine. Start by cutting two six-inch pieces of regular or mini-sized patterned duct tape, then stick them together and punch a hole in the middle of one of the short sides with a hole punch. Loop three pieces of twine through the hole and tie a tassel at the top, then adorn the front of the bookmark with monogram stickers to add even more personality to your favorite reads.
Lego of Clutter
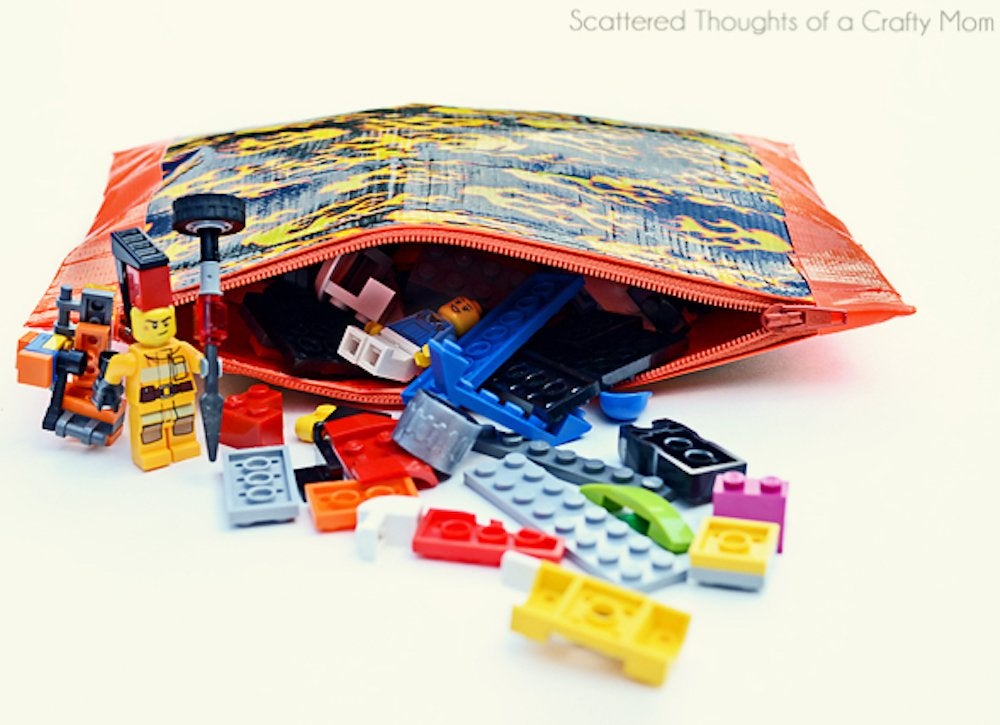
Whether their latest obsession is Legos or jigsaw puzzles, tots can tote around all of their favorite toys—and keep play zones clutter- and accident-free—with this no-sew duct tape zipper pouch in tow. Zip through this project by assembling strips of patterned duct tape into a double-sided square sheet, making a few creative folds to form a pouch, then hot gluing a zipper to the top edge of the pouch. Seal the edges of the pouch with leftover duct tape, then fill the lightweight and portable pouch with toys or trinkets before your little one’s next play date.
Homework Helper
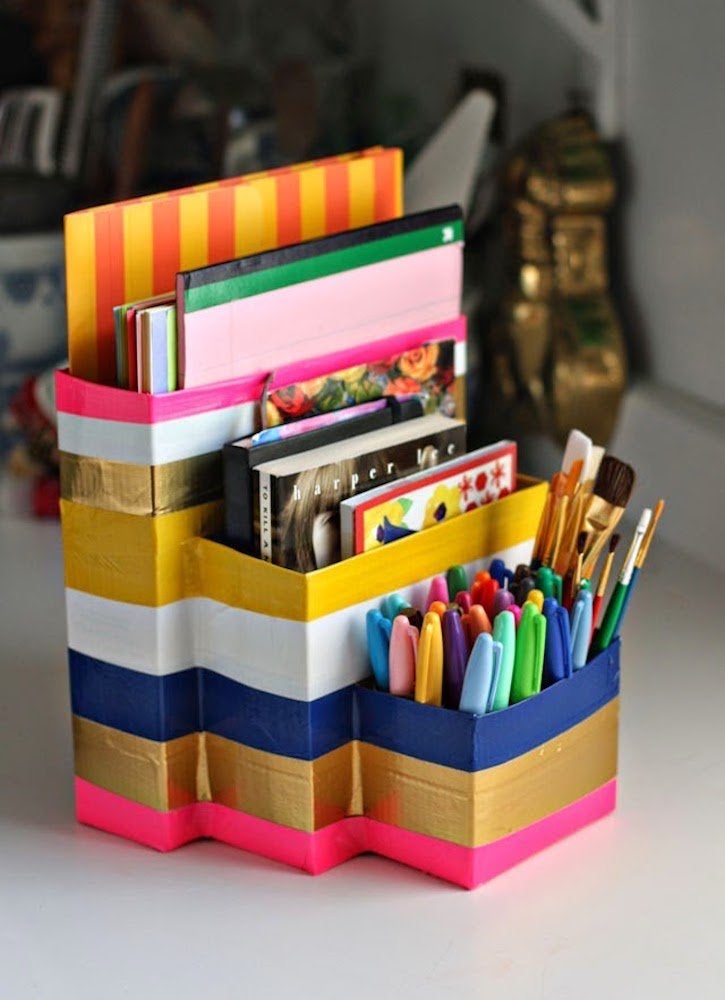
The ultimate cure for back-to-school clutter, this homework caddy adds both organization and color to a child’s room or craft corner. Recreate the desktop organizer by positioning three cardboard cereal or pasta boxes side by side, trimming off the box tops to create a tiered silhouette, then wrapping the assembly with multiple different shades of colored duct tape to bind and cover the boxes. Reserve the largest slot in the caddy for folders and papers, the middle slot for books or journals, and the smallest for markers, pens, and even calculators.
Flowers at your Feet
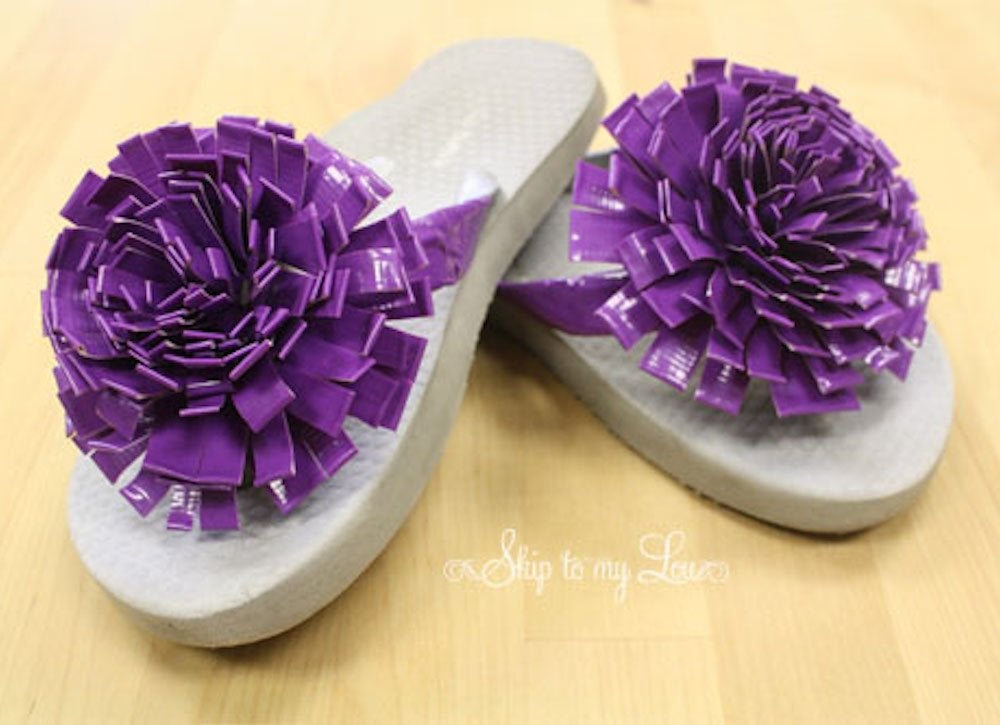
As adorable as they are easy to make, these duct tape flowers can transform the most forgettable pair of flip flops into a fun summer accent for warm weather days. Add the floral flair to your own shoes with some strategic cutting, folding, and wrapping of strips of duct tape until the pieces resemble a three-dimensional flower bud. Using floral wire, fasten the flower to your flip flops, then wrap the straps with duct tape to secure and conceal the wire. Make a second duct tape flower for your other flip flop to strut the streets in style!
Mixed Bag
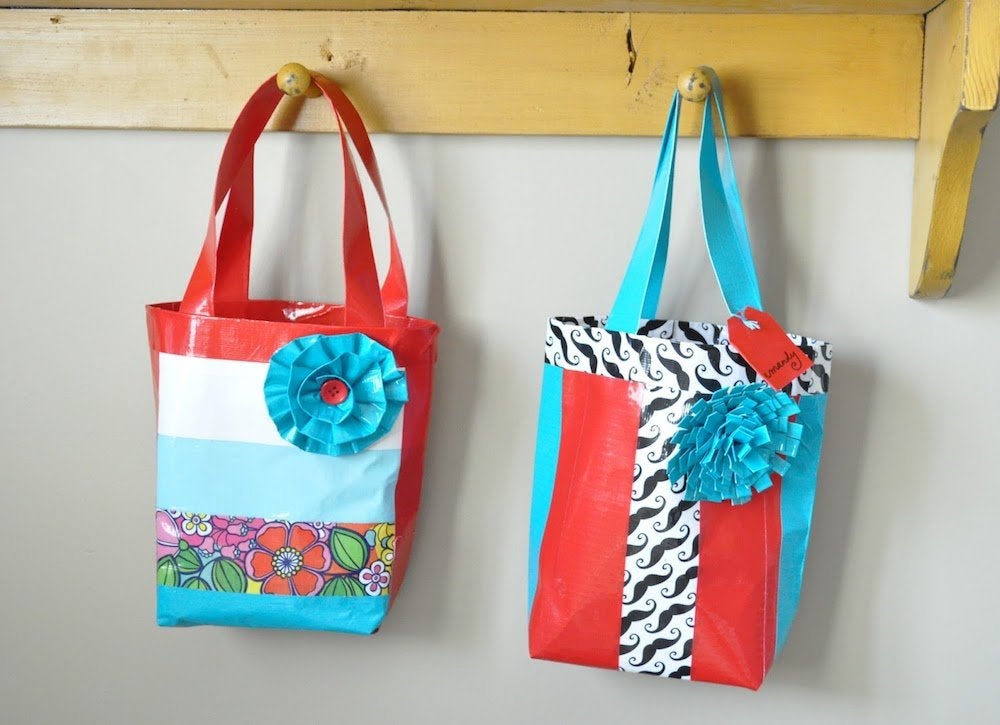
This stylish tote wasn’t conceived by a high-end fashion designer, but rather, a clever DIYer. A plastic bag forms the lining of the no-sew tote, which is then covered with alternating strips of solid and patterned duct tape and sealed with more duct tape. The double handles, fashioned from the same tape, give you a firm grip on the bag as you tote your essentials around town. For an even more playful touch, adorn the front of the bag with colorful decorative flowers made of wound and pleated strips of leftover duct tape.
The Key to Staying Organized
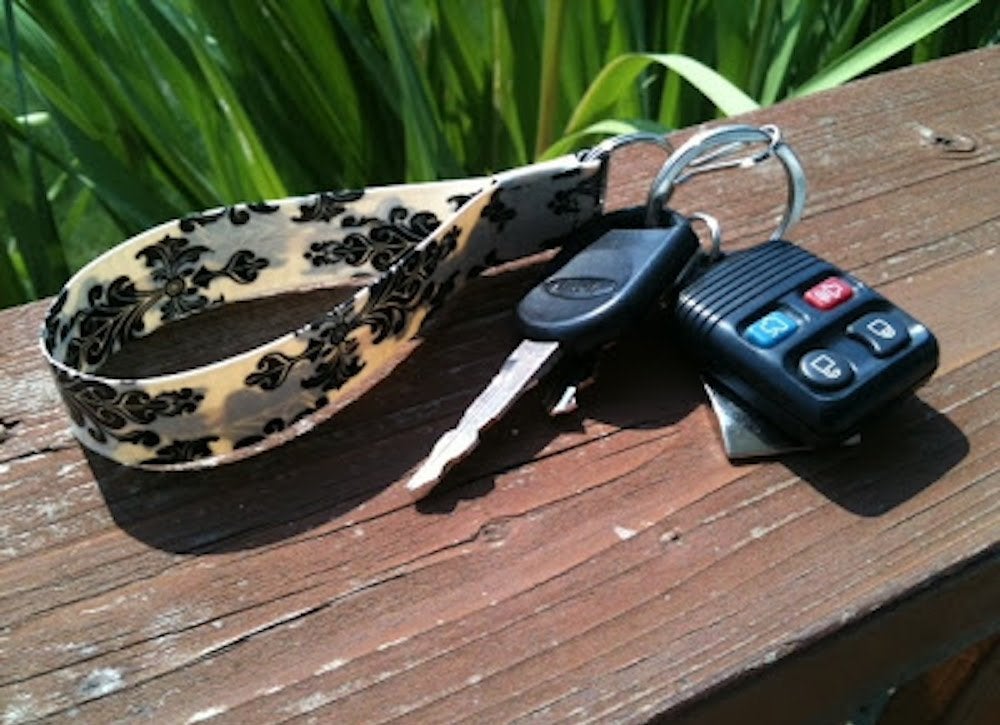
Lost keys will become a worry of the past when you fashion this key wristlet from humble duct tape. Fold in half a foot-long strip of patterned tape in hot dog style, then form the folded strip into a loop. Thread the two loose ends of the loop through a key ring and stick them together with extra duct tape to complete your homemade key organizer. Slip car and house keys, club cards, and more onto the key ring of the wristlet to keep them close at hand even when you’re on the go.
Brace Yourself
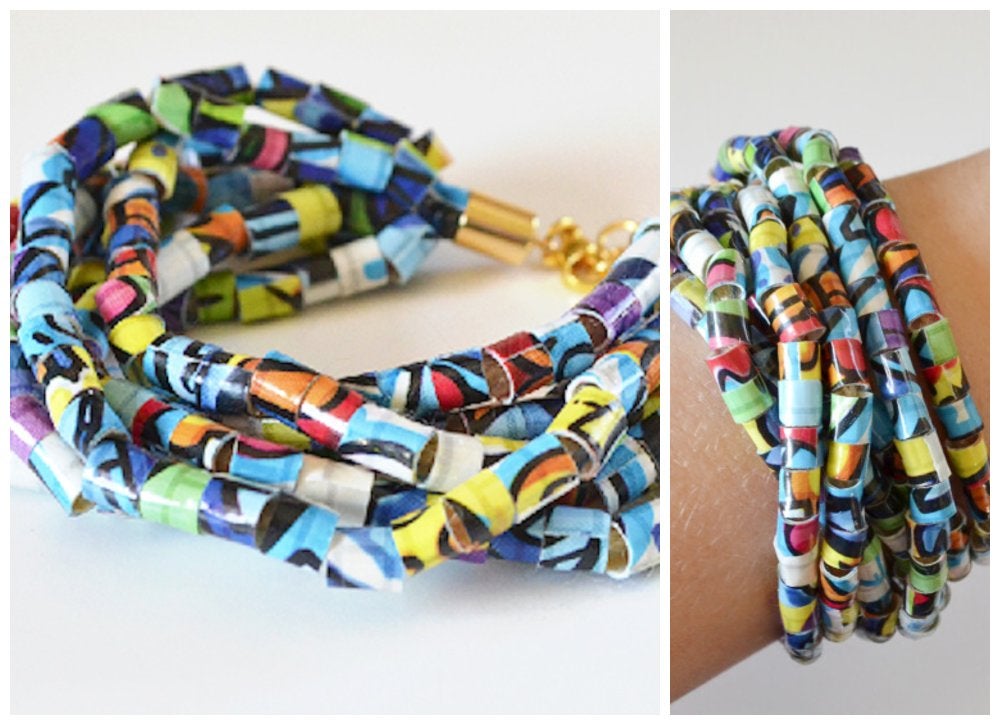
Move over, friendship bracelets—there’s a new DIY jewelry staple in town. This bargain beauty is created by wrapping graffiti-themed duct tape around plastic drinking straws, then cutting the straws into bead-sized pieces. String the “beads” onto six strands of yarn, then knot the ends of the yarn and hide them with metallic cord ends for a polished finish.
Lawn Leisure
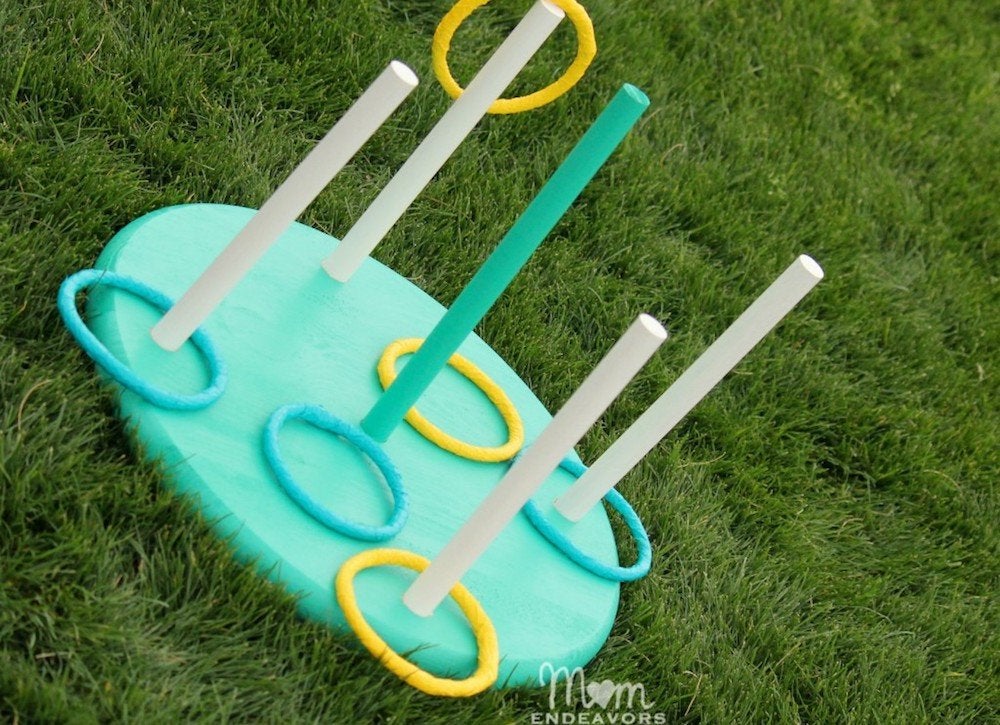
Duct tape, nylon, and scrap wood make for a winning combination in this DIY ring toss. After assembling the ring toss board from a painted wooden round and dowels, wrap duct tape around loops of nylon rope to form lightweight rings for the game. Use two different colors of duct tape to represent two different teams, then start the family fun with a round of everyone’s favorite summertime lawn game.
Checkered Pastime
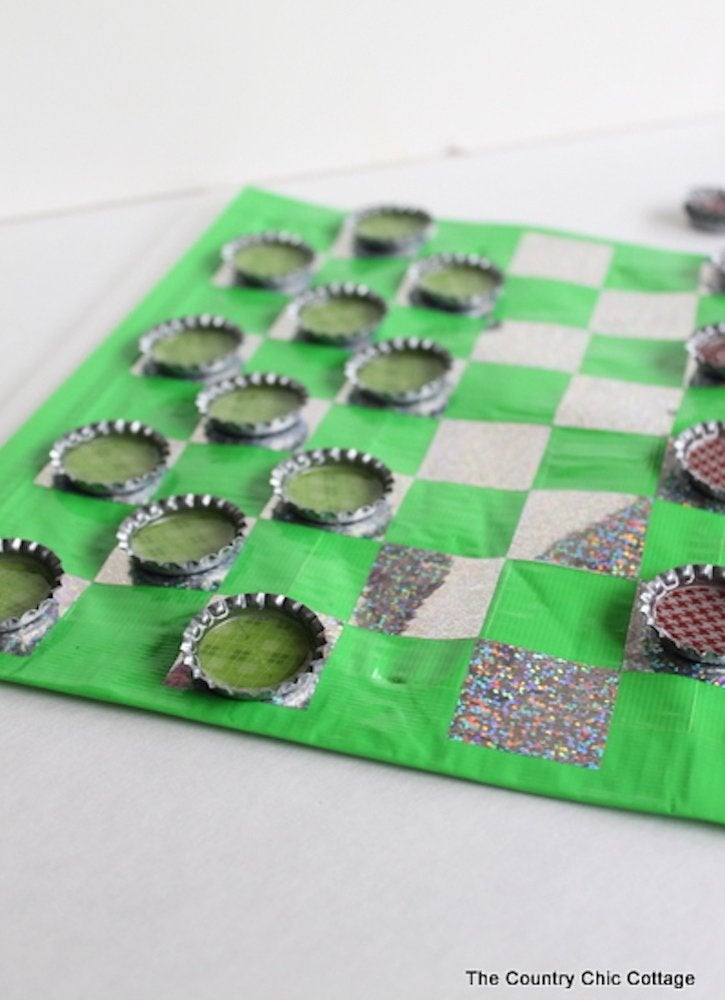
This travel-friendly, storage-smart checkerboard provides the perfect diversion during a summer road trip. Build the checkerboard by adhering colored duct tape strips to both sides of a gallon-sized ziplock bag, then sealing the sides with matching duct tape. Adhere squares of contrasting duct tape over one side of the board to achieve the checkerboard pattern, then top this side of the board with bottle cap “checkers” in different colors to represent the two opposing sides. When the game is over, conveniently stash and store the checkers in the bag so you never lose a piece even during bumpy travel.
A Nearly Free Lunch
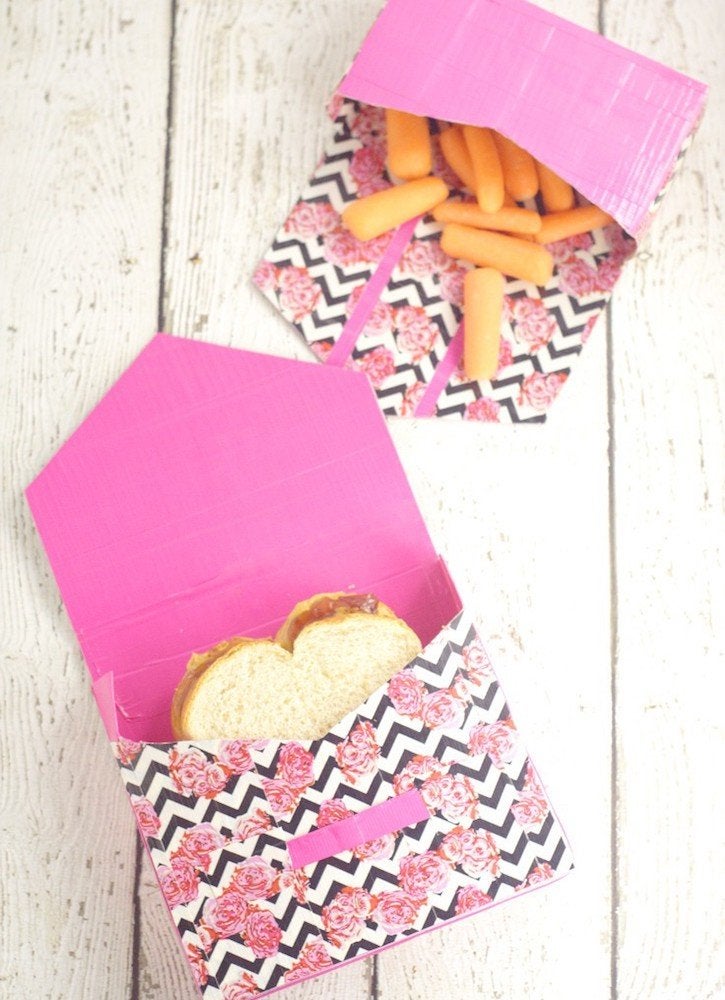
For a more durable alternative to plastic ziplocks, slip these duct tape sandwich bags into your child’s—or your own—lunch box. The envelope design of the bags comes from a simple printable template (available here) that includes a front, back, and flap. Cover the template pieces with strips of patterned duct tape, trim the excess, then assemble the pieces into a bag, using additional strips of tape as side pieces that connect the front and back. To close the bag, tape a ribbon of duct tape to the front and tuck the flap underneath it. Lunchtime couldn’t be easier—or more fun!
Rest Up
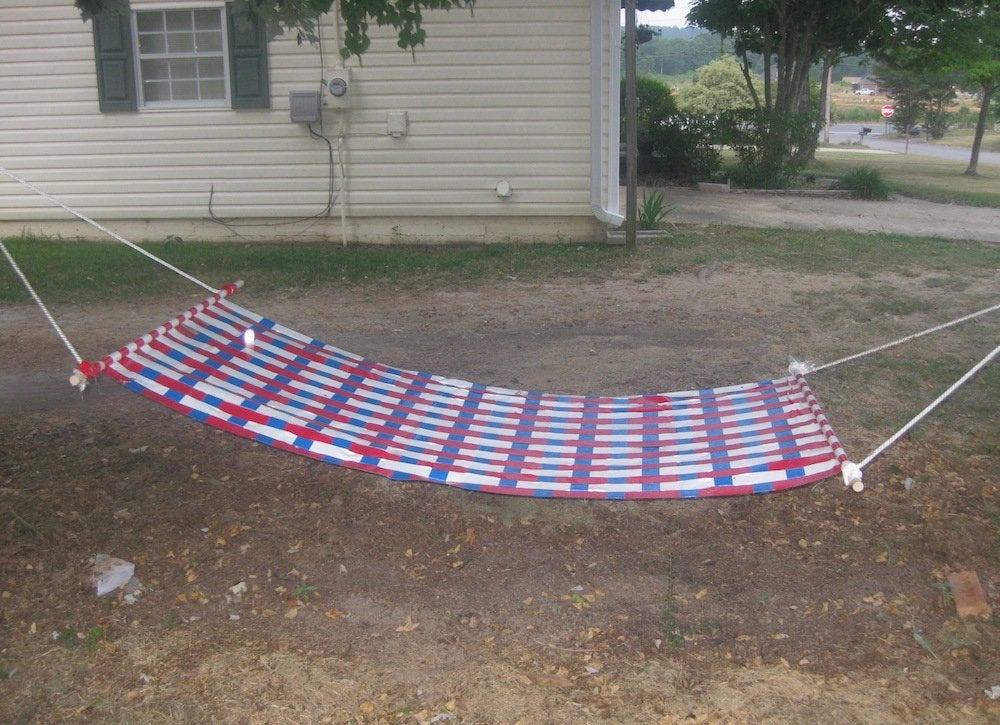
instructables.com via Dadzilla
The rugged, waterproof finish of duct tape makes it an excellent material for a backyard hammock. This patriotic rest stop requires only two wooden dowels, three rolls of duct tape, and a steady hand to recreate. After rolling out an initial layer of tape in alternating bands of red and white, weave additional bands of blue duct tape through the existing bands to create a woven pattern. Attach rope to the heavy-duty dowels on each end of the hammock, then tie to two neighboring trees to complete the lazy-day essential and kick up your feet.
Seeing Stars
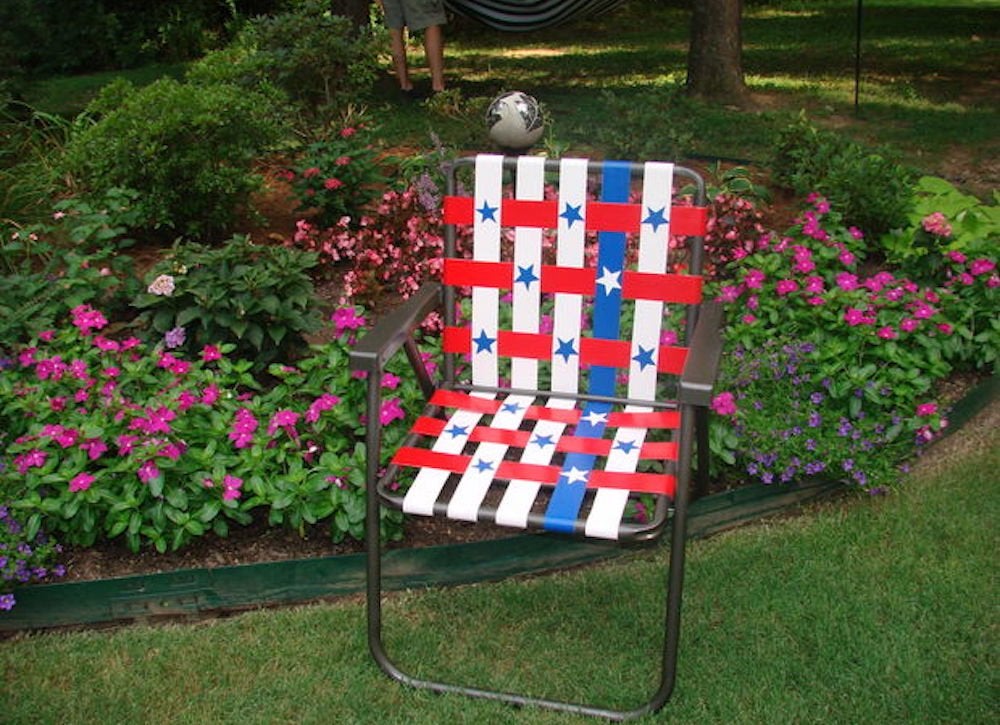
instructables.com via Kapaow
Don’t relegate that old lawn chair to the junkyard just yet! If the chair frame is still in tact, you need only tear out and replace the weather-beaten seat and back to transform it into a stylish stars-and-stripes-themed sitter. String three, three-layered bands of red duct tape horizontally across the seat and back frame, then weave white and blue bands vertically through the red bands to create an eye-catching interlocking tapestry. For the finishing touch, cut out star-shaped pieces of duct tape and stick them to the new chair seat and back for patriotic flair.
Put Your Own Spin on It
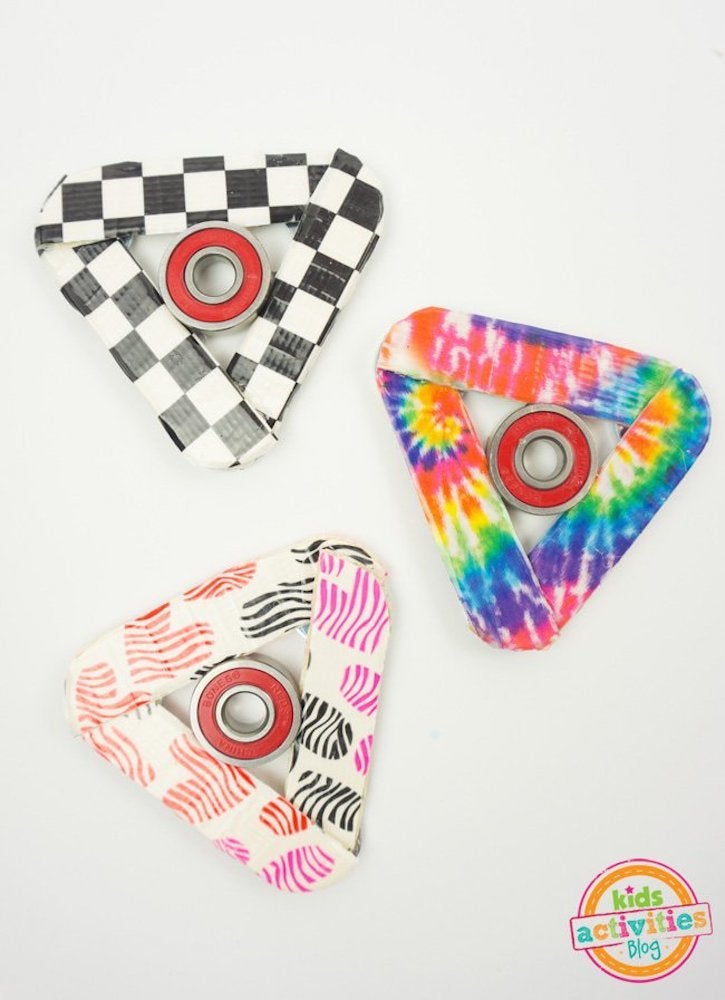
For a unique spin on the modern craze of fidget spinners, add this low-cost duct tape spinner to your kids’ collection of knickknacks. You can build it by breaking two craft sticks in half, covering three of the halves with patterned duct tape, then gluing the taped sticks together to form a triangle. Glue down a skate bearing so that it sits securely in the center of the spinner, then glue washers to each point of the triangle—this will add the weight needed to make the spinners spin lightning fast.
Case Closed on Clutter
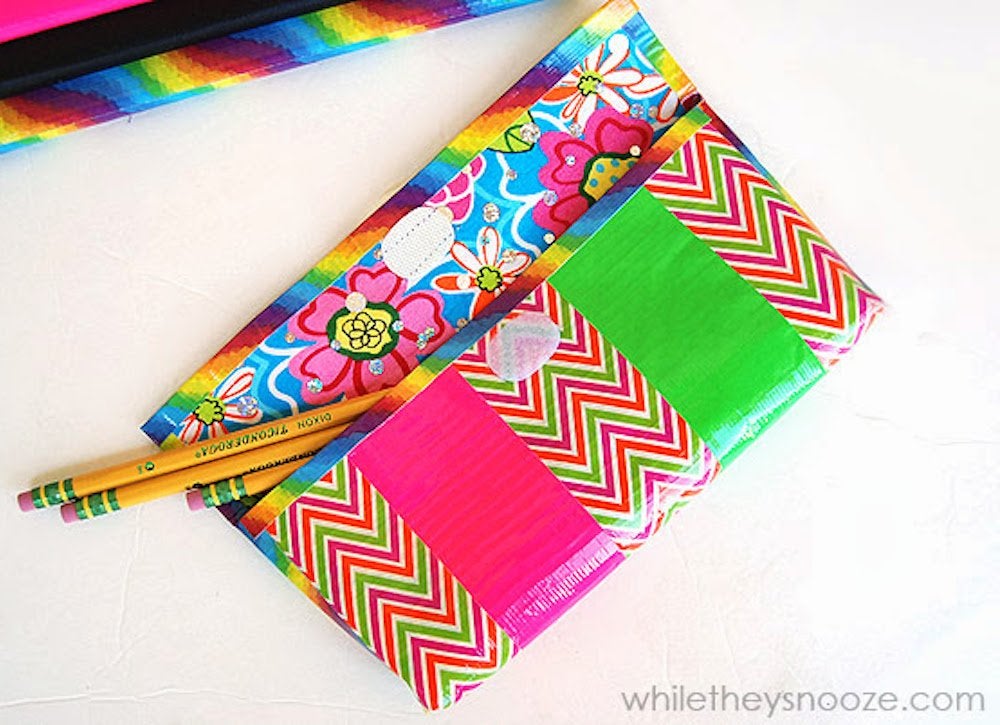
You can cross off one more item on your back-to-school shopping list after you make this creatively conceived DIY pencil case. Start by pulling out a scrap of your favorite fabric, then cover it one side with duct tape in any color or pattern. When you’re finished, flip the fabric, trim the excess tape with scissors, and fold the fabric up so that a two-inch flap remains at the top. Seal the sides of the case with leftover duct tape, then stitch Velcro to the flap and back so that kids can close the case in a matter of seconds when the school bell rings.
On the Dot
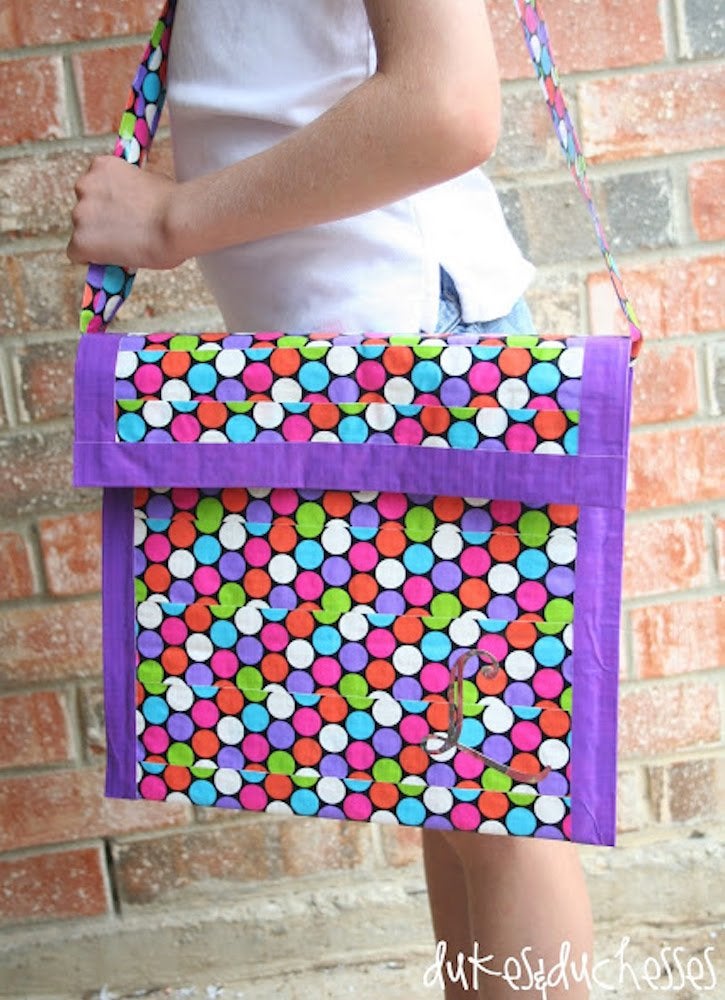
If you have a few rolls of duct tape and a large mailing envelope lying around the house, you already have most of the makings of this crafty homemade messenger bag. A few creative cuts to the envelope create a handy pocket for stashing homework, while magnetic strips attached to the flap and the body of the bag allow for easy closure. But what really makes the bag standout from store-bought finds is its eye-popping exterior, made from strips of polka-dotted duct tape—plus a very tiny monogrammed letter for the tiny tot who totes it.
Another DIY Under Your Belt
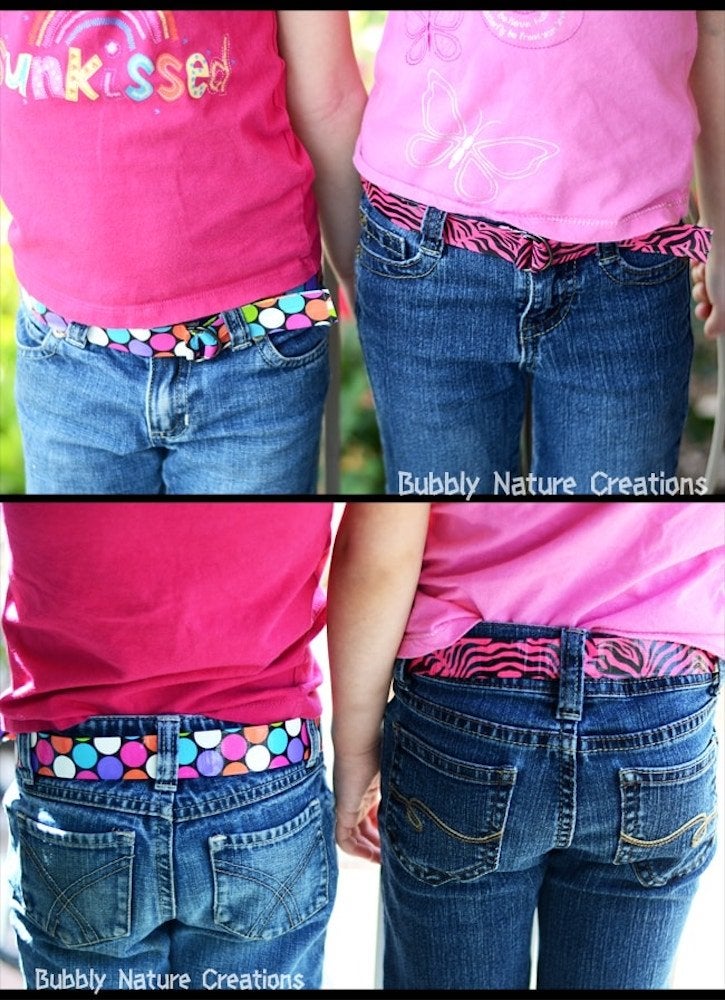
If loose jeans or style-devoid slacks are cramping your style, make room in your accessory closet for this DIY belt. Get the look by tearing two waist-sized strips of duct tape, one white and one patterned. Tear the white strip in half lengthwise, stick it to the patterned strip, and fold the patterned strip over the white strip to form a sturdy belt. Fold one end of the belt over two D rings, then secure the fold with a strip of white duct tape before wearing the artful accessory.
Out-of-the-Box Organizer
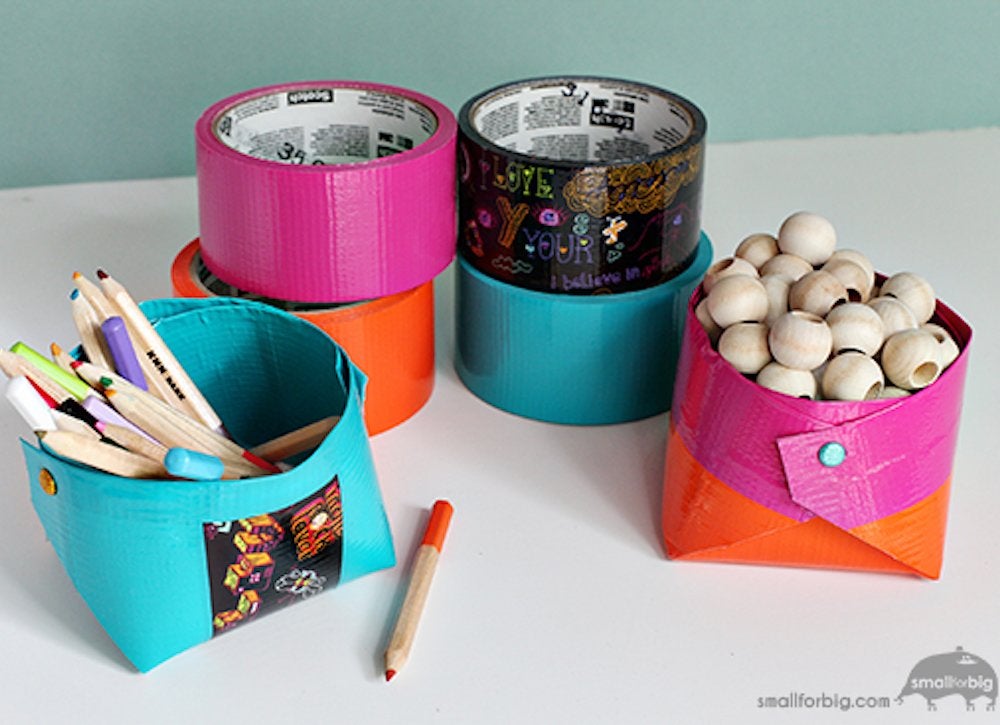
Easy to transport and even easier to make, these duct tape boxes corral loose belongings across the home. Get started by downloading and printing a basic template (available here), covering the unprinted side with bright, solid-colored duct tape, then trimming the excess tape. Cut along the lines of the unprinted back side of the template, then assemble the box and secure the sides with metallic brads. Fill the boxes with pencils, coins, beauty supplies, or countless other doodads to cure clutter in the office, bedroom, craft room, or playroom.
Homemade Handheld
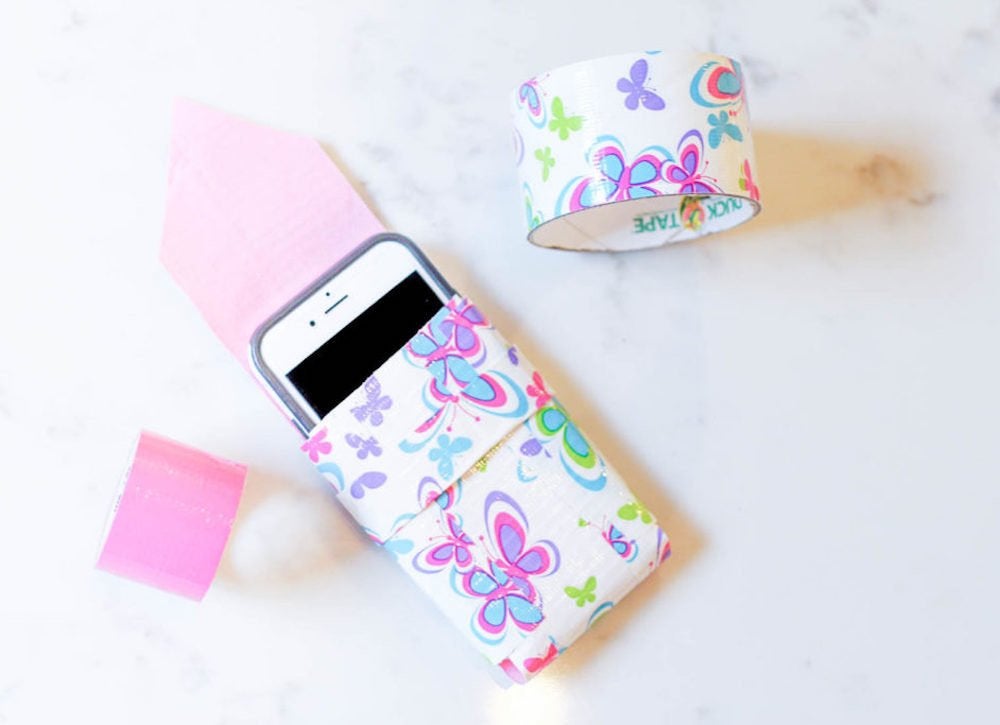
Are you tired of seeing scratches on your smartphone screen, but don’t want to splurge on a brand-name phone case? Save your phone—and save money—by making this duct tape cell phone case. The pretty protector is none other than a large fabric scrap that is covered with patterned duct tape, cut into pieces for the body, the sides, and the back pocket. Fold the body piece into pouch, then tape on the sides and the pocket, and slide the front flap through the strap on the body to keep your phone safe and scratch-free.
Patriot's Porch

Liven up the entryway with red, white, and blue with this patriotic wreath made from duct tape and an old summertime standby: the pool noodle. Bend the pool noodle into a circle, completely cover it in white duct tape, then add patriotic flair in the form of a red, white, and blue bow and a garland embellished with stars. In under half an hour, your glitzy entryway will become the envy of all of your neighbors—yet none will be wise to how easy or economical it was to create.

I Was Dead Set On Stone Floors—Until I Saw These Options
See how a virtual floor designer might just change how you envision your floors, as it did for this editor with her ongoing kitchen renovation.
